Byteline lets you automatically sync Jobber clients, jobs, and invoices with Google Sheets and other supported apps.
You can import existing Jobber records, keep future changes synchronized, or configure a two-way sync so updates made in either app are reflected in the other. No coding or complex workflow automation is required.
This guide explains how to install Byteline Sync in Jobber and configure your first Jobber data sync.
This article uses Google Sheets as an example. The setup process is similar when connecting Jobber to another supported app.
What can you sync from Jobber?
Byteline supports the following Jobber data types:
Clients
Sync customer information from Jobber, including contact details and related client information.
Jobs
Sync Jobber jobs and work orders, including details such as assigned team members, timing, status, title, and customer information.
Invoices
Sync Jobber invoices, including invoice details, totals, payment status, line items, and related customer information.
The exact fields available depend on the selected Jobber data type and the access permissions granted to Byteline.
Before you begin
You will need:
An active Jobber account with permission to install apps.
A Byteline account.
Access to the app you want to connect to Jobber, such as Google Sheets.
Permission to view or update the Jobber data included in your sync.
Standard Data Sync features
For information about features available across all Byteline integrations—including field mappings, filters, sync directions, previews, and issue resolution—see Data Sync - Getting Started
Installing Byteline Sync app in Jobber
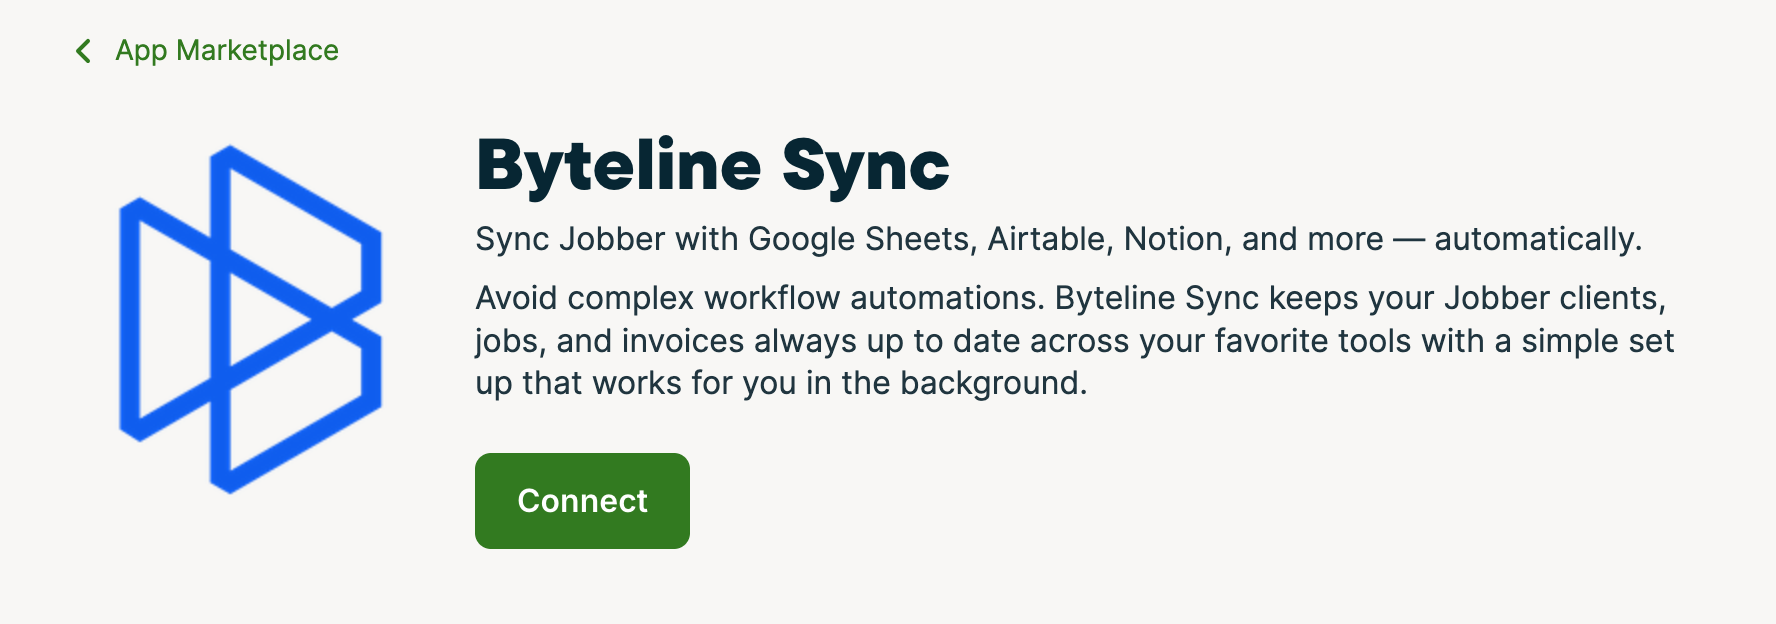
Before configuring your sync, install the Byteline Sync app from the Jobber App Marketplace.
Sign in to your Jobber account.
Open Apps or the App Marketplace.
Search for Byteline Sync.
Select the Byteline Sync app.
Click Connect.
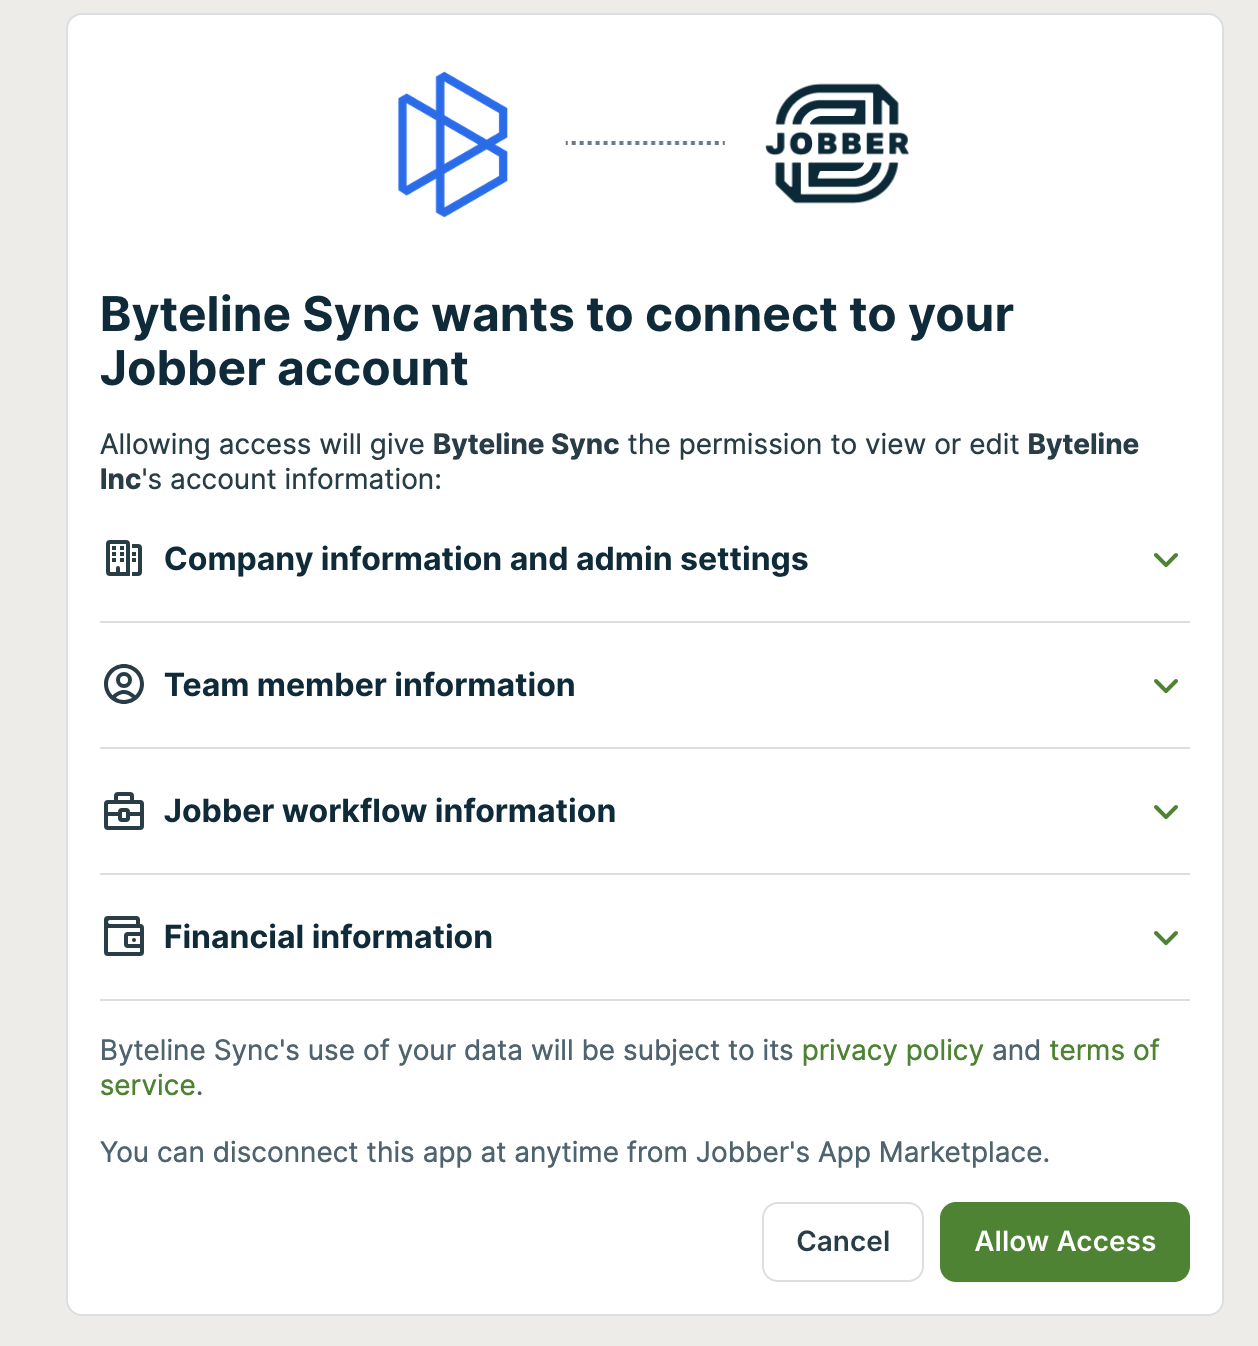
Review the requested permissions and approve access.
Create a Jobber data sync in Byteline
Step 1: Start a new sync
Log in to your Byteline account and navigate to the My Syncs page.
Click on the "Create Sync" button to begin the configuration.
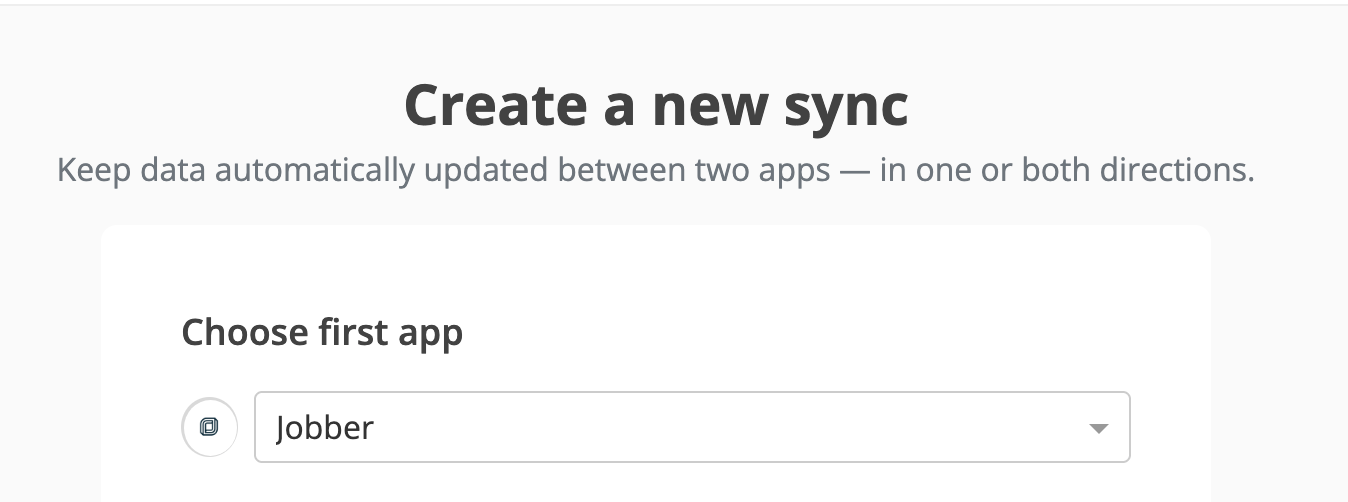
Step 2: Select Jobber and your destination app
Choose Jobber as the first app to sync. Alternatively, you can select another app first and then pick Jobber as the second app. The order does not limit the sync direction—you will choose the direction later in the setup.
Next, select the app you want to connect to Jobber, such as Google Sheets.
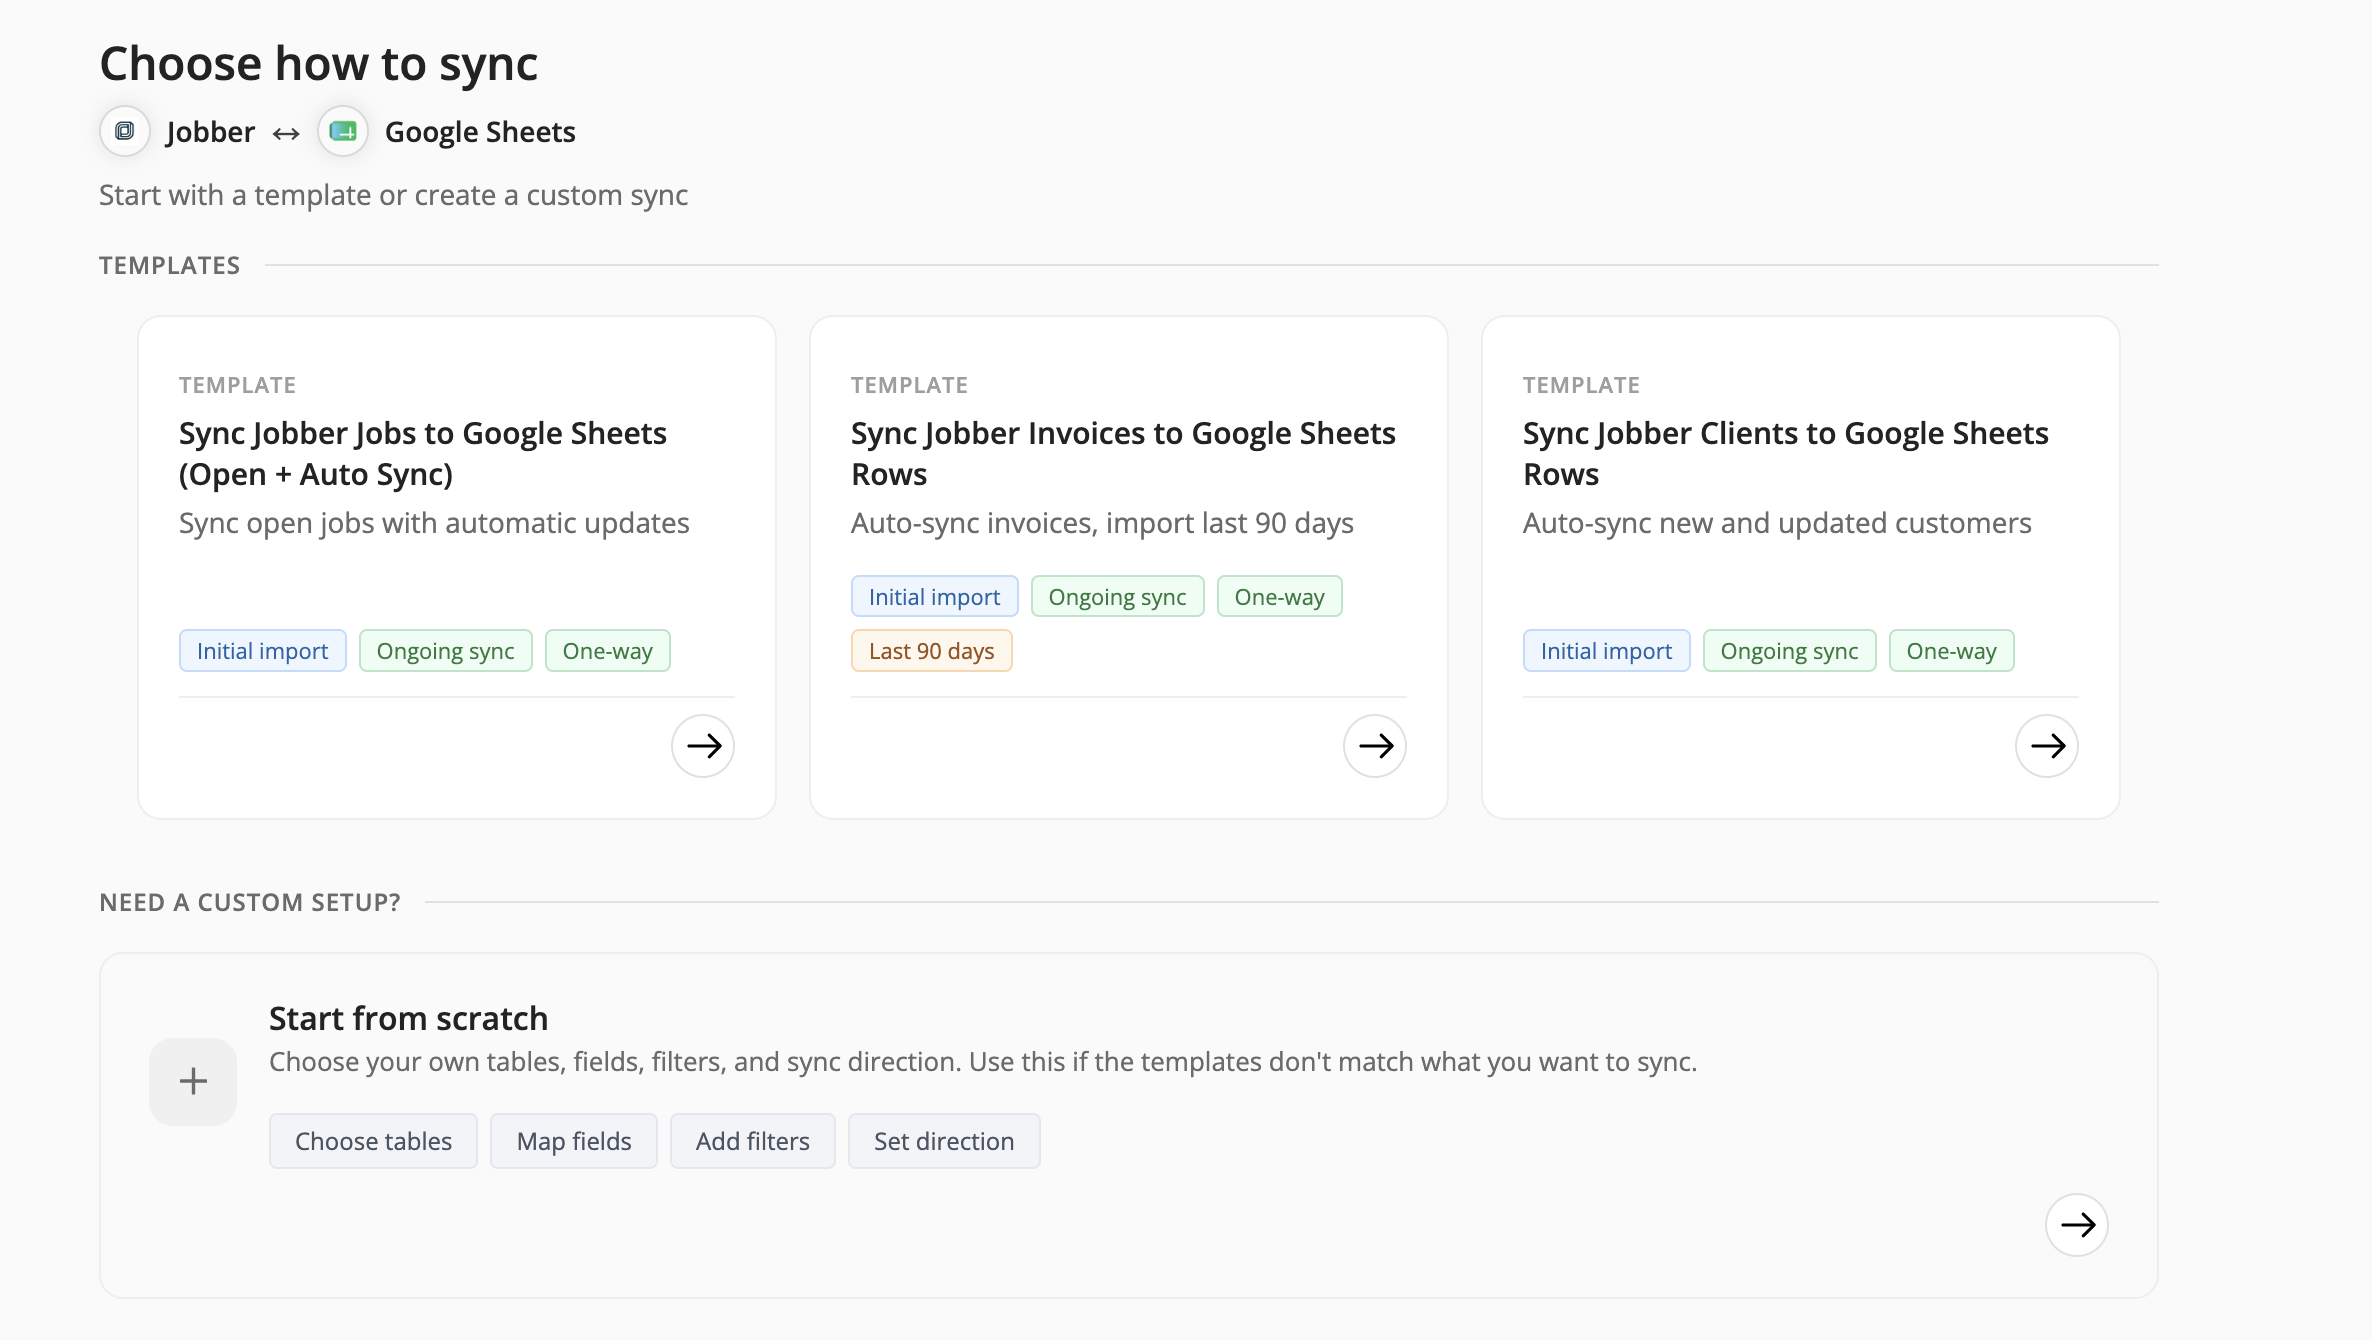
Step 3: Choose a template or start from scratch
Byteline may display preconfigured templates for common Jobber use cases, such as:
Sync Jobber jobs to Google Sheets
Sync Jobber invoices to Google Sheets
Sync Jobber clients to Google Sheets
A template automatically selects commonly used settings and fields.
Choose Start from scratch when you need more control over:
The Jobber data type
Sync direction
Existing and future records
Field mappings
Filters
Destination tables or worksheets
Option 1: Configure from a template
When a template is available, we recommend using it because it preconfigures the most common sync settings and field mappings. You can edit the sync later to fine-tune it for your use case.
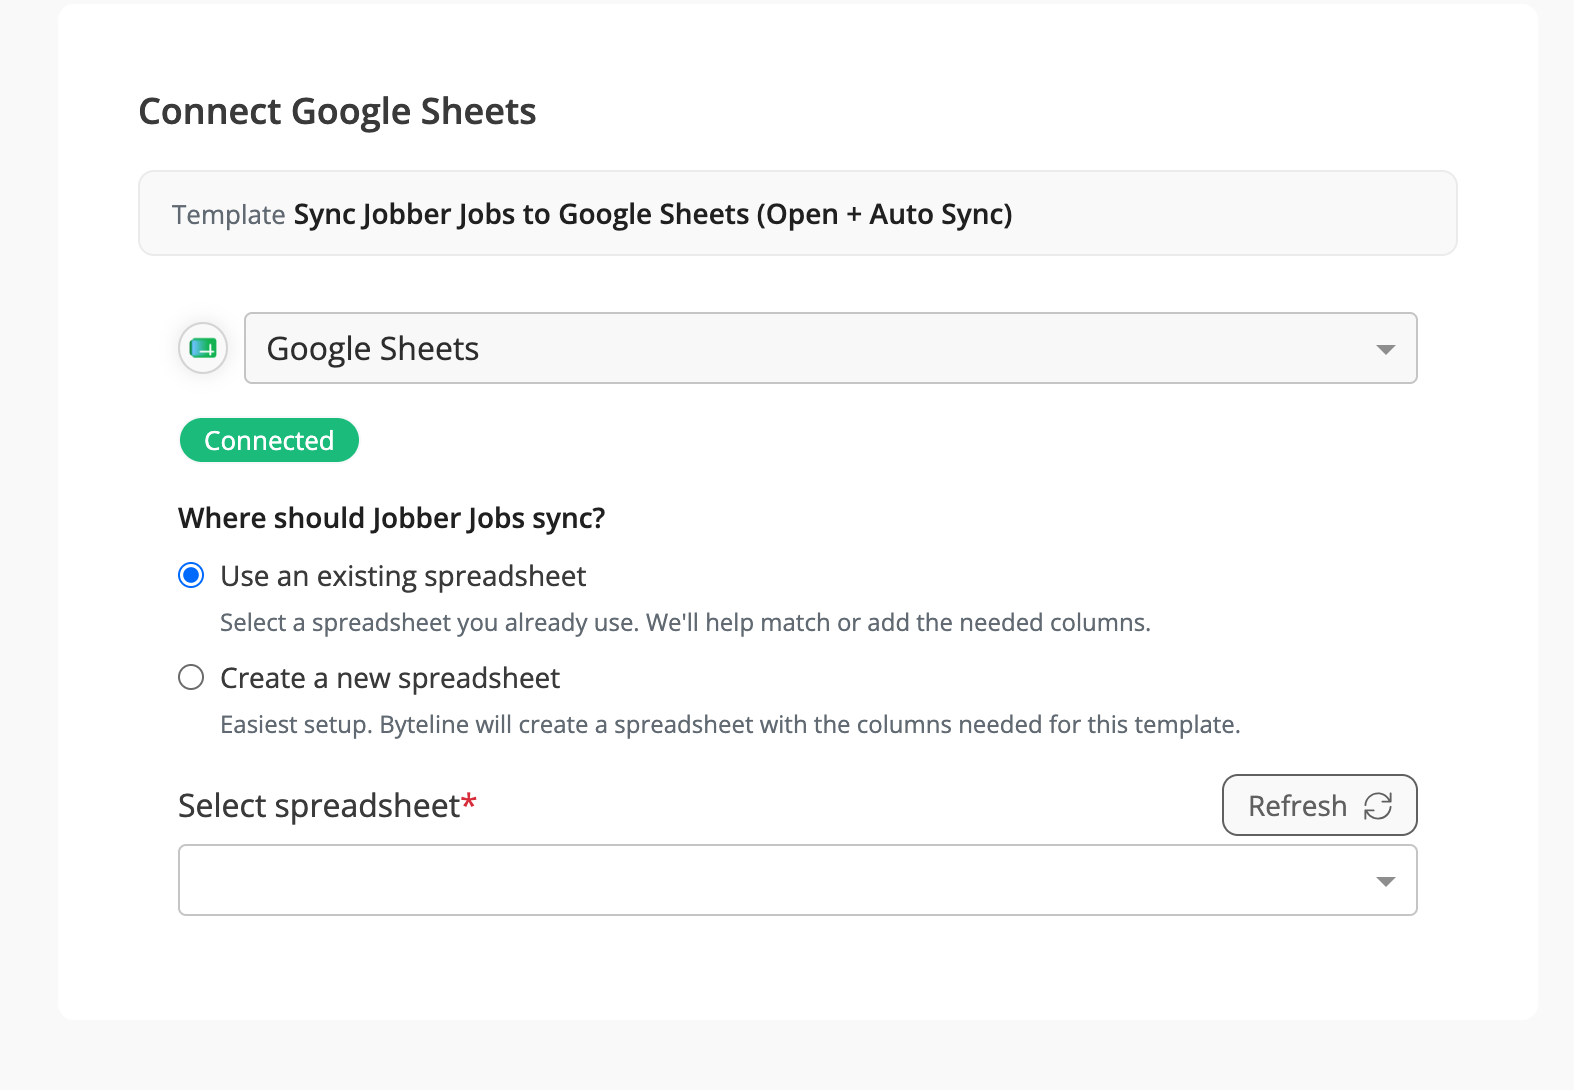
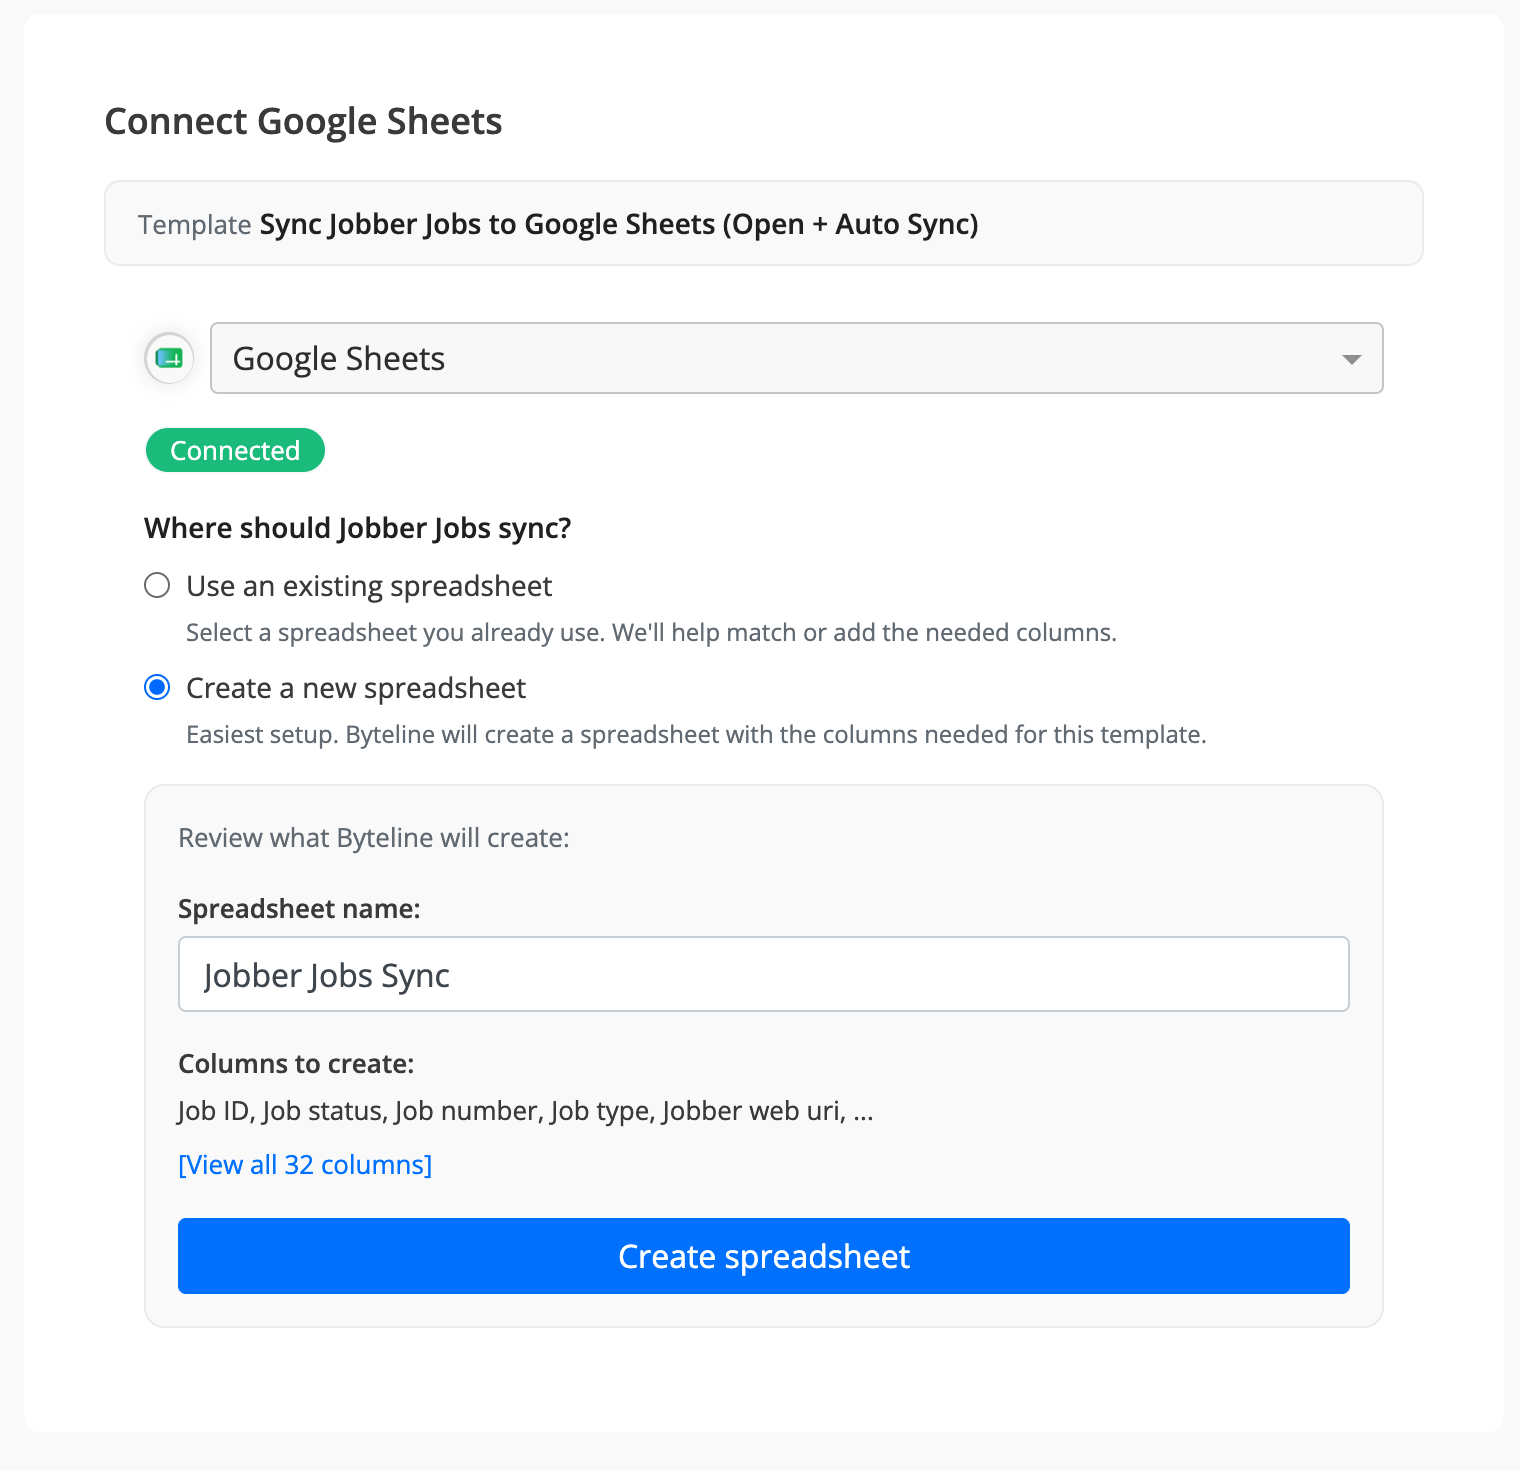
Choose where the Jobber records should sync:
Use an existing spreadsheet: Select a spreadsheet and worksheet you already use. Byteline will help match the required fields to your existing columns.
Create a new spreadsheet: Byteline will create a spreadsheet with the columns required by the selected template. You can review the columns and change the spreadsheet name before creating it.
Review the spreadsheet name and columns, and then click Create spreadsheet.
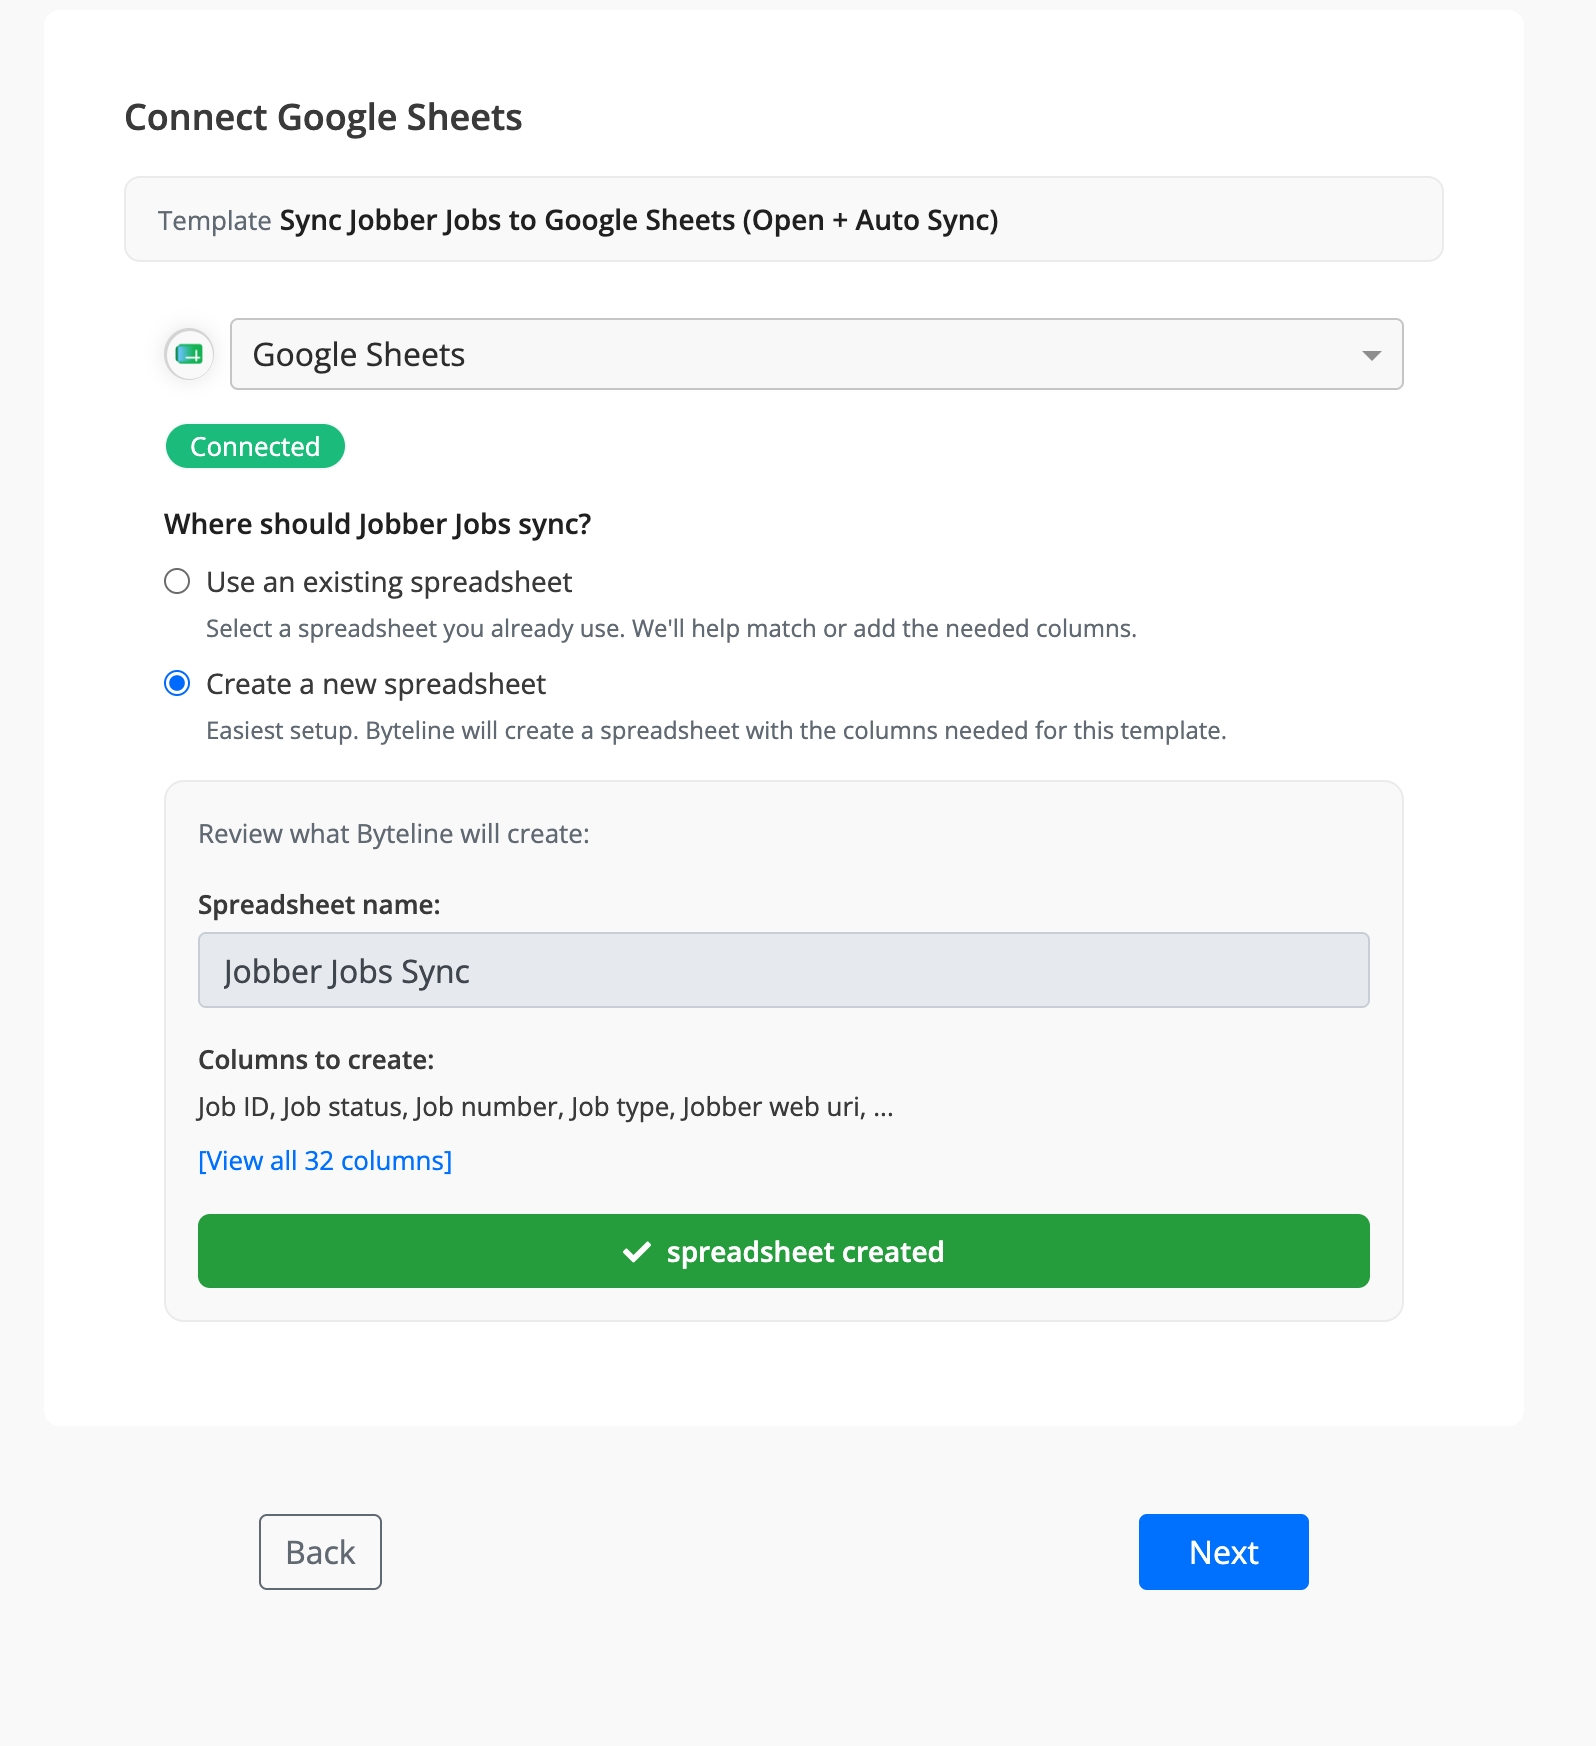
Click on "Create spreadsheet" to create the spreadsheet with the shown columns. Optionally, you can change the spreadsheet name to the one you prefer.
After the spreadsheet is created, a confirmation message appears. Click Next to continue.
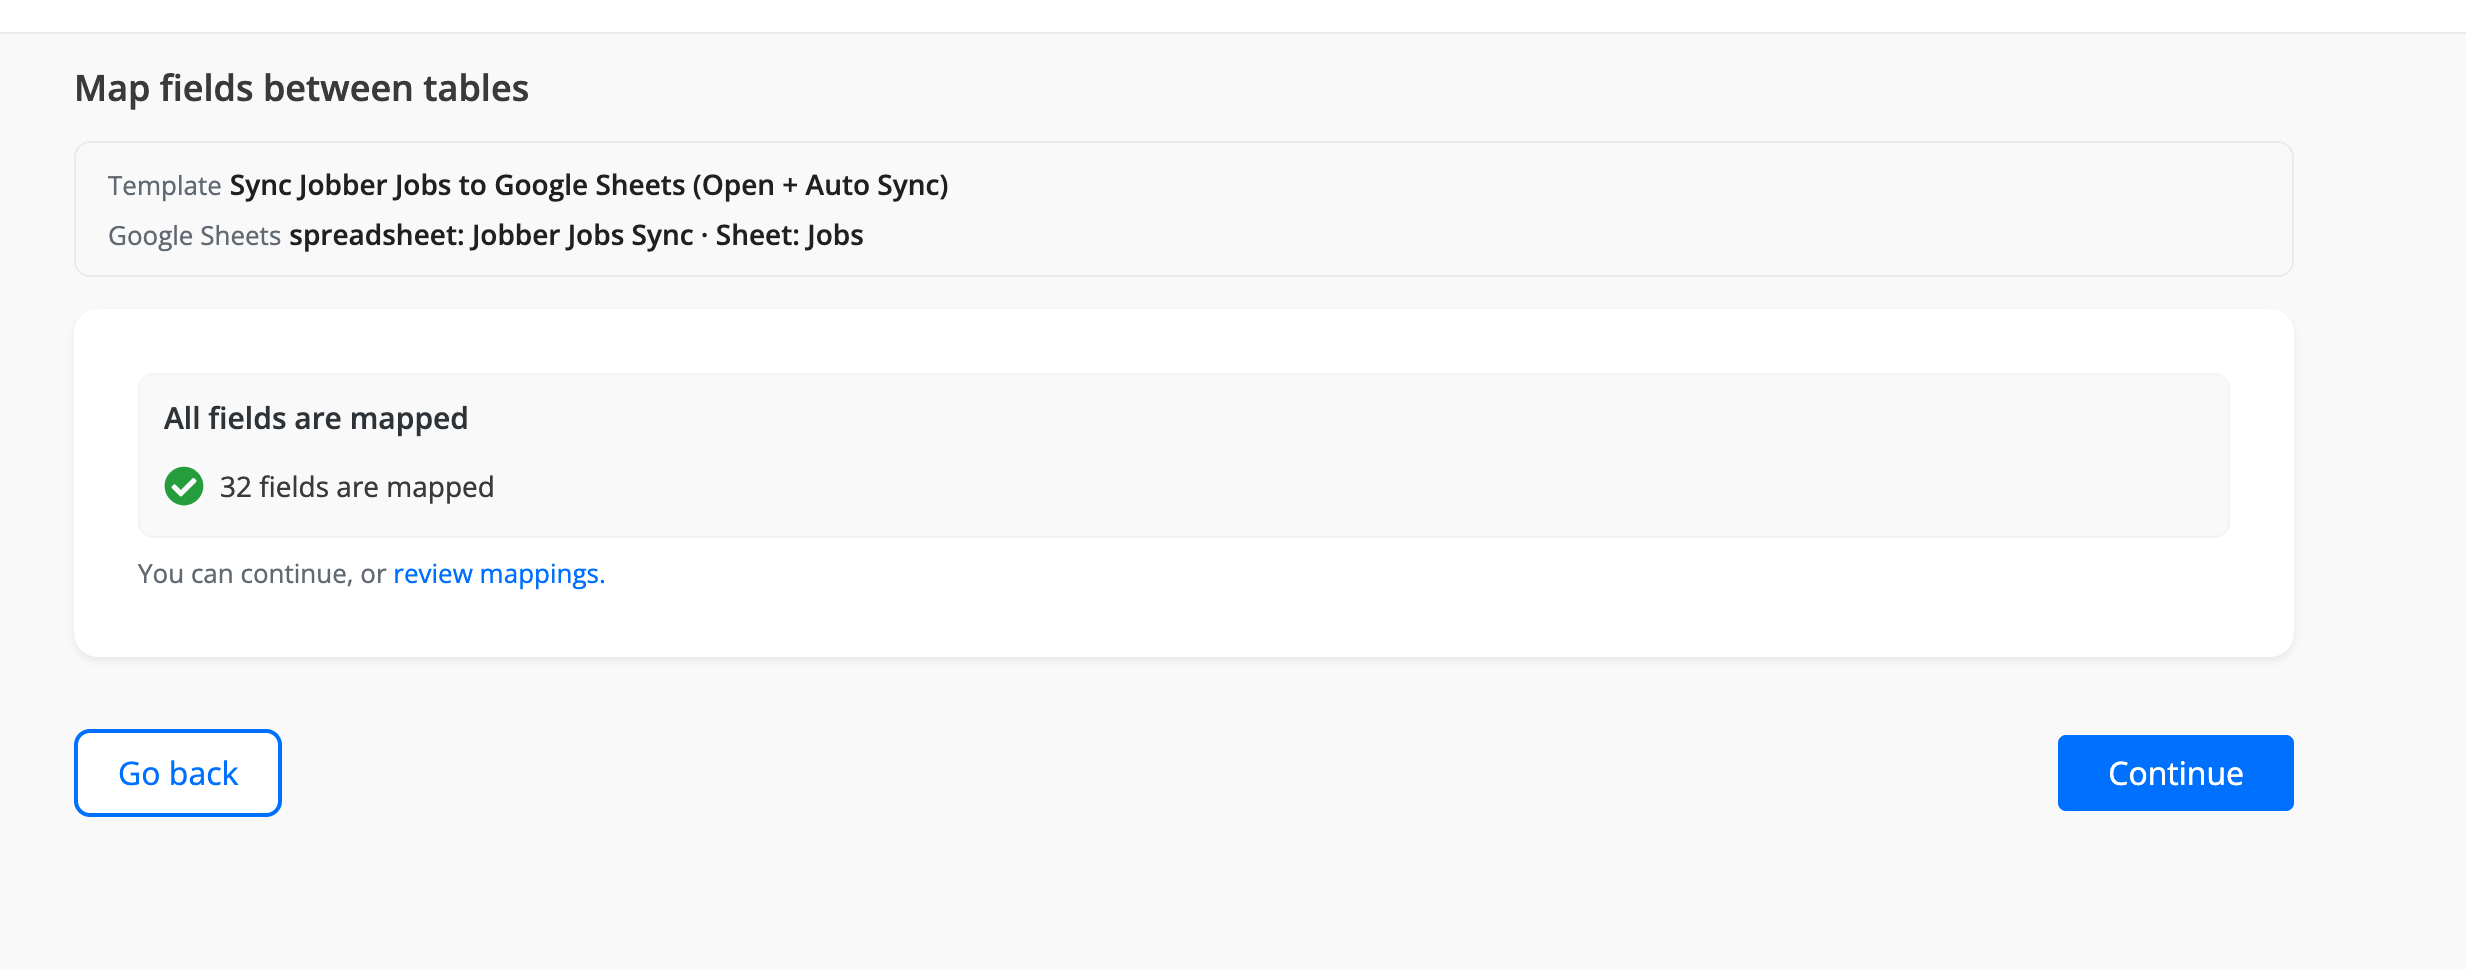
Map fields between tables
Byteline automatically maps the fields included in the template. Review the number of mapped fields, and click Review mappings to inspect the individual field mappings. When everything looks correct, click Continue.
Your template setup is now complete. Continue to Review and start your Jobber sync.
Option 2: Configure a custom sync
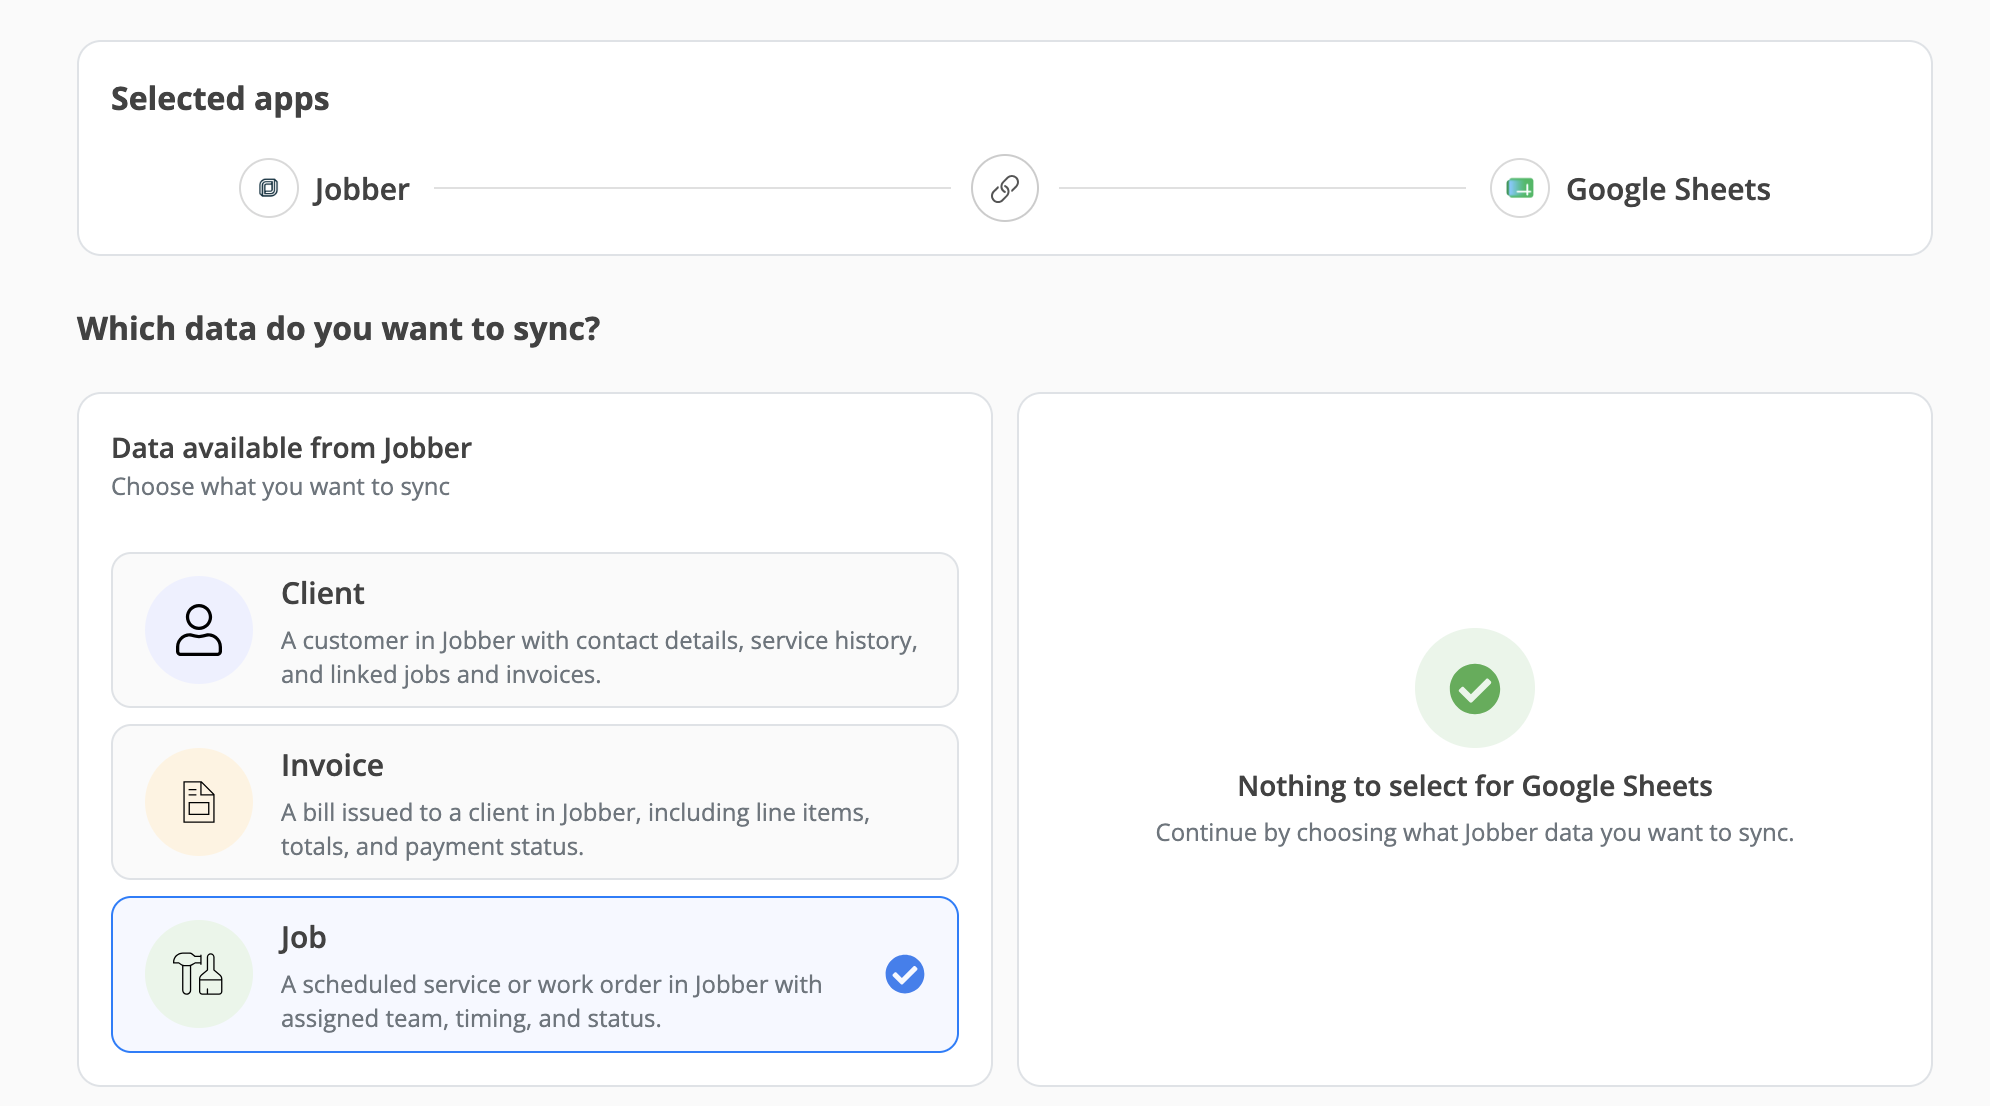
Select the Jobber data that you want to sync. Choose the Jobber data type you want to synchronize:
Client
Job
Invoice Each data type is configured as a separate table mapping. For example, selecting Job lets you map Jobber job fields to columns in Google Sheets.
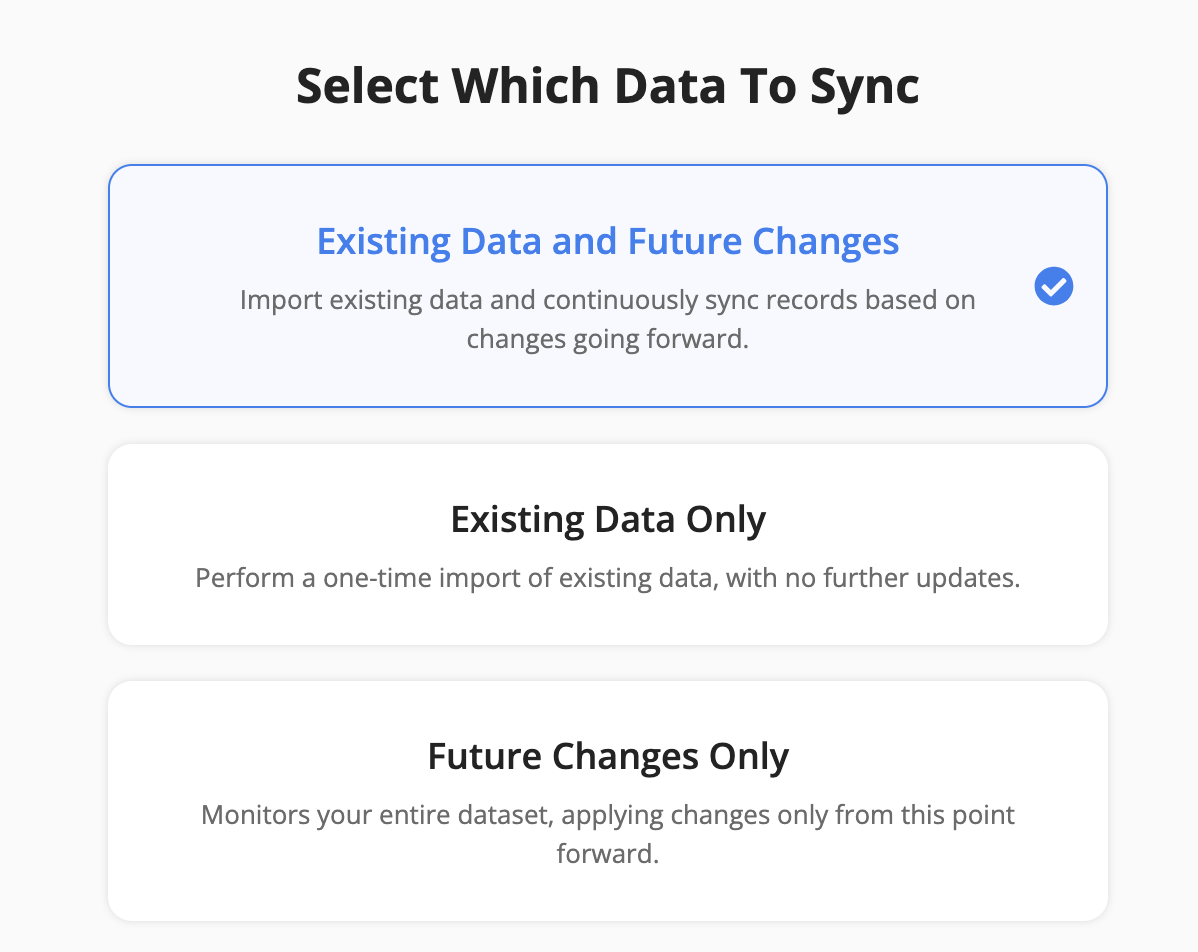
Choose which records to sync Select how Byteline should handle existing records and future changes.
Existing Data and Future Changes Imports your existing Jobber records and keeps new or updated records synchronized after the initial import. This is the best option when you want a complete dataset that stays current.
Existing Data Only Performs a one-time import of existing Jobber records. Changes made after the import will not be synchronized.
Future Changes Only Starts monitoring for changes after the sync becomes live. Existing Jobber records are not imported unless they are changed after the sync begins.
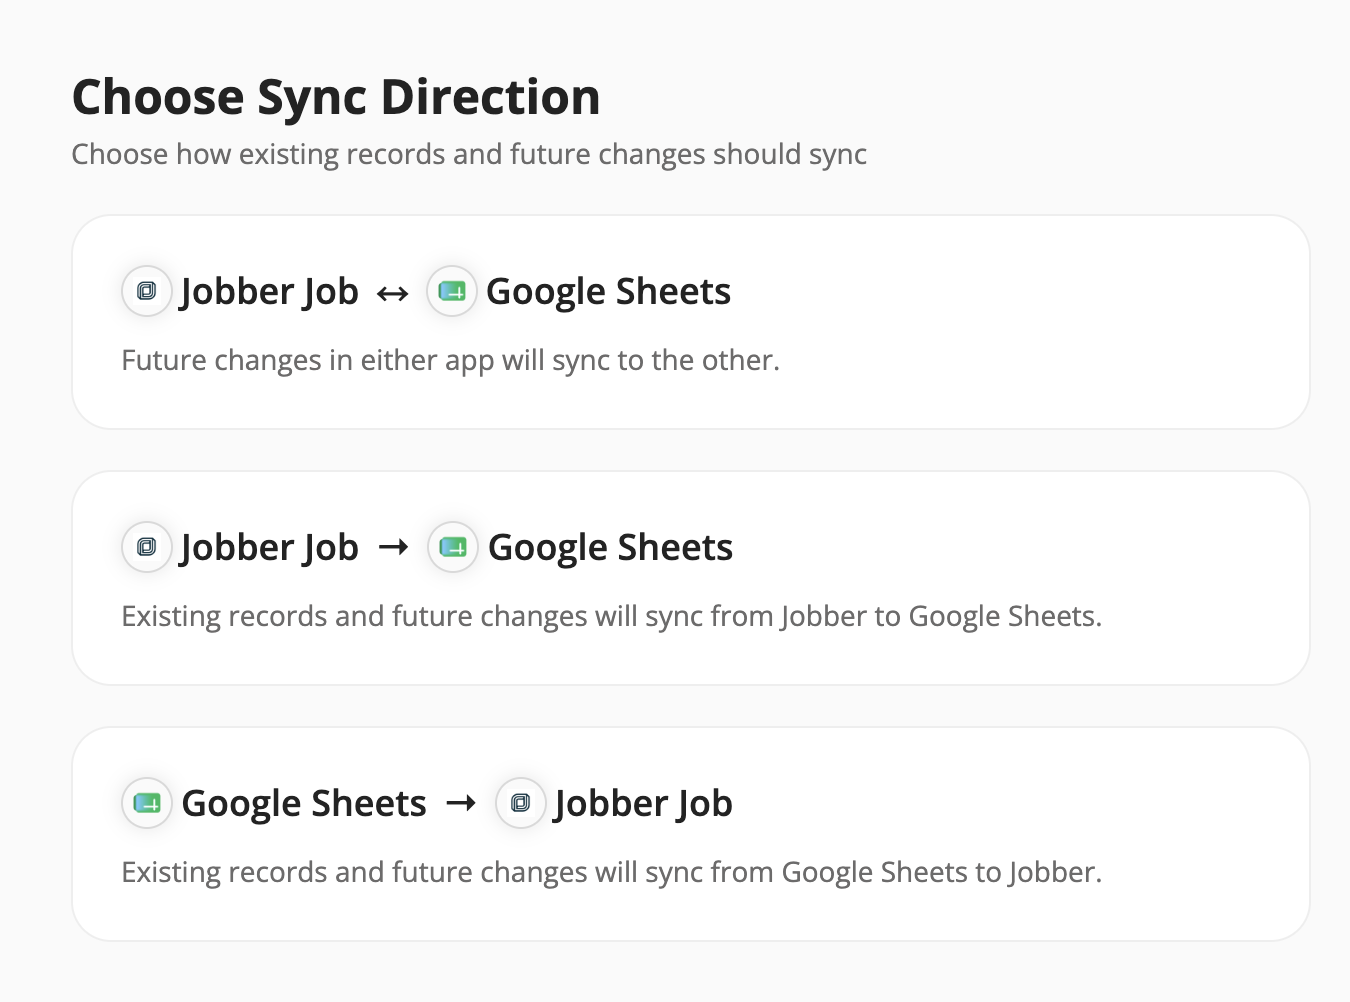
Choose the Jobber sync direction Select how data should move between Jobber and the connected app.
Two-way sync (Jobber ↔ Paired app) Supported changes made in either app are synchronized to the other. For example, with a Jobber and Google Sheets two-way sync:
A supported update in Jobber can update the matching Google Sheets row.
A supported update in Google Sheets can update the corresponding Jobber record.
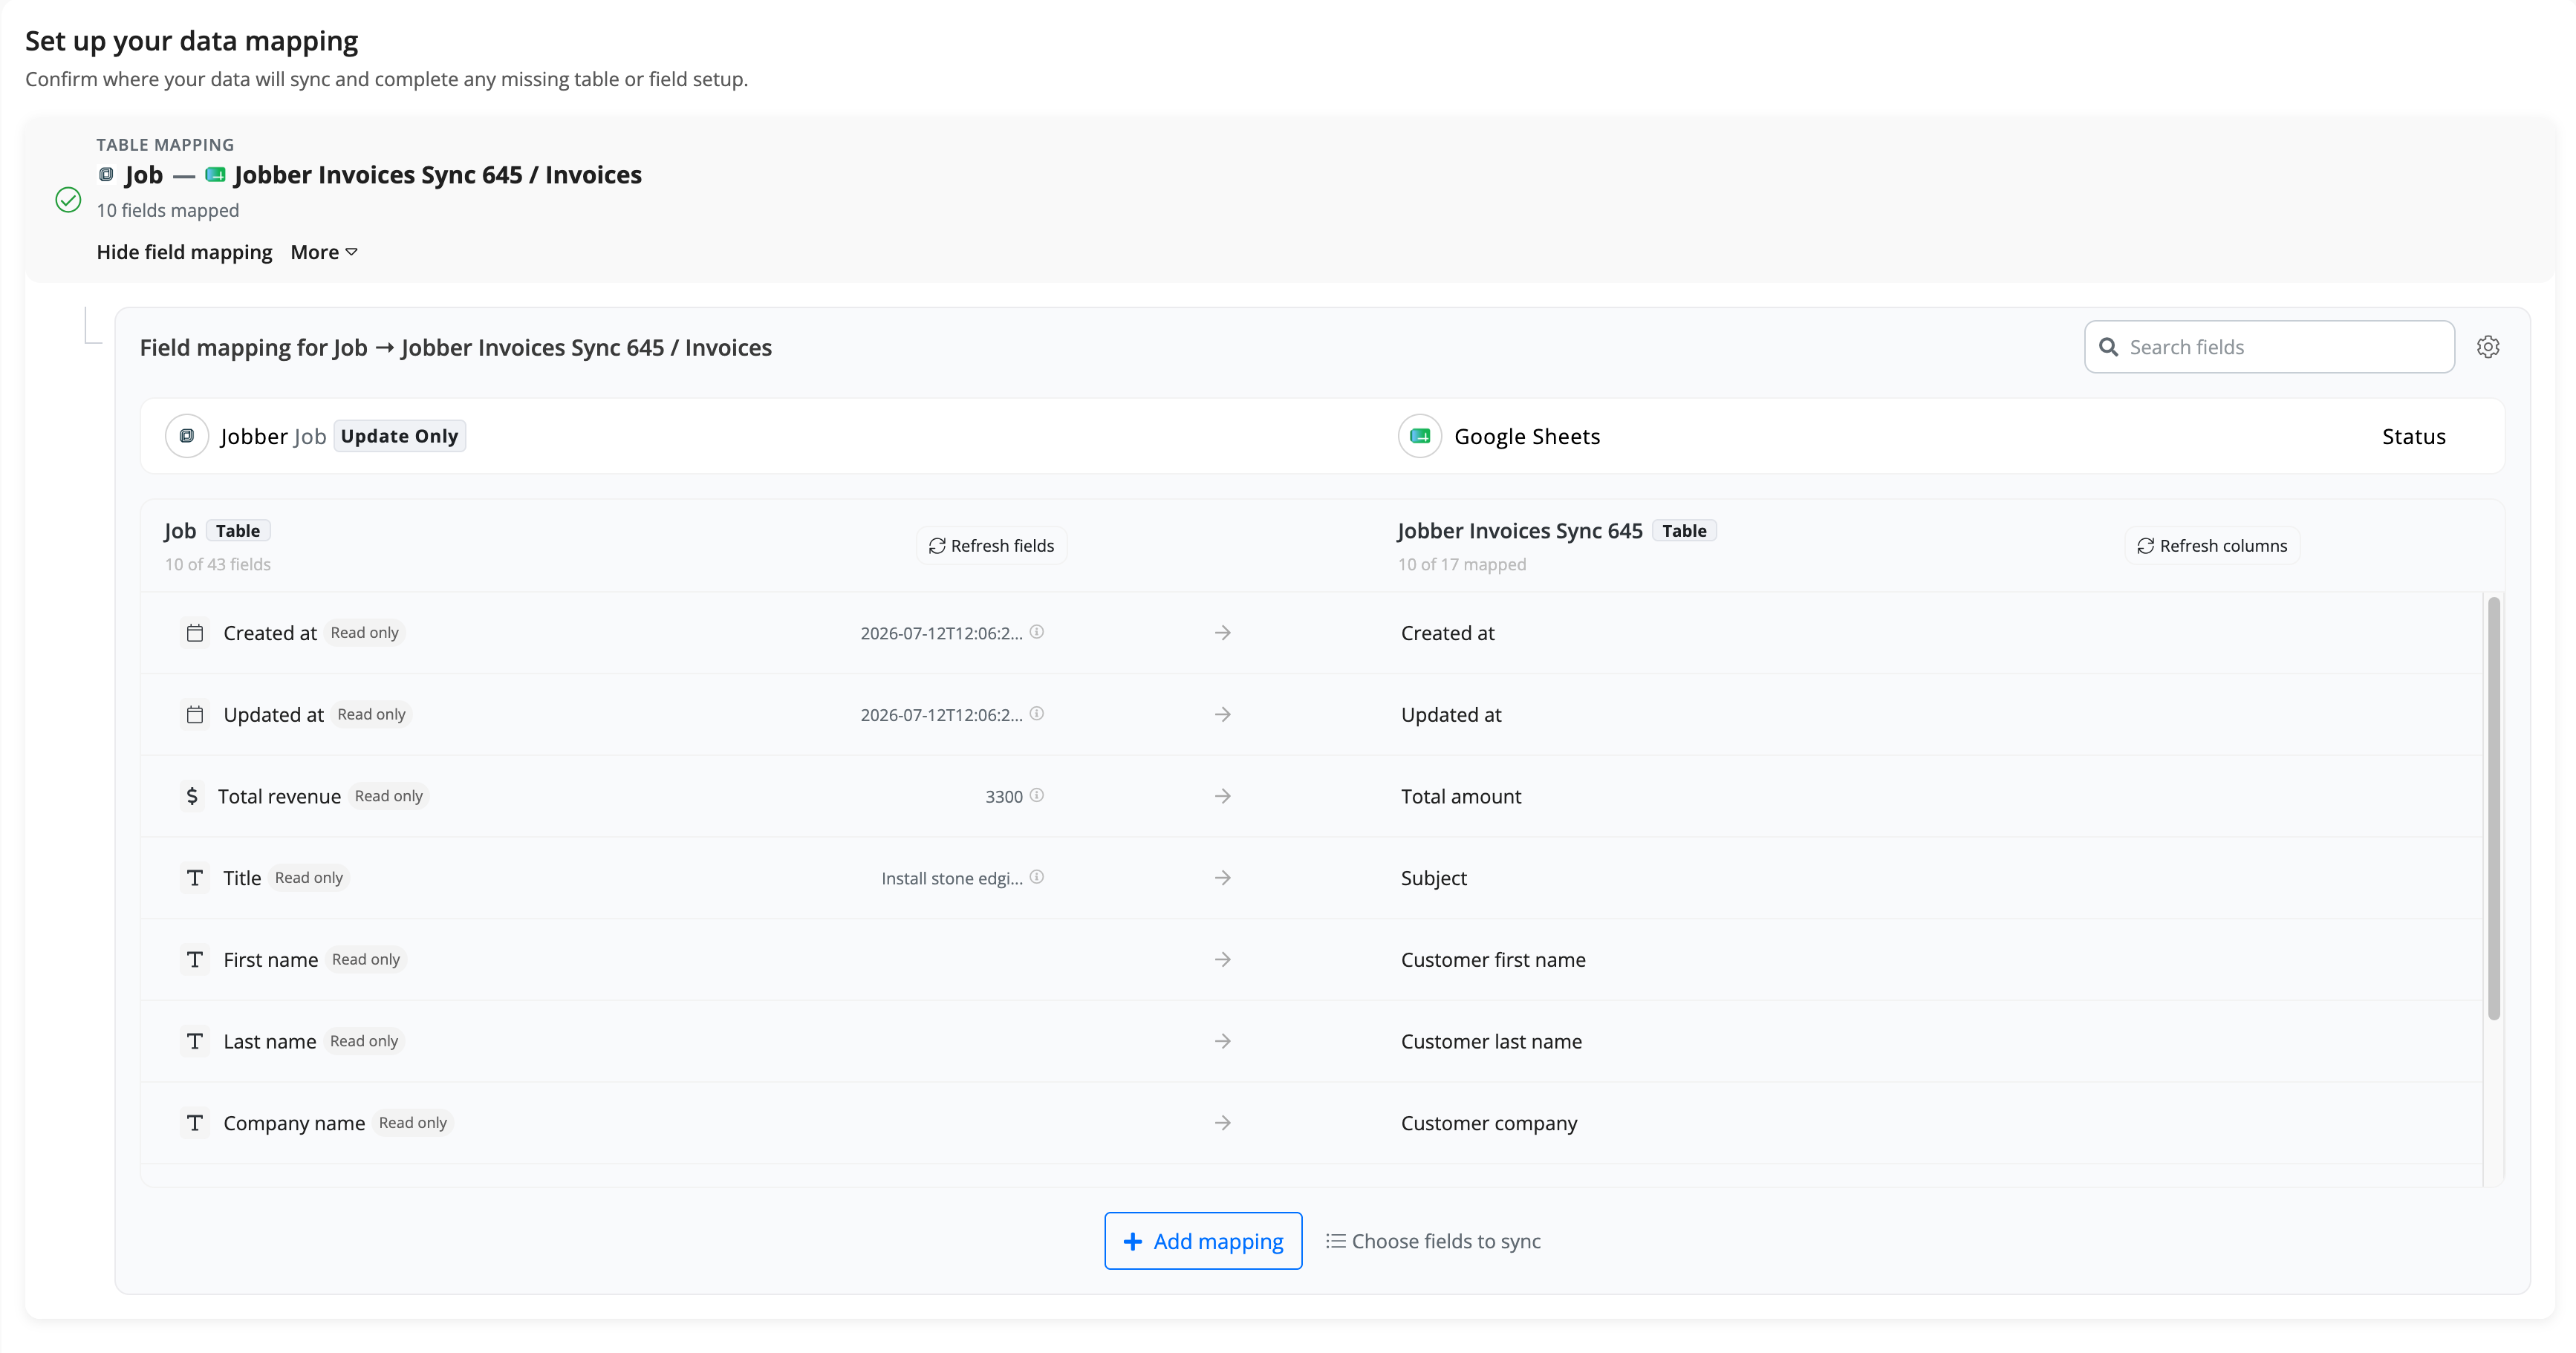
Some Jobber fields are read-only and cannot be updated from the connected app. Byteline identifies these fields during field mapping.
One-way sync from Jobber (Jobber → Paired app) Existing records and future changes move from Jobber to the connected app. Use this option when Jobber should remain the primary source of truth.
One-way sync to Jobber (Paired app → Jobber) Records and supported changes move from the connected app into Jobber. Use this option when another system should create or update Jobber records. The available directions may vary based on the selected Jobber data type and whether Jobber allows those records or fields to be created or updated.
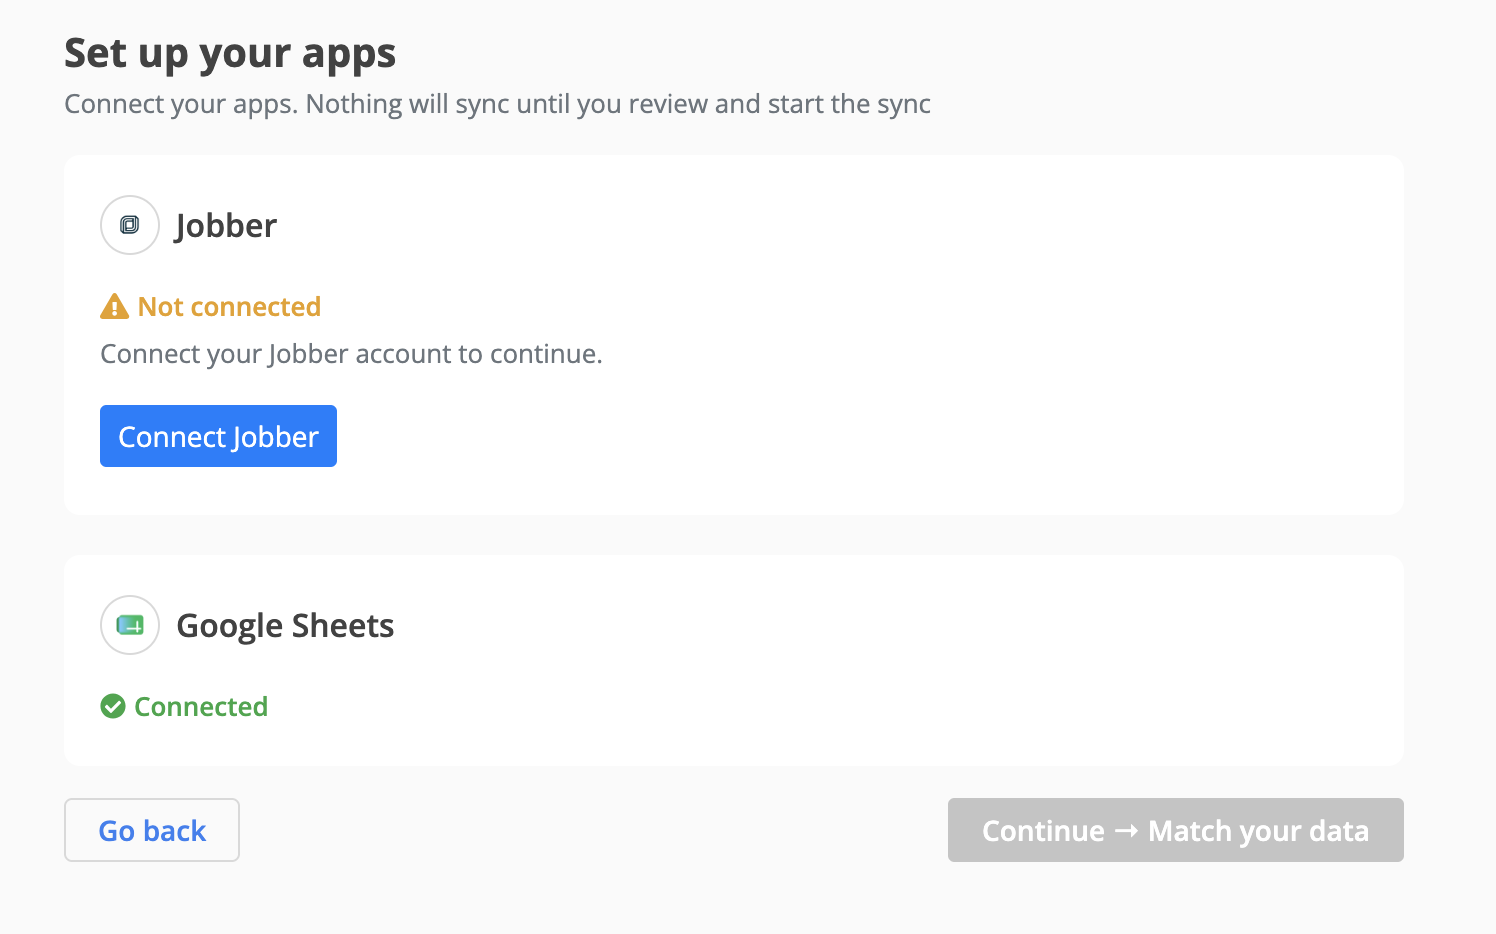
Connect your Jobber account In this step, you will authorize Byteline to access your Jobber account. This step is only required when the connection to Jobber is not yet established. Nothing is synchronized during this step. Your sync will begin only after you review the preview and click Start sync.Click on the "Connect Jobber" button and it will show you the OAuth approval dialog from Jobber.
Match Jobber data with the paired app
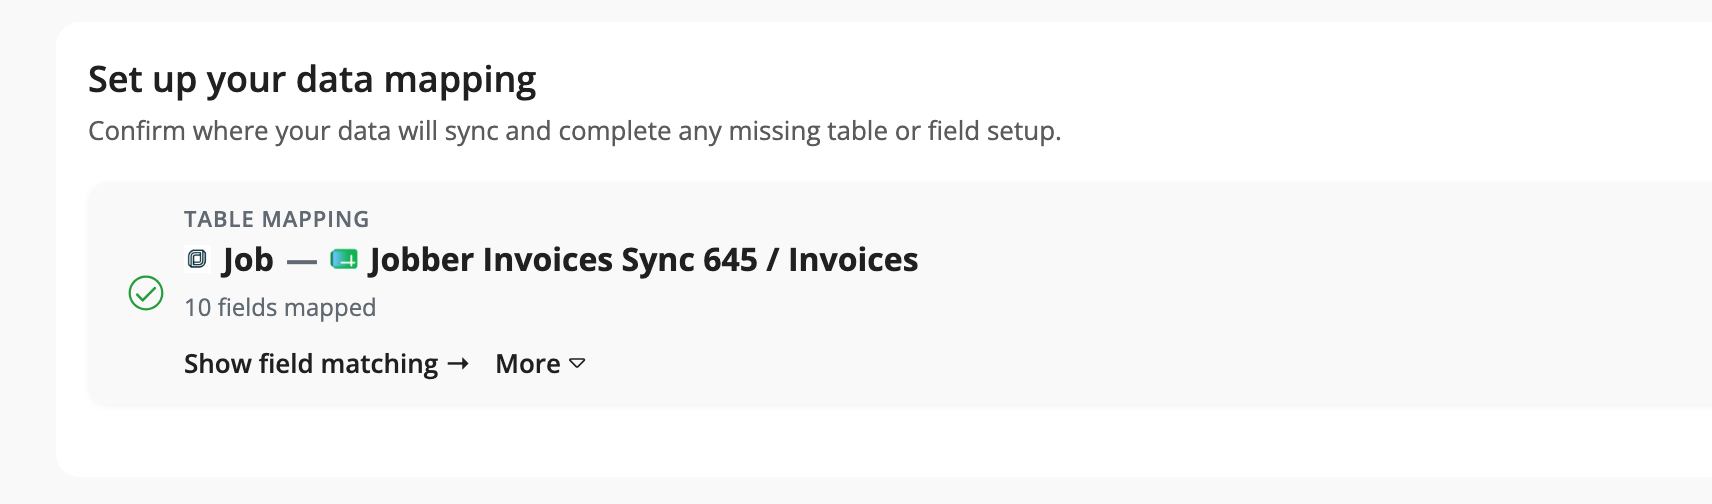
Review the table mapping The data-mapping screen shows where your Jobber records will be synchronized. For example: Jobber Job → Google Sheets Jobs worksheet Each table-mapping card shows:
The Jobber data type
The destination table or worksheet
The number of mapped fields
The selected sync direction
Any configuration issues that need attention
Confirm that the correct Jobber data type is connected to the correct destination.Review and edit field mappings Click Show field mapping to expand the table and review individual fields. Each mapping connects a Jobber field to a field or column in the other app From this screen, you can:
Add a field mapping
Remove an unnecessary mapping
Change the destination field
Search for a field
Review read-only Jobber fields
Choose which fields participate in the sync
Only map fields that you want Byteline to create or update.
Your custom sync setup is now complete. Continue to the next section to preview and start your sync.
Review and start your Jobber sync
The following steps are the same whether you configured your sync from a template or started from scratch.
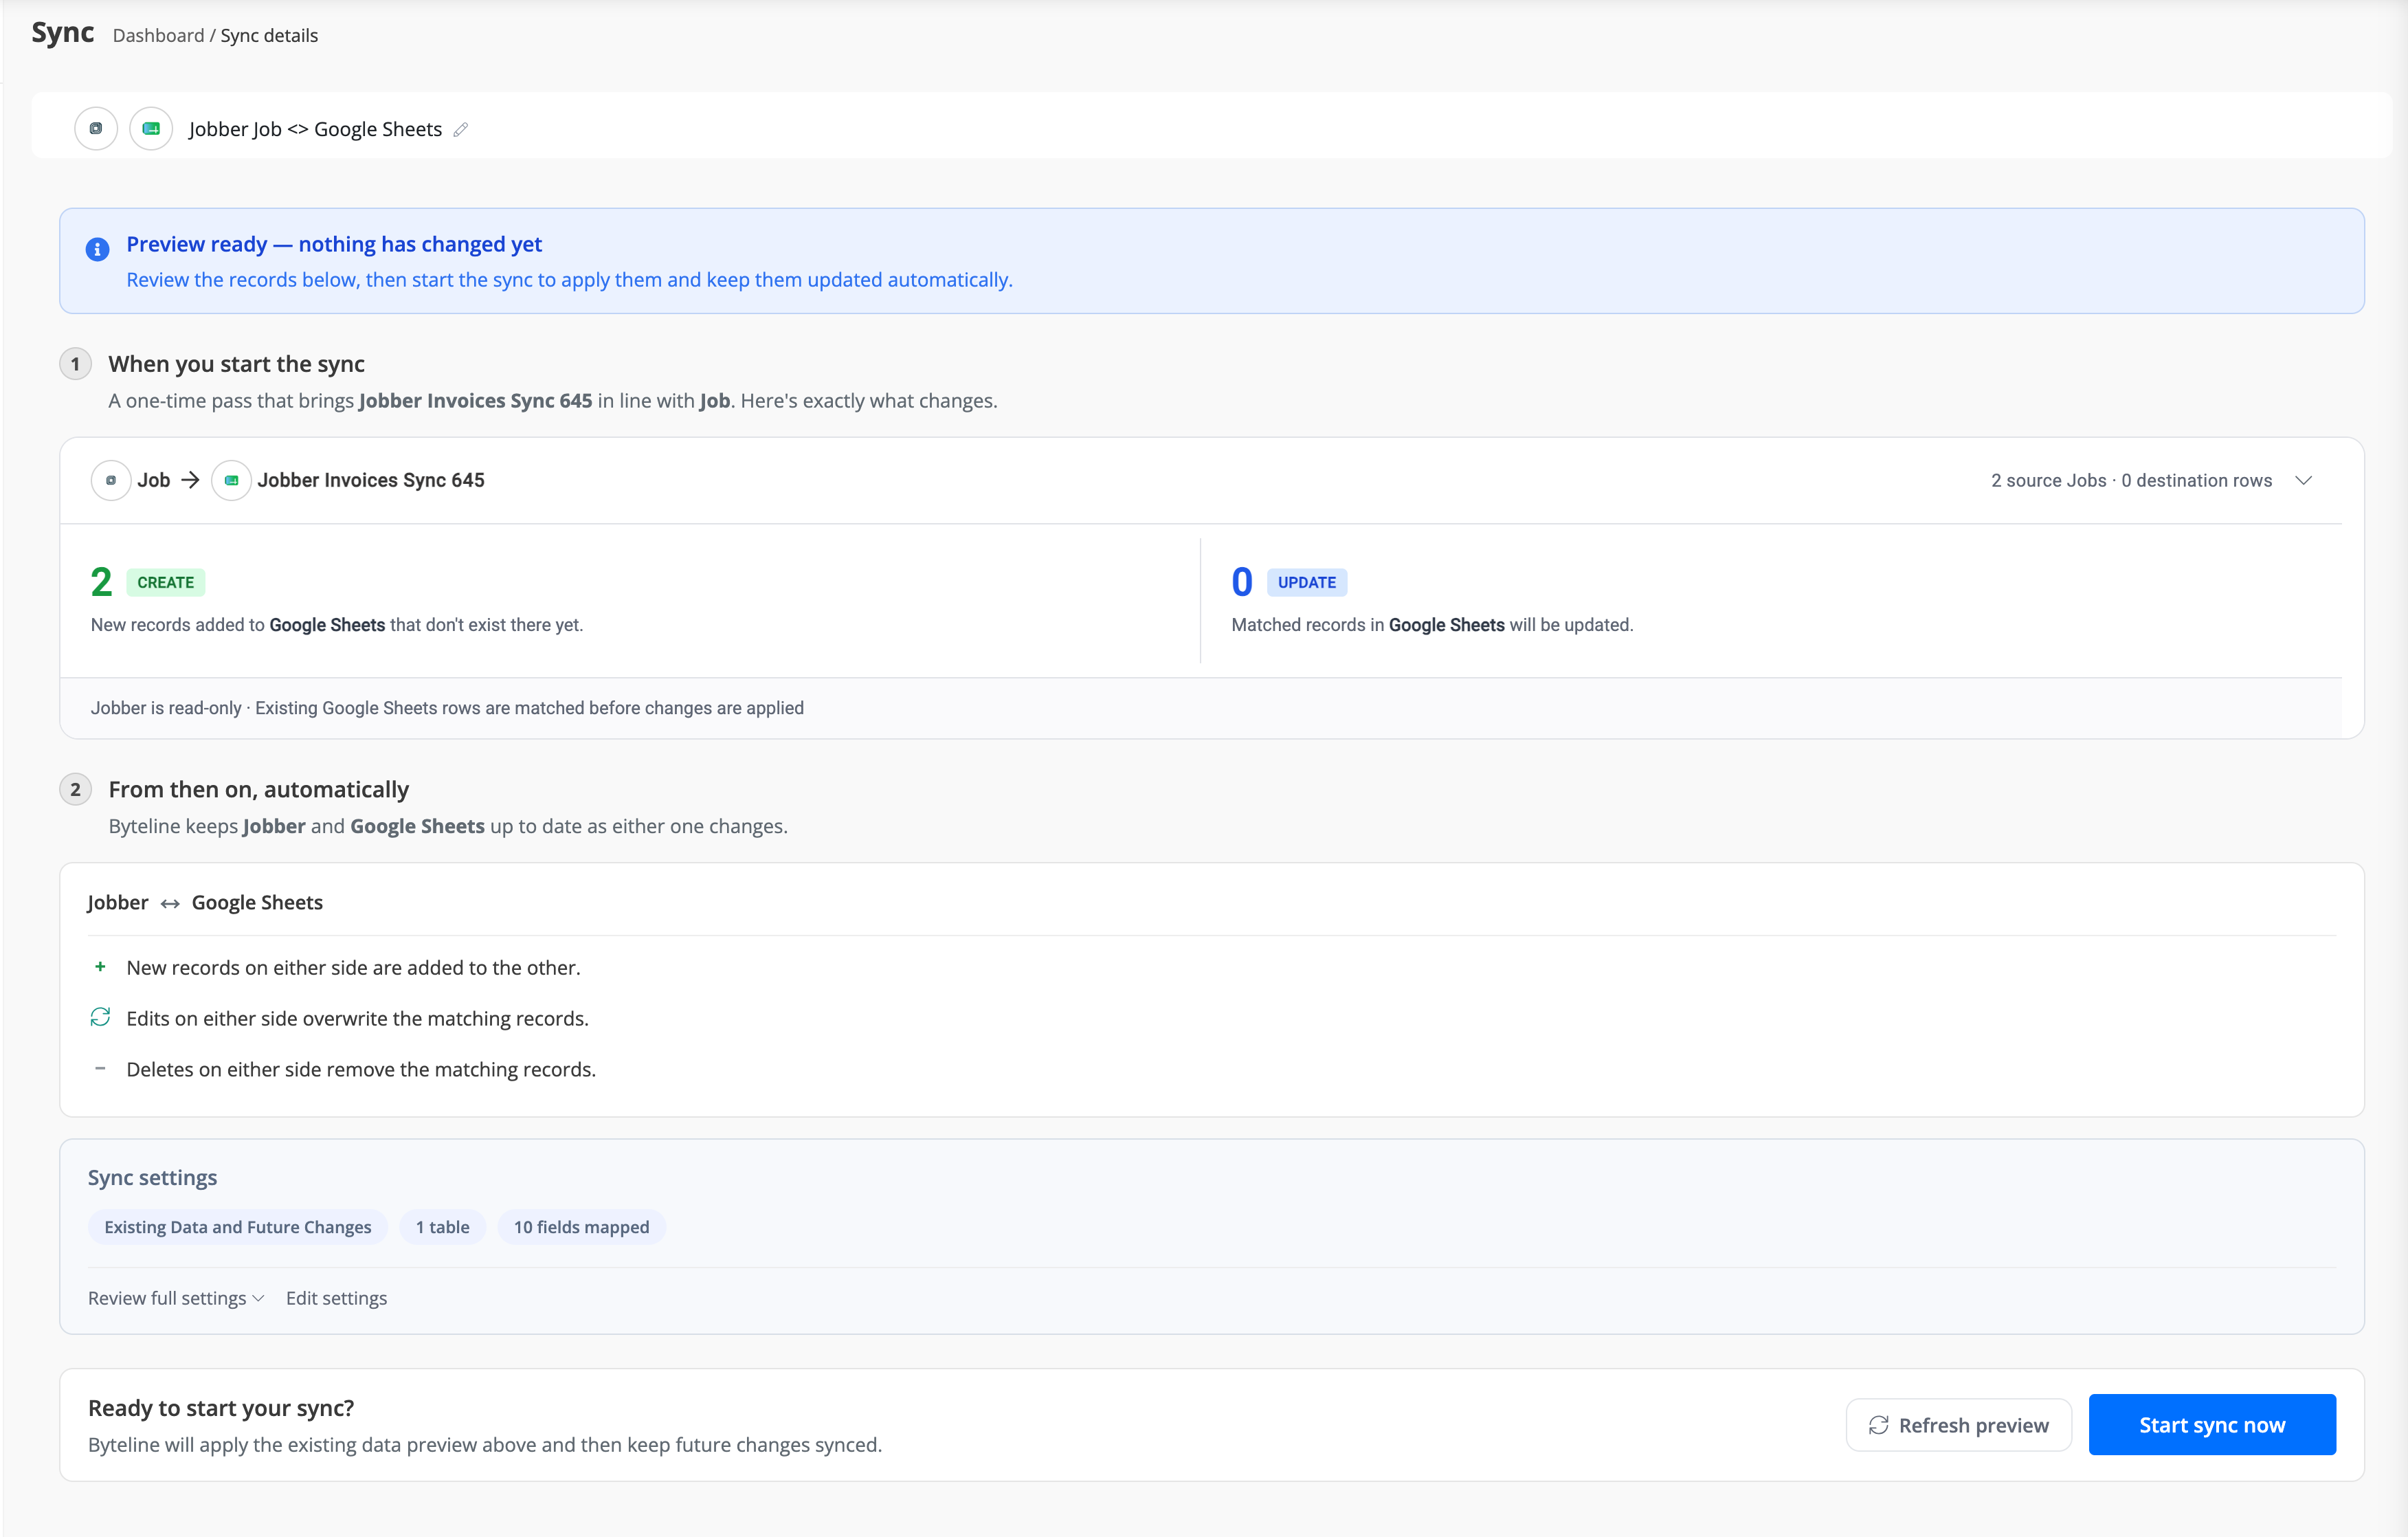
Preview the Jobber Sync Before making any changes, Byteline generates a preview of the initial sync. The preview shows how many records are expected to be:
Created
Updated
Deleted, when deletion syncing is enabled
Left unchanged
It also explains how future changes will be handled after the sync becomes live. Review the preview carefully to confirm:
The correct records are included.
The sync direction is correct.
Records are being created or updated in the expected app.
Field mappings contain the correct information.
No unexpected records will be removed.
The preview does not modify your data.
When source data changes while you are reviewing the setup, click Refresh preview to generate updated results.
Start the Jobber sync After reviewing the preview, click Start sync now. What happens next depends on the settings you selected:
Byteline processes the existing Jobber records included in the preview.
The sync becomes live.
Byteline monitors Jobber and the connected app for supported changes.
New and updated records are synchronized according to your selected direction.
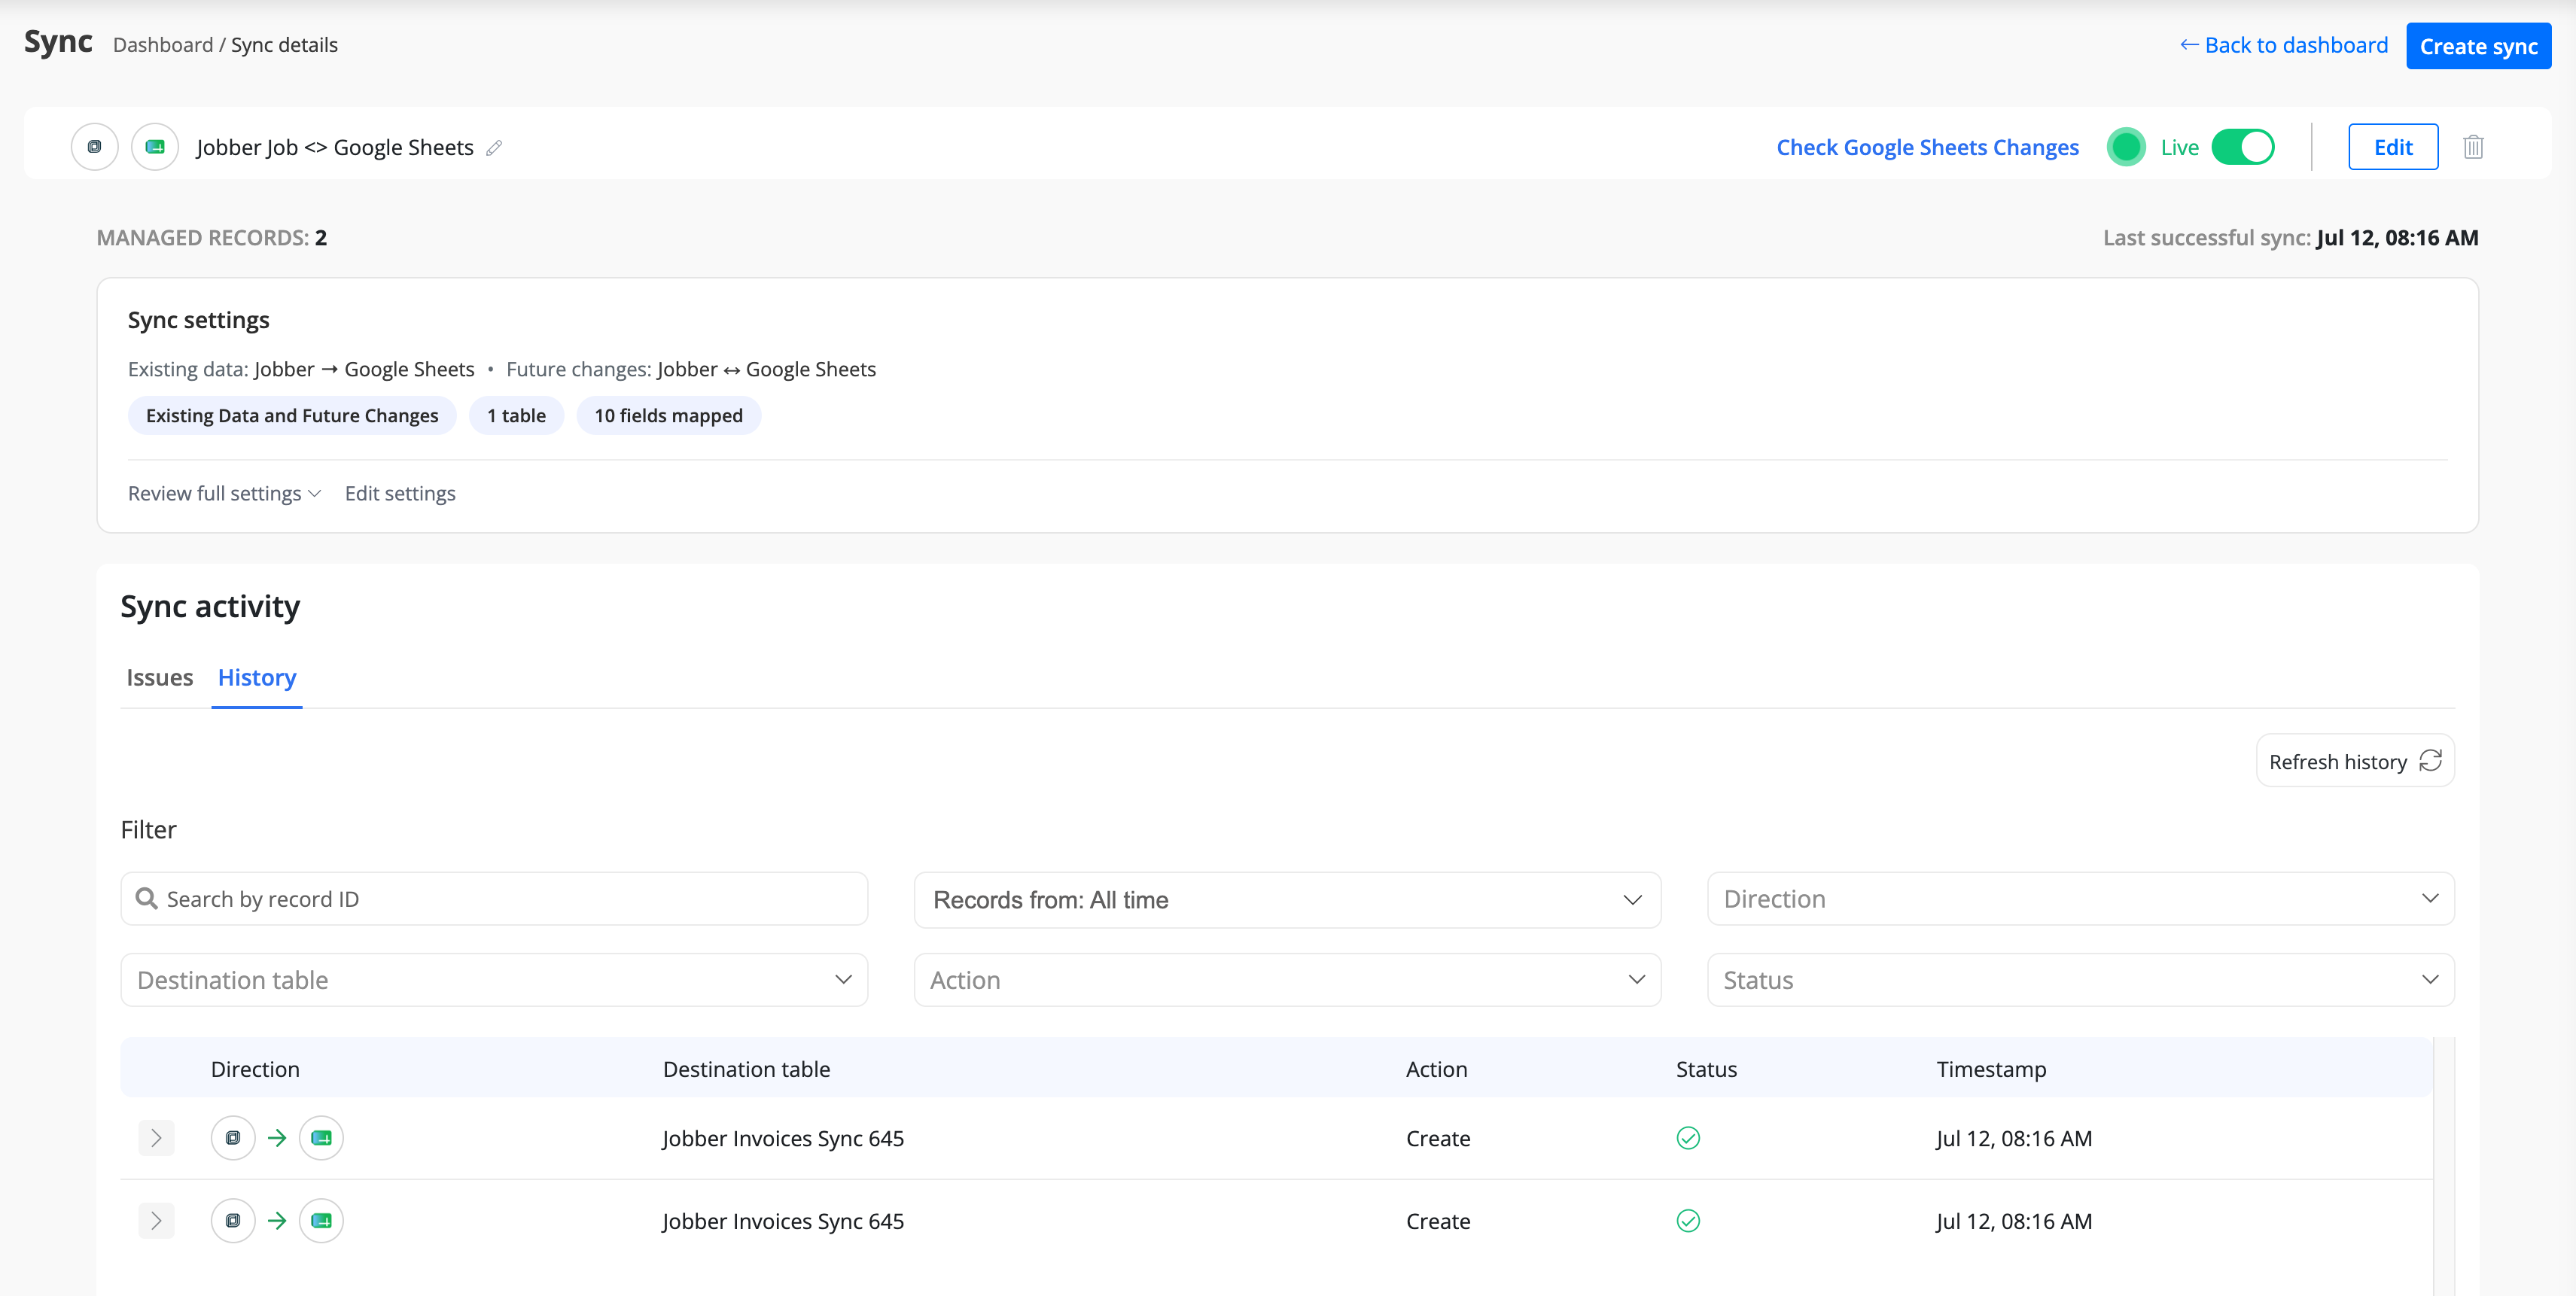
You can monitor individual record activity from the sync’s History section.
Monitor your Jobber sync
After the sync becomes live, open its details page to review:
Current sync status
Last successful sync time
Managed record count
Record-level sync history
Creates and updates
Sync warnings or errors
Sync settings and field mappings
Use the Issues section to review records that could not be synchronized and follow the displayed resolution instructions.
Frequently asked questions
Can I sync Jobber with Google Sheets?
Yes. Byteline can sync supported Jobber clients, jobs, and invoices with Google Sheets. You can import existing records, synchronize future changes, and configure one-way or two-way behavior where supported.
Can I export existing Jobber records?
Yes. Select Existing Data Only for a one-time export, or Existing Data and Future Changes to import existing records and keep them updated afterward.
Does the Jobber sync run automatically?
Yes. When future syncing is enabled and the sync is live, Byteline automatically checks for supported changes and synchronizes them according to your settings.
Can Google Sheets update Jobber?
Yes, when you configure a direction from Google Sheets to Jobber or choose a two-way sync. Only writable Jobber fields can be updated. Read-only fields are shown during field mapping.
Will connecting Jobber immediately change my data?
No. Connecting your account only authorizes access. Byteline does not begin modifying records until you review the preview and start the sync.
Can I change the mapped Jobber fields?
Yes. During setup, expand the field mapping to add, remove, or change fields. You can also edit the sync settings later. Changes to a live sync apply according to the options shown when editing.
Why can’t I update a particular Jobber field?
Some Jobber fields are read-only or cannot be changed through the Jobber API. Byteline identifies read-only fields in the mapping screen and prevents unsupported updates.
Need help with your Jobber integration?
Use the Chat option in the bottom-right corner of the Byteline console for assistance with choosing the right Jobber data type, configuring field mappings, reviewing the sync preview, or resolving sync issues.