Framer Data Sync

This comprehensive document will walk you through the step-by-step configuration process for Framer data sync and address specific use cases tailored to Framer.
Standard Data Sync functionality
Please refer to Data Sync - Getting Started for the standard data sync functionality. The getting started document covers usages of data sync features valid for all integrations.
Requirements
Installing app
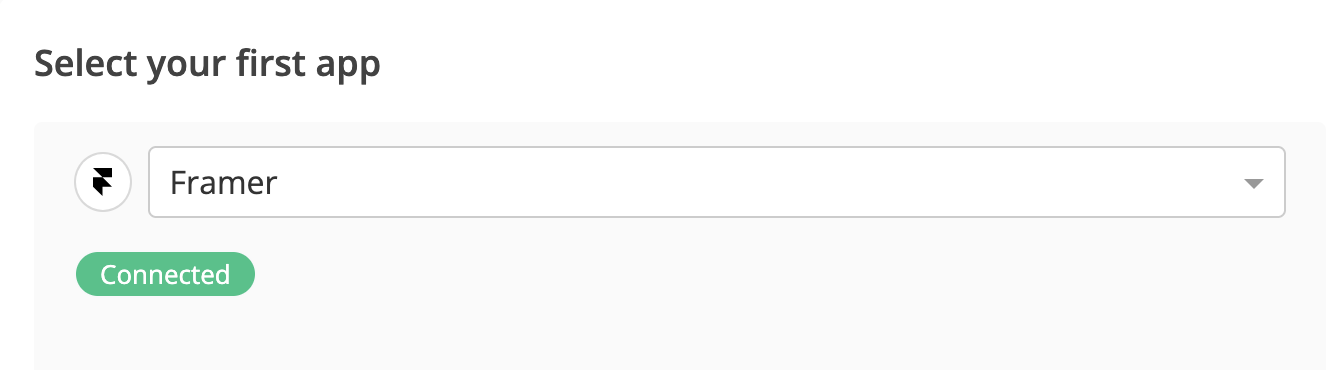
- Go to Byteline Console.
- Create a new sync and choose Framer as the first app. Then, select the second app.
- On the next screen, click Connect Framer to establish a connection to your Framer account.
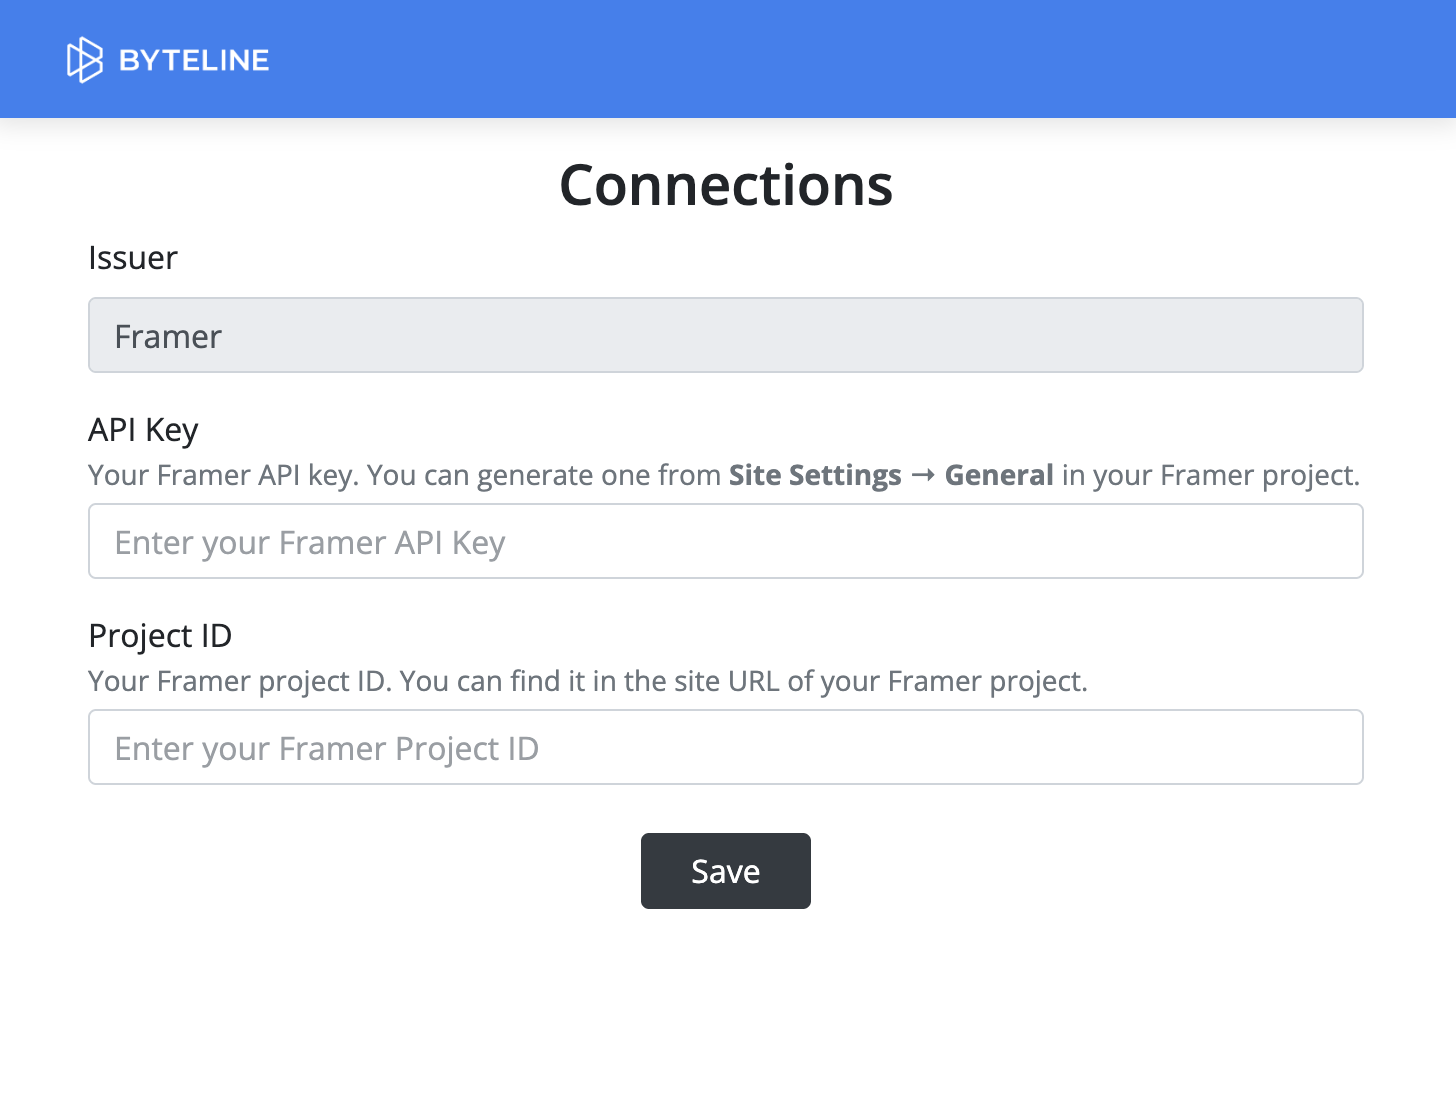
How to get your Framer API Key
- Log in to your Framer account
- Select the project you want to connect
- Open Site Settings → General
- Scroll to the API Keys section
- Click Create API Key
- Copy the generated key and paste it here. (The API key in the UUID format, e.g.
c54d76df-05b0-43a3-ab2d-80cdf6757e48)
Important: Make sure you generate the API key for the correct site, as each site has its own key.
How to find your Framer Project ID
- Open your Framer project in the browser.
- Look at the URL in the address bar
Example:https://framer.com/projects/Nova-App-copy--dFu2XRqmWggPa1234567-1BR5X?node=... - The Project ID is the string after the project name and
--. You only need the part before the next-after the--.
In this example:Project ID = dFu2XRqmWggPa1234567
Configuring Framer Data Sync
Step 1: Start the Sync Setup
- Log in to your Byteline account and navigate to the My Syncs page.
- Click on the "Create Sync" button to begin the configuration.
Step 2: Select Framer as Your First App
- Choose Framer as the first app to sync.
- Alternatively, you can select another app first and then pick Framer as the second app.
Step 3: Connect the Second App
- Select the second app for syncing and log in to authorize the connection.
- Once connected, click "Continue" to move to the table mapping screen.
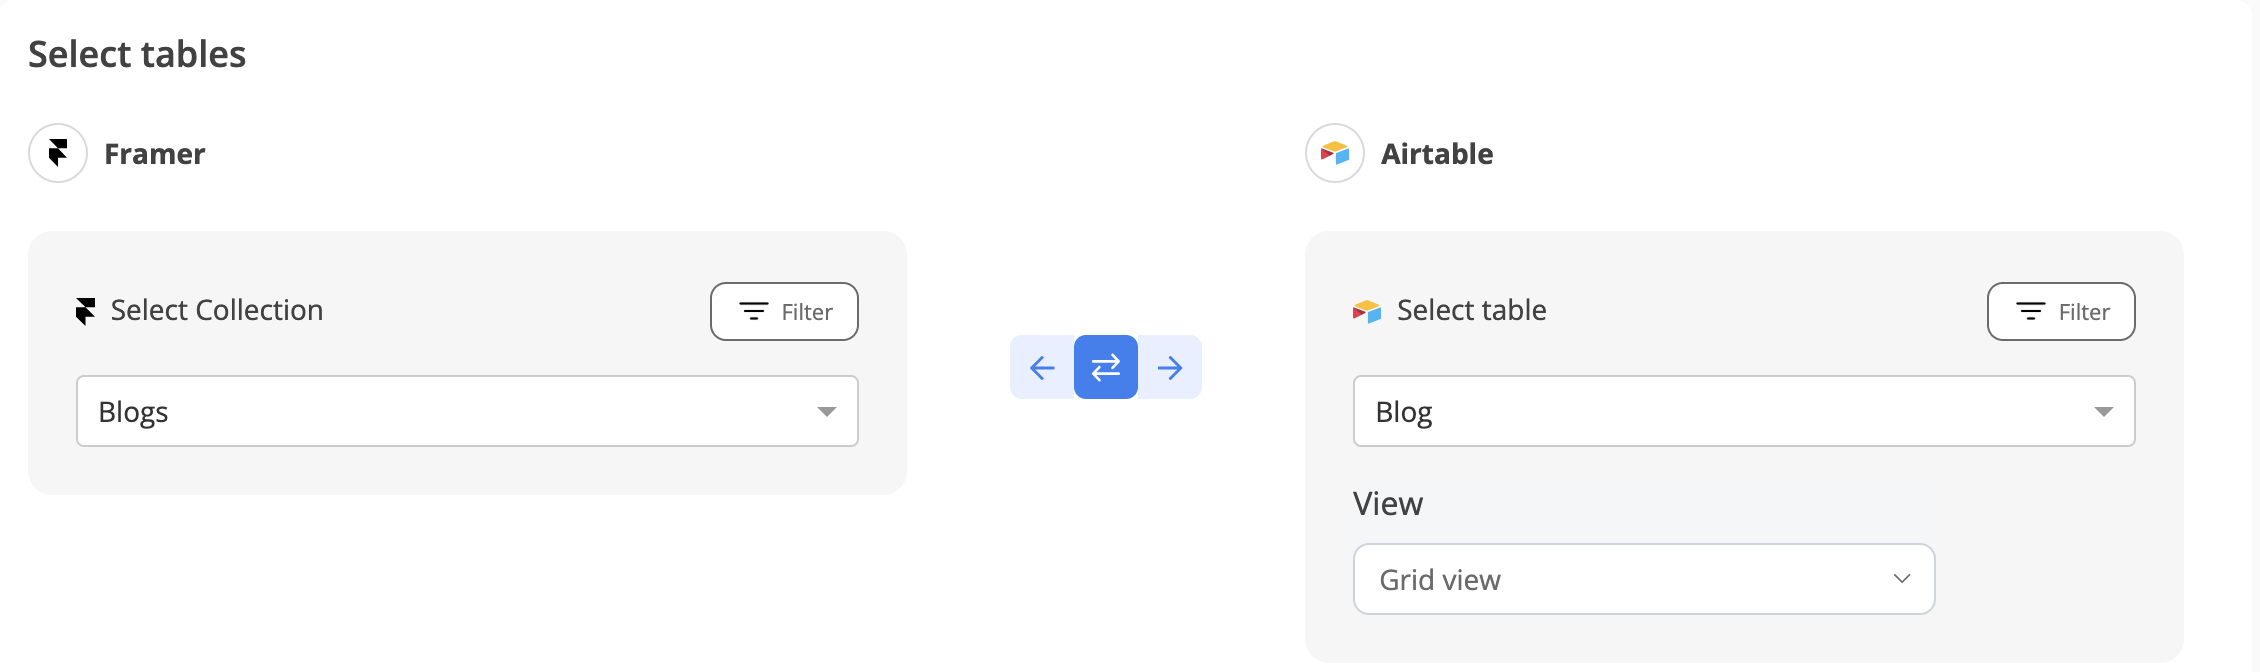
Step 4: Map Tables Between Framer and the Other App
- Select the tables to sync between both apps.
- Select the tables you want to sync between the two apps.
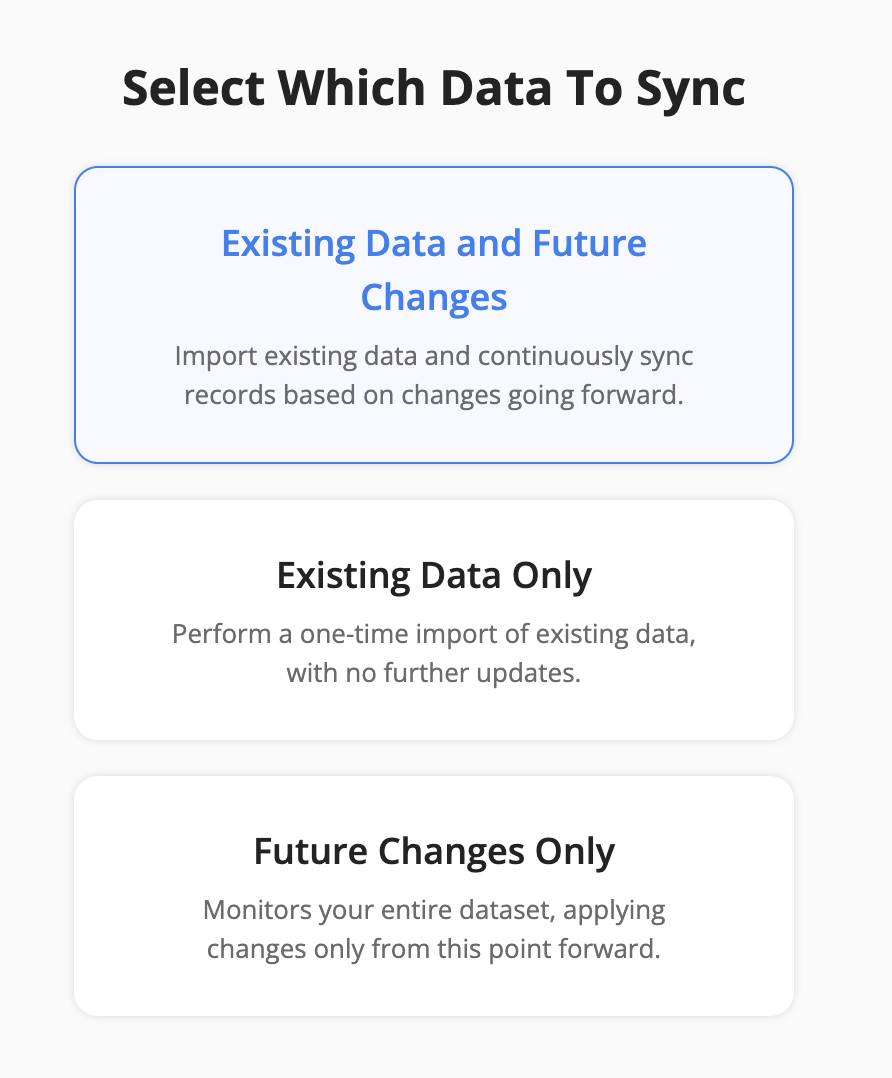
Step 5: Choose Which Data to Sync
For each sync, you'll need to select whether to sync existing records, future changes, or both.
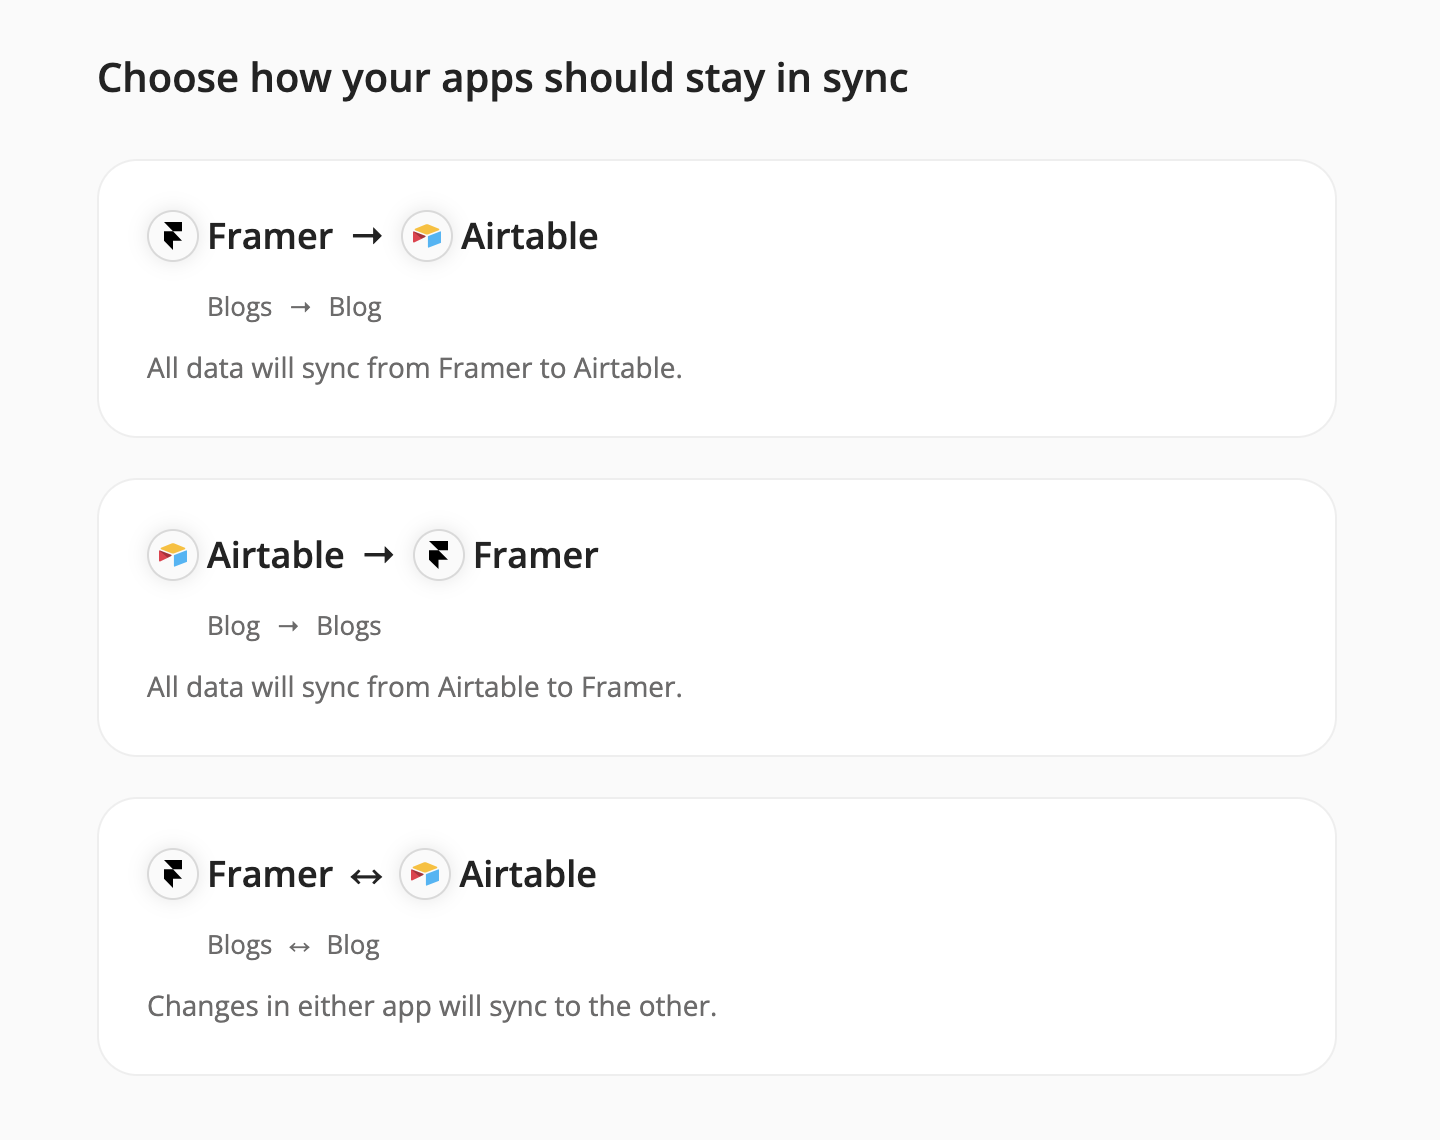
Step 6: Choose Sync Direction
For a two-way sync, select the two-way option and then choose the direction for syncing existing data. For a one-way sync, the direction for real-time and historical sync remains the same.
Step 7: Configure Field Mapping
- On the Field Mapping screen, drag and drop fields from the right panel into the mapped fields column to create mappings.
Note: Not all fields are shown in the screenshot below.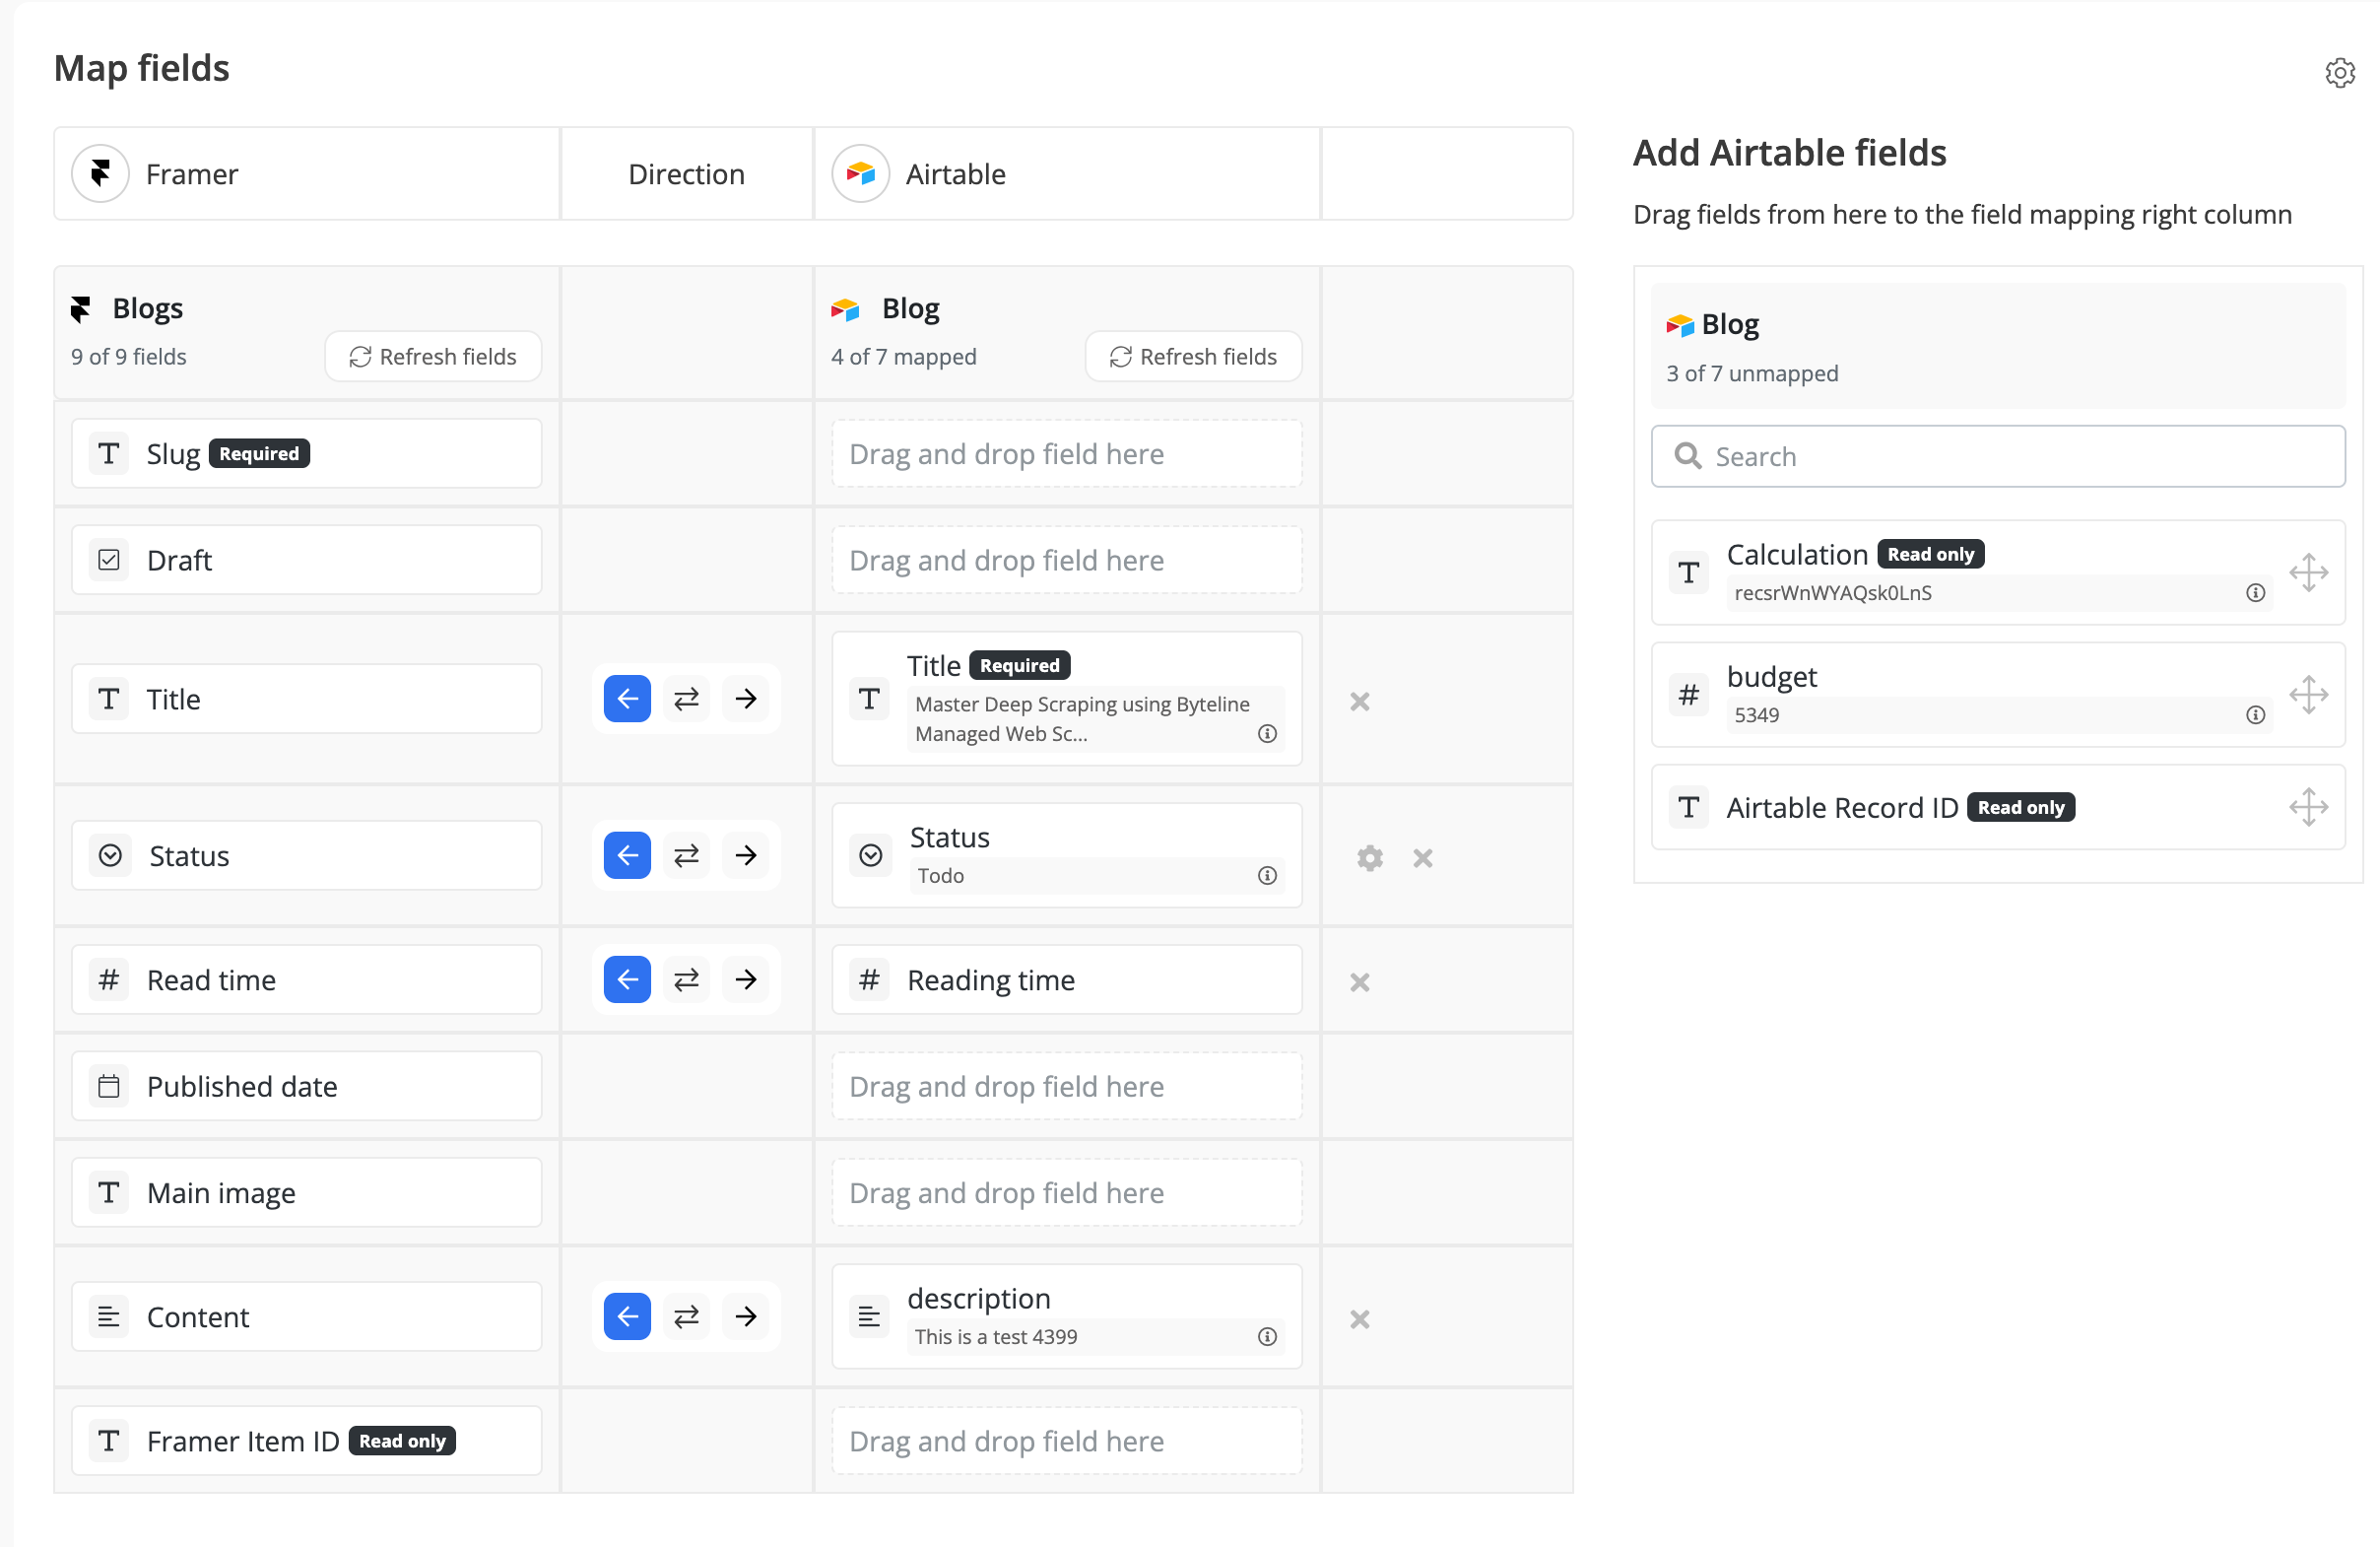
- To delete a mapping, click the X button next to the field.
- Select the sync direction at the field level using the arrow buttons.
One-Way Sync: Data flows from one app to the other.
Two-Way Sync: Data flows bidirectionally between both apps. - Once your mappings are finalized, click "Continue.
Step 8: Review Sync Preview
- Preview the sync setup to ensure everything is configured correctly.
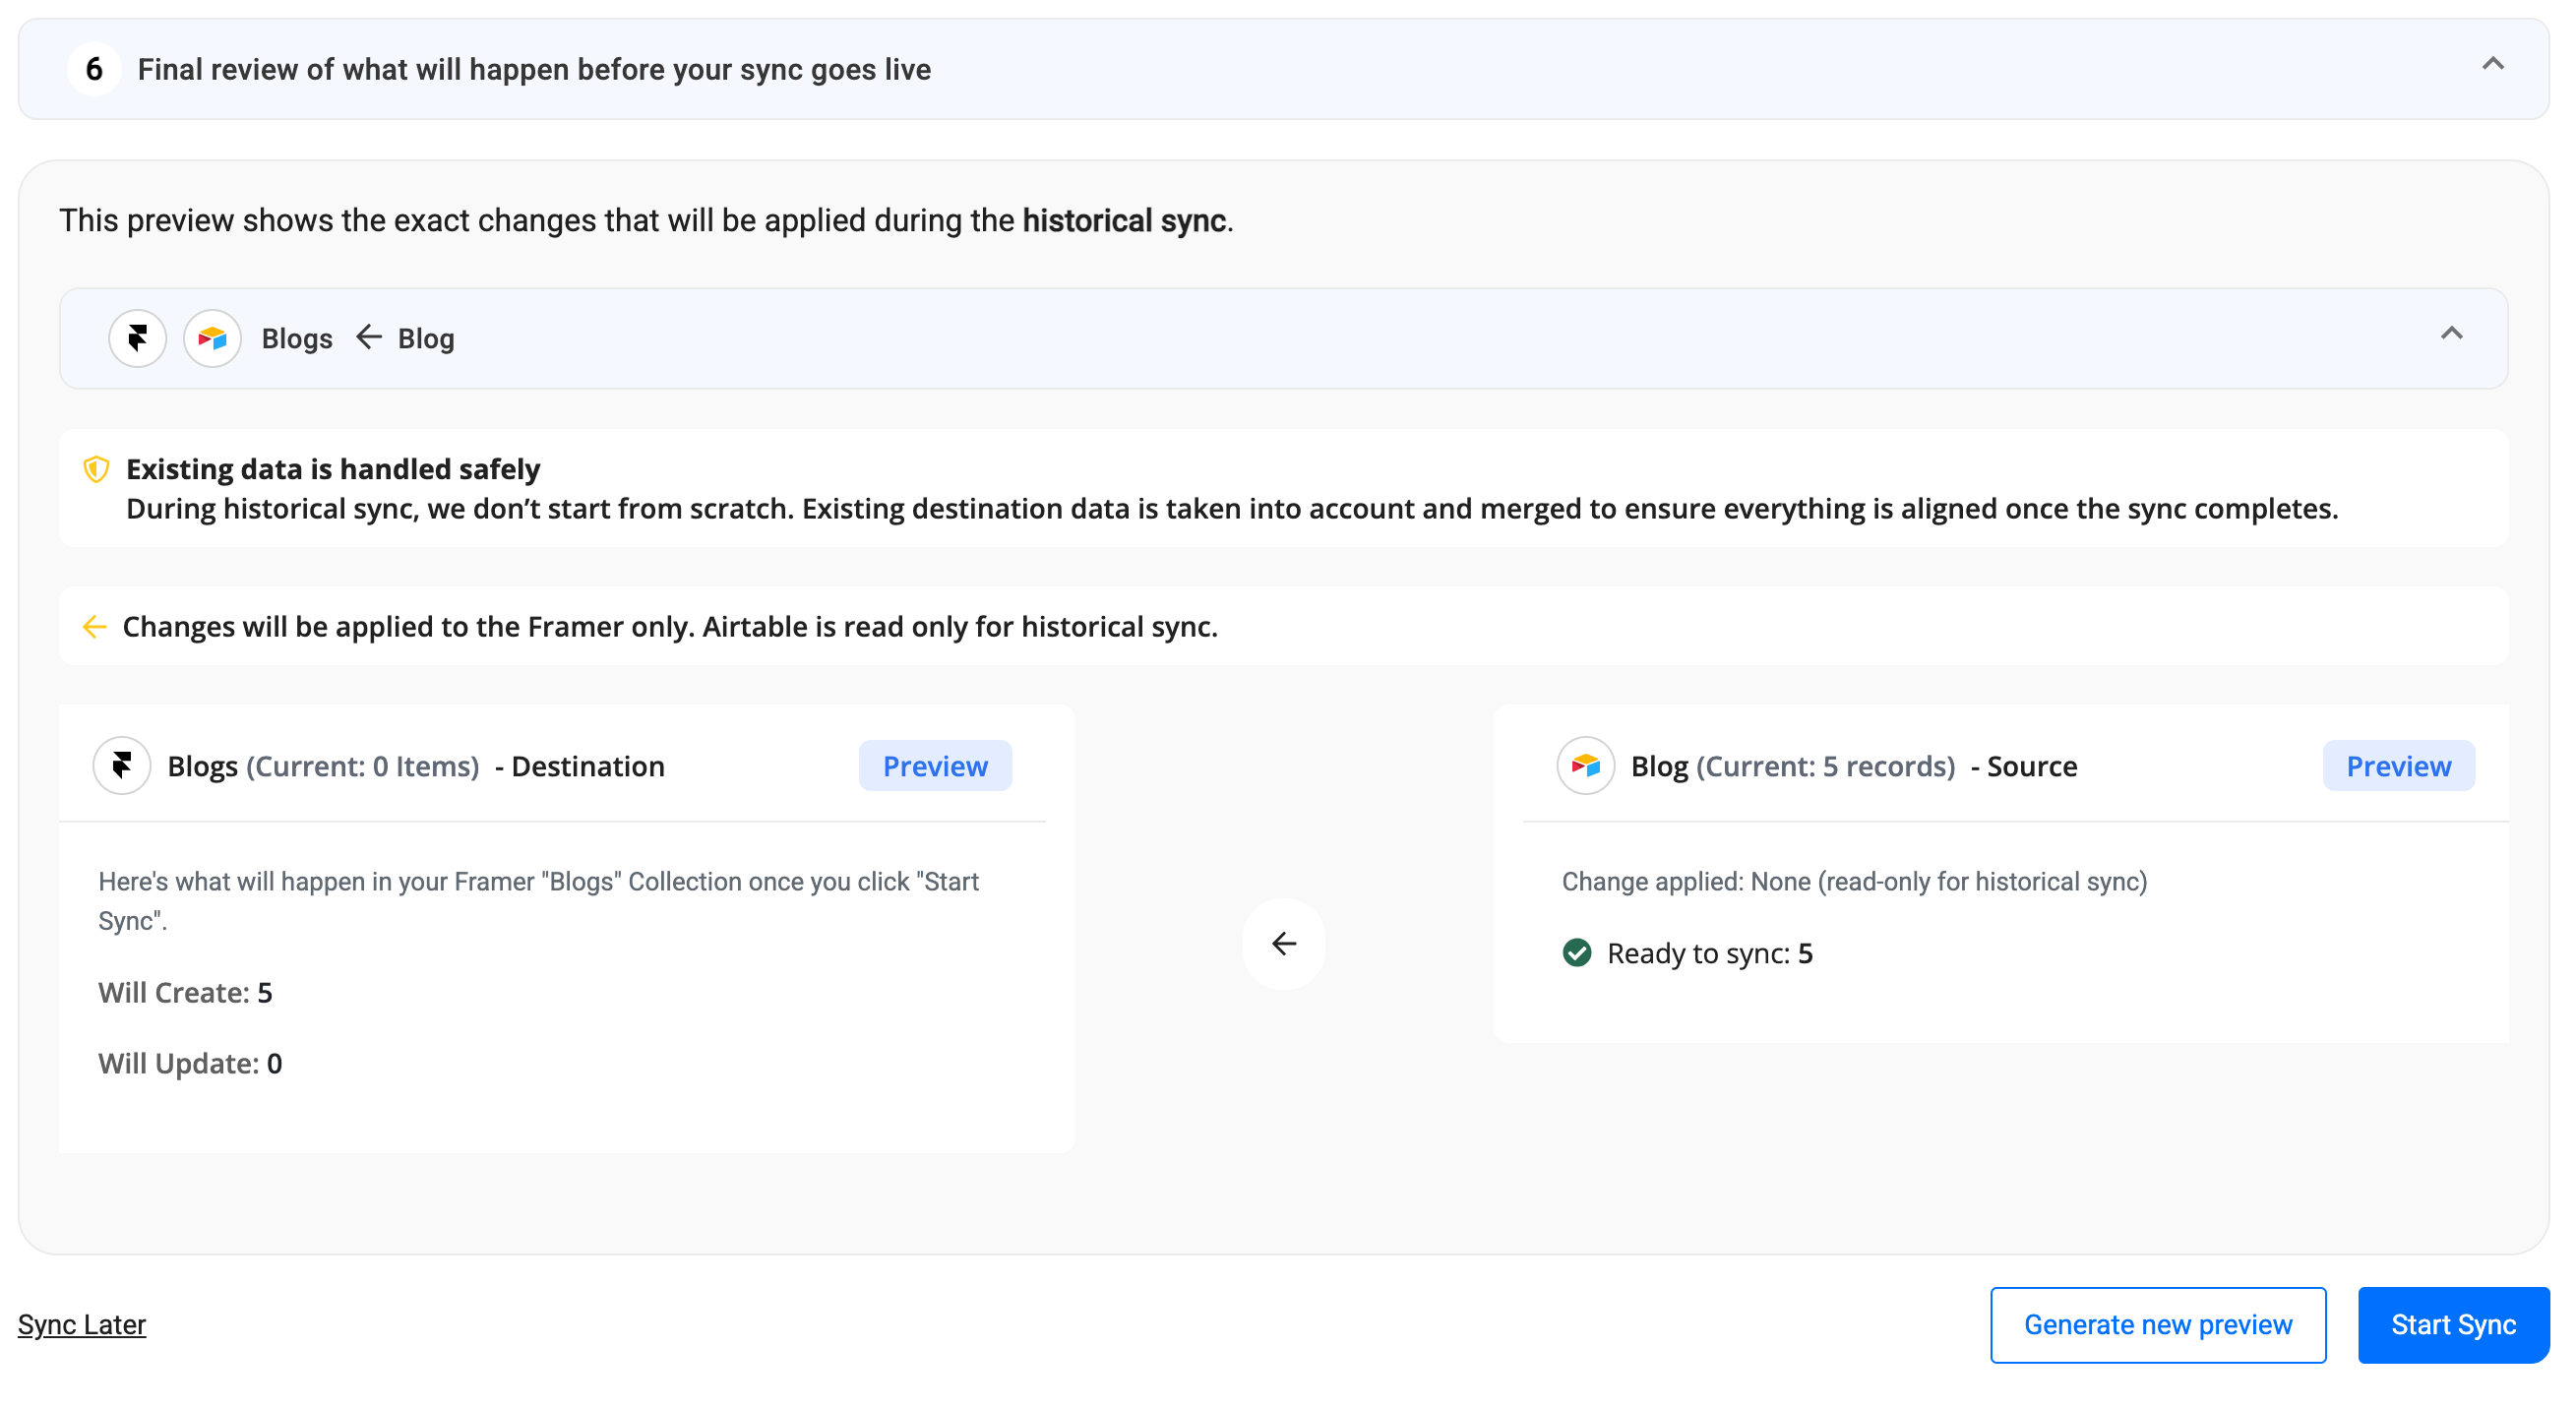
- If all looks good, click "Start Sync."
- Byteline will:
- Perform an initial sync of your existing data.
- Keep the sync running automatically, ensuring your Framer data stays up to date.
You can monitor sync progress, view logs, or make changes anytime from the Syncs page. If you need to pause or edit the sync, simply open it from your dashboard.
✅ That’s it! Your Framer sync is now live.