Data Sync - Getting Started

Introduction
Byteline allows users to synchronize data of two different databases or CMS systems with ease. Whether you want to keep the data of two CMS systems synchronized or want to ensure your databases are synchronized, the platform lets you do it effortlessly.
How to Sync Data between two applications
In this guide, we have uncovered a few simple steps to help you synchronize data between two applications, namely Airtable and Webflow, using Byteline. These instructions are applicable for any two CMS systems or databases.
We have divided this article into four sections to make it easy for you to understand the process of data synchronization on Byteline, as illustrated below:
- Configuring Data Sync
- Handling Existing Data
- Preview
- Start Sync
- View Records Sync History
Let’s begin.
Configuring Data Sync
In this section, you will learn how to configure two applications, Airtable and Webflow, for data synchronization between them with Byteline.
Select Apps
To configure data synchronization, you first need to select two different applications, which can be done by following the steps mentioned below.
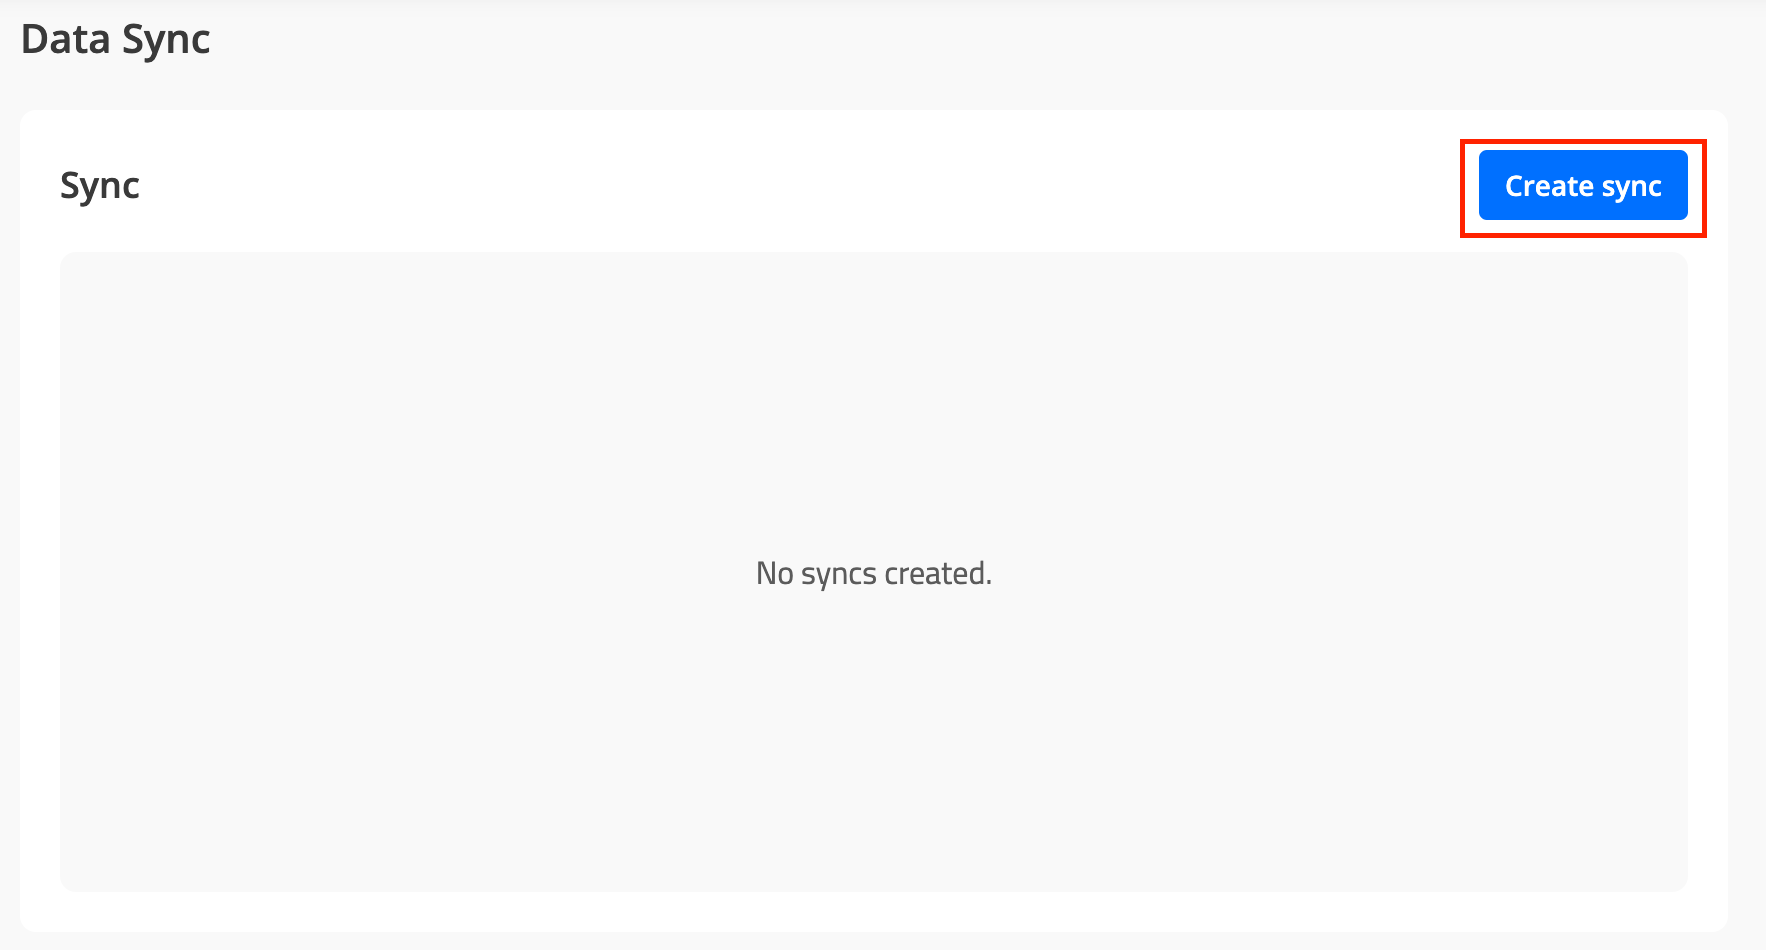
Step 1: On the New Sync page, click on the Add New button next to the My Syncs in the sidebar menu.
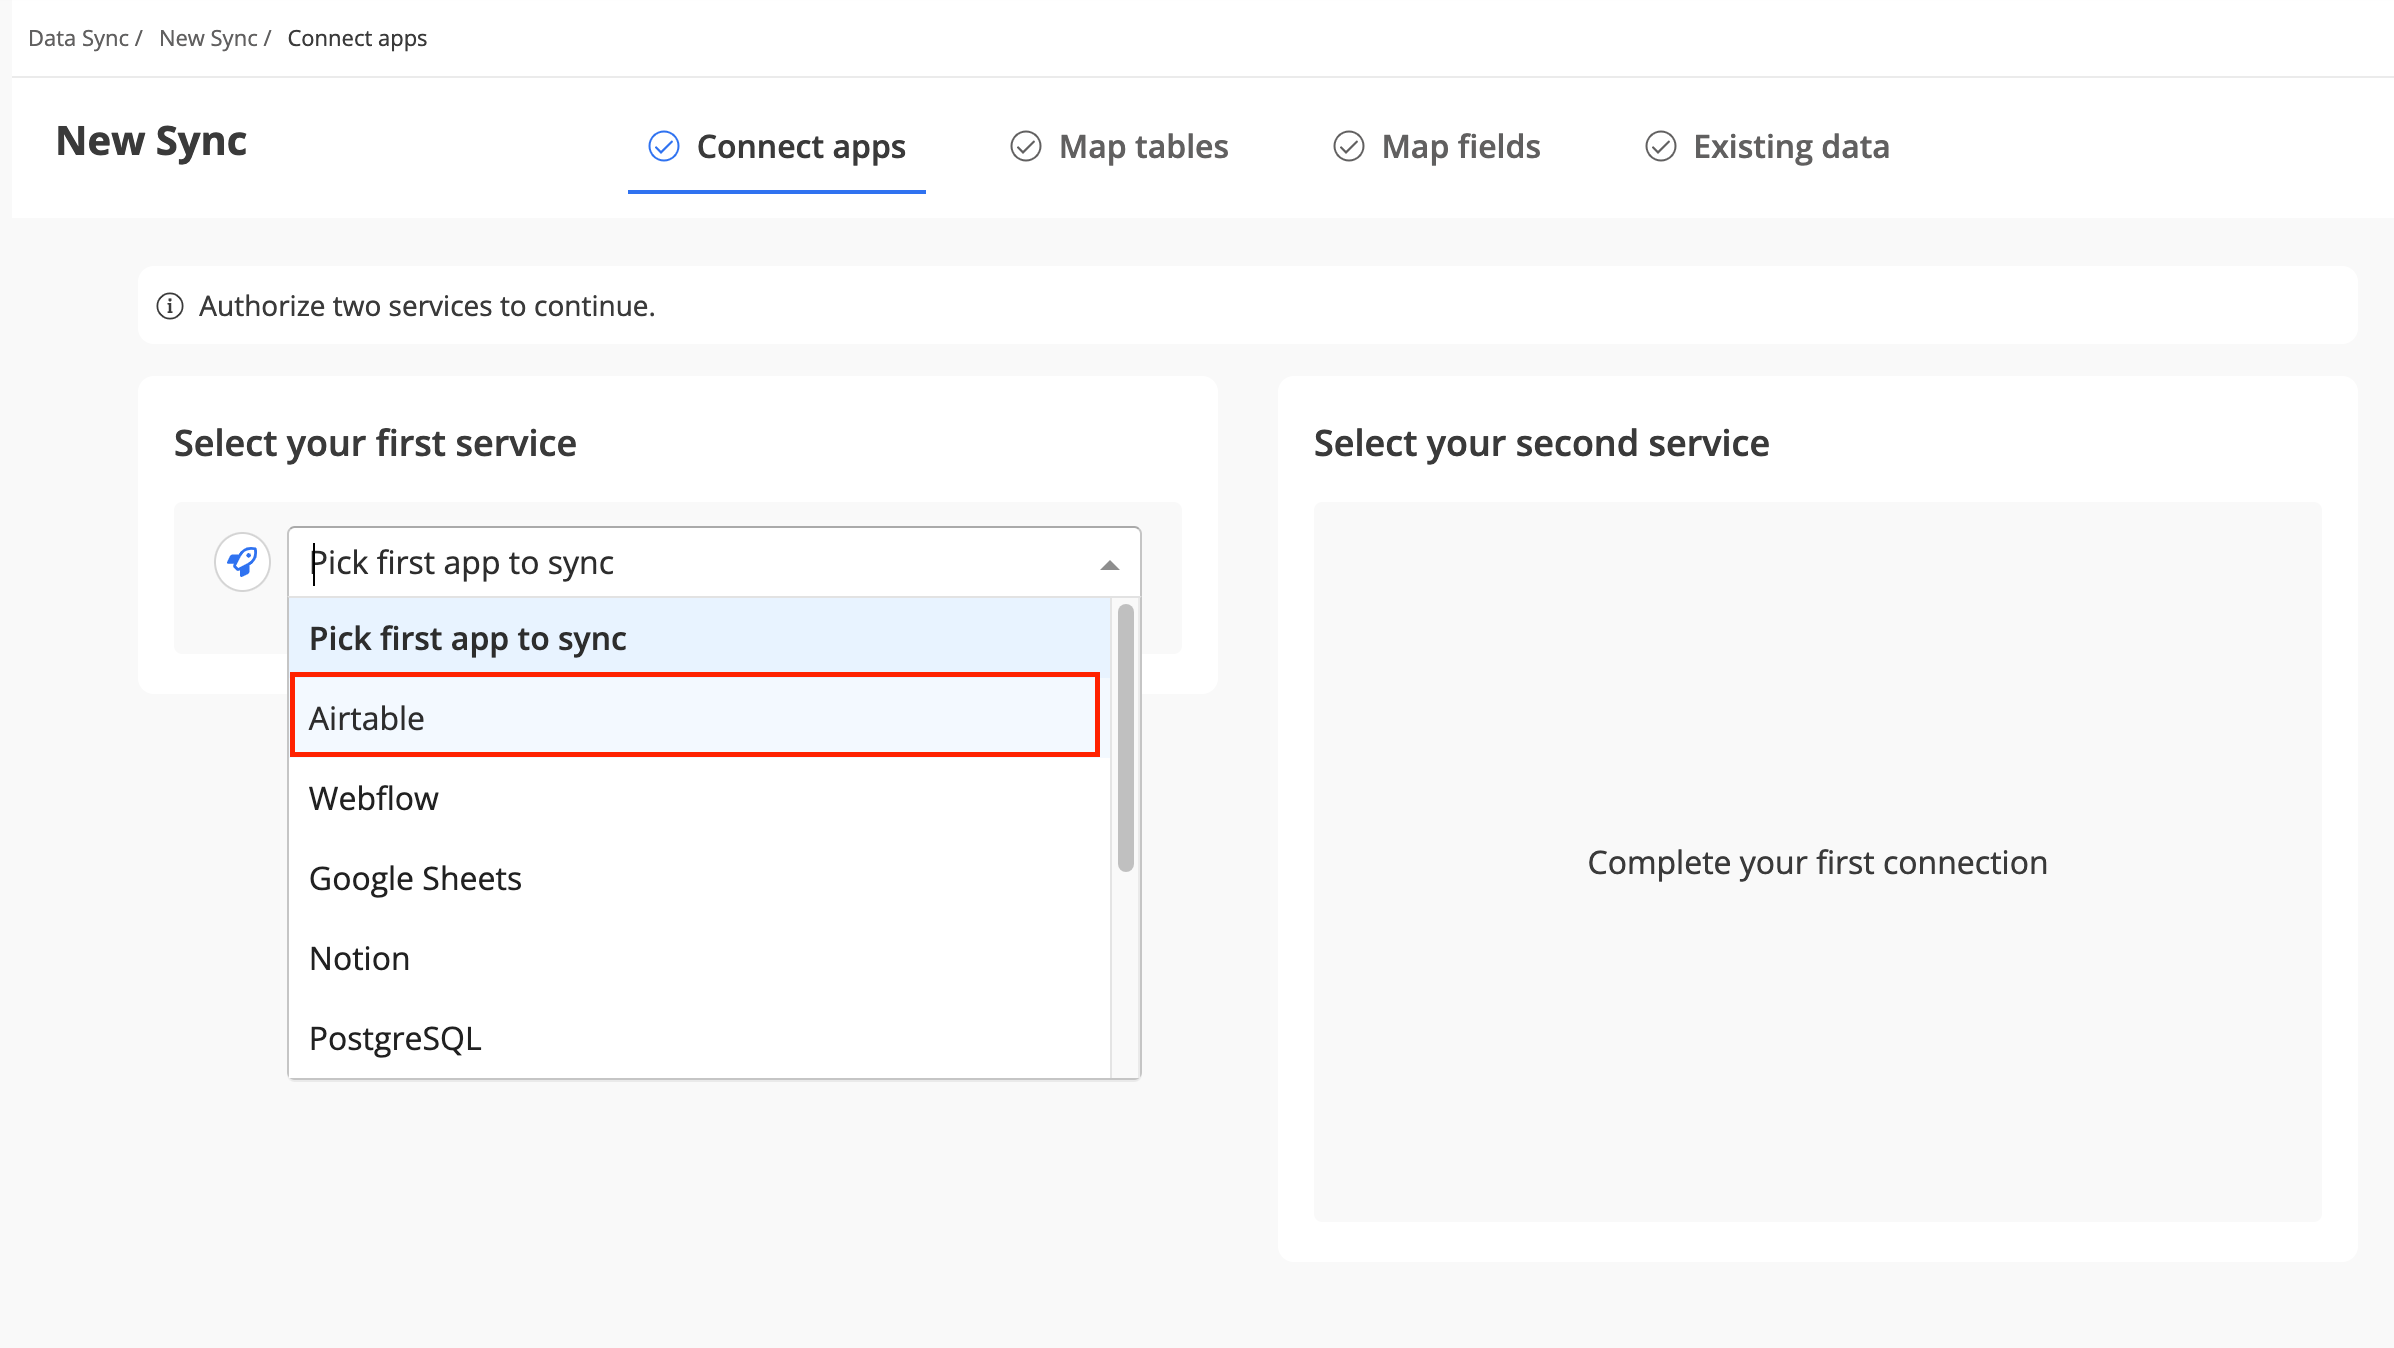
Step 2: Click on the "Pick first app to sync" field and select the your app from the dropdown list.
Step 3: Sign in to Airtable by clicking the Sign in button next to the dropdown.

Step 4: Once you have signed into Airtable, select the desired base from the Airtable base dropdown list.
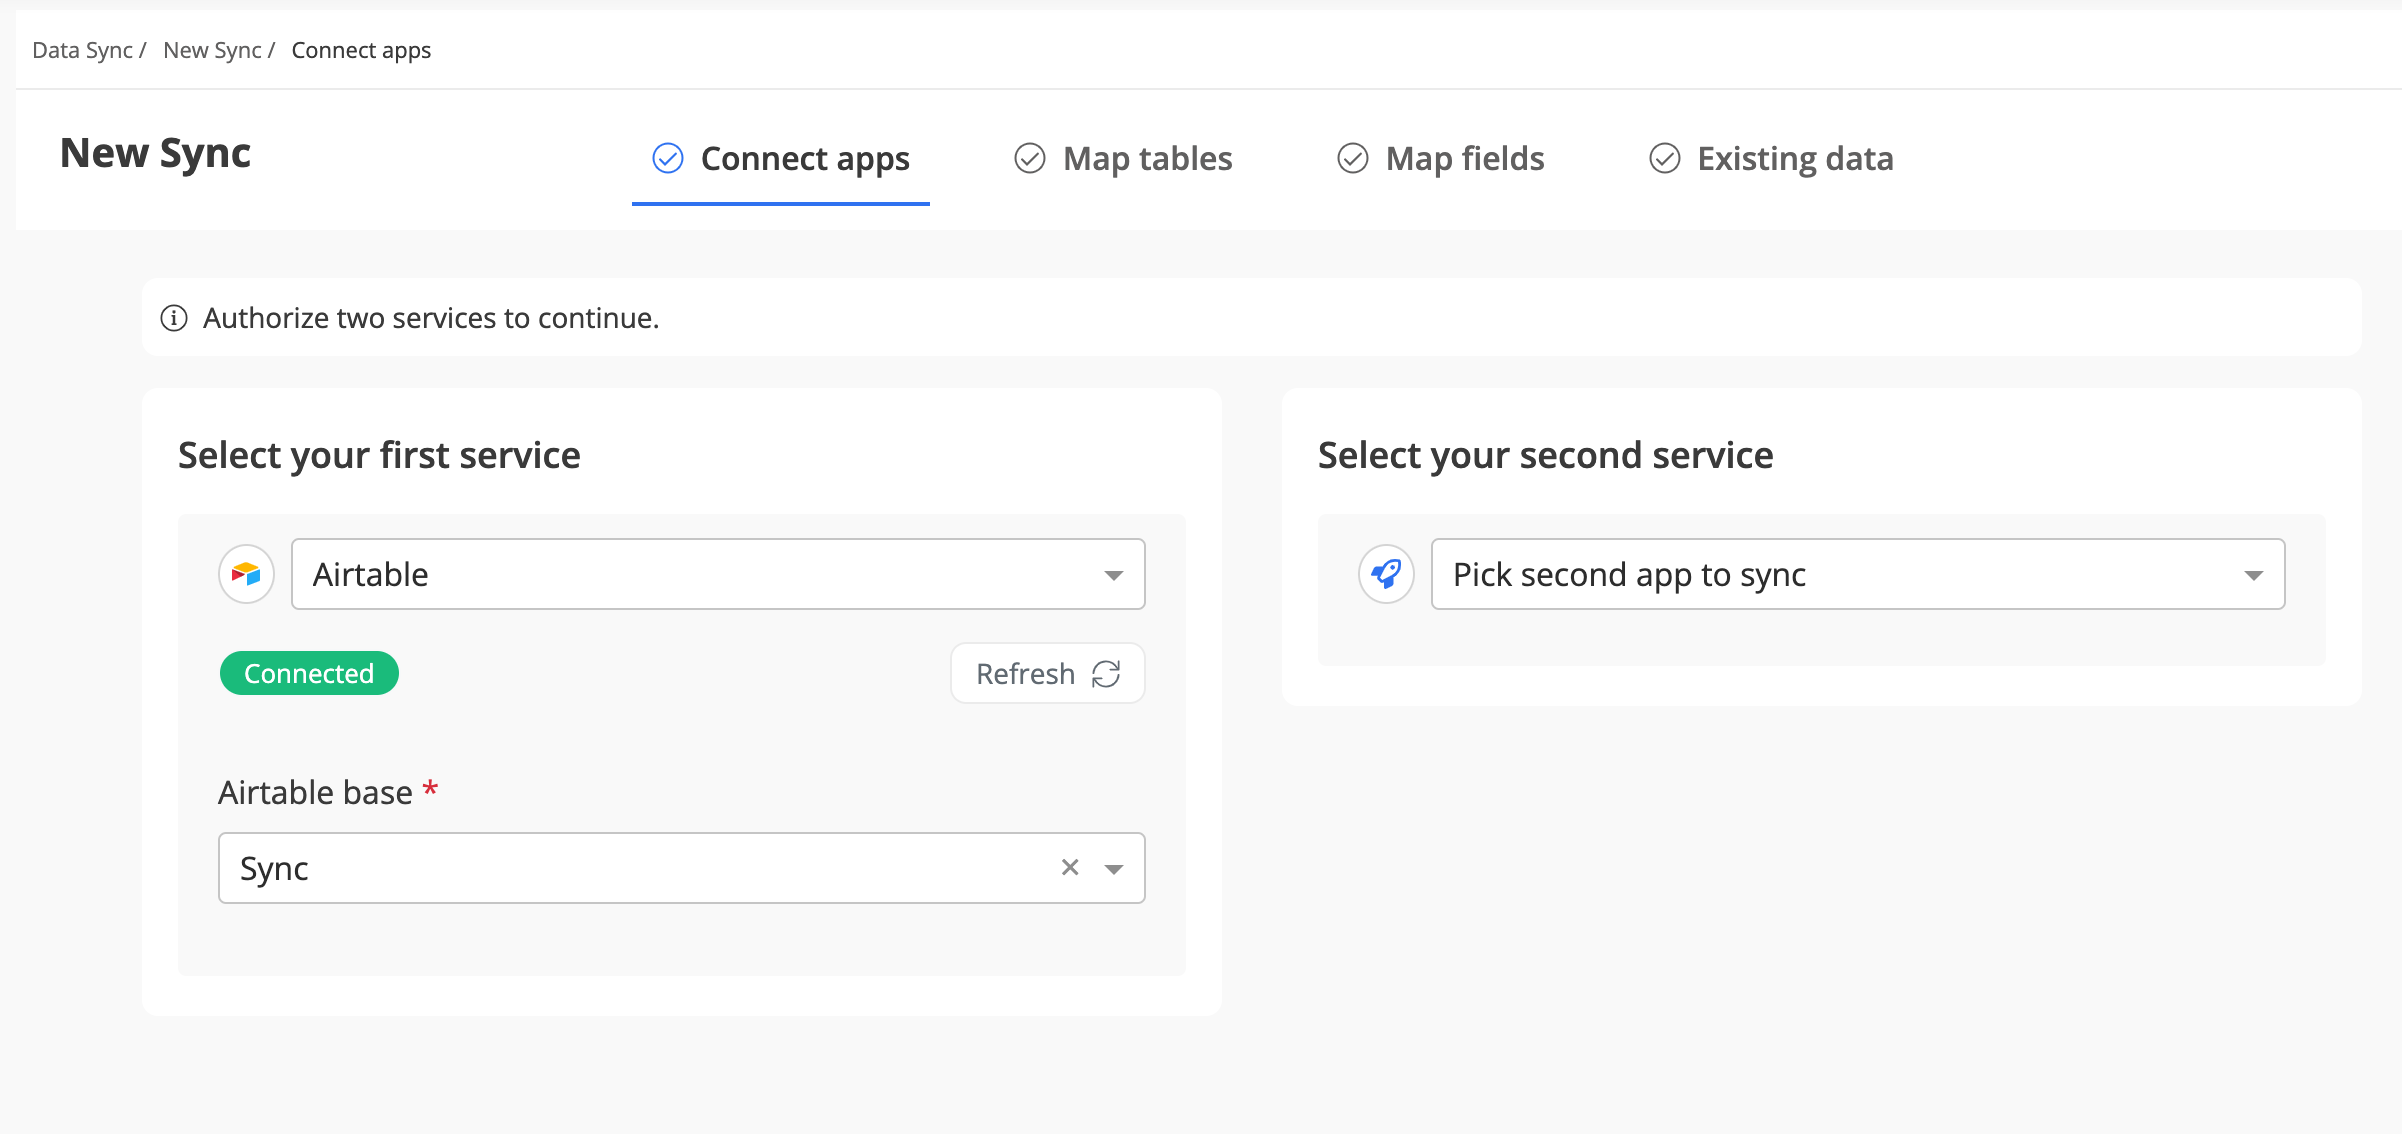
Step 5: Click on the "Pick second app to sync" dropdown and select Webflow from the dropdown list. Now, create a connection to Webflow like how you did for Airtable
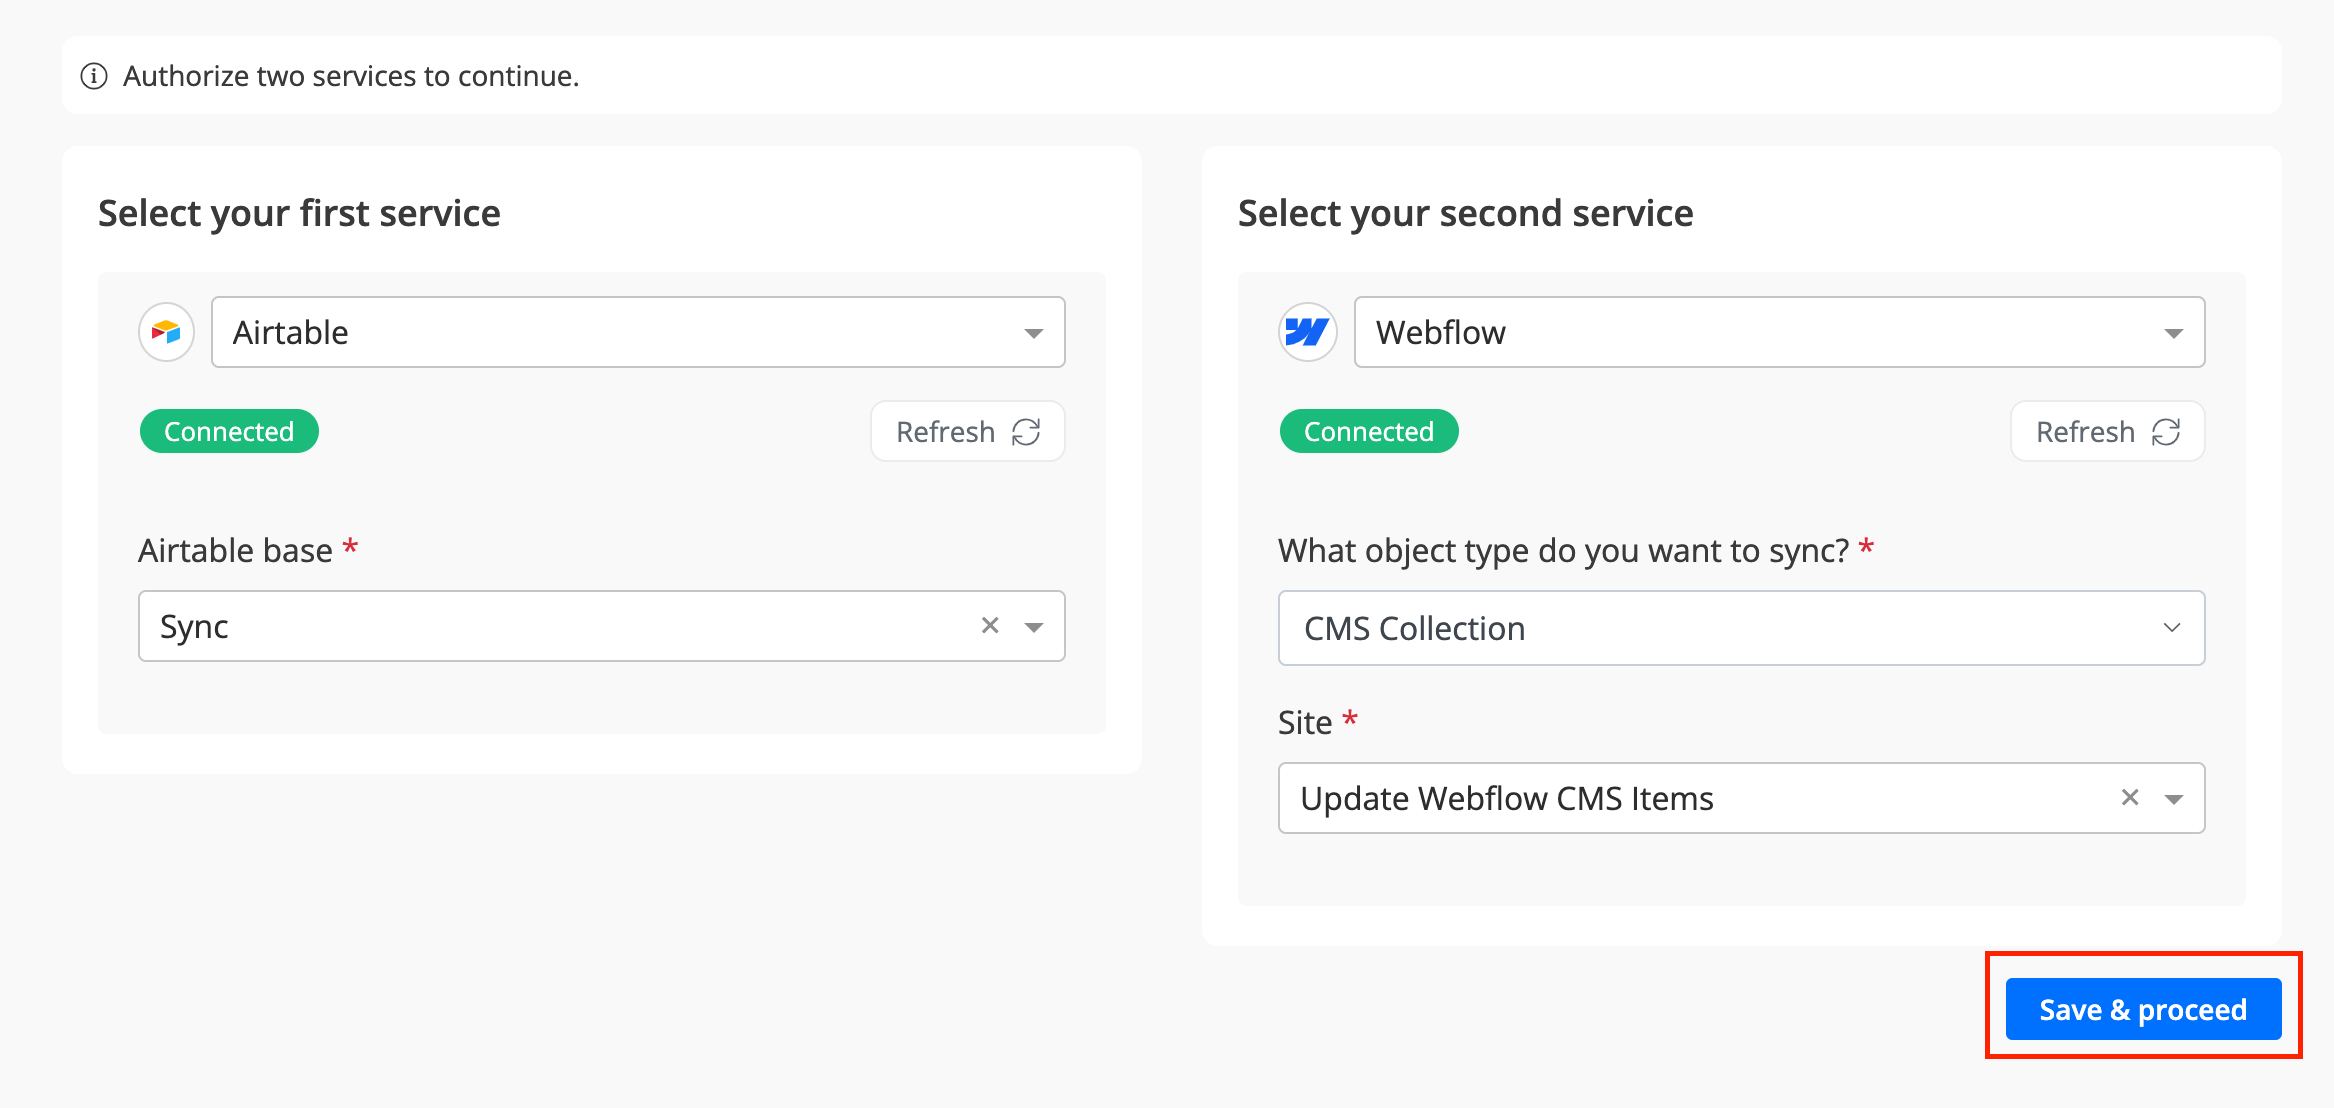
Step 7: Once you have signed into Webflow, select the "object type" along with the Site from the dropdowns.
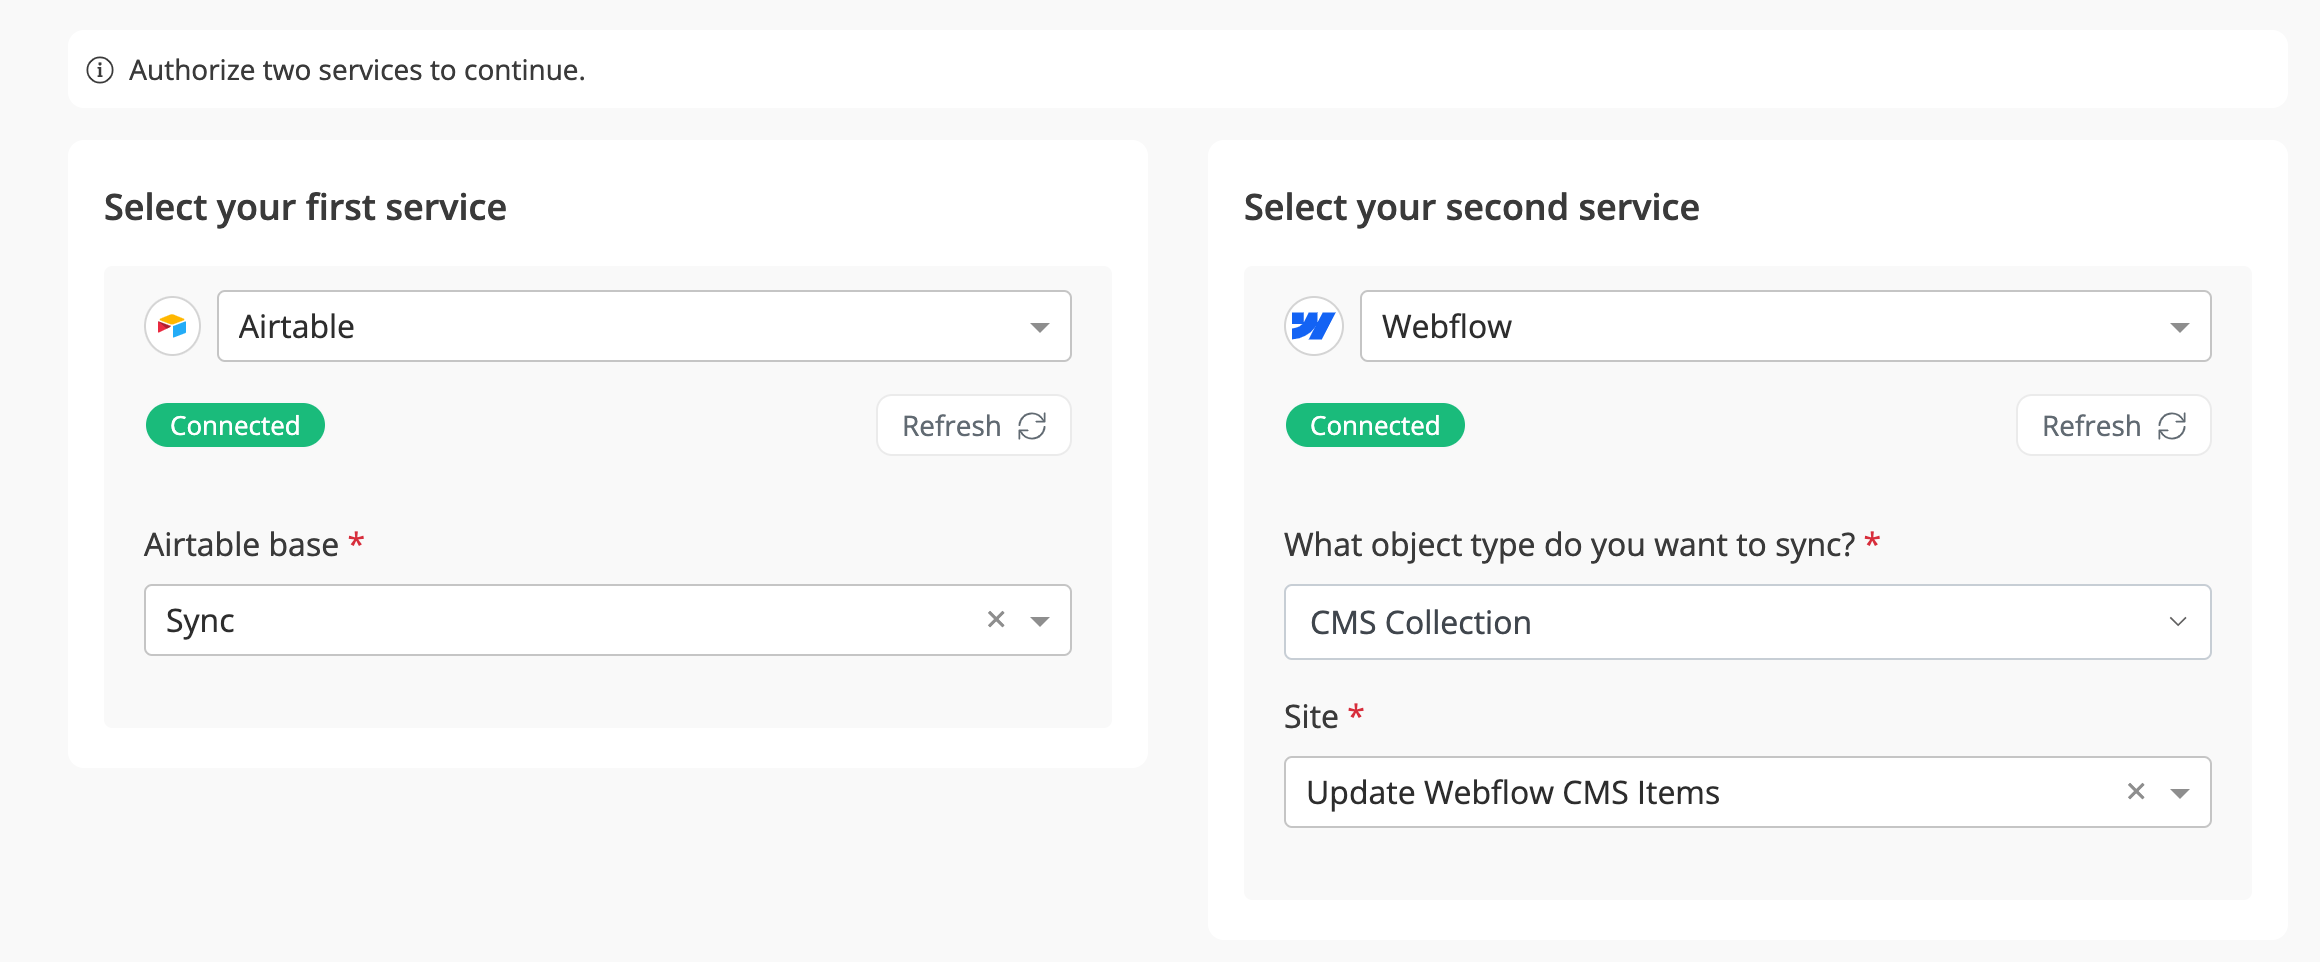
Step 8: Click on the Save & Proceed button.
Select Table(s)
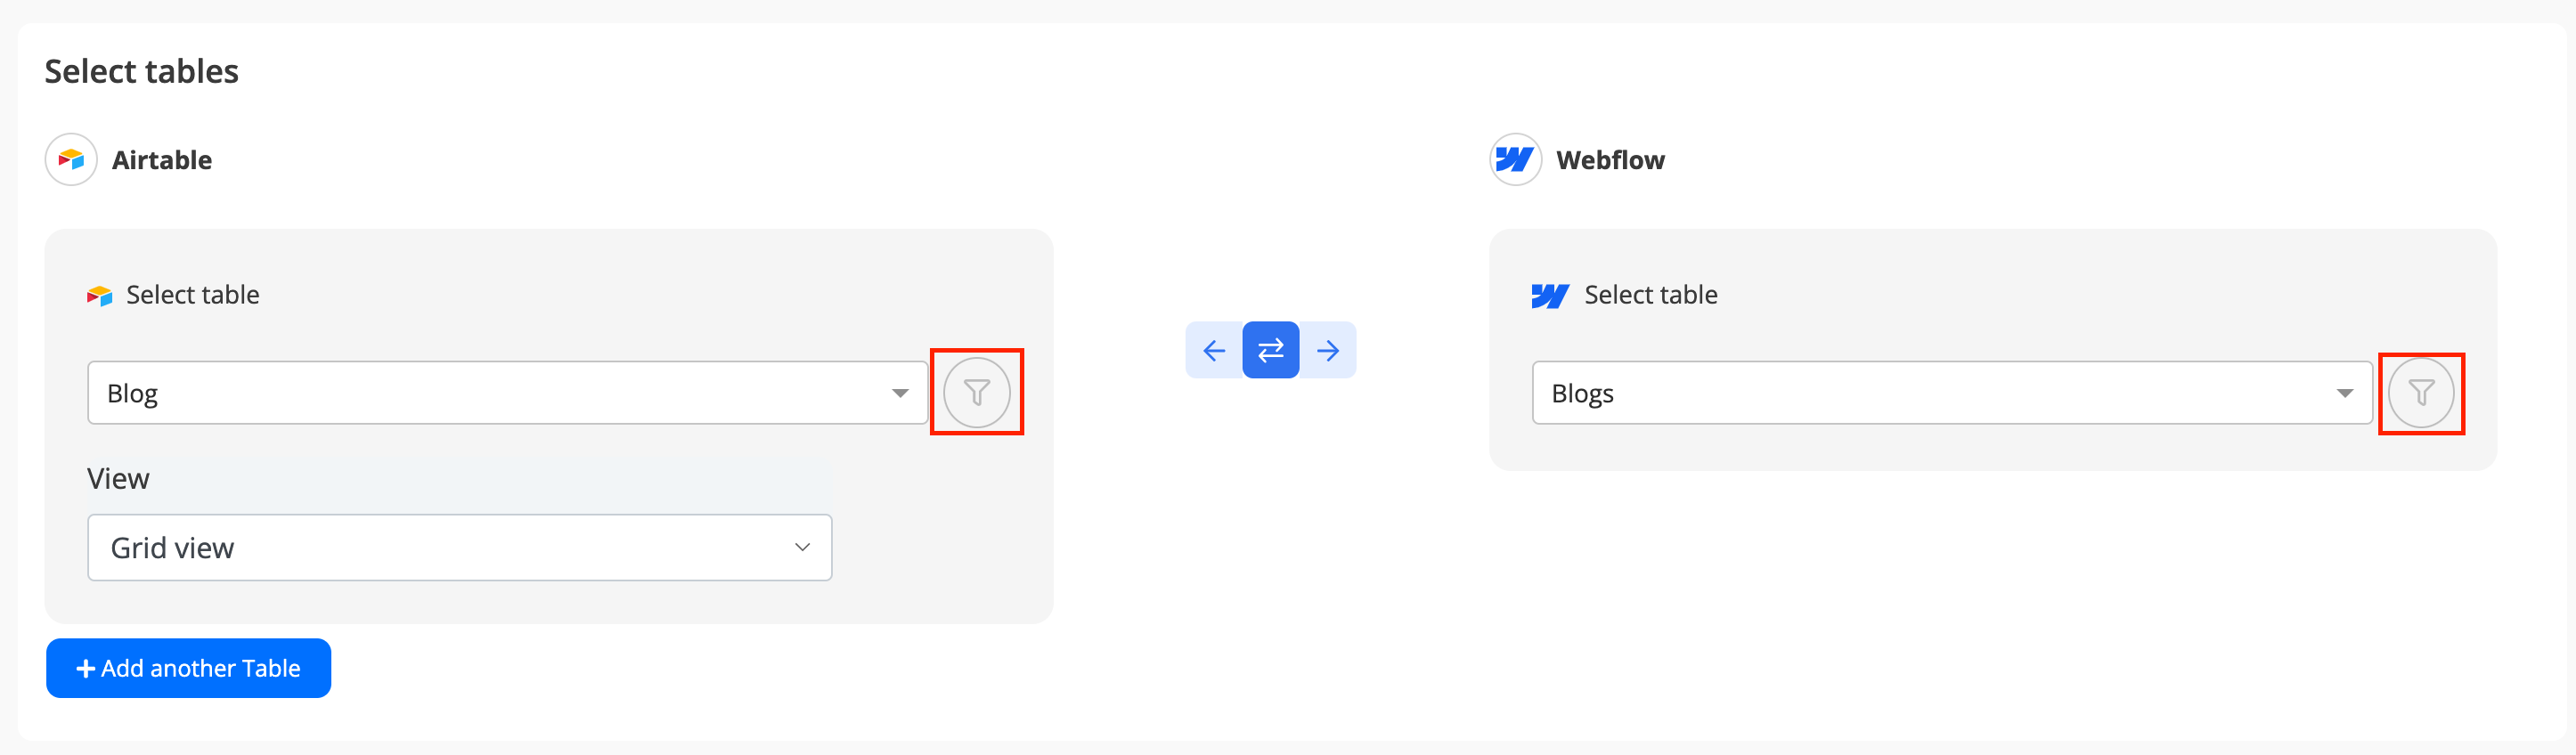
Step 1: Once you select the Airtable base and Webflow site, you can view available tables for both. Choose the desired table from Airtable and Webflow dropdown list. Byteline performs mapping automatically based on the table names.
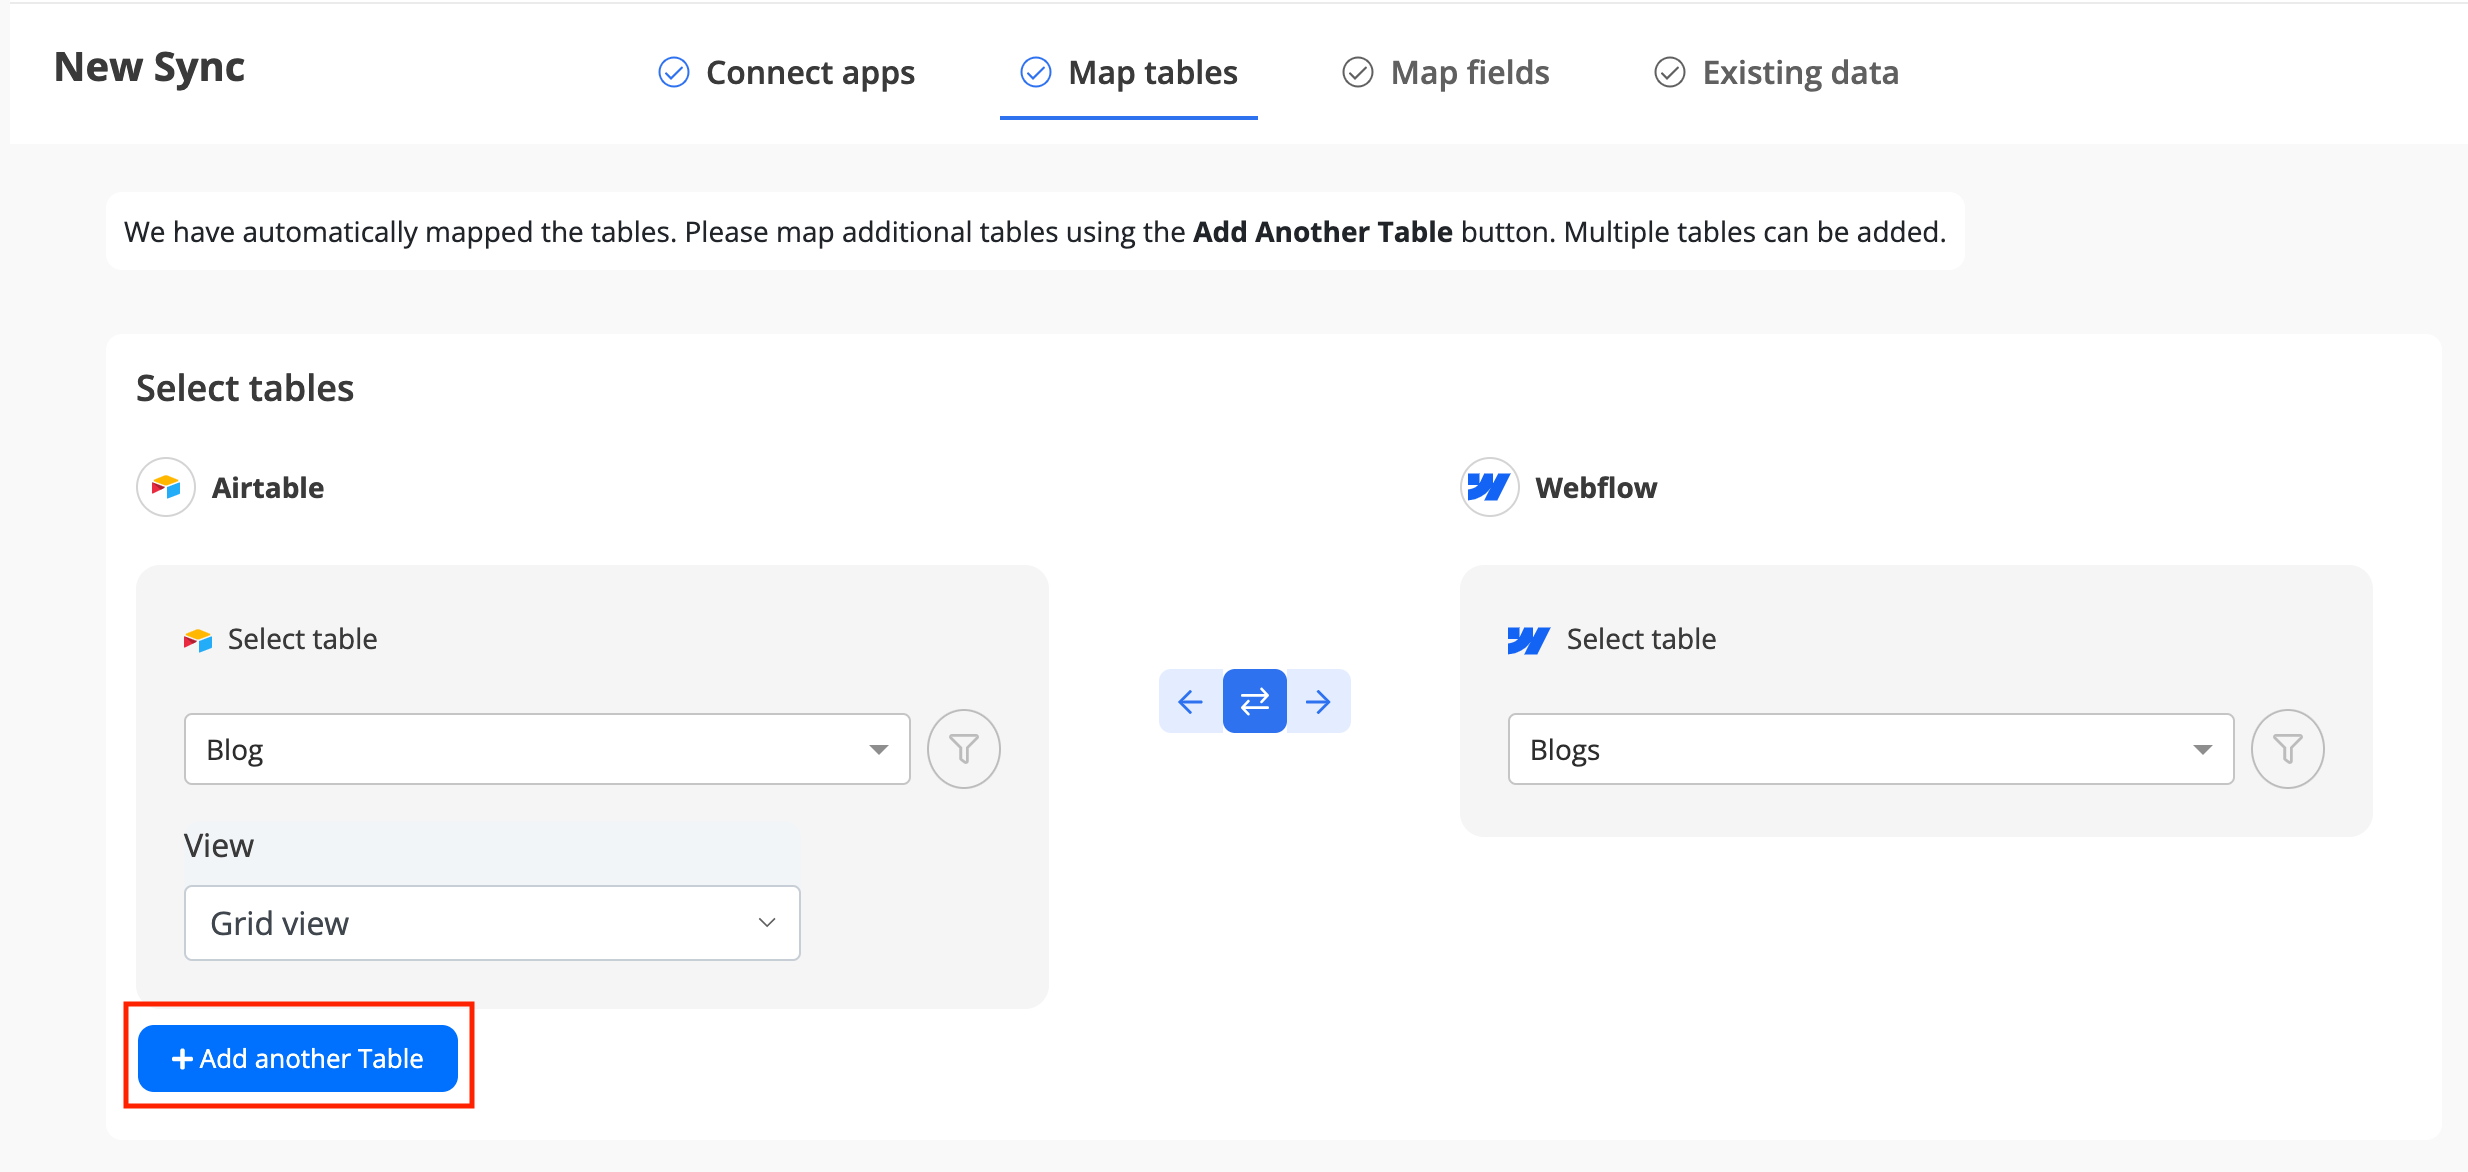
Step 2: After selecting the desired table(s) from Airtable and Webflow, delete all other tables displayed on the screen by clicking on the Trash Bin button.
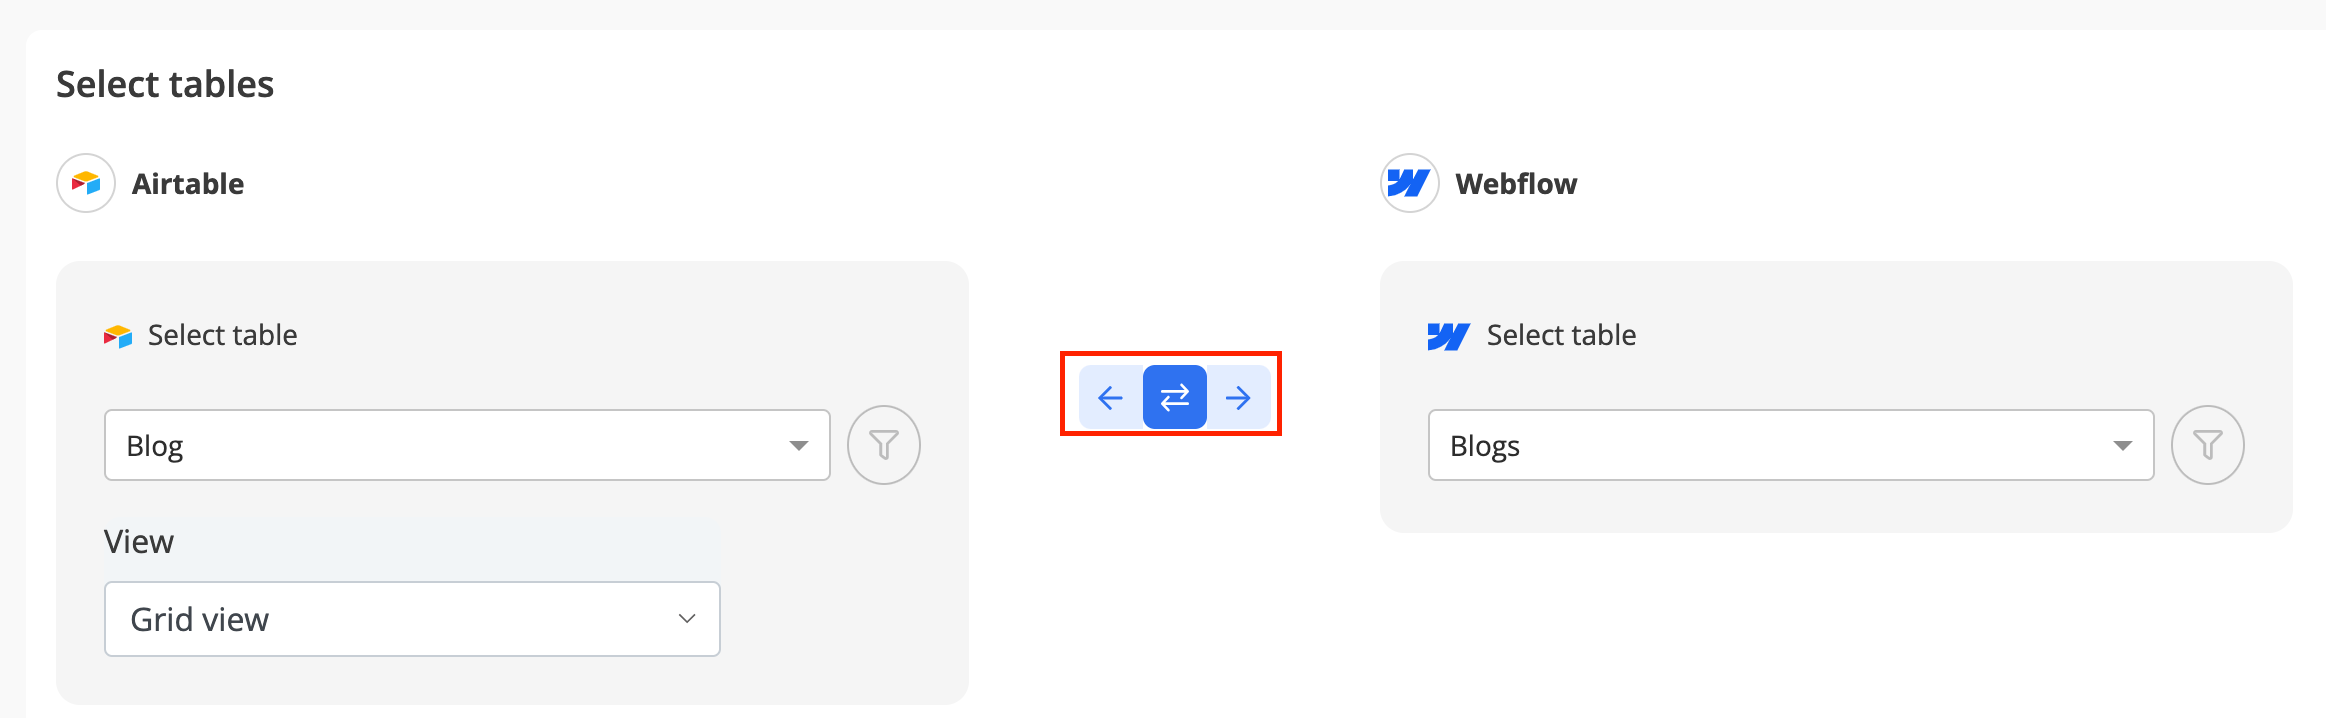
Note: Users can synchronize the data either two-way or one-way. By default, the sync is set to two-way. You can set the sync one way, either left to right or right to left.
- Two-way sync: In this type of sync, the data is synchronized bidirectionally whether you create, update, or delete in the Airtable or Webflow.
- One-way sync: In this type of sync, the data is synchronized only in one direction, right-to-left or left-to-right.
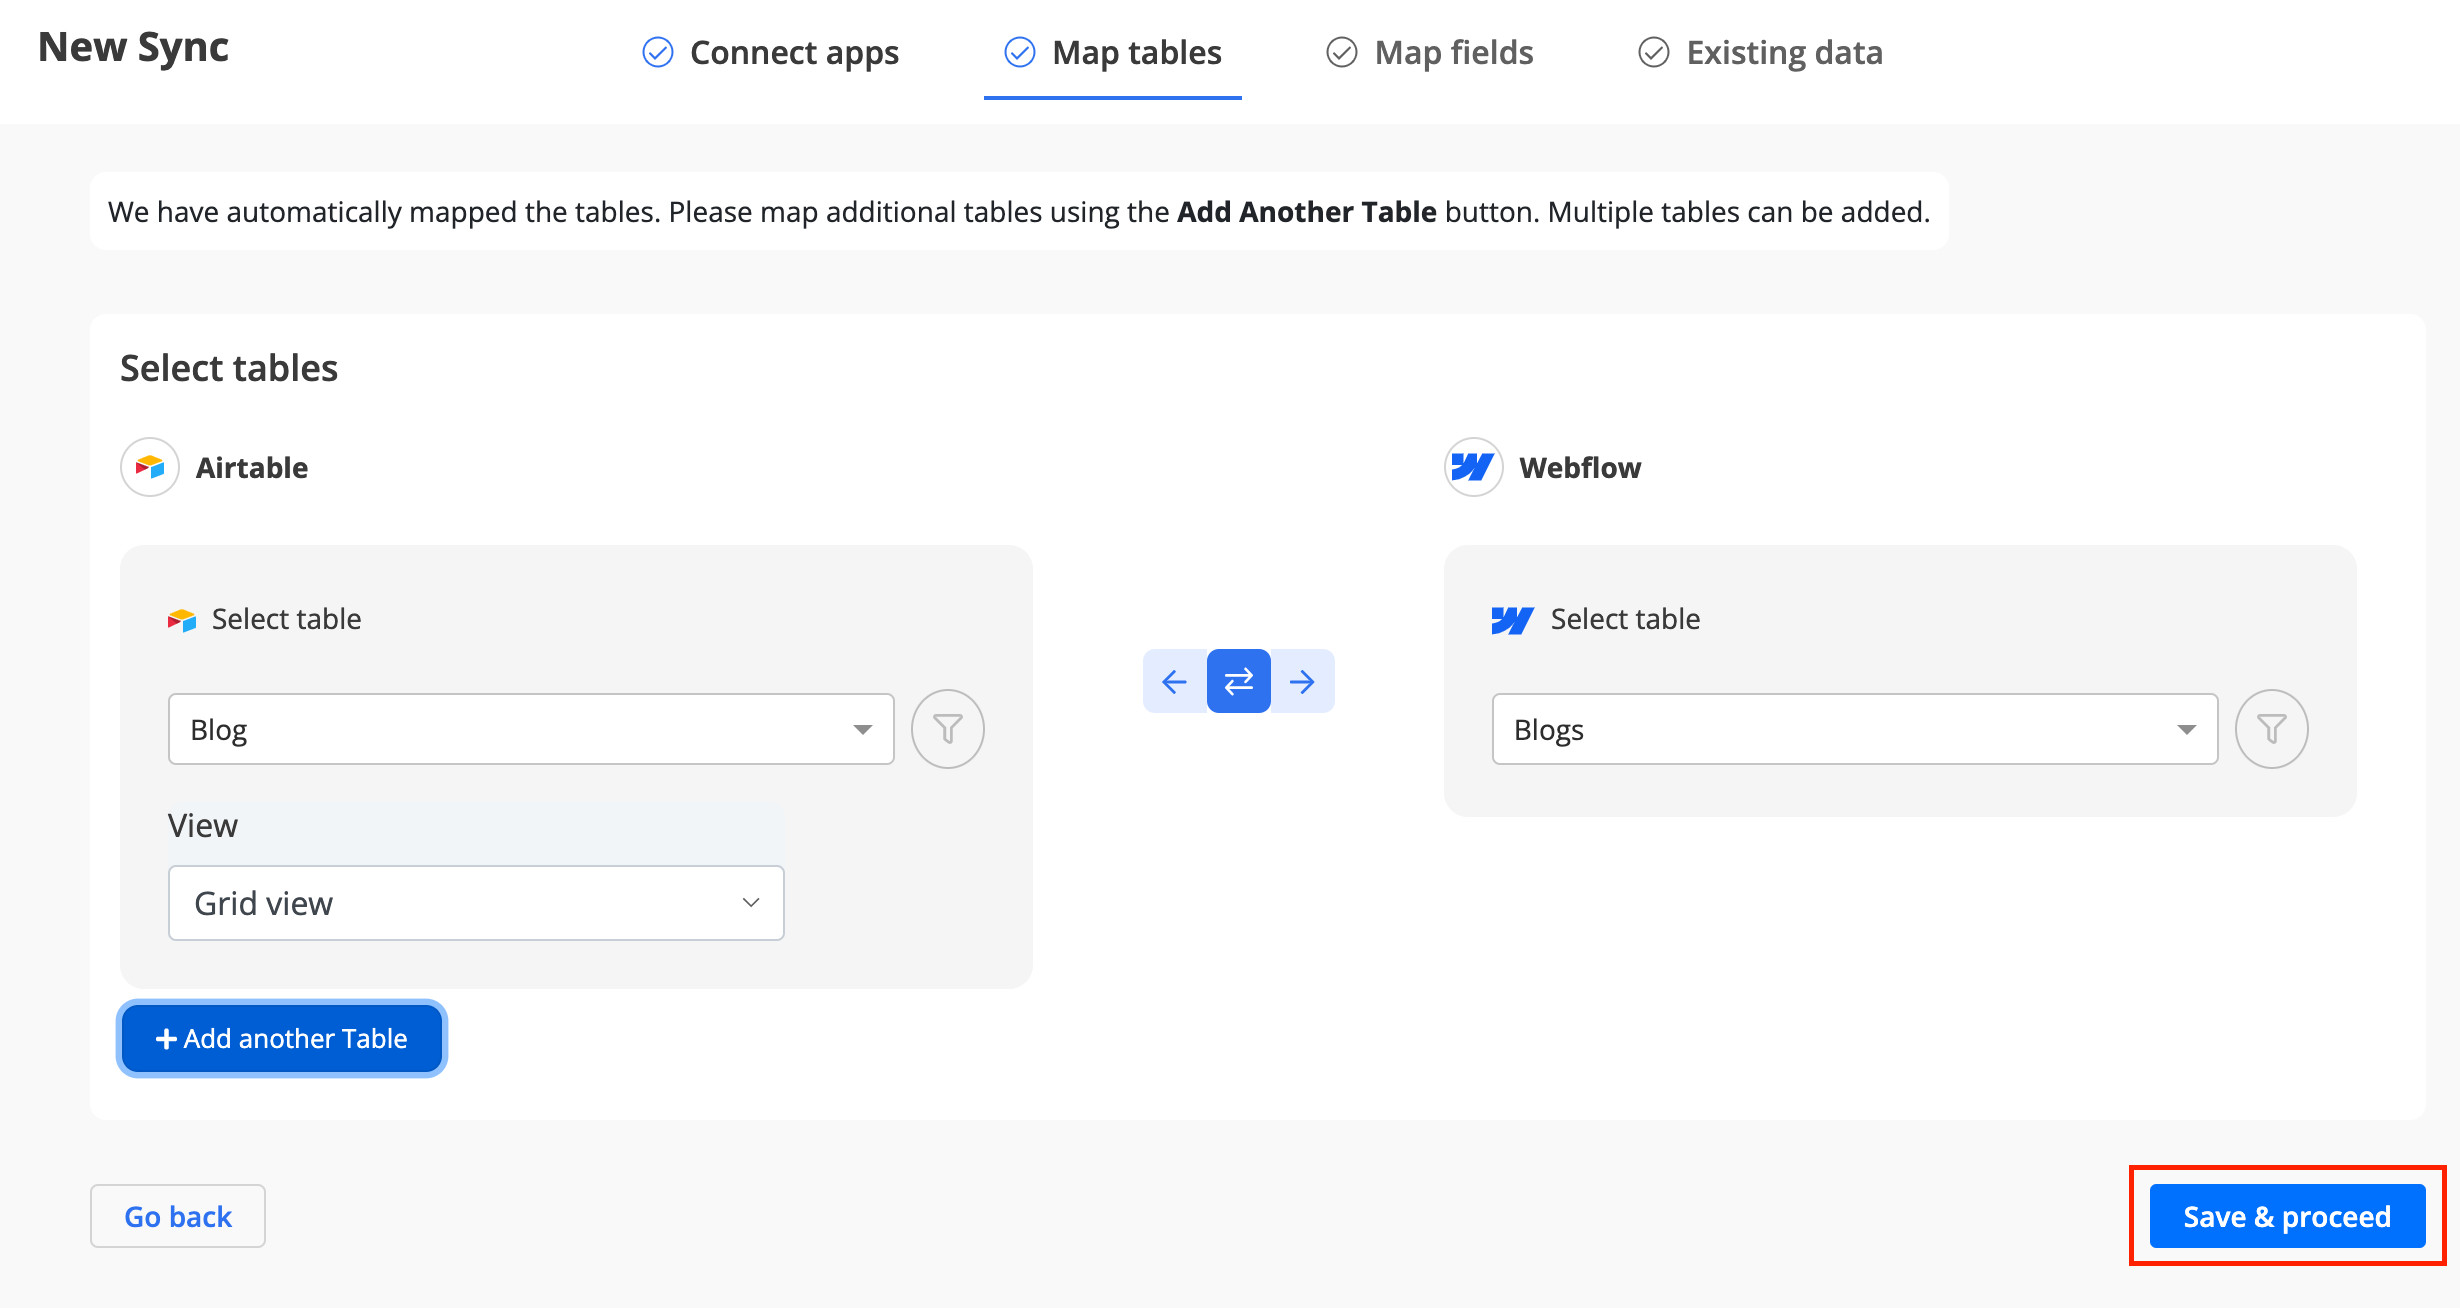
Step 3: Click on the Save & Proceed button.
Filters
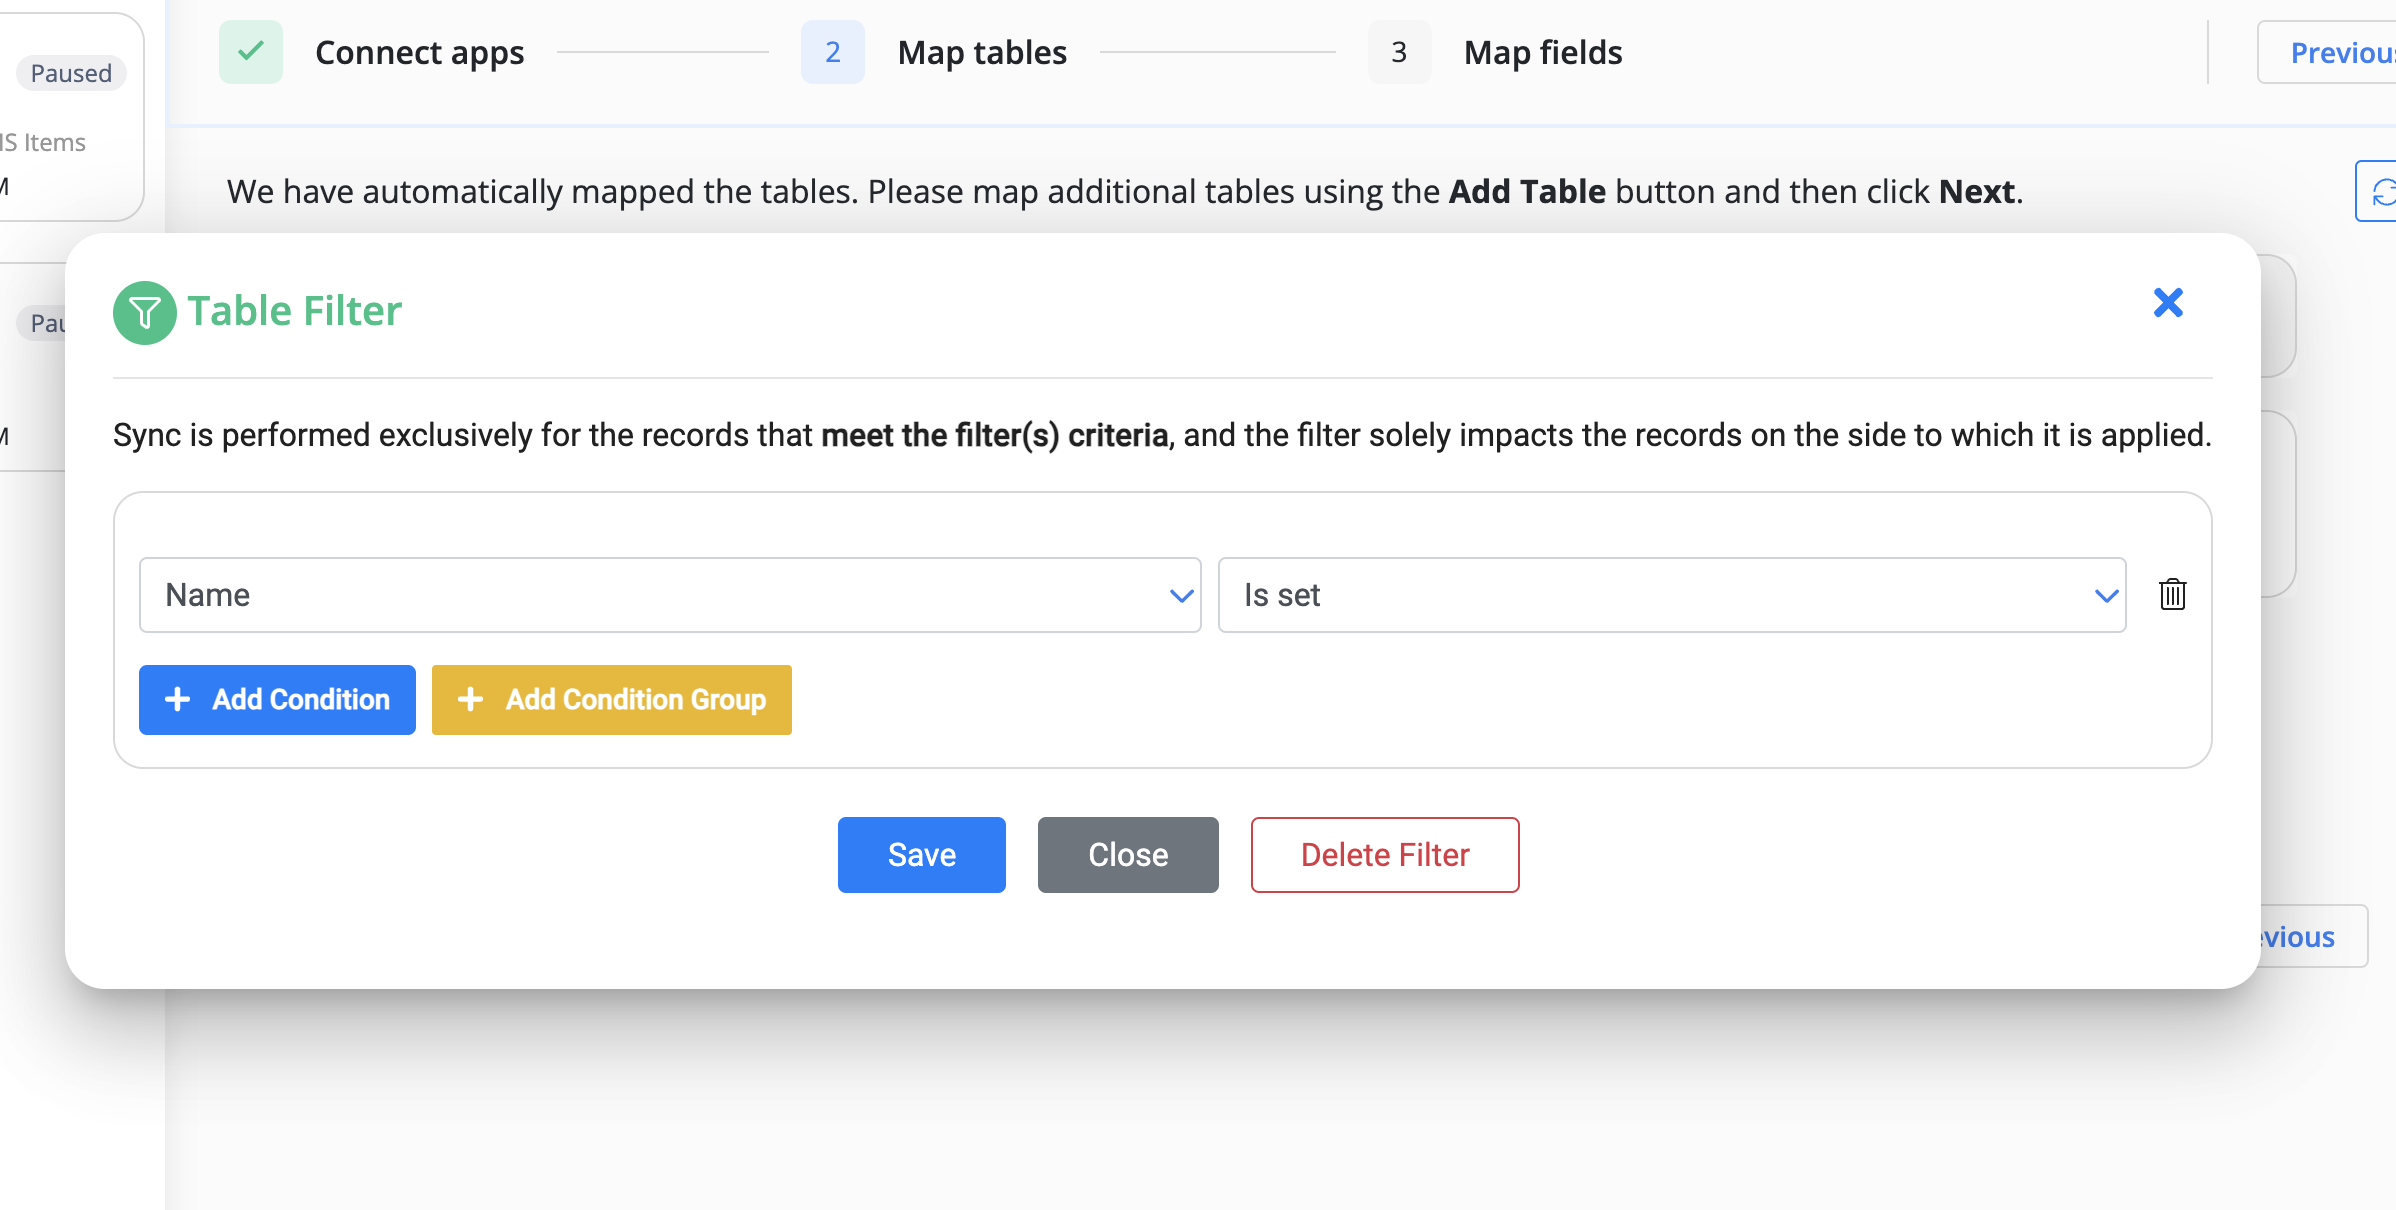
In the table mapping screen, you can configure filter(s) on one or both sides of the sync. The filter only affects the data consumed from the side of the sync where it's configured. For example, if you add a filter on Airtable (above sync) to filter out the records with the empty "Name" field, then it will only sync the Airtable records with some value in the "name" field. It will not have any effect on the records read or created/updated on the Webflow.
Below is a sample filter on the Airtable "Name" field.
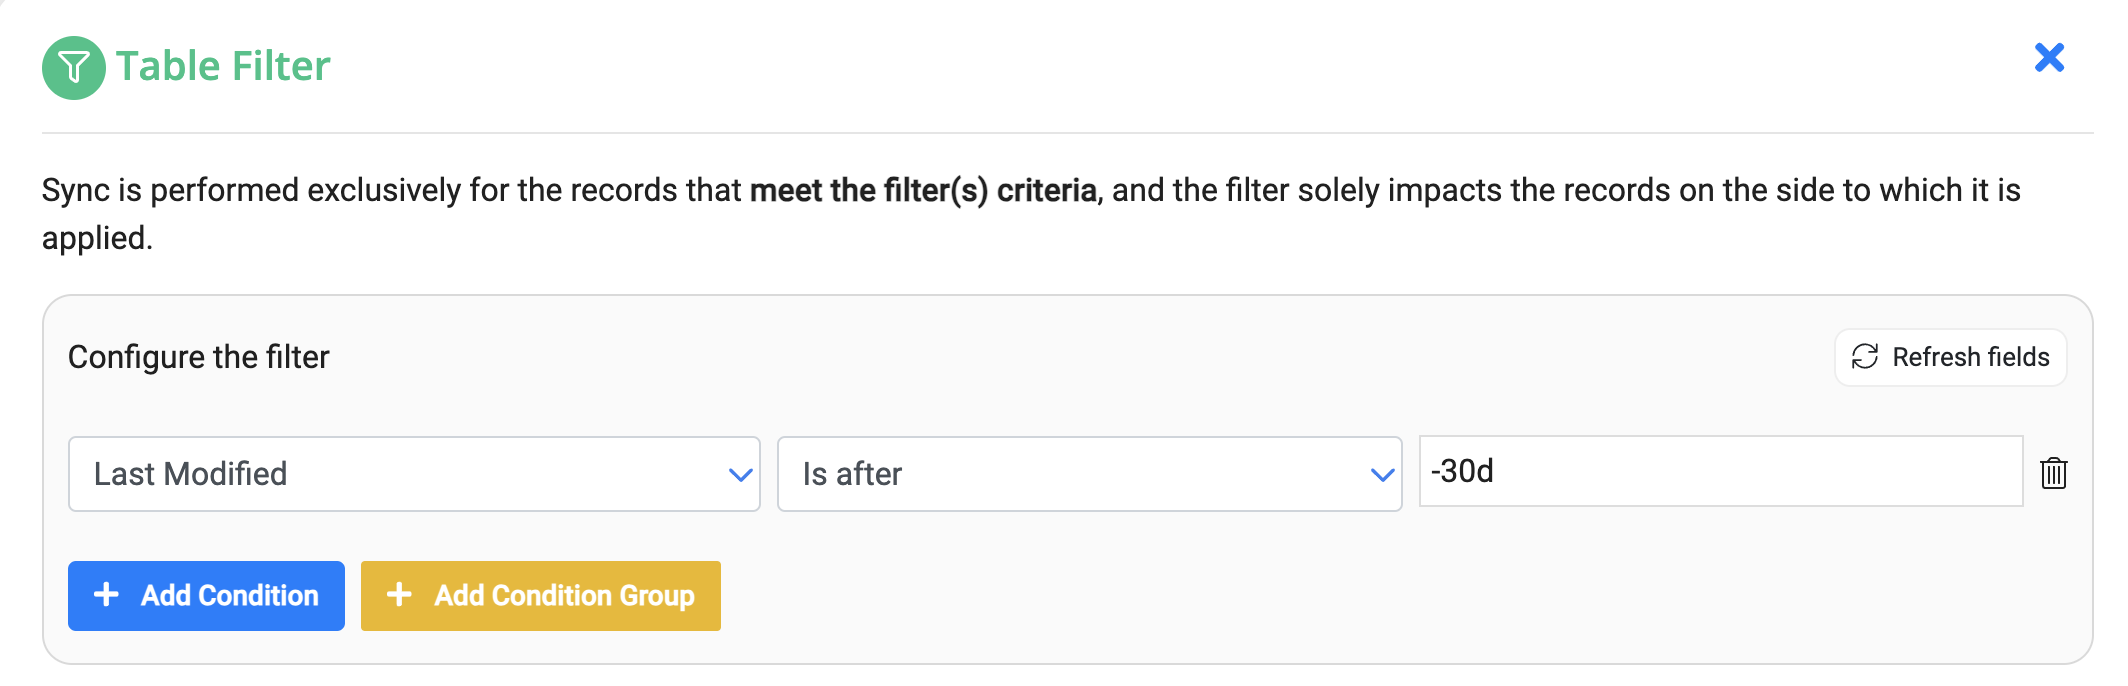
Date & Time Filters
Byteline offers robust filtering options, including support for date and time-based filters. These filters can handle both absolute date-times, such as 2020-10-26T16:56, and relative formats like -30d (for the past 30 days). For a detailed guide on using date and time formats in filters, visit our documentation on writing dates.
Selecting Data To Sync
When setting up your sync, you can choose from three options to determine which data should be synchronized.
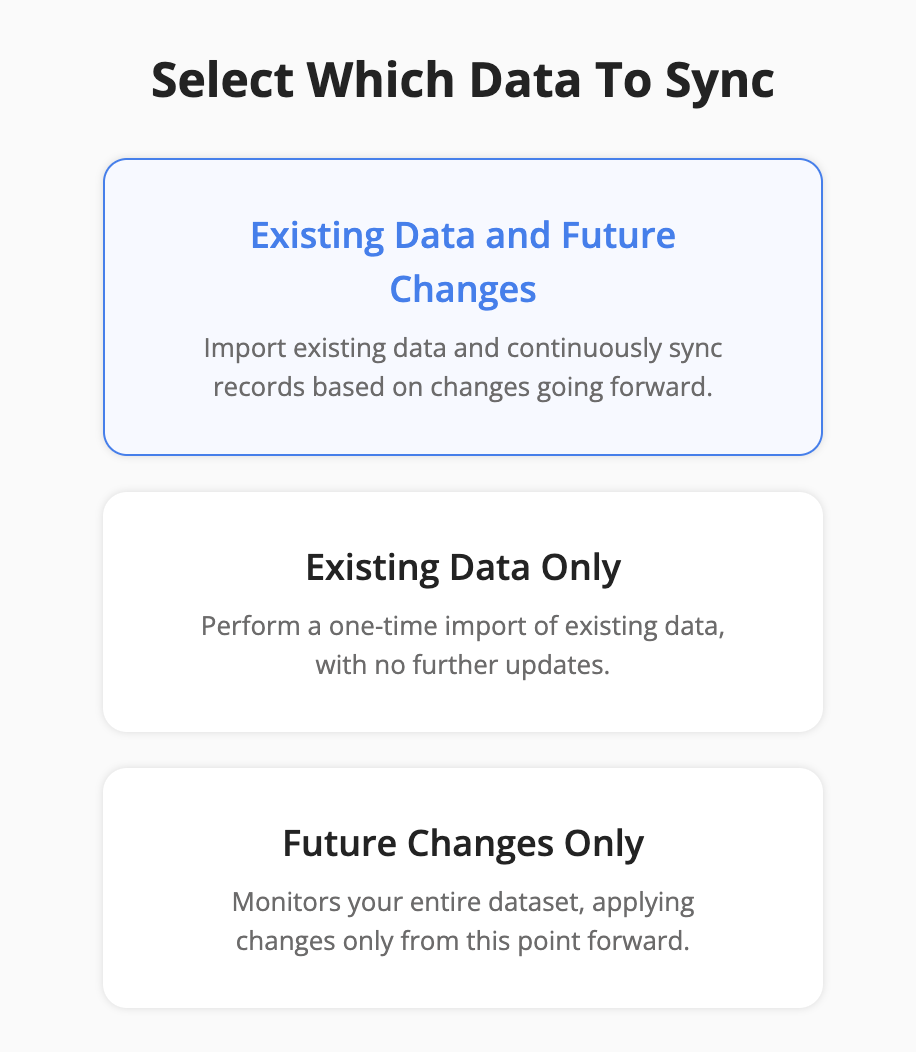
Both Existing and Future Data
This option ensures that all your data—both past and future—remains in sync. It works in two stages:
- Historical Sync: All existing data is synced.
- Ongoing Sync: Once the sync is live, it continuously updates with new changes.
Choose this option if you want a fully synchronized dataset that includes historical data and stays up to date with future changes.
Existing Data Only
This option syncs only the existing data at the time of execution. It does not keep syncing new changes after the initial run.
- Ideal for one-time syncs.
- You can manually rerun the sync whenever needed.
Use this if you only need a snapshot of your current data without keeping the sync always running.
Future Data Only
This option starts syncing only new data changes from the moment the sync goes live. Any existing data before the sync starts is ignored.
Note: Since past data is not synced, only records that change after the sync starts will be in sync. Older records may remain out of sync.
Choose this option if you only need to track new and updated records going forward.
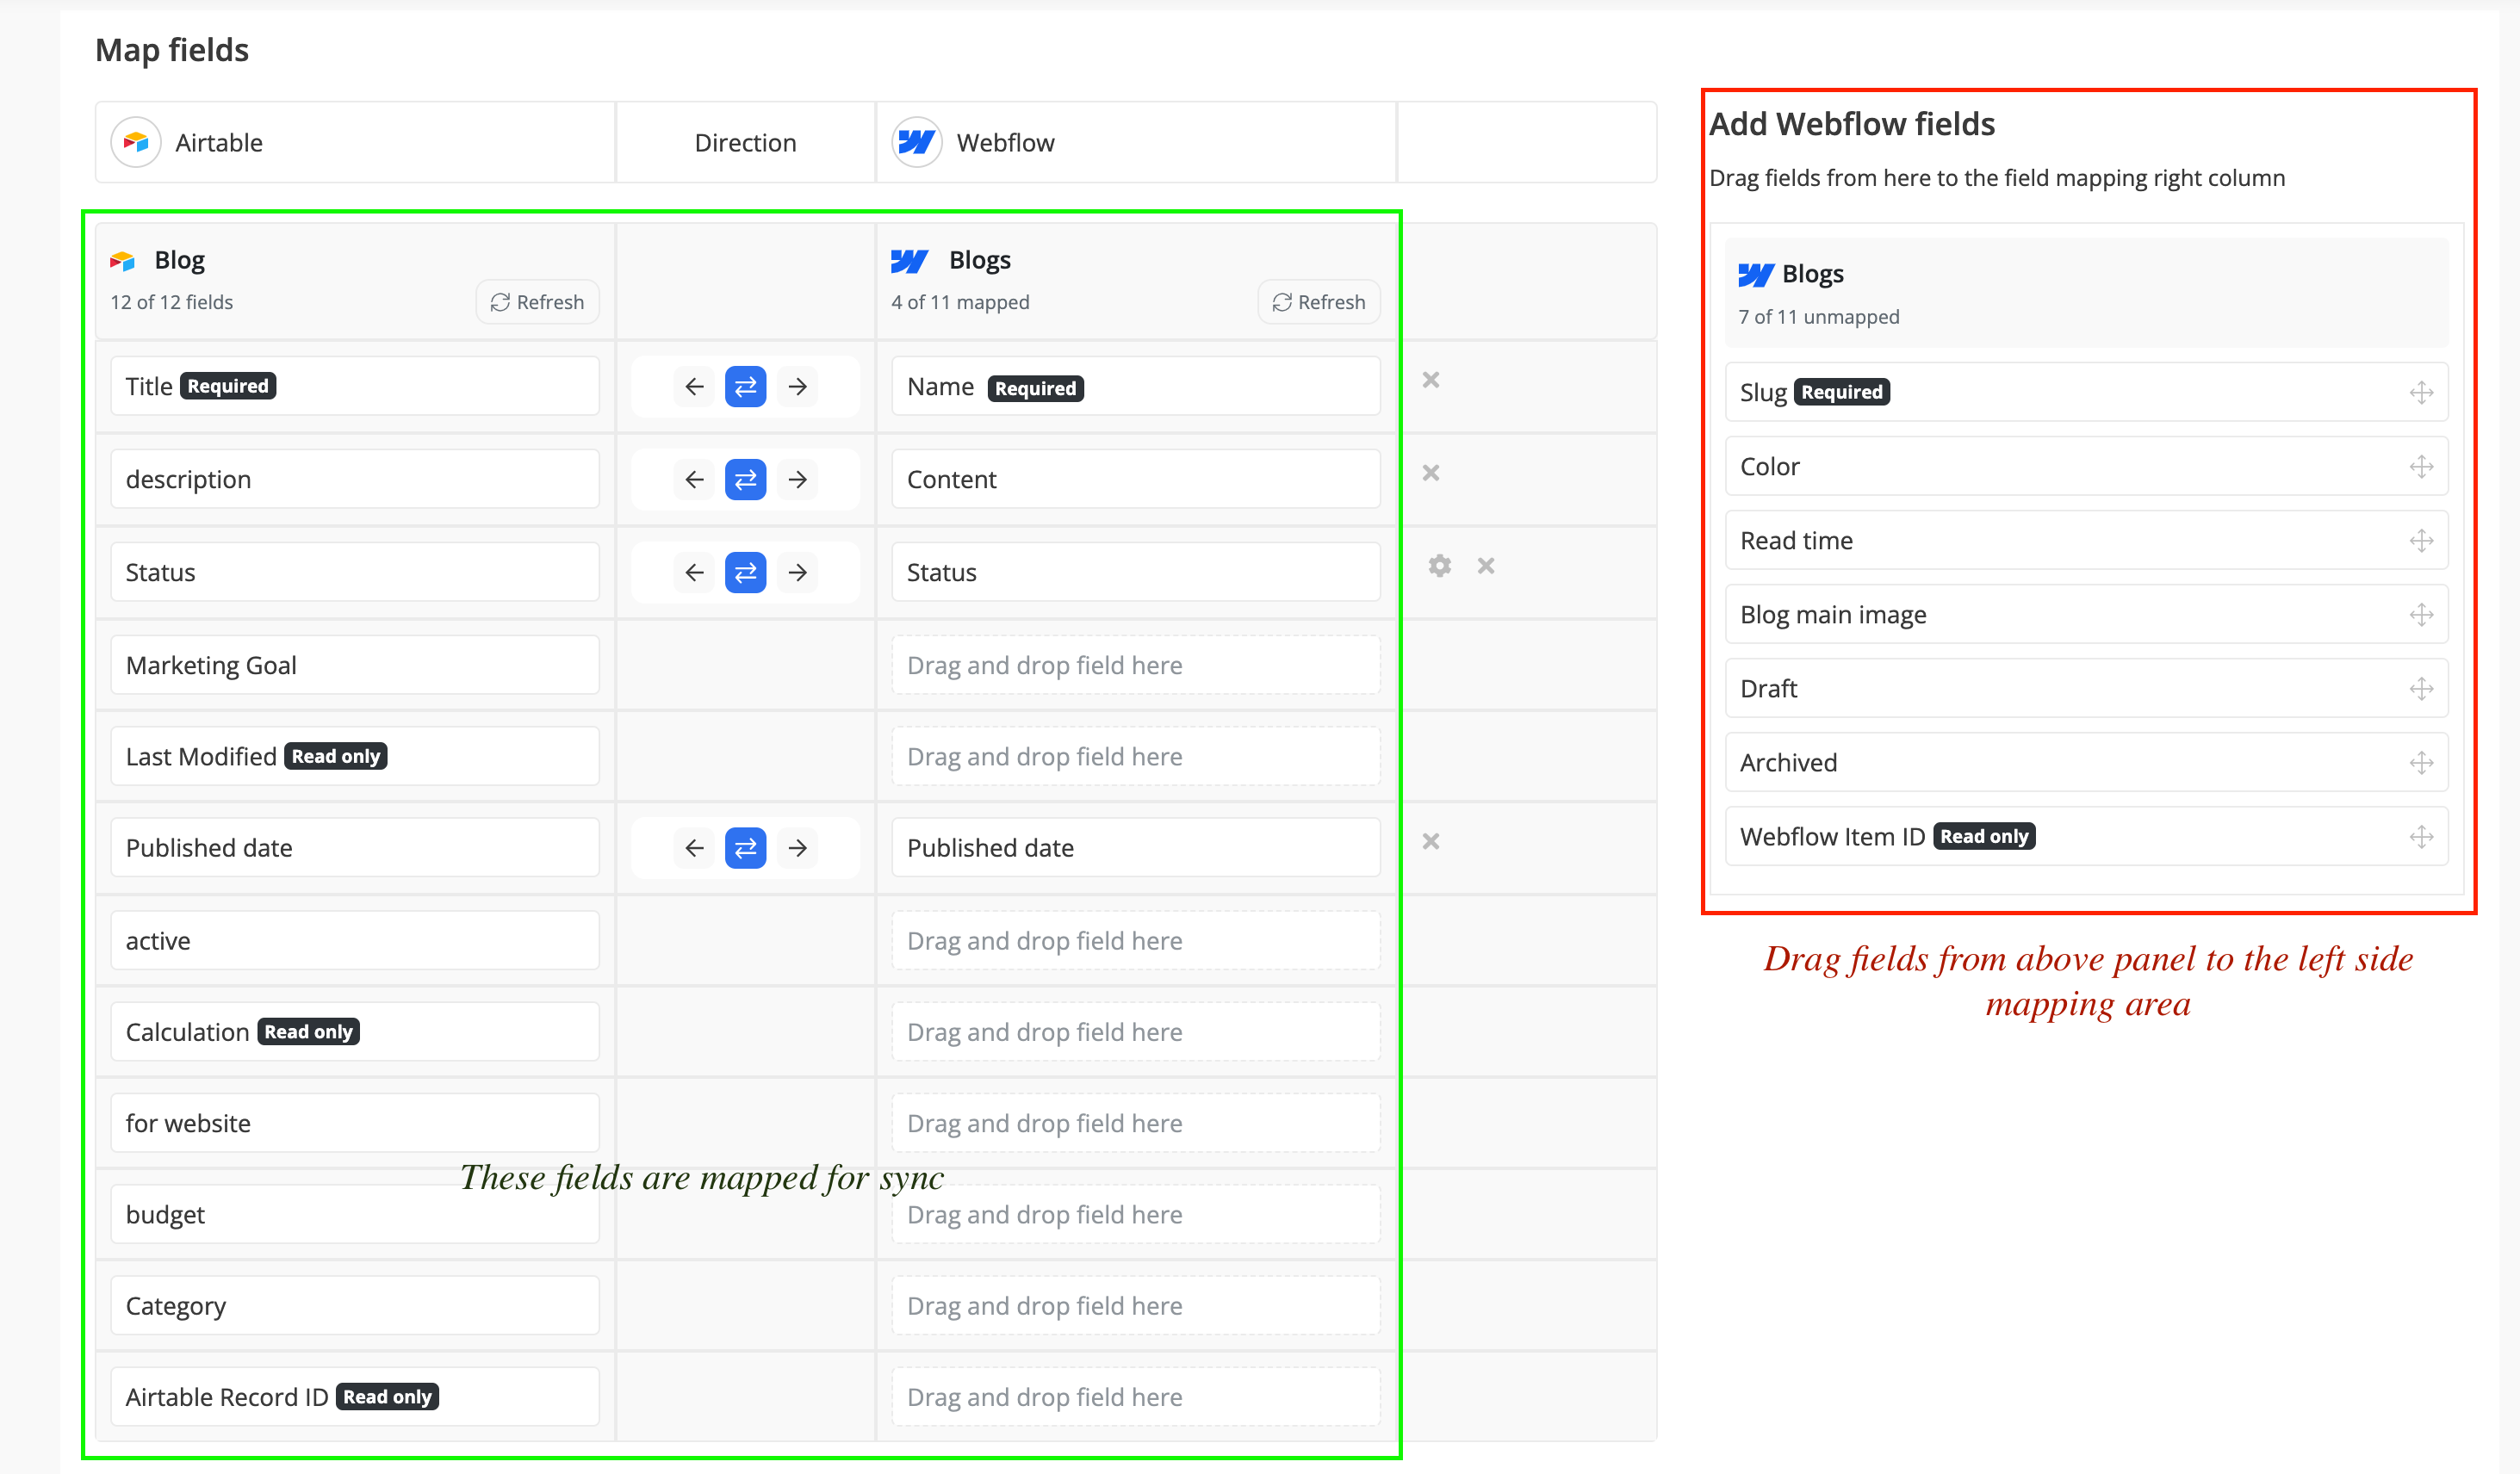
Configure Field Mapping
Once you select the tables, you need to configure the field mapping for both applications in the Byteline console by following the below steps. Byteline performs mapping automatically based on the field names.
Be sure to map all required fields, indicated by the "Required" tag next to each field.
Field-Level Sync Direction
Byteline supports field-level sync direction for ongoing data sync, giving you detailed control over how data moves between systems.
With the blue direction buttons, you can easily set different sync directions for individual fields, ensuring data flows exactly where it’s needed. This feature helps you customize and optimize your sync process for greater flexibility and accuracy.
Generated or Read-only Fields
Every cloud app has read-only fields that can't be changed but can be read; these include record IDs, formulas, etc. These fields can only be the source of the sync. In other words, you can't update the value of a read-only field by taking value from the other app.
When you select a read-only field for the mapping and then select the mapped field from the other app, the icon in the center will change to indicate a one-way sync with the source being the chosen read-only field.
Below is an example of the "ID" field from Notion mapped to a "Notion ID" field in Airtable. When a new record is created in Notion (left), its ID will be sent to Airtable's "Notion ID" field. But if you manually change the "Notion ID" in Airtable, the change will not be synced.

Syncing Multilingual Content?
If your source app stores content in separate language fields (for example: Title_EN, Title_FR, Title_DE), you can map each field normally during sync.
See Multilingual Content Support for full details.
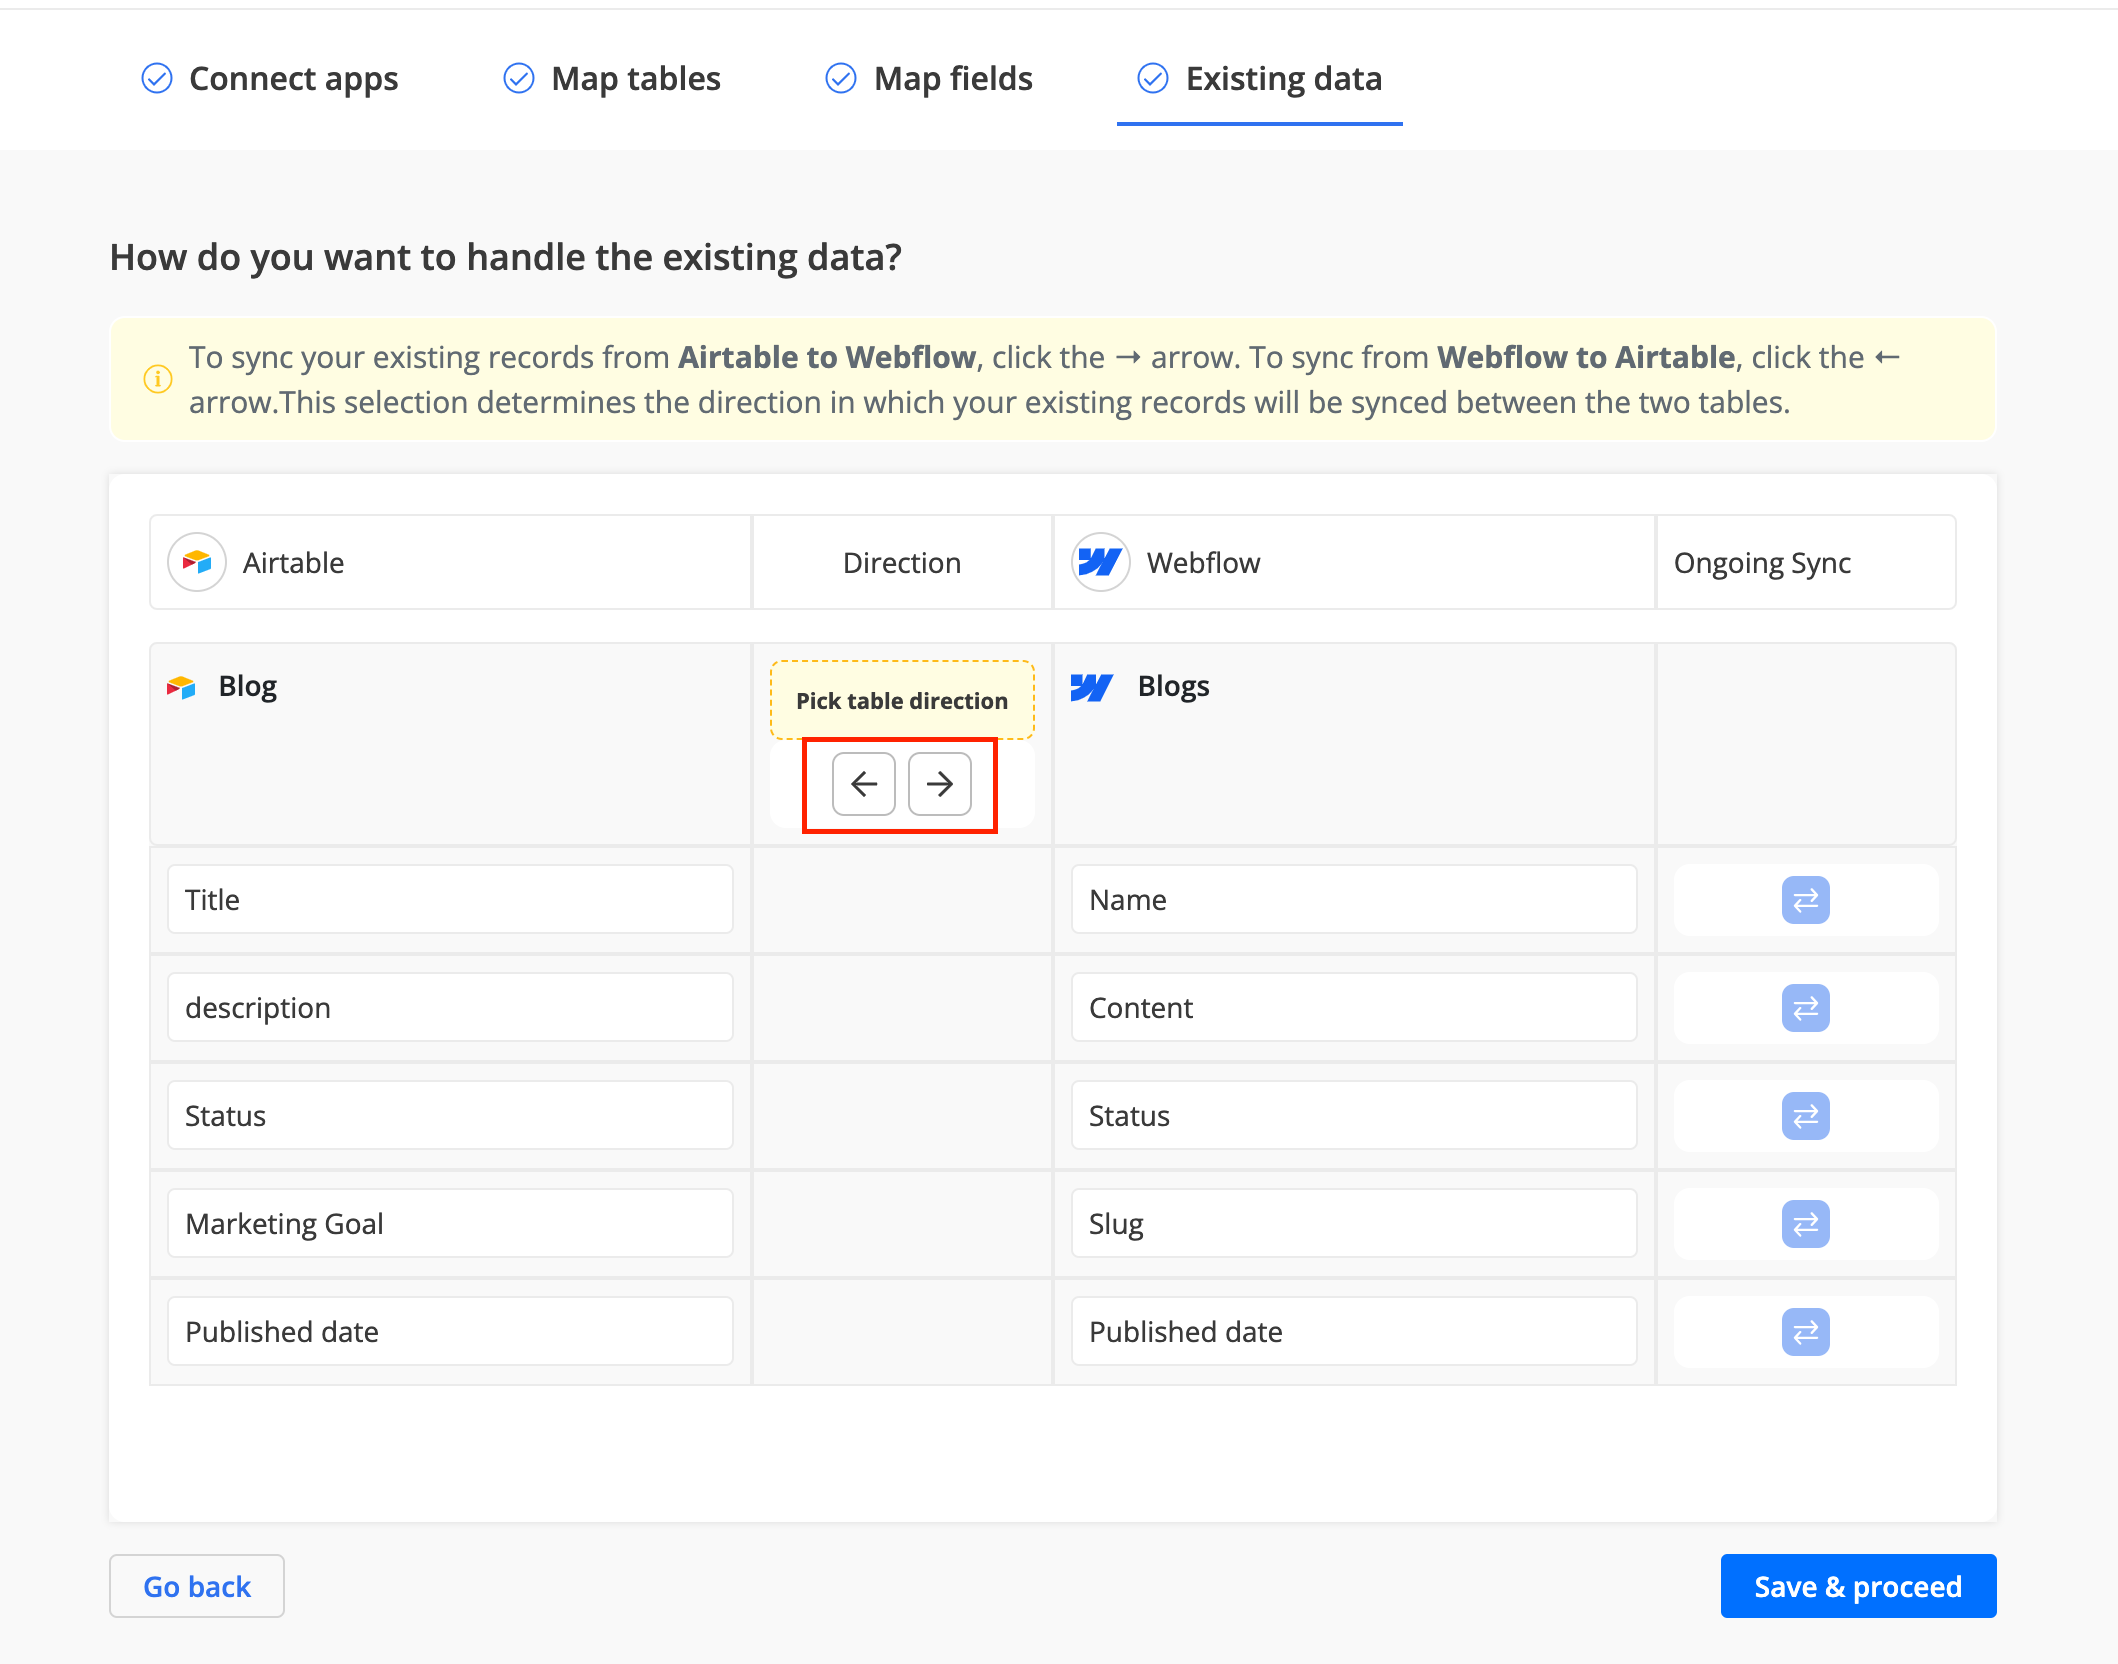
Existing Data
Byteline allows you to sync your existing data for the tables configured for the sync. Simply choose the direction in which the data should be synced by selecting one of the arrow buttons on the screen below.
Once the direction is selected, click the "Save & Proceed" button to continue.
For details on the syncing existing data, check out our Historical Sync documentation.
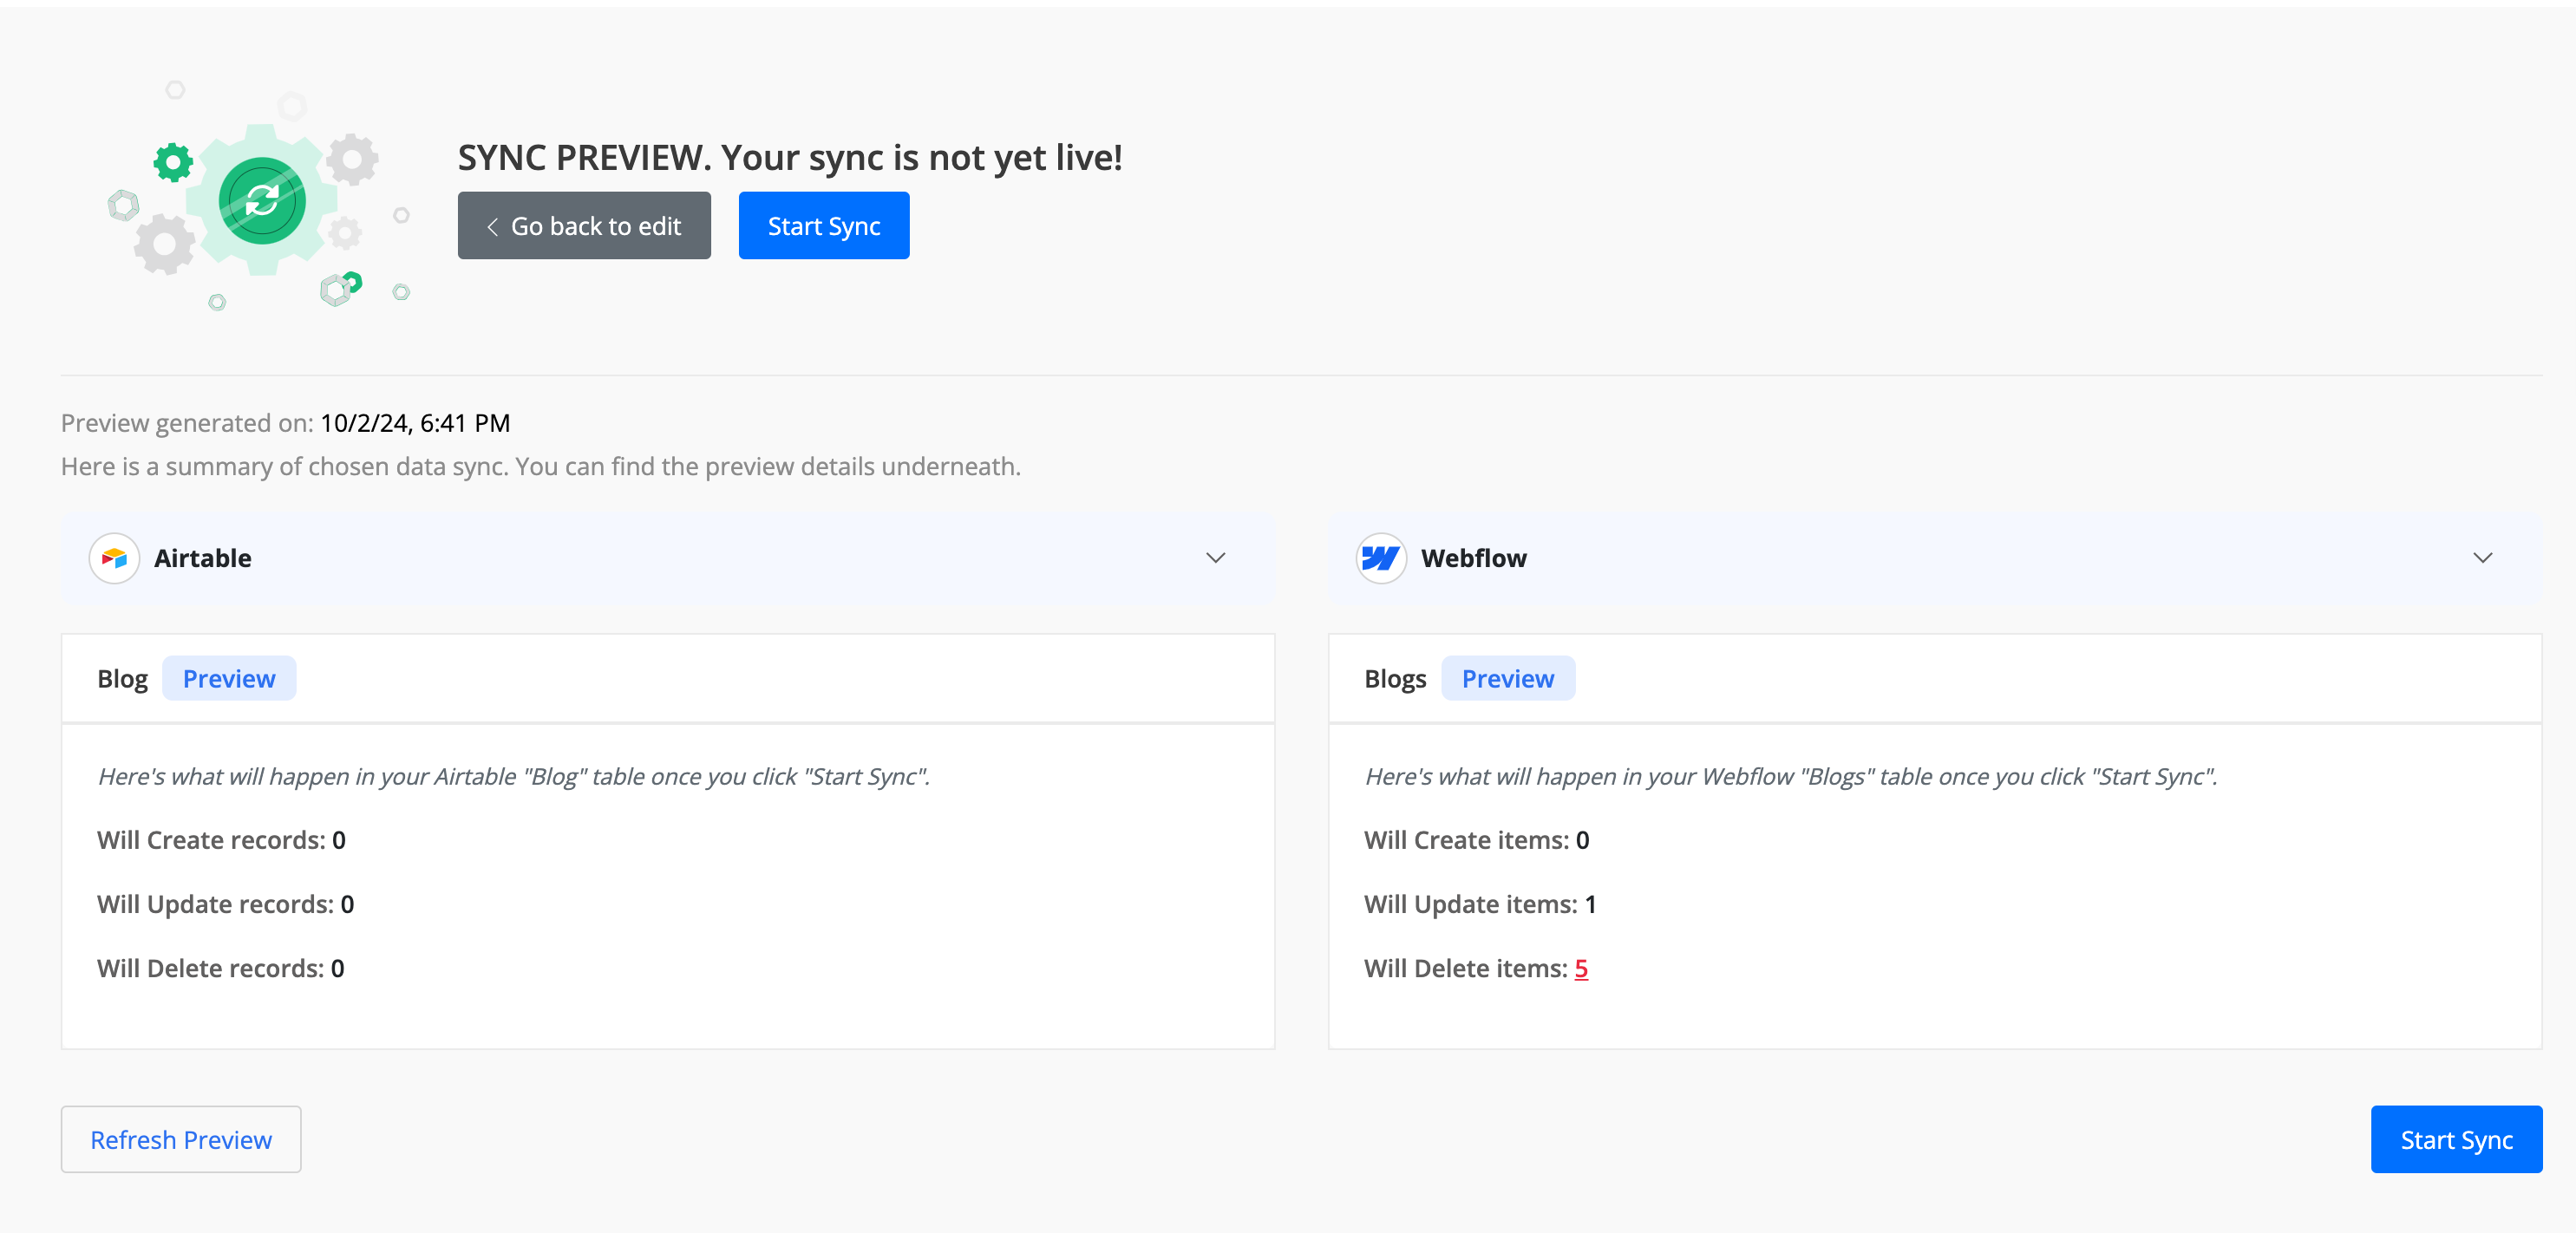
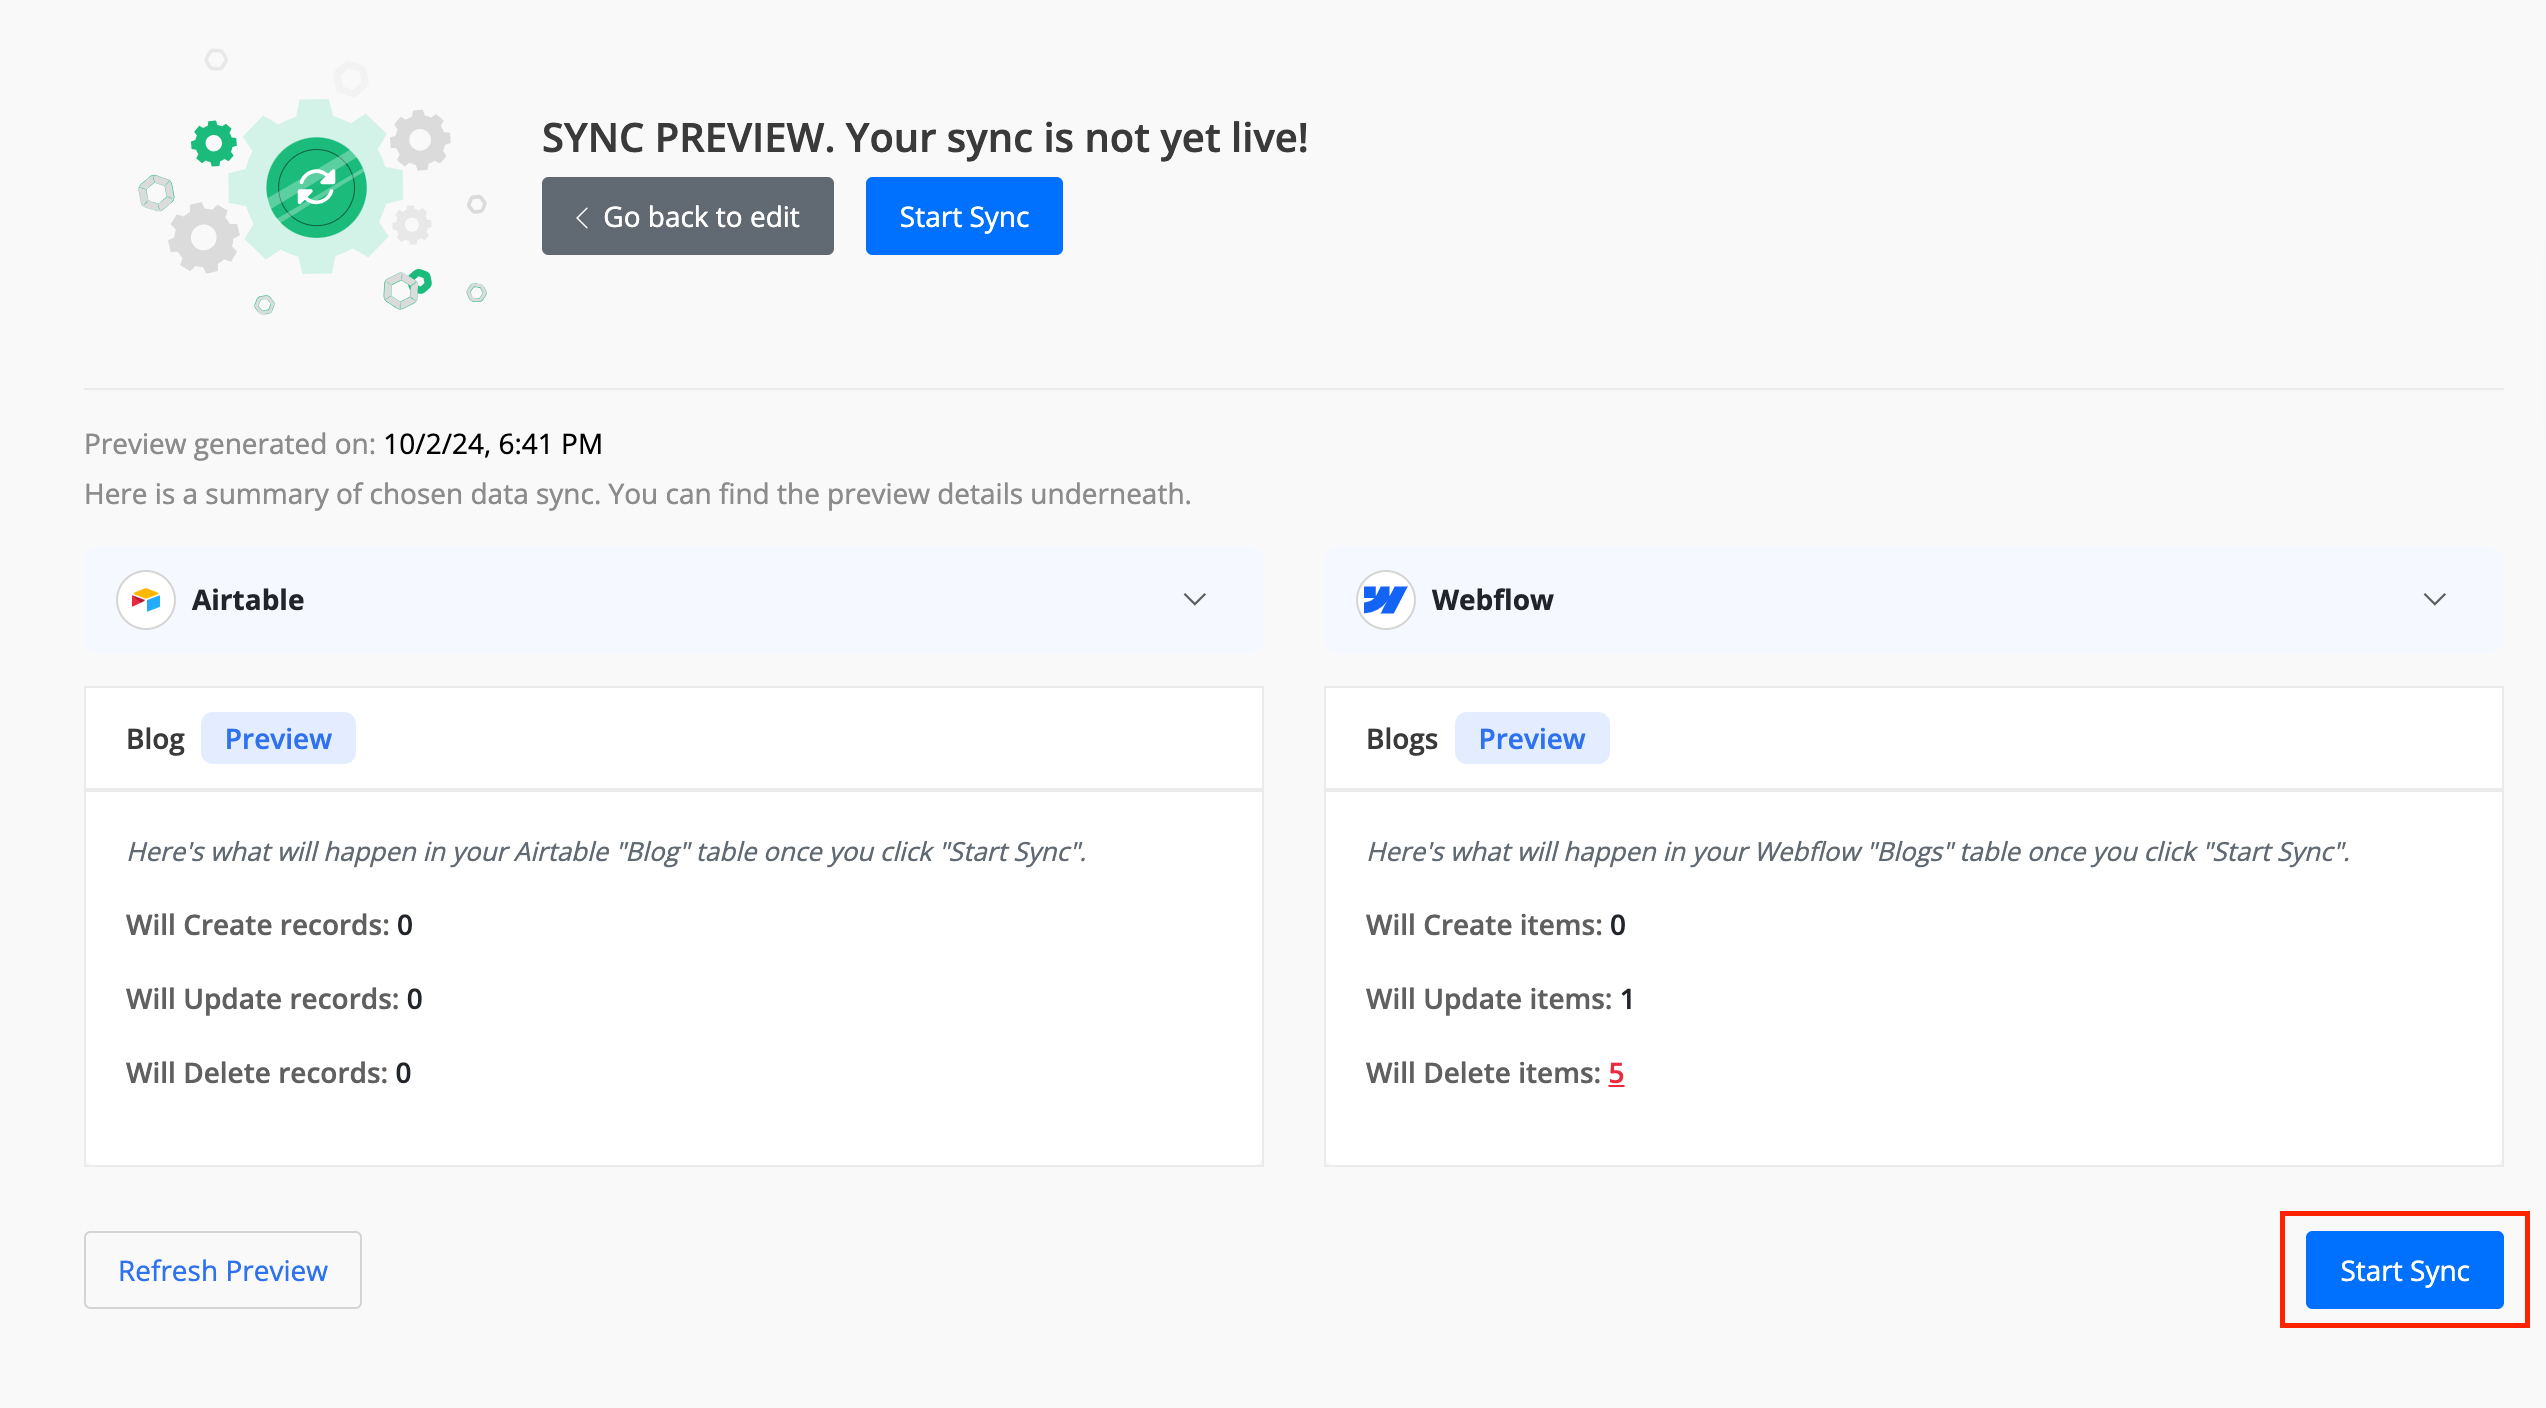
Preview (for existing data)
On the next screen, you'll see a preview with a summary of the records that will be impacted for each table. This includes the number of records that will be created, updated, and deleted for the selected CMS systems.
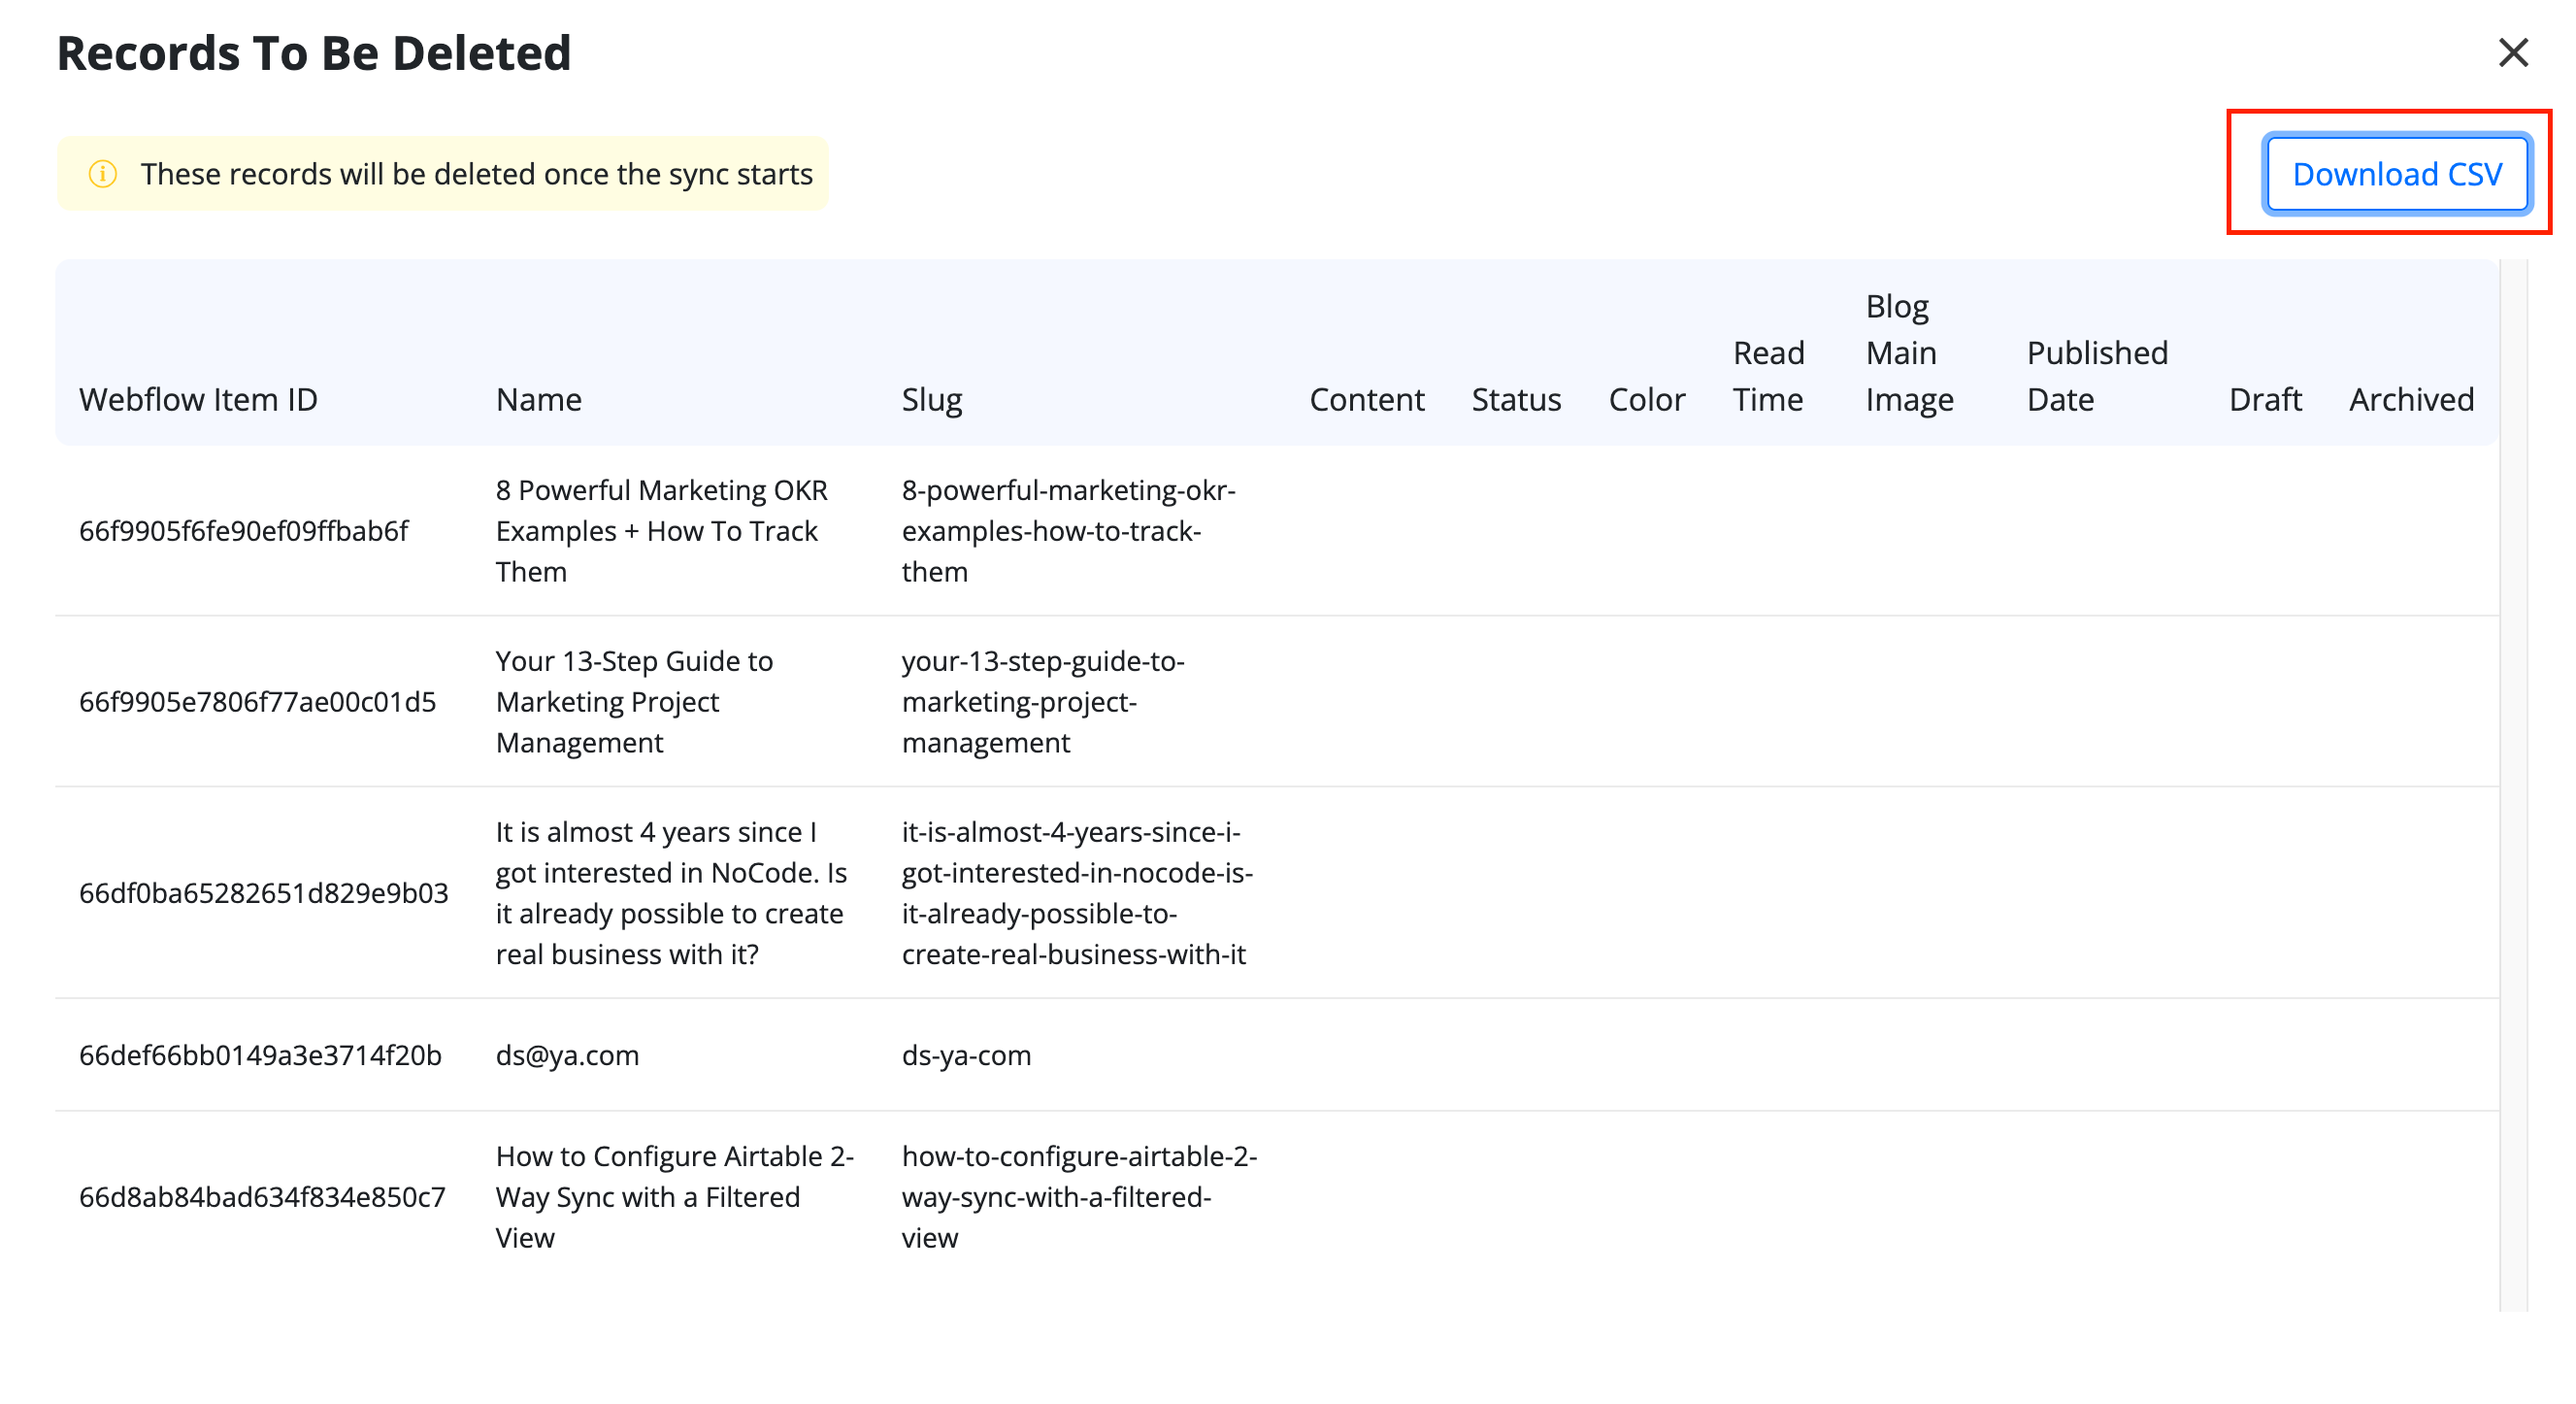
Records to be deleted
When syncing existing data, some records may be marked for deletion. Byteline gives you the ability to review these records in advance, providing peace of mind by ensuring that only expected records are deleted.
To view the details of these records, click the red-underlined link for each "Will delete items" value. This will open a pop-up displaying the records to be deleted in a table format.
You can also export these records as a CSV file for backup purposes.
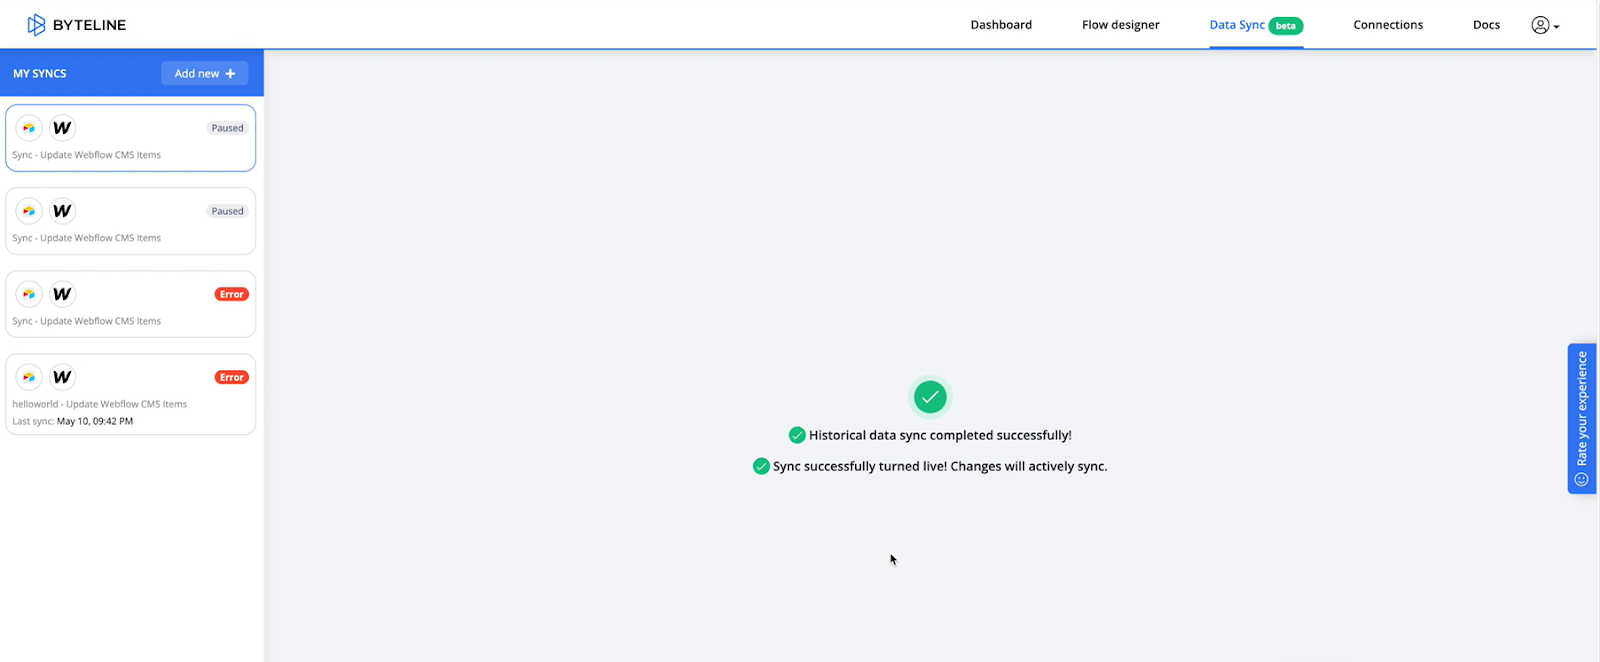
Start Sync
After you're satisfied with the Preview results, click on the Start Sync button.
Once the synchronization is complete, a message will appear on the screen saying, Historical data sync completed successfully! and Sync successfully turned live! Changes will actively sync. After a few seconds, you will be automatically redirected to the Change History page.
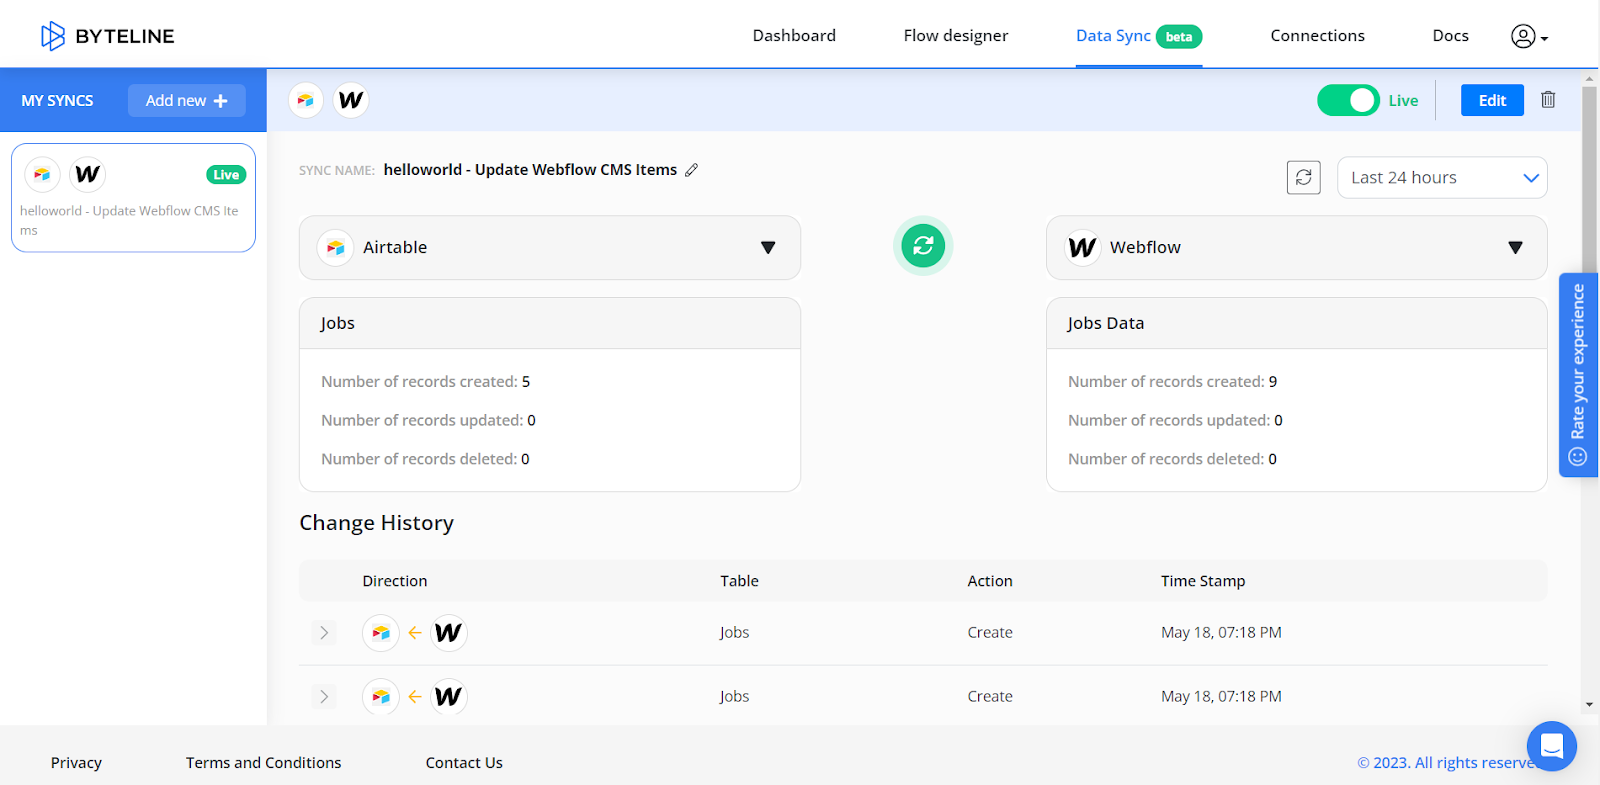
View Records Sync History
Byteline allows the users to view the record-level history of all the data synchronization made between CMS systems with ease.
On the Change History page, you can view the history of any of the changes made in both Airtable or Webflow. For example, if you make any change in one of the CMS systems, it will be automatically reflected on the other system that you have connected for data synchronization.
In this case, whether you make any changes in Airtable or Webflow, it automatically changes in the other one. You do not need to make changes in both tables manually.
Field Mapping Rules
Handling multiple values mapped to a single field
If a source field (such as phone numbers or emails) contains multiple values, and you map it to a single-value field on the destination, Byteline will sync only one value.
– When the source has a “primary” value (e.g., primary phone), the primary is used.
– If no primary is defined, the first value in the list is used.
This ensures predictable results for your syncs.
How empty field values are handled
Byteline handles empty field values differently when creating a new record versus updating an existing record.
When Byteline creates a new record in the destination app, empty source fields are skipped by default. This means Byteline does not send empty values just to clear or overwrite fields in the destination app.
This helps protect default values, required setup, or app-specific behavior in the destination app.
For example, if a source record has a name but its description is empty, Byteline will create the destination record with the name and leave the description field untouched.
Source record:
Name: Blue Shirt
Description: empty

Destination record created:
Name: Blue Shirt
Description: left unchanged or handled by the destination app
After a record has already been created or matched, mapped fields stay in sync. If a user later clears a mapped field in the source app, Byteline will also clear the corresponding field in the destination app.
For example:
Before update:
Source Description: Lightweight cotton shirt
Destination Description: Lightweight cotton shirt

User clears Description in the source app.

After sync:
Source Description: empty
Destination Description: empty
This behavior keeps synced records accurate while avoiding unwanted overwrites during record creation.
Important: Byteline only clears a destination field when the source field is clearly emptied. If a field is missing from an app response, unavailable, or not included in the sync, Byteline does not treat that as a cleared value.