Campaign Monitor Data Sync

This comprehensive document will walk you through the step-by-step configuration process for Campaign Monitor data sync and address its specific use cases.
Supported Objects
Byteline supports syncing the following data objects from QuickBooks:
- Subscribers
Standard Data Sync functionality
Please refer to Data Sync - Getting Started for the standard data sync functionality. The getting started document covers the usage of data sync features valid for all integrations.
Configuring Campaign Monitor Data Sync
Step 1: Start the Sync Setup
- Log in to your Byteline account and navigate to the My Syncs page.
- Click on the "Create Sync" button to begin the configuration.
Step 2: Select Campaign Monitor as Your First App
- Choose Campaign Monitor as the first app to sync.
Alternatively, you can select another app first and then pick Campaign Monitor as the second app. - Click on the "Sign In" button under Campaign Monitor to connect it to Byteline.
- Now select the Subscriber for the data type to sync.
- Select the client for which the data needs to be synced.
Step 3: Connect the Second App
- Select the second app for syncing and log in to authorize the connection.
- Once connected, click "Continue" to move to the table mapping screen.
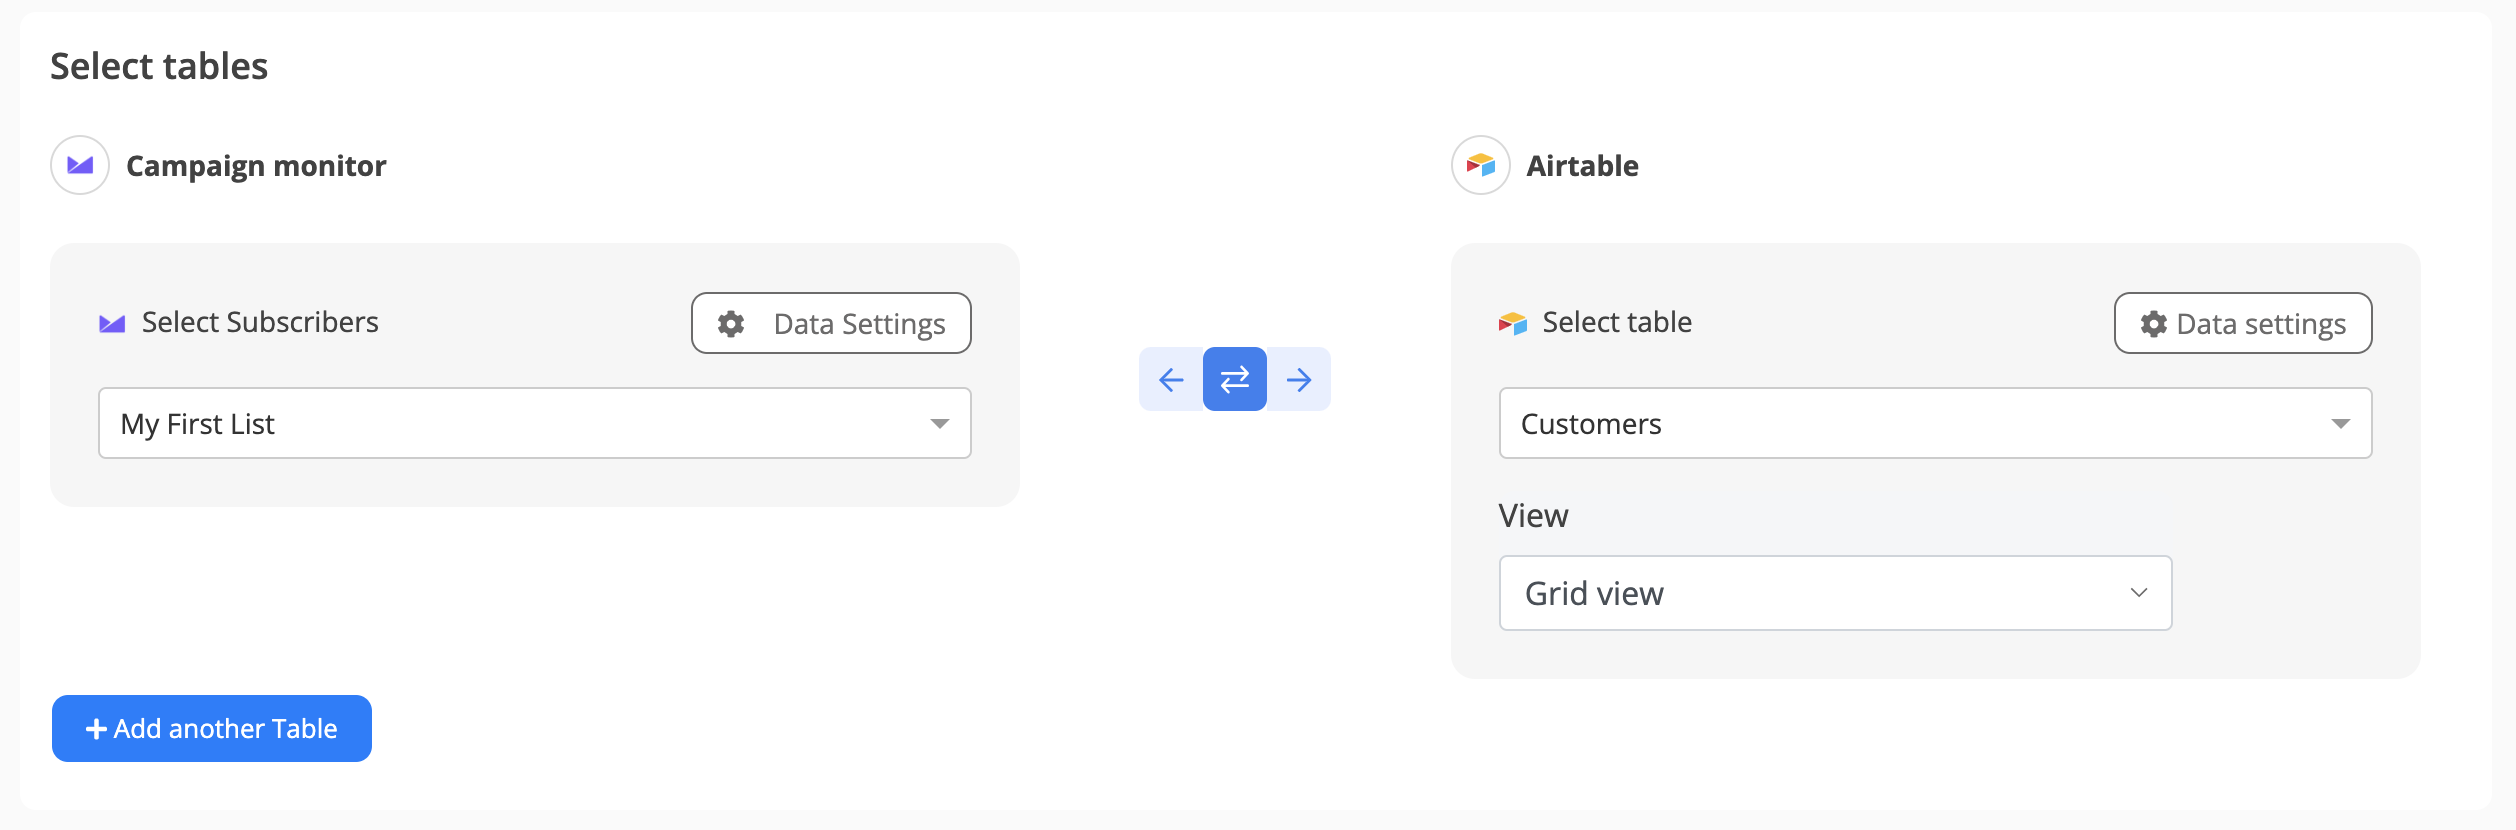
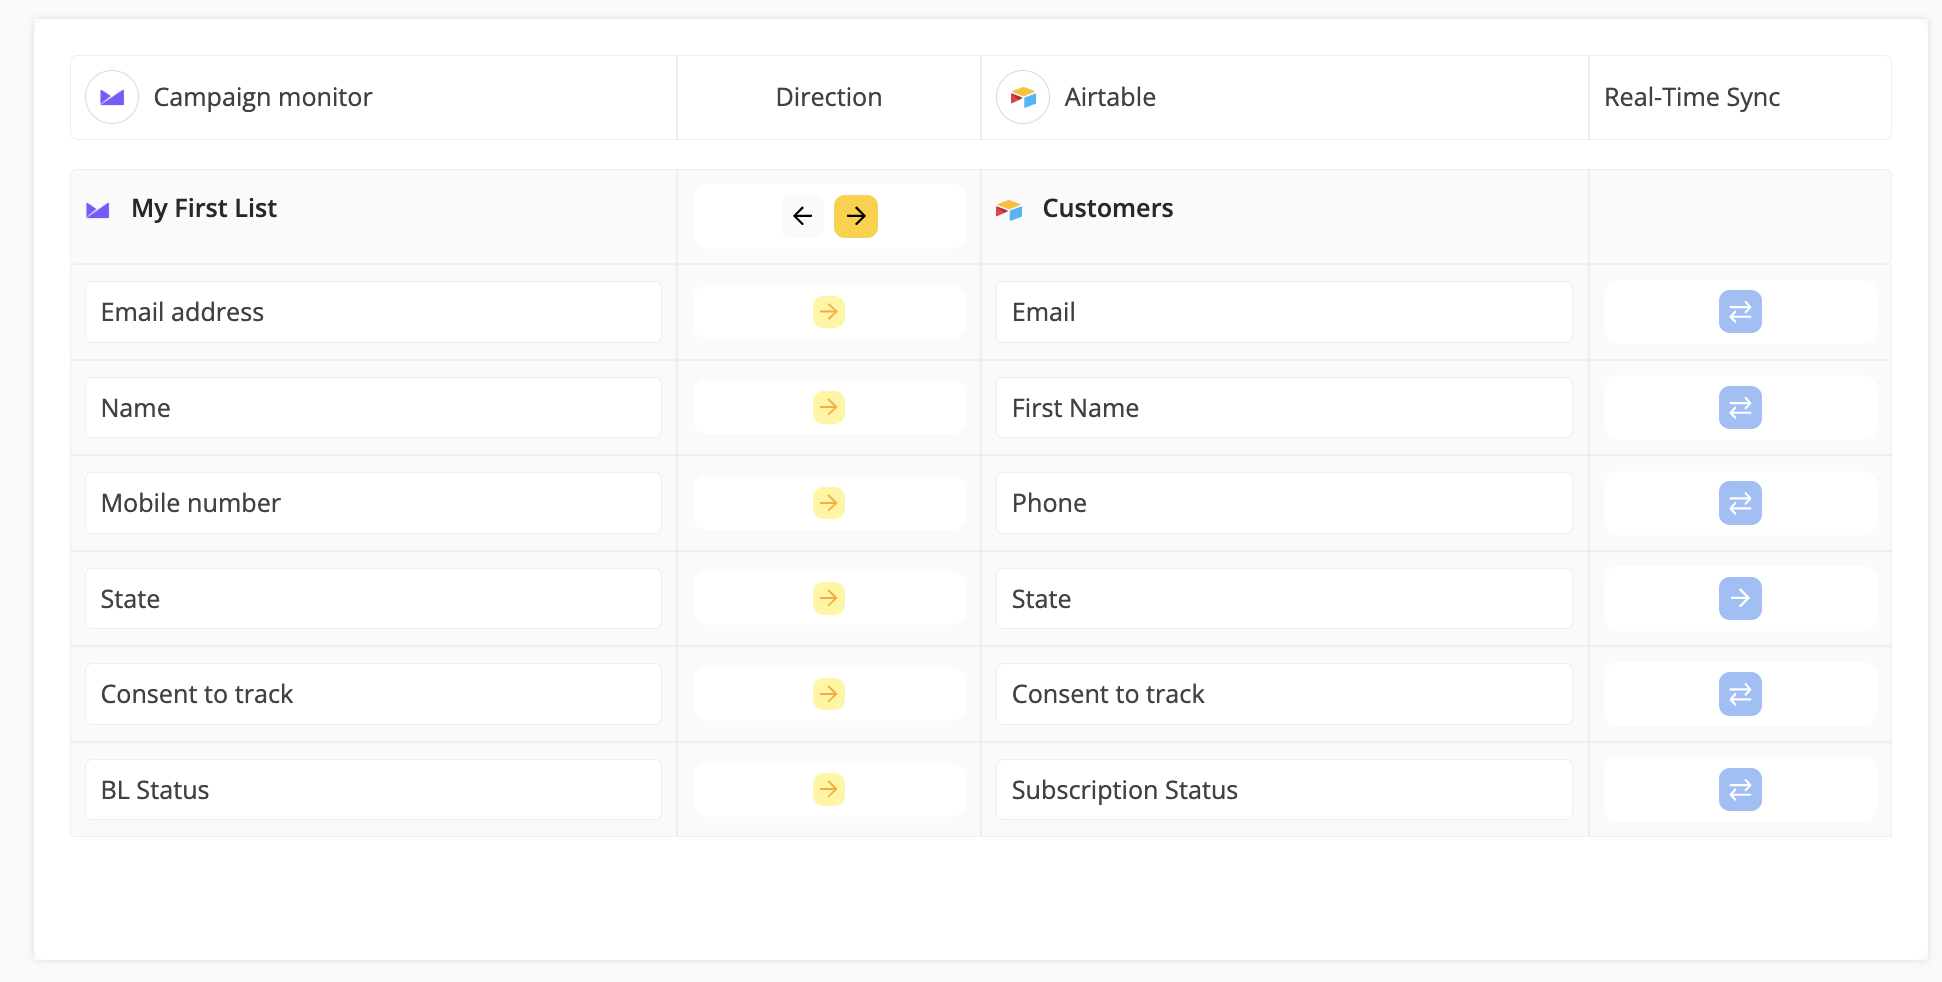
Step 4: Map Tables Between Campaign Monitor and the Other App
- Select the tables you want to sync between the two apps.
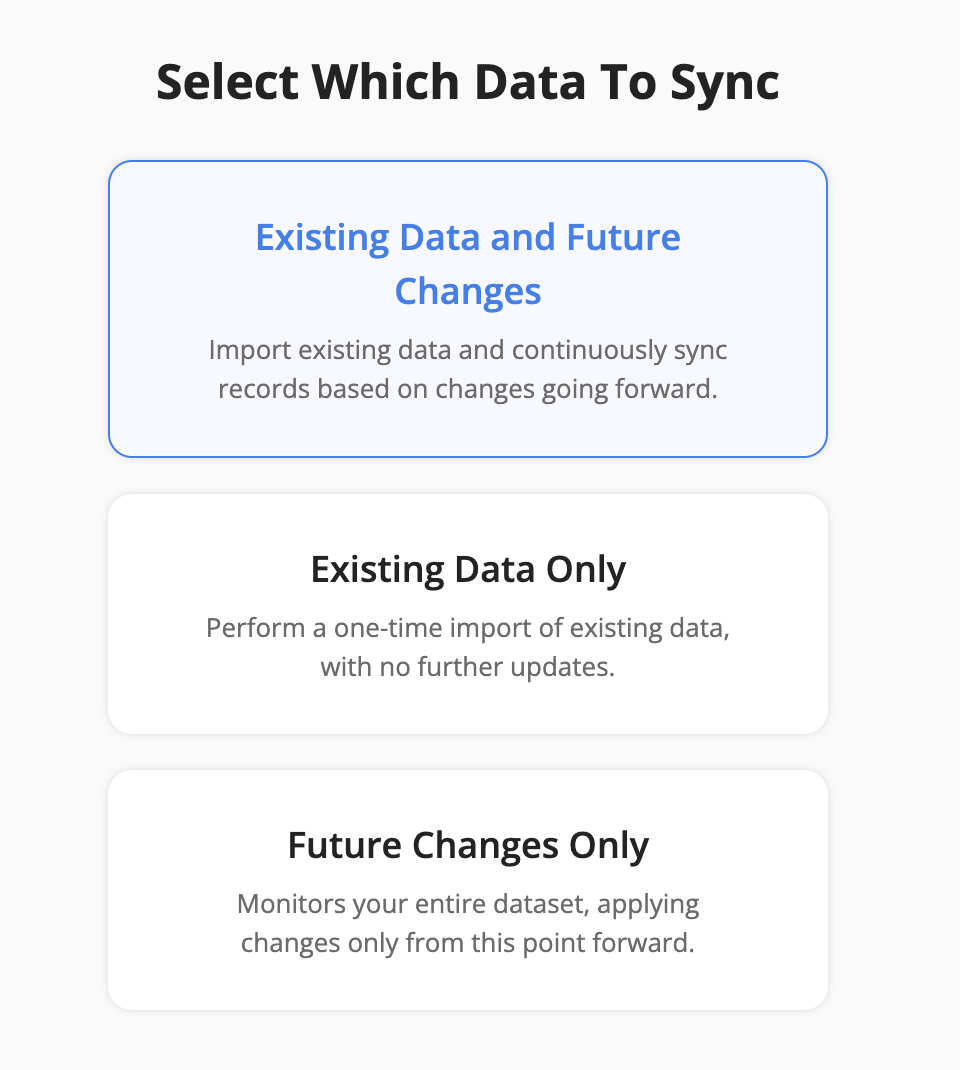
Step 5: Select Which Data to Sync
Step 6: Configure Field Mapping
- On the Field Mapping screen, drag and drop fields from the right panel into the mapped fields column to create mappings.
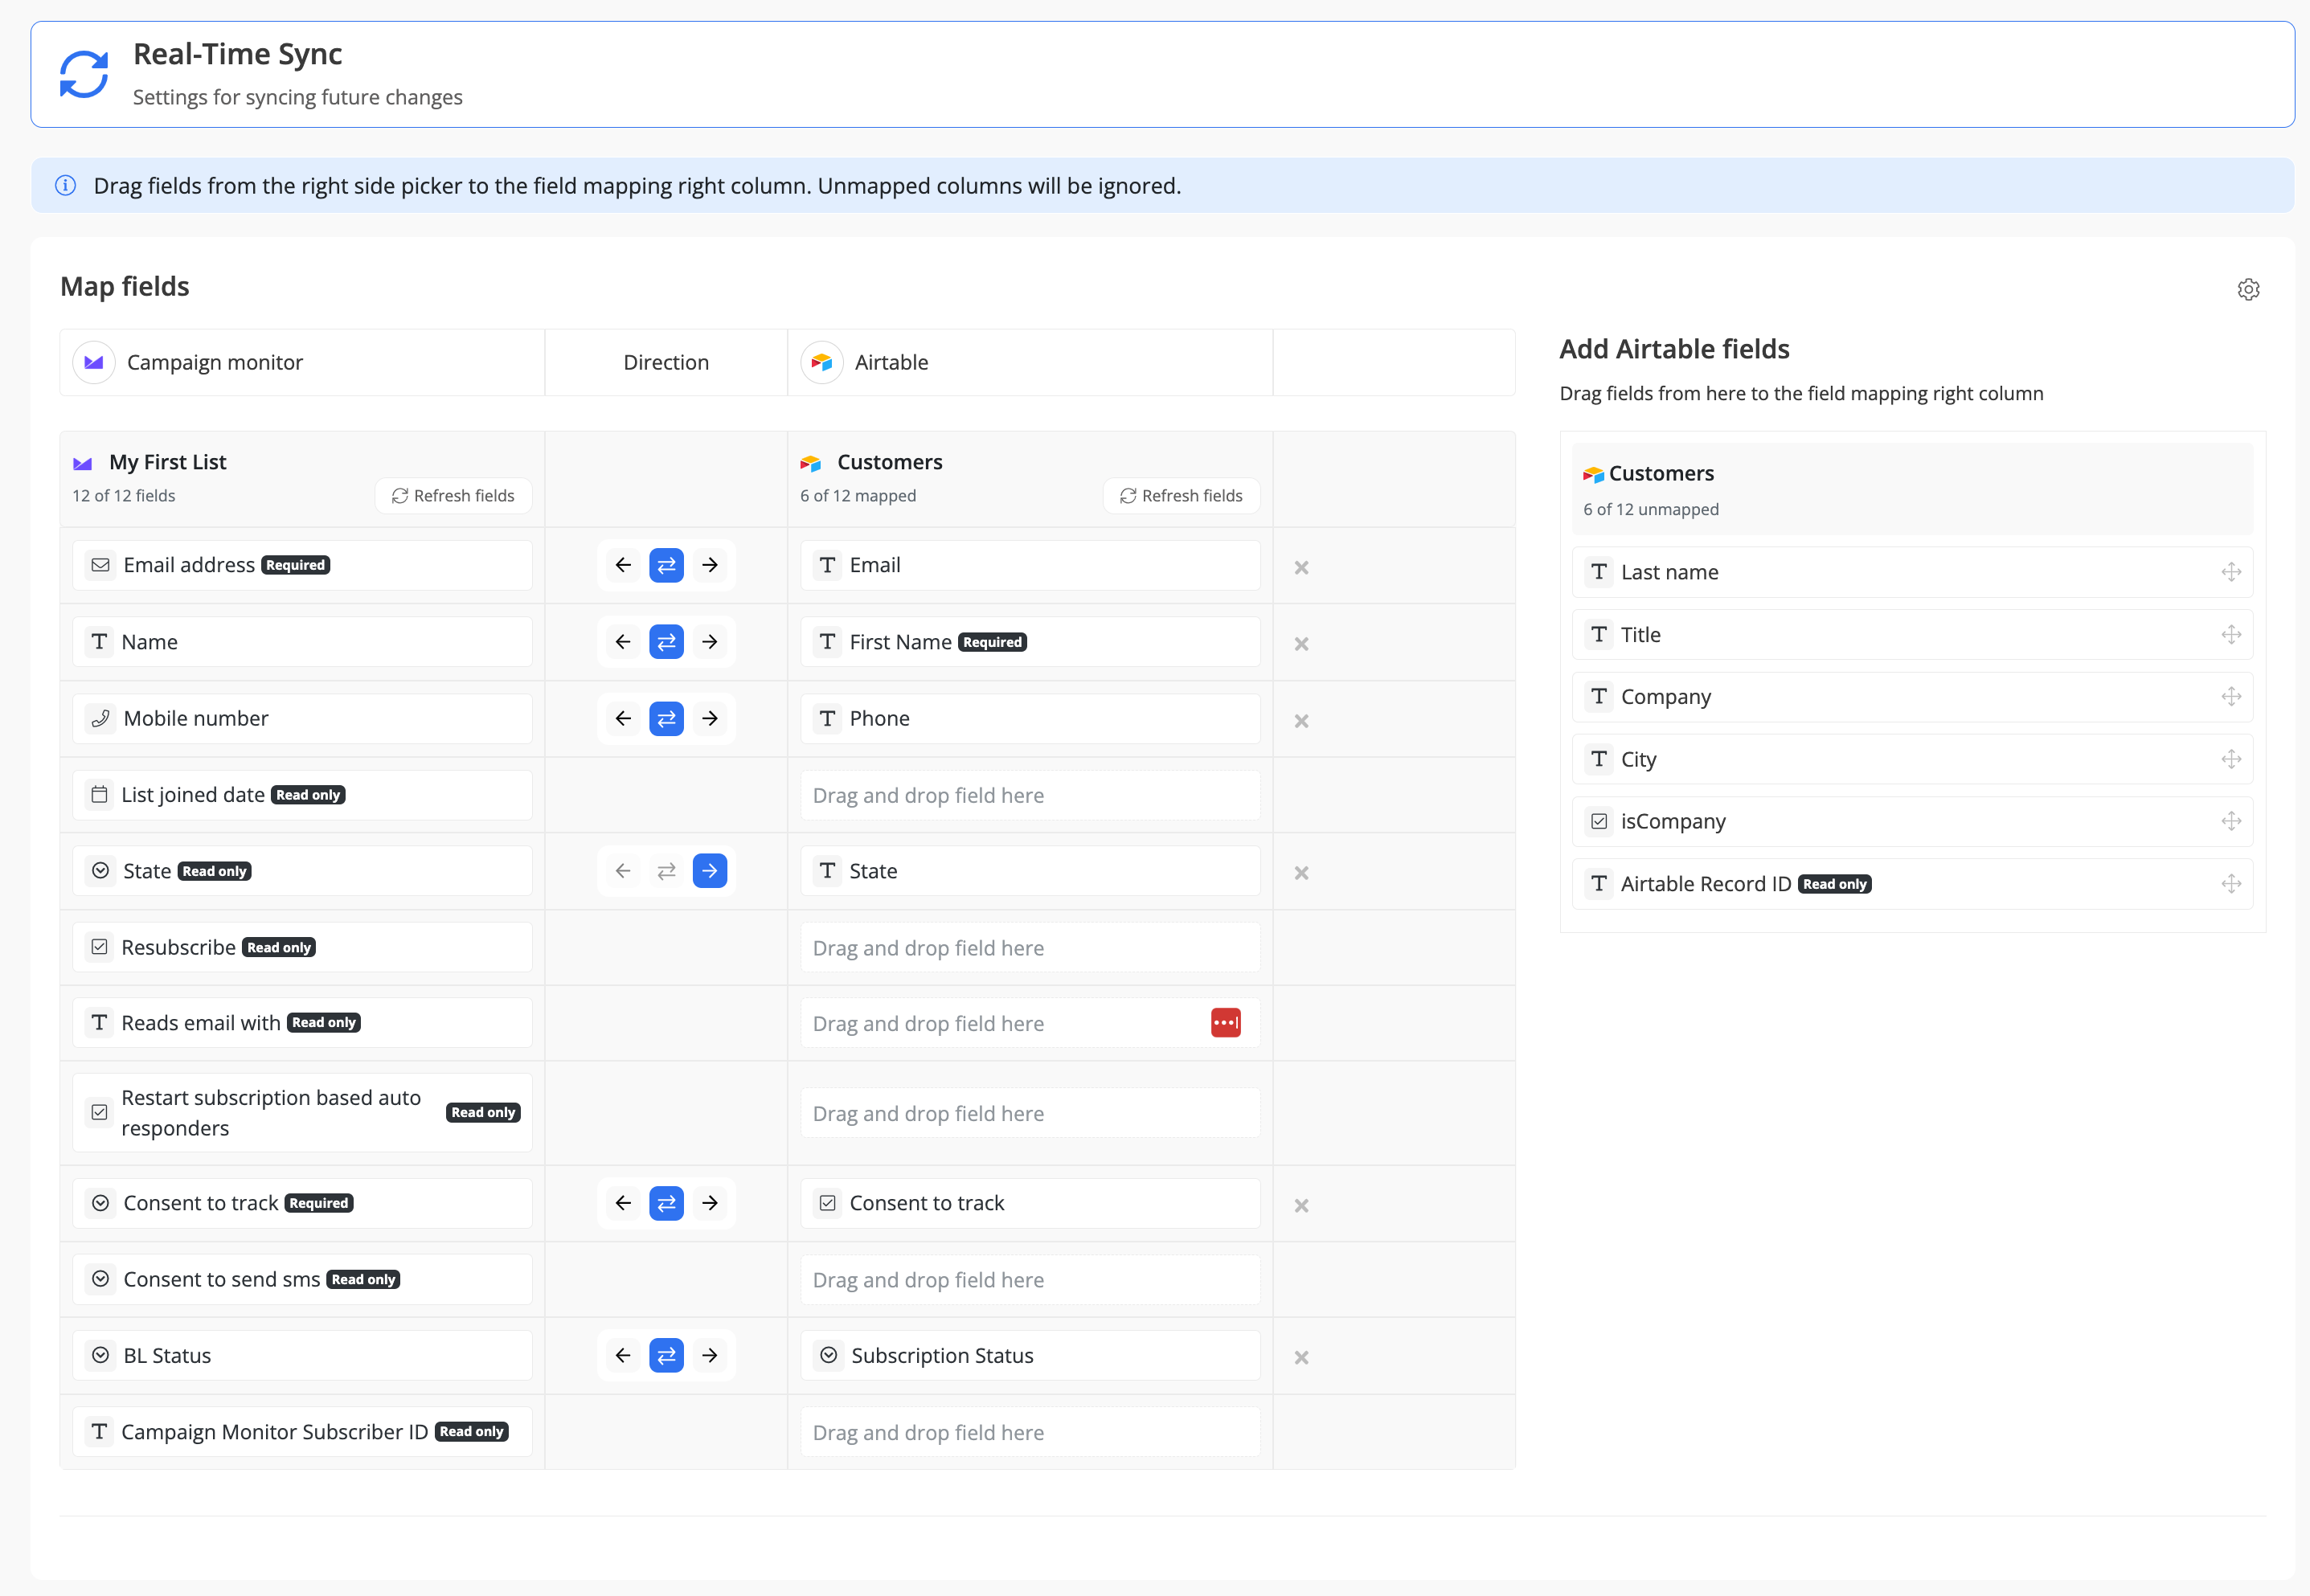
- To delete a mapping, click the X button next to the field.
- Select the sync direction at the field level using the arrow buttons.
One-Way Sync: Data flows from one app to the other.
Two-Way Sync: Data flows bidirectionally between both apps. - Once your mappings are finalized, click "Continue.
Step 7: Sync Existing Data Configuration
Select the sync direction for your existing data:
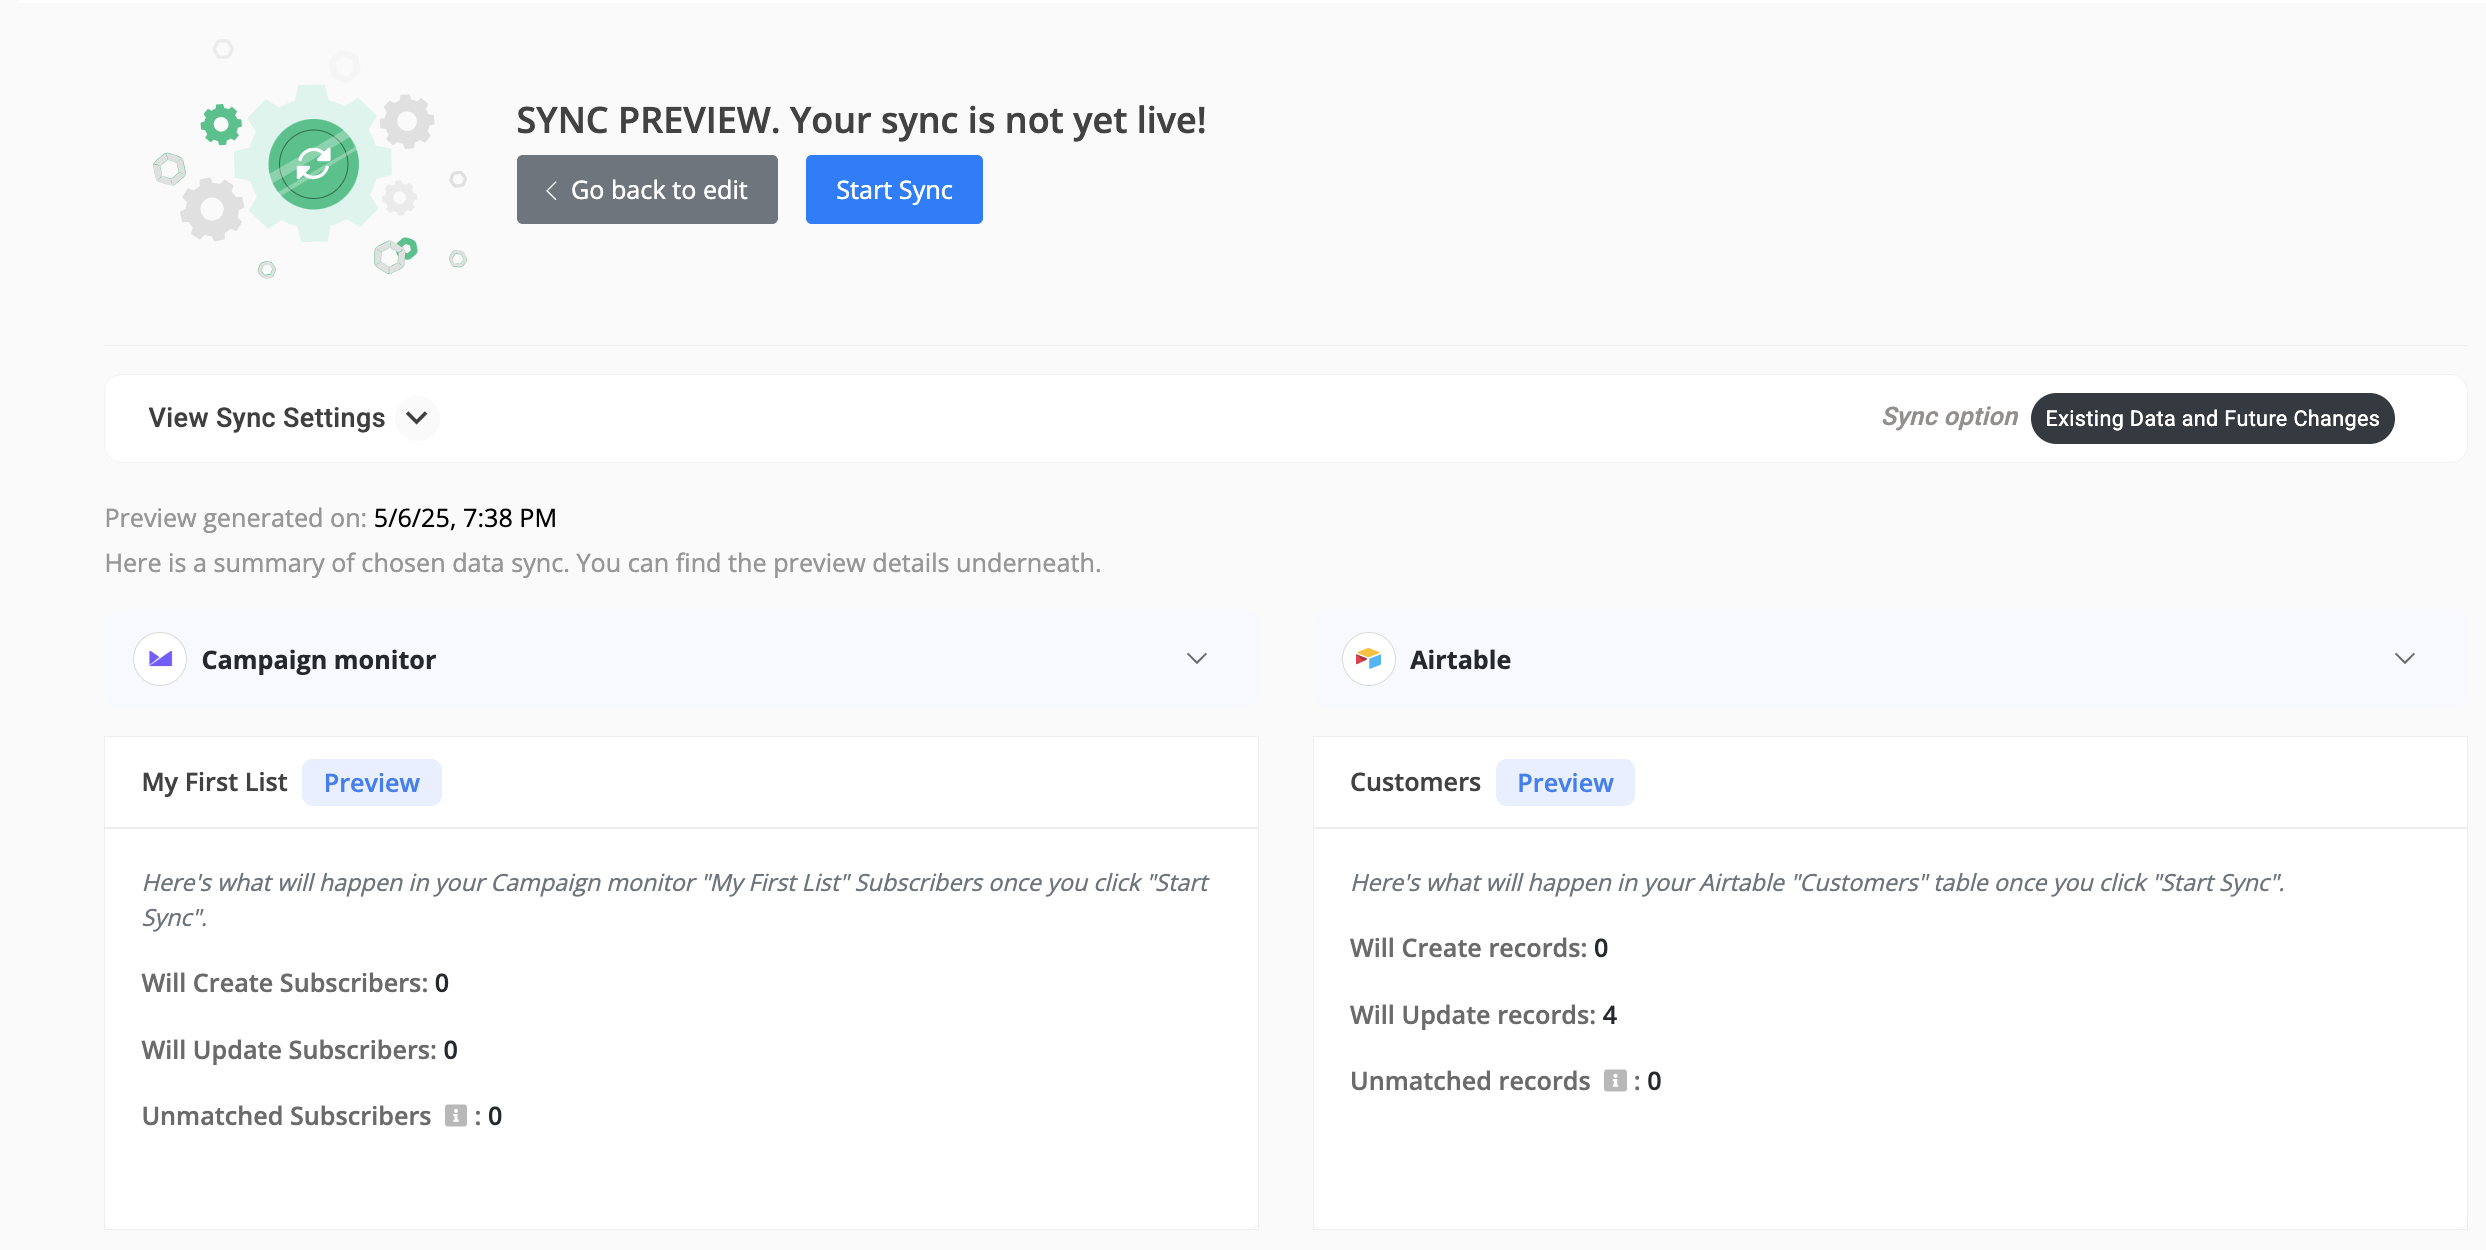
Step 8: Review Sync Preview
- Preview the sync setup to ensure everything is configured correctly.
- If all looks good, click "Start Sync."
- Byteline will sync your existing data and make the sync live.