
Byteline allows users to synchronize data of two different databases or CMS systems with ease. Whether you want to keep the data of two CMS systems synchronized or want to ensure your databases are synchronized, the platform lets you do it effortlessly.
In this guide, we have uncovered a few simple steps to help you synchronize data between two applications, namely Airtable and Webflow, using Byteline. These instructions are applicable for any two CMS systems or databases.
We have divided this article into four sections to make it easy for you to understand the process of data synchronization on Byteline, as illustrated below:
Let’s begin.
In this section, you will learn how to configure two applications, Airtable and Webflow, for data synchronization between them with Byteline.
To configure data synchronization, you first need to select two different applications, which can be done by following the steps mentioned below.
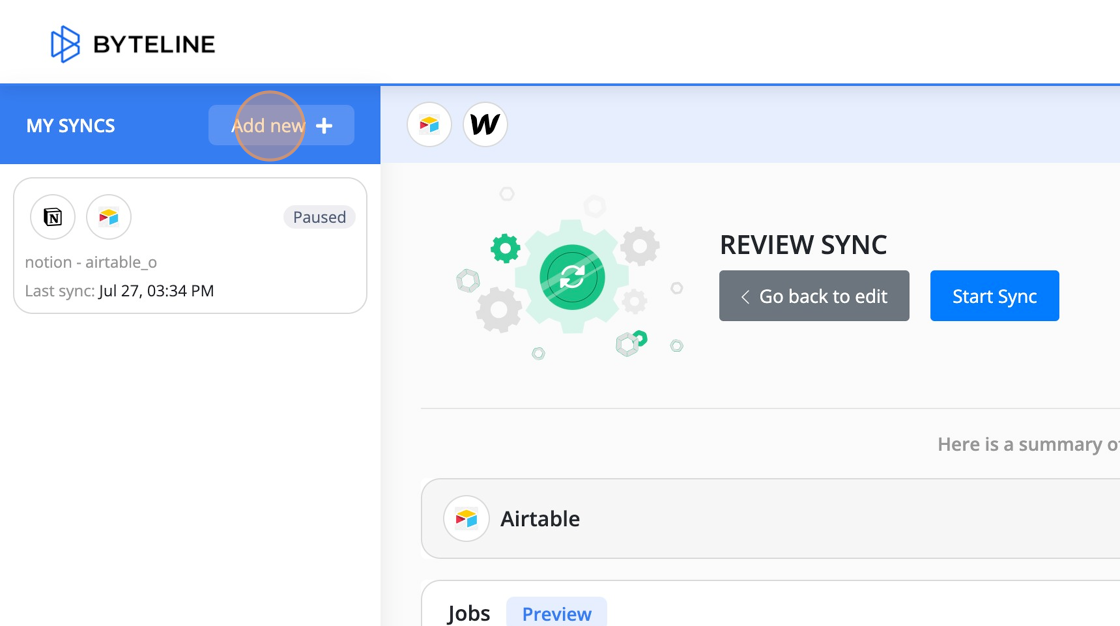
On the New Sync page, click on the Add New button next to the My Syncs in the sidebar menu.

Step 1: Select both apps by either typing the app's name in each text box or scrolling through the list of categorized apps. Once both apps have been selected click "Set up sync". In this example we will be connecting Airtable data with Webflow.
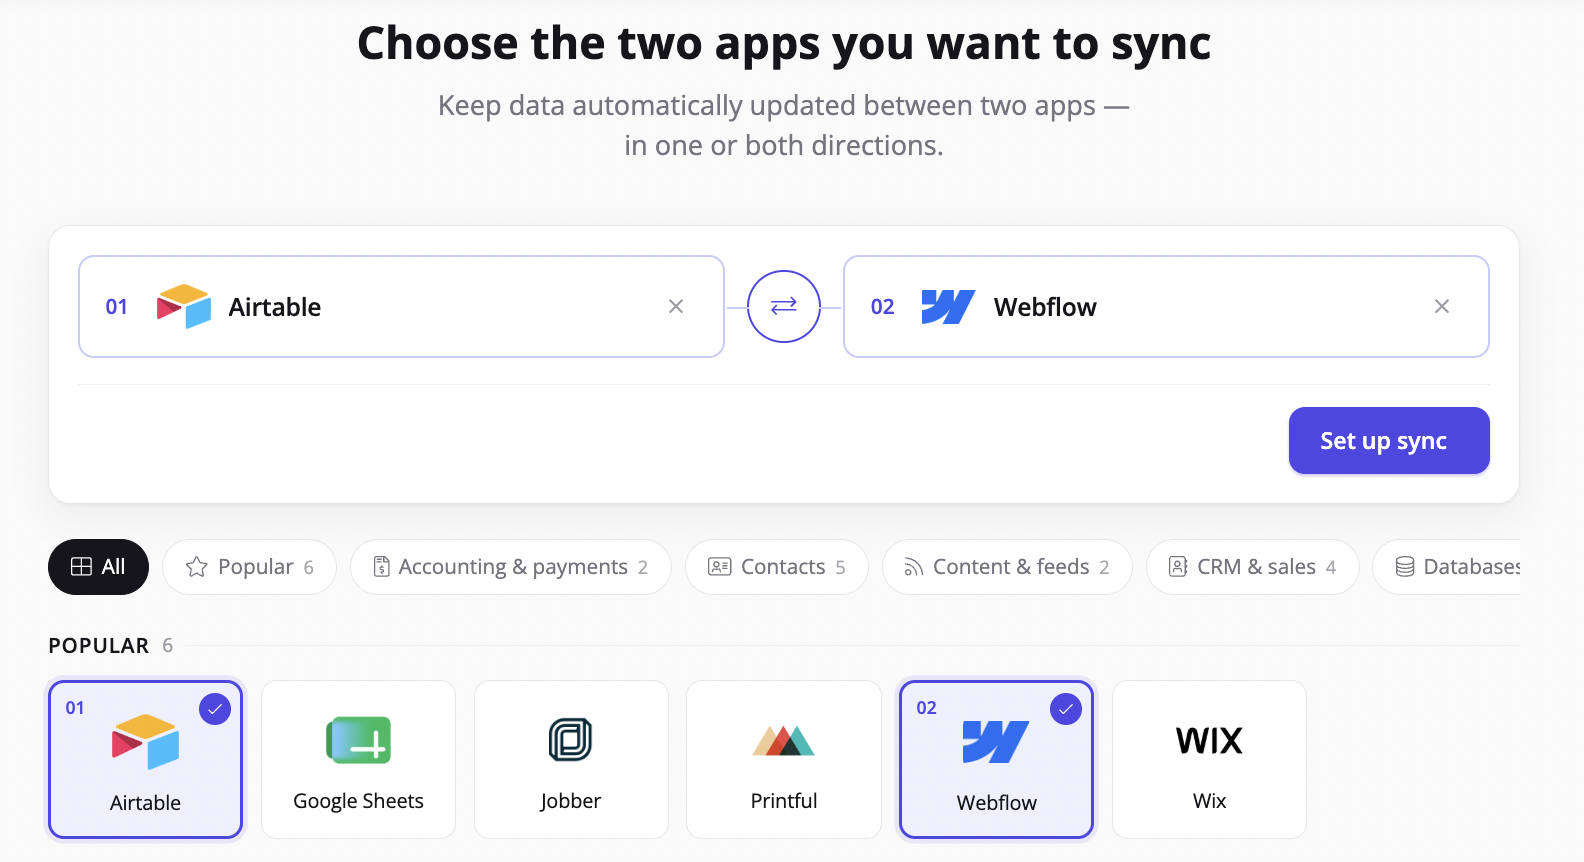
Step 2: Select from a prebuilt template to save time or create your own configuration for complete customization. Each app combination is unique and we have created templates that address specific use cases.

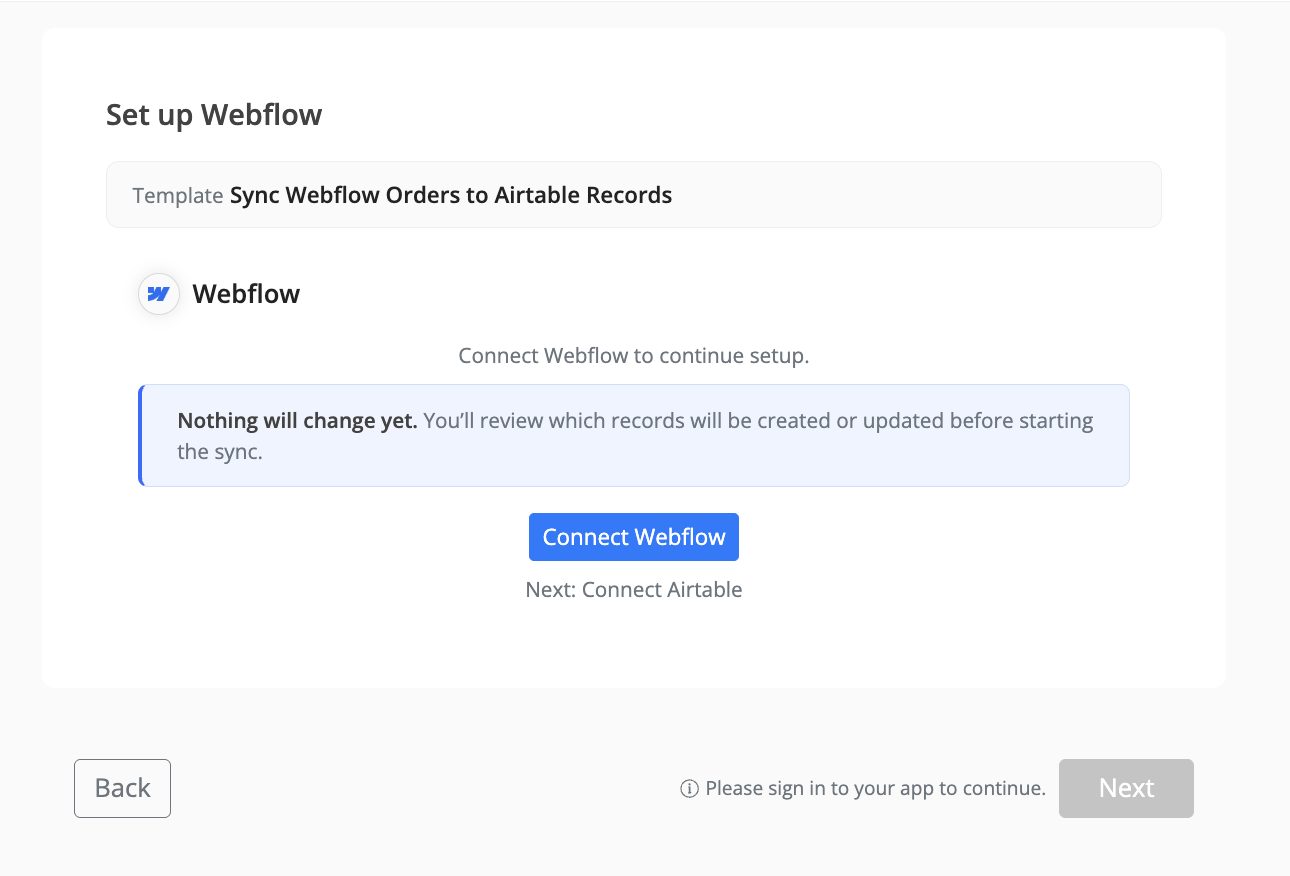
Step 3 (TEMPLATE): Sign in to the apps by clicking the 'Connect [app]' button. Once connected, click 'Next'.
Ensure that pop-ups are disabled, as the new connection dialogs appear in pop-up windows.
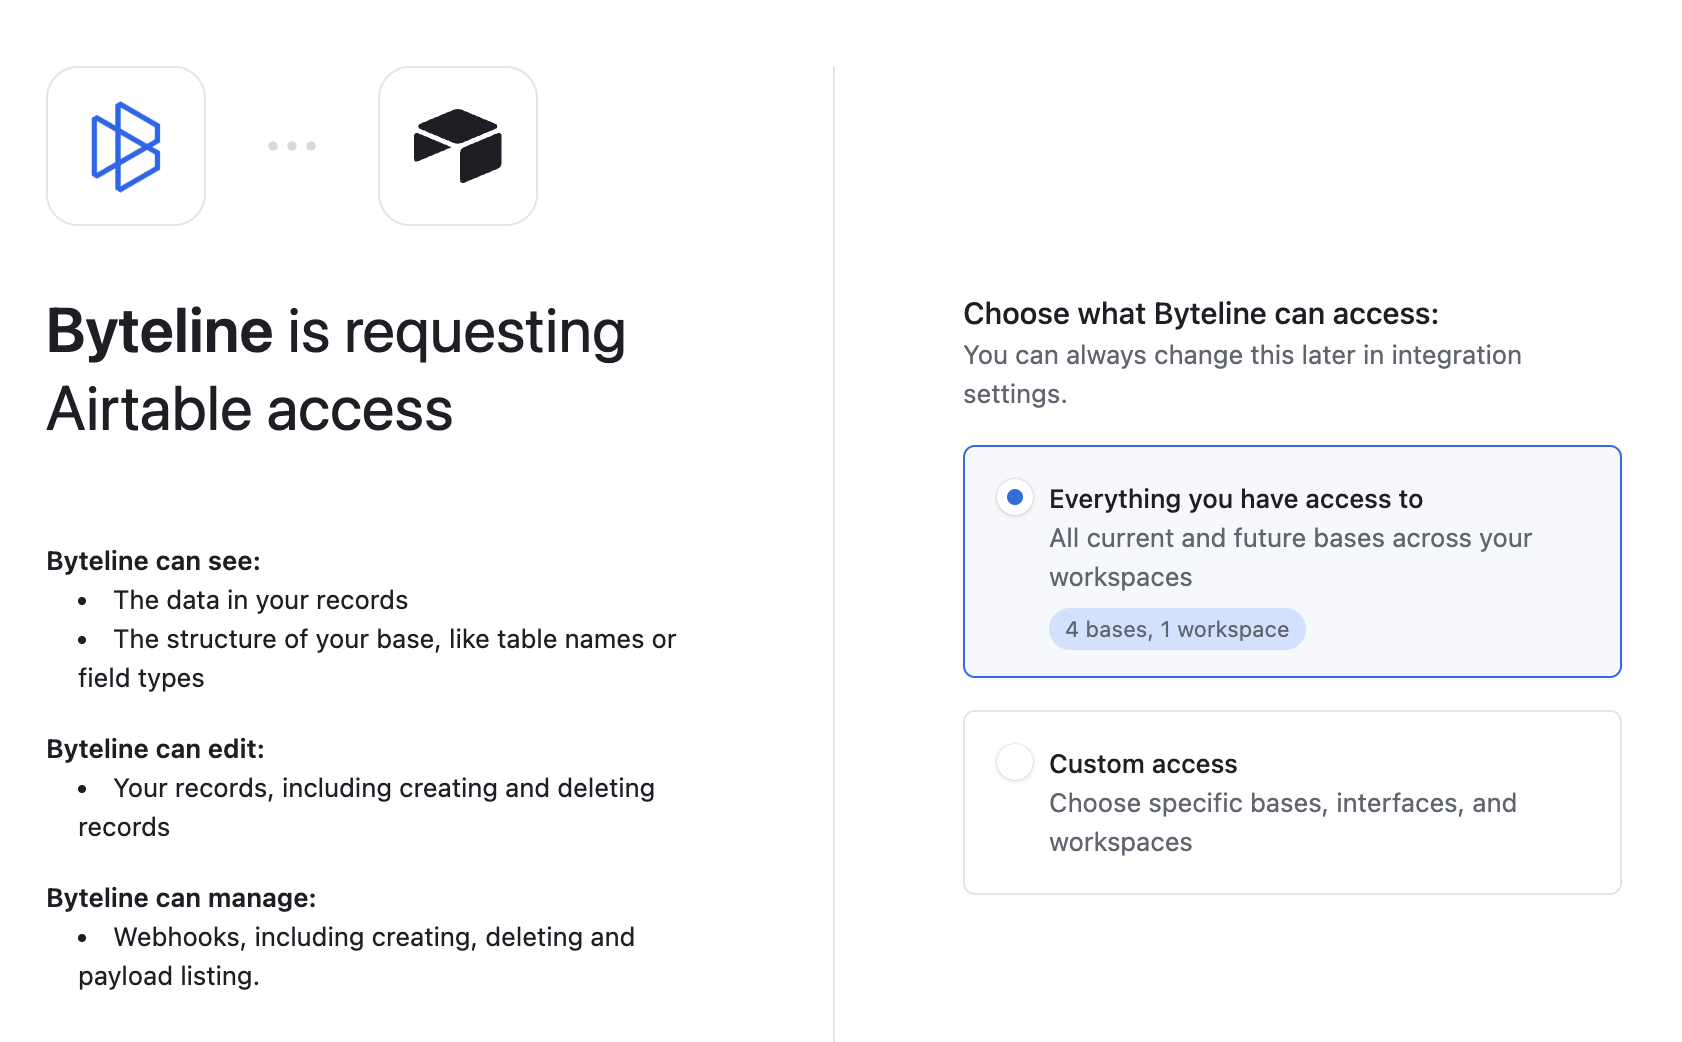
Step 4 (TEMPLATE): Grant access to Byteline with the necessary permissioning to keep your sync running.
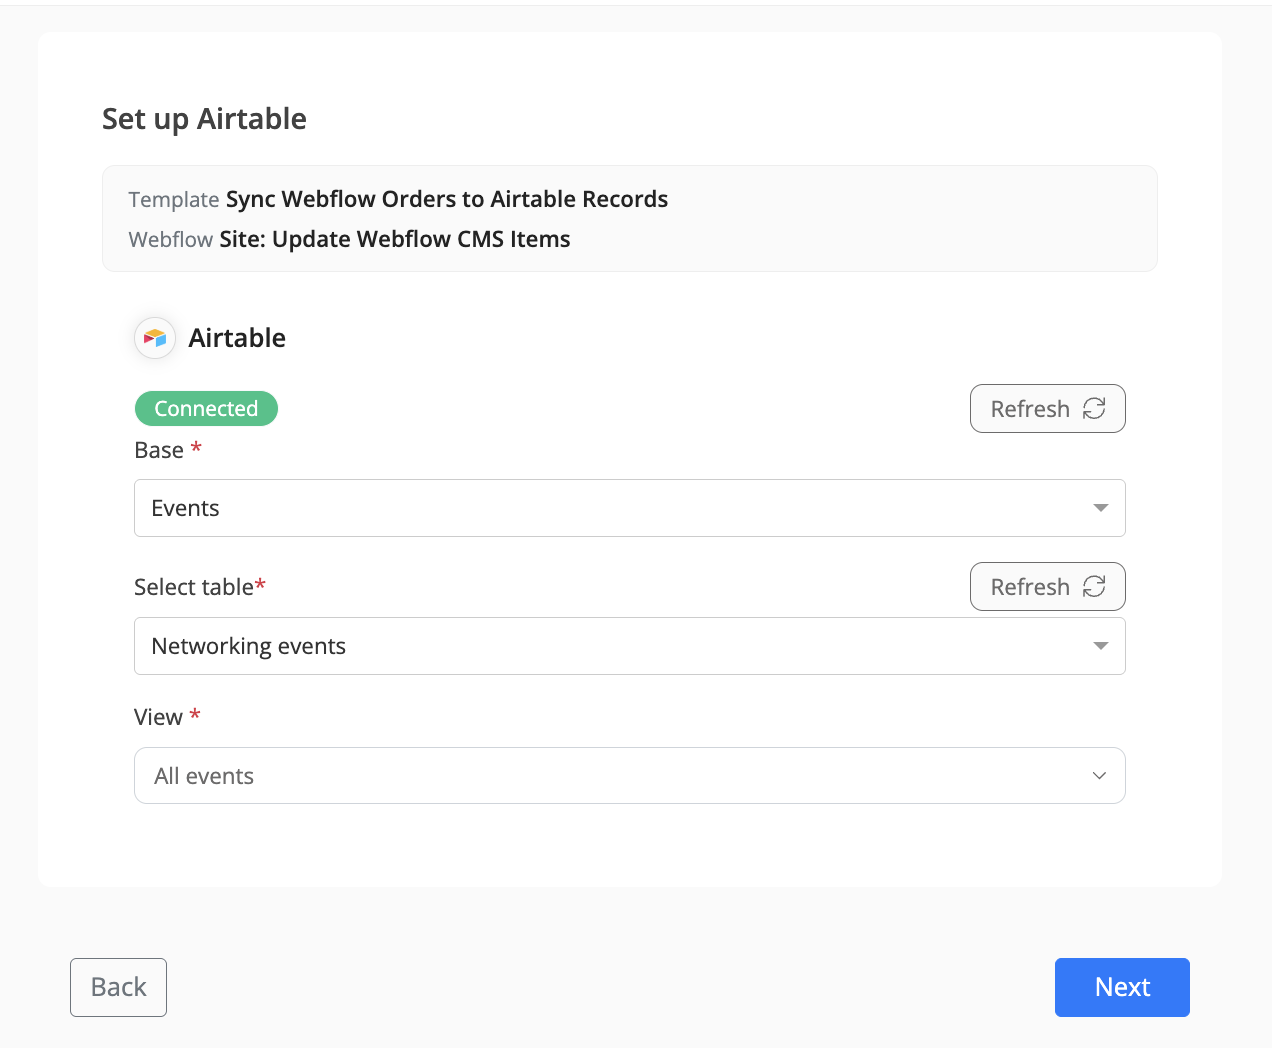
Step 5 (TEMPLATE): Once you have signed into Airtable, select the desired base from the Airtable base dropdown list. Click 'Next'.
Step 6 (TEMPLATE): Byteline will automatically map fields for you with templates. You can see exactly how the fields are matched by clicking 'review mappings' or click 'Continue for the next step.

Step 7: Once you have signed into Webflow, select the "object type" along with the Site from the dropdowns.
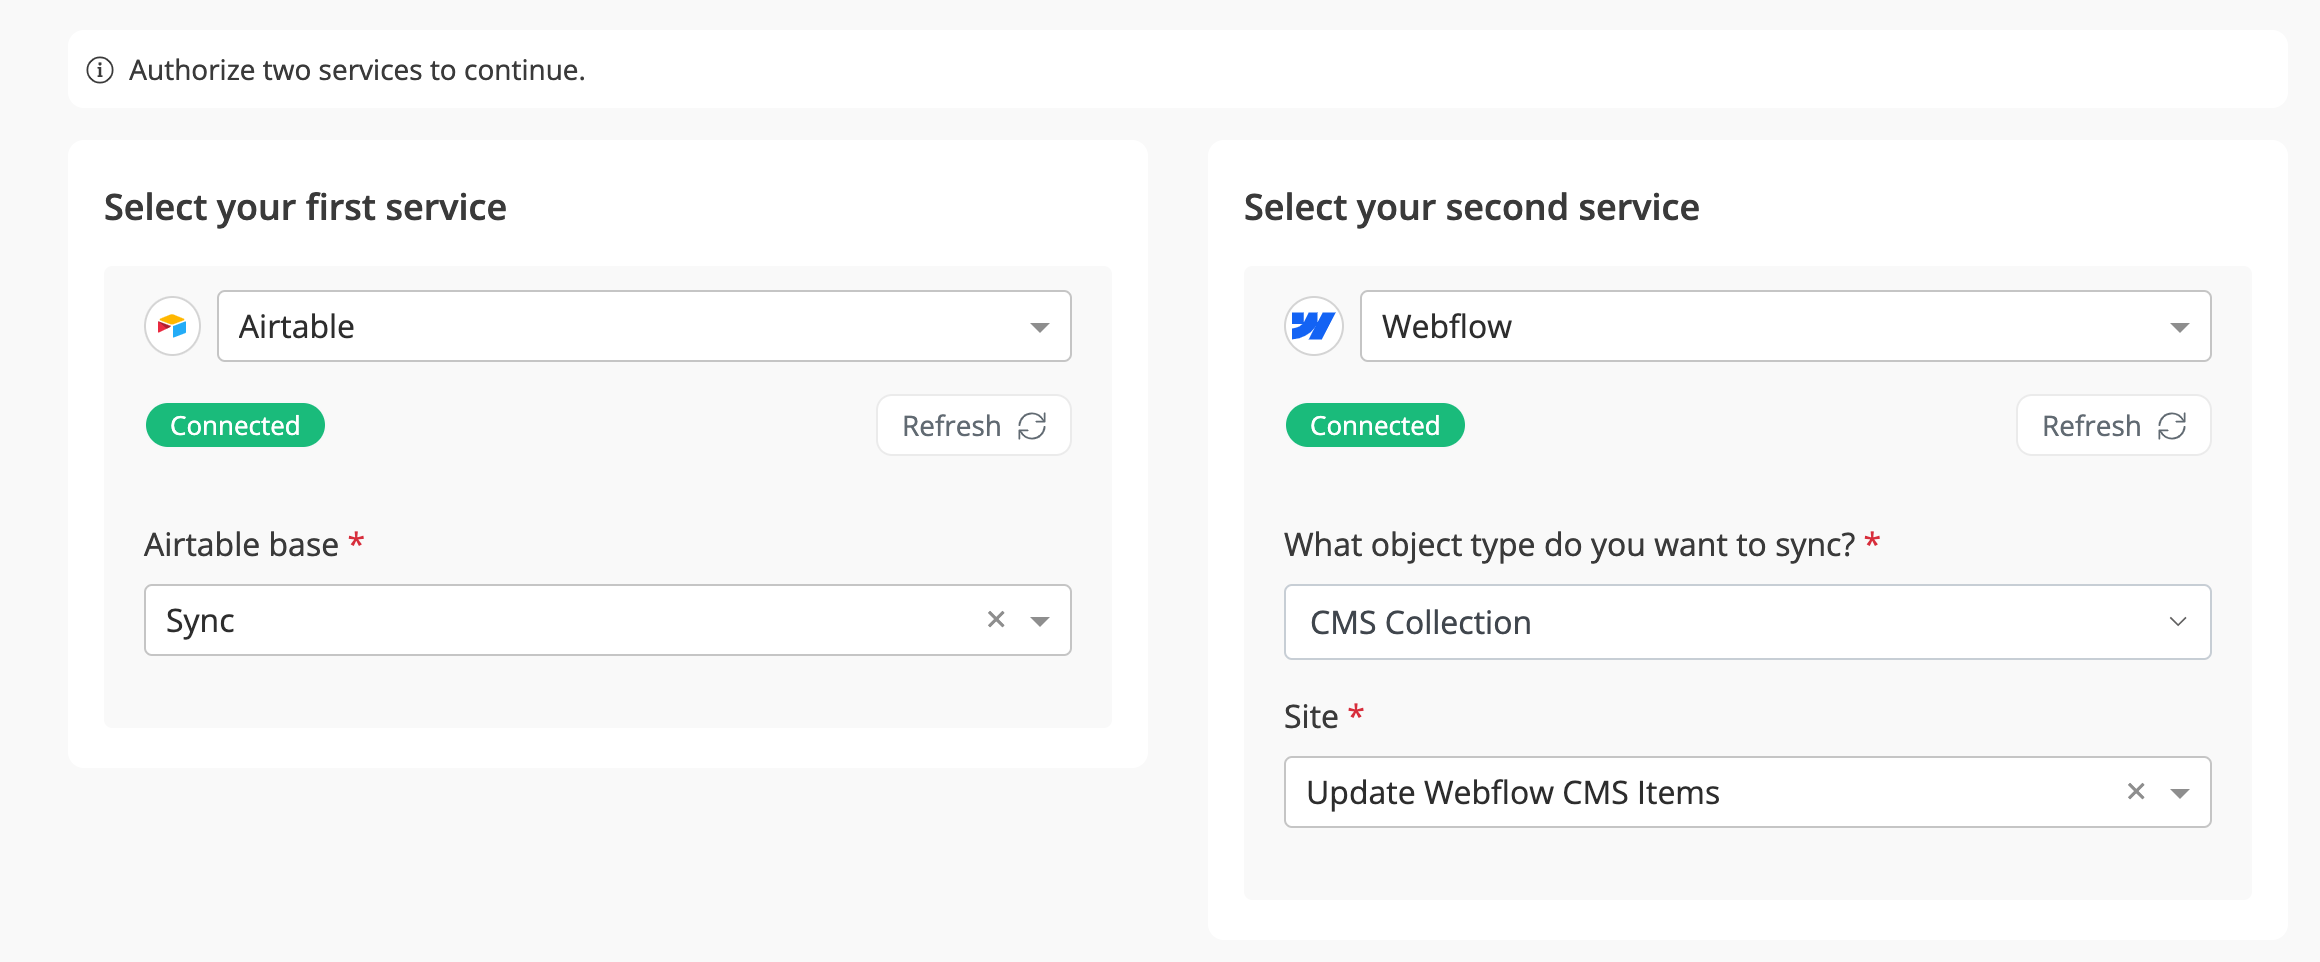
Step 8: Click on the Save & Proceed button.

Step 1: Once you select the Airtable base and Webflow site, you can view available tables for both. Choose the desired table from Airtable and Webflow dropdown list. Byteline performs mapping automatically based on the table names.
Note: Users can manually add a table mapping. All they need to do is click the Add another Table button and choose the desired tables from the drop-down list. Multiple tables can be mapped on this screen.

Step 2: After selecting the desired table(s) from Airtable and Webflow, delete all other tables displayed on the screen by clicking on the Trash Bin button.
Note: Users can synchronize the data either two-way or one-way. By default, the sync is set to two-way. You can set the sync one way, either left to right or right to left.

Step 3: Click on the Save & Proceed button.

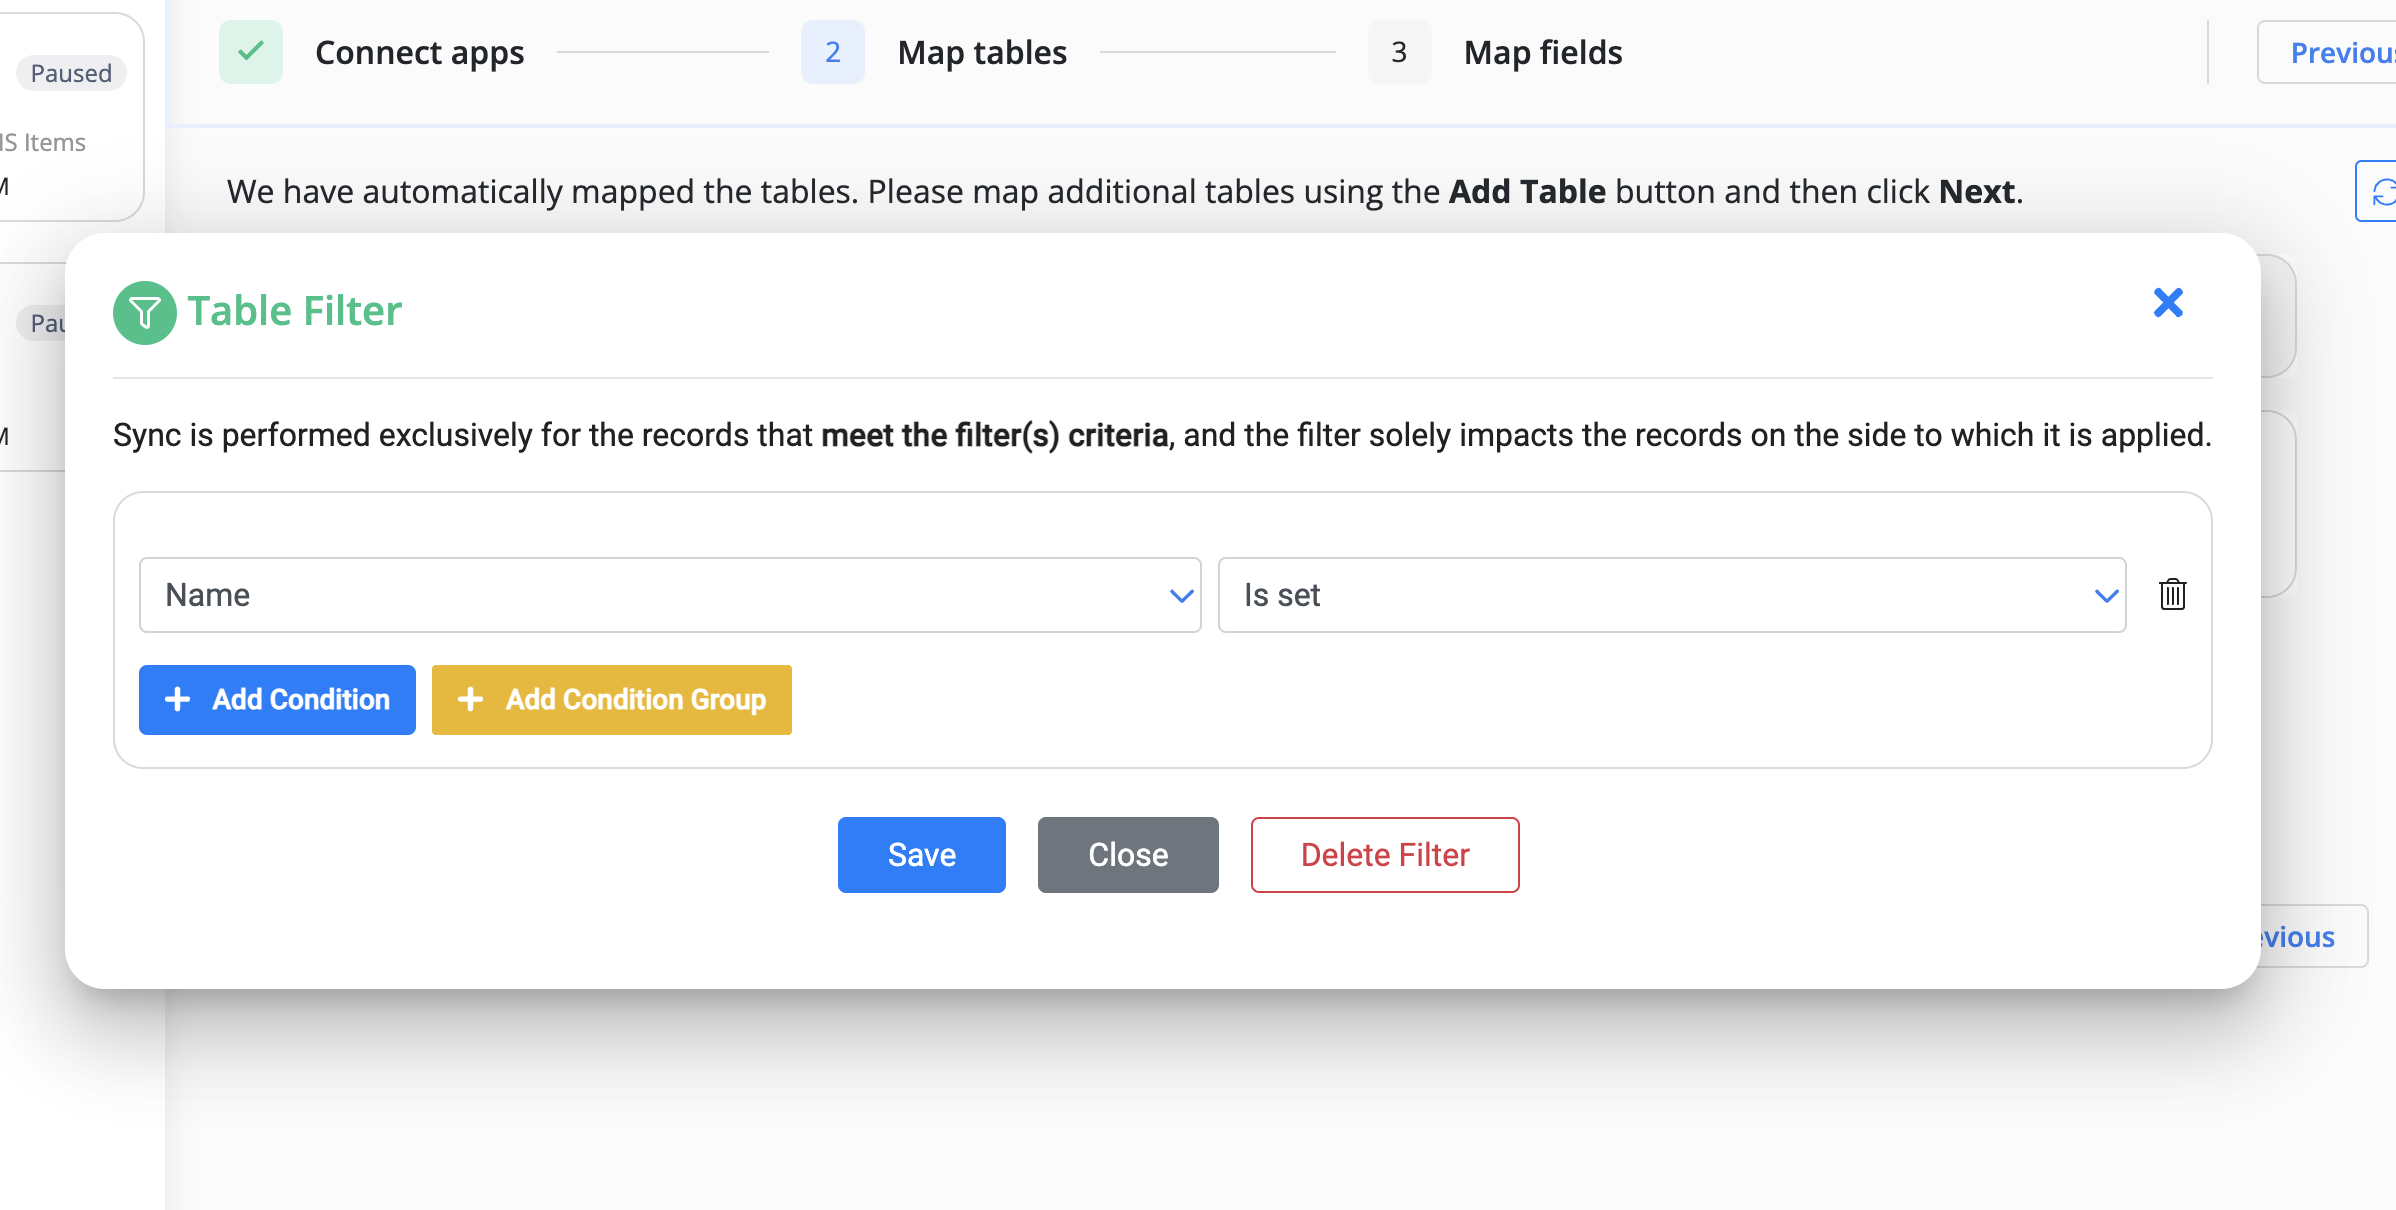
In the table mapping screen, you can configure filter(s) on one or both sides of the sync. The filter only affects the data consumed from the side of the sync where it's configured. For example, if you add a filter on Airtable (above sync) to filter out the records with the empty "Name" field, then it will only sync the Airtable records with some value in the "name" field. It will not have any effect on the records read or created/updated on the Webflow.

Below is a sample filter on the Airtable "Name" field.
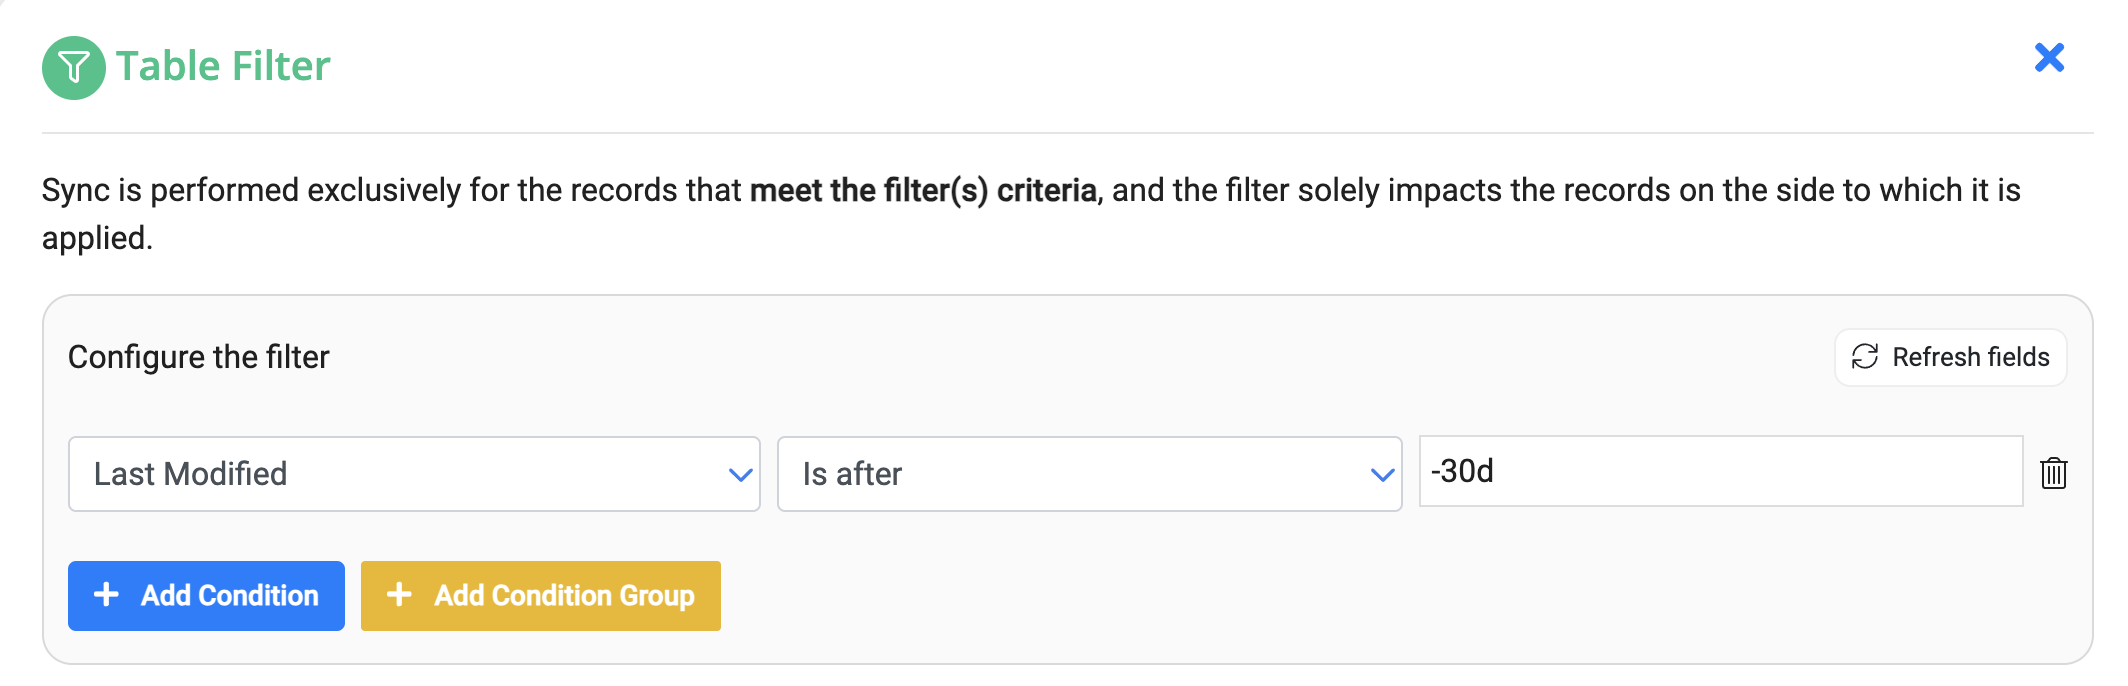
Byteline offers robust filtering options, including support for date and time-based filters. These filters can handle both absolute date-times, such as 2020-10-26T16:56, and relative formats like -30d (for the past 30 days). For a detailed guide on using date and time formats in filters, visit our documentation on writing dates.
When setting up your sync, you can choose from three options to determine which data should be synchronized.
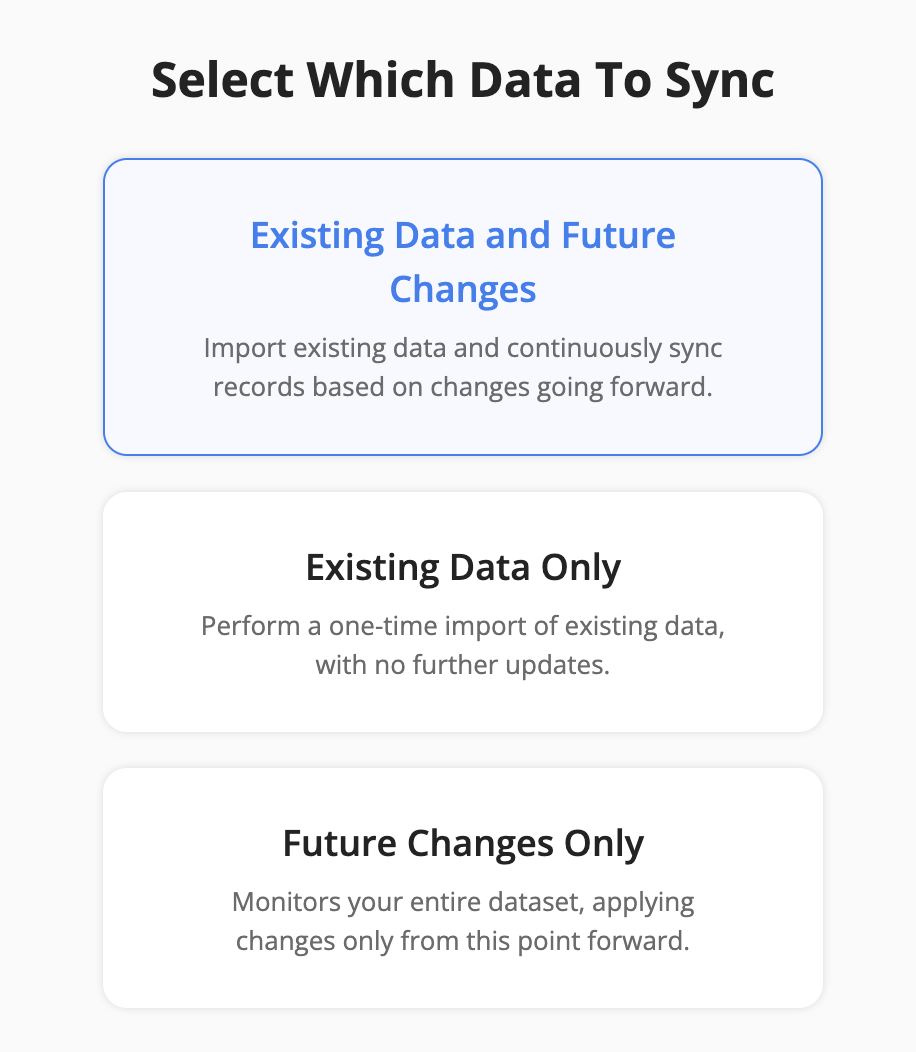
This option ensures that all your data—both past and future—remains in sync. It works in two stages:
Choose this option if you want a fully synchronized dataset that includes historical data and stays up to date with future changes.
This option syncs only the existing data at the time of execution. It does not keep syncing new changes after the initial run.
Use this if you only need a snapshot of your current data without keeping the sync always running.
This option starts syncing only new data changes from the moment the sync goes live. Any existing data before the sync starts is ignored.
Note: Since past data is not synced, only records that change after the sync starts will be in sync. Older records may remain out of sync.
Choose this option if you only need to track new and updated records going forward.
Field mapping tells Byteline which fields to connect between your apps. For example, map Email in one app to Email Address in the other.
Byteline suggests mappings automatically. Review them before continuing:
During the initial sync, mapped destination fields may be overwritten with source values. If your setup includes existing data, review the sync preview before starting.
When your mappings are ready, click Continue.
For detailed instructions on field directions, read-only fields, fixed values, select options, and empty values, see Field Mapping.
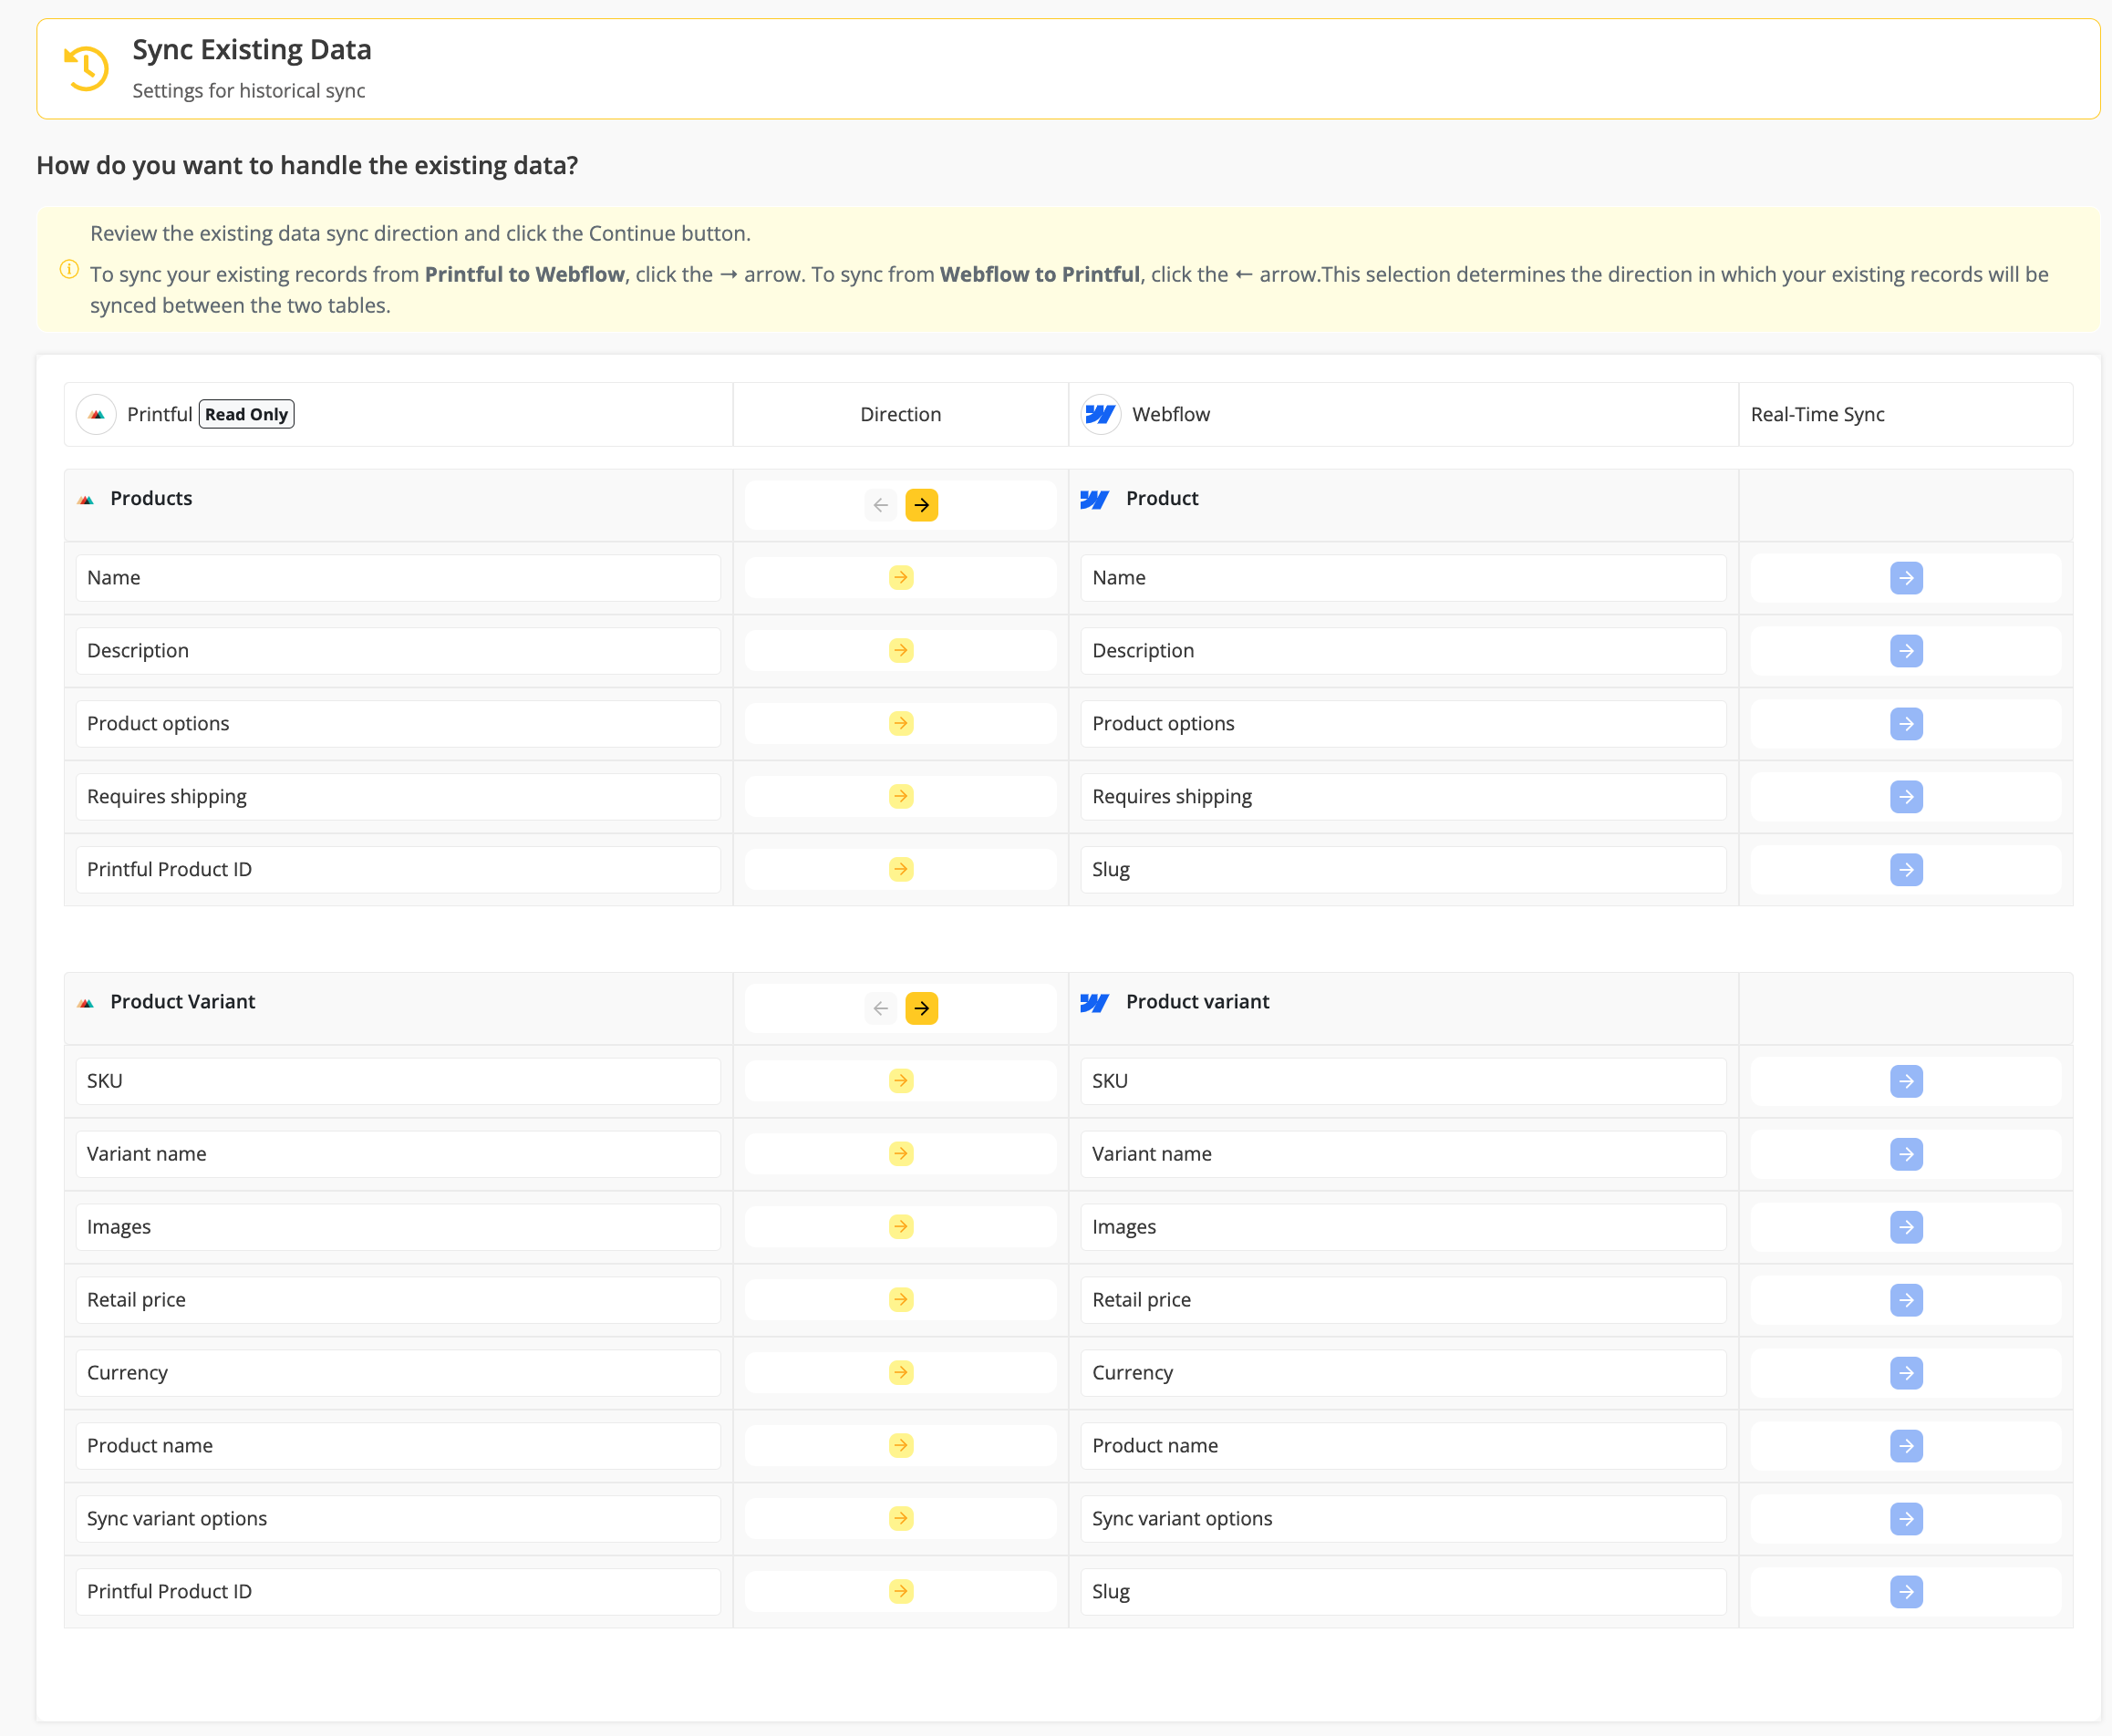
Byteline allows you to sync your existing data for the tables configured for the sync. Simply choose the direction in which the data should be synced by selecting one of the arrow buttons on the screen below.
Once the direction is selected, click the "Save & Proceed" button to continue.

For details on the syncing existing data, check out our Historical Sync documentation.
On the next screen, you'll see a preview with a summary of the records that will be impacted for each table. This includes the number of records that will be created, updated, and deleted for the selected CMS systems.
Note: The sync hasn't started yet. This is just a preview of what will occur once the sync begins.

When syncing existing data, some records may be marked for deletion. Byteline gives you the ability to review these records in advance, providing peace of mind by ensuring that only expected records are deleted.
To view the details of these records, click the red-underlined link for each "Will delete items" value. This will open a pop-up displaying the records to be deleted in a table format.
You can also export these records as a CSV file for backup purposes.

Sometimes Byteline cannot confidently match records that already exist in both apps. For example, you may have 200 contacts in one app and 10 customers in another app, but none of them share the same matching values.
When this happens, Byteline will ask you how you want to continue:
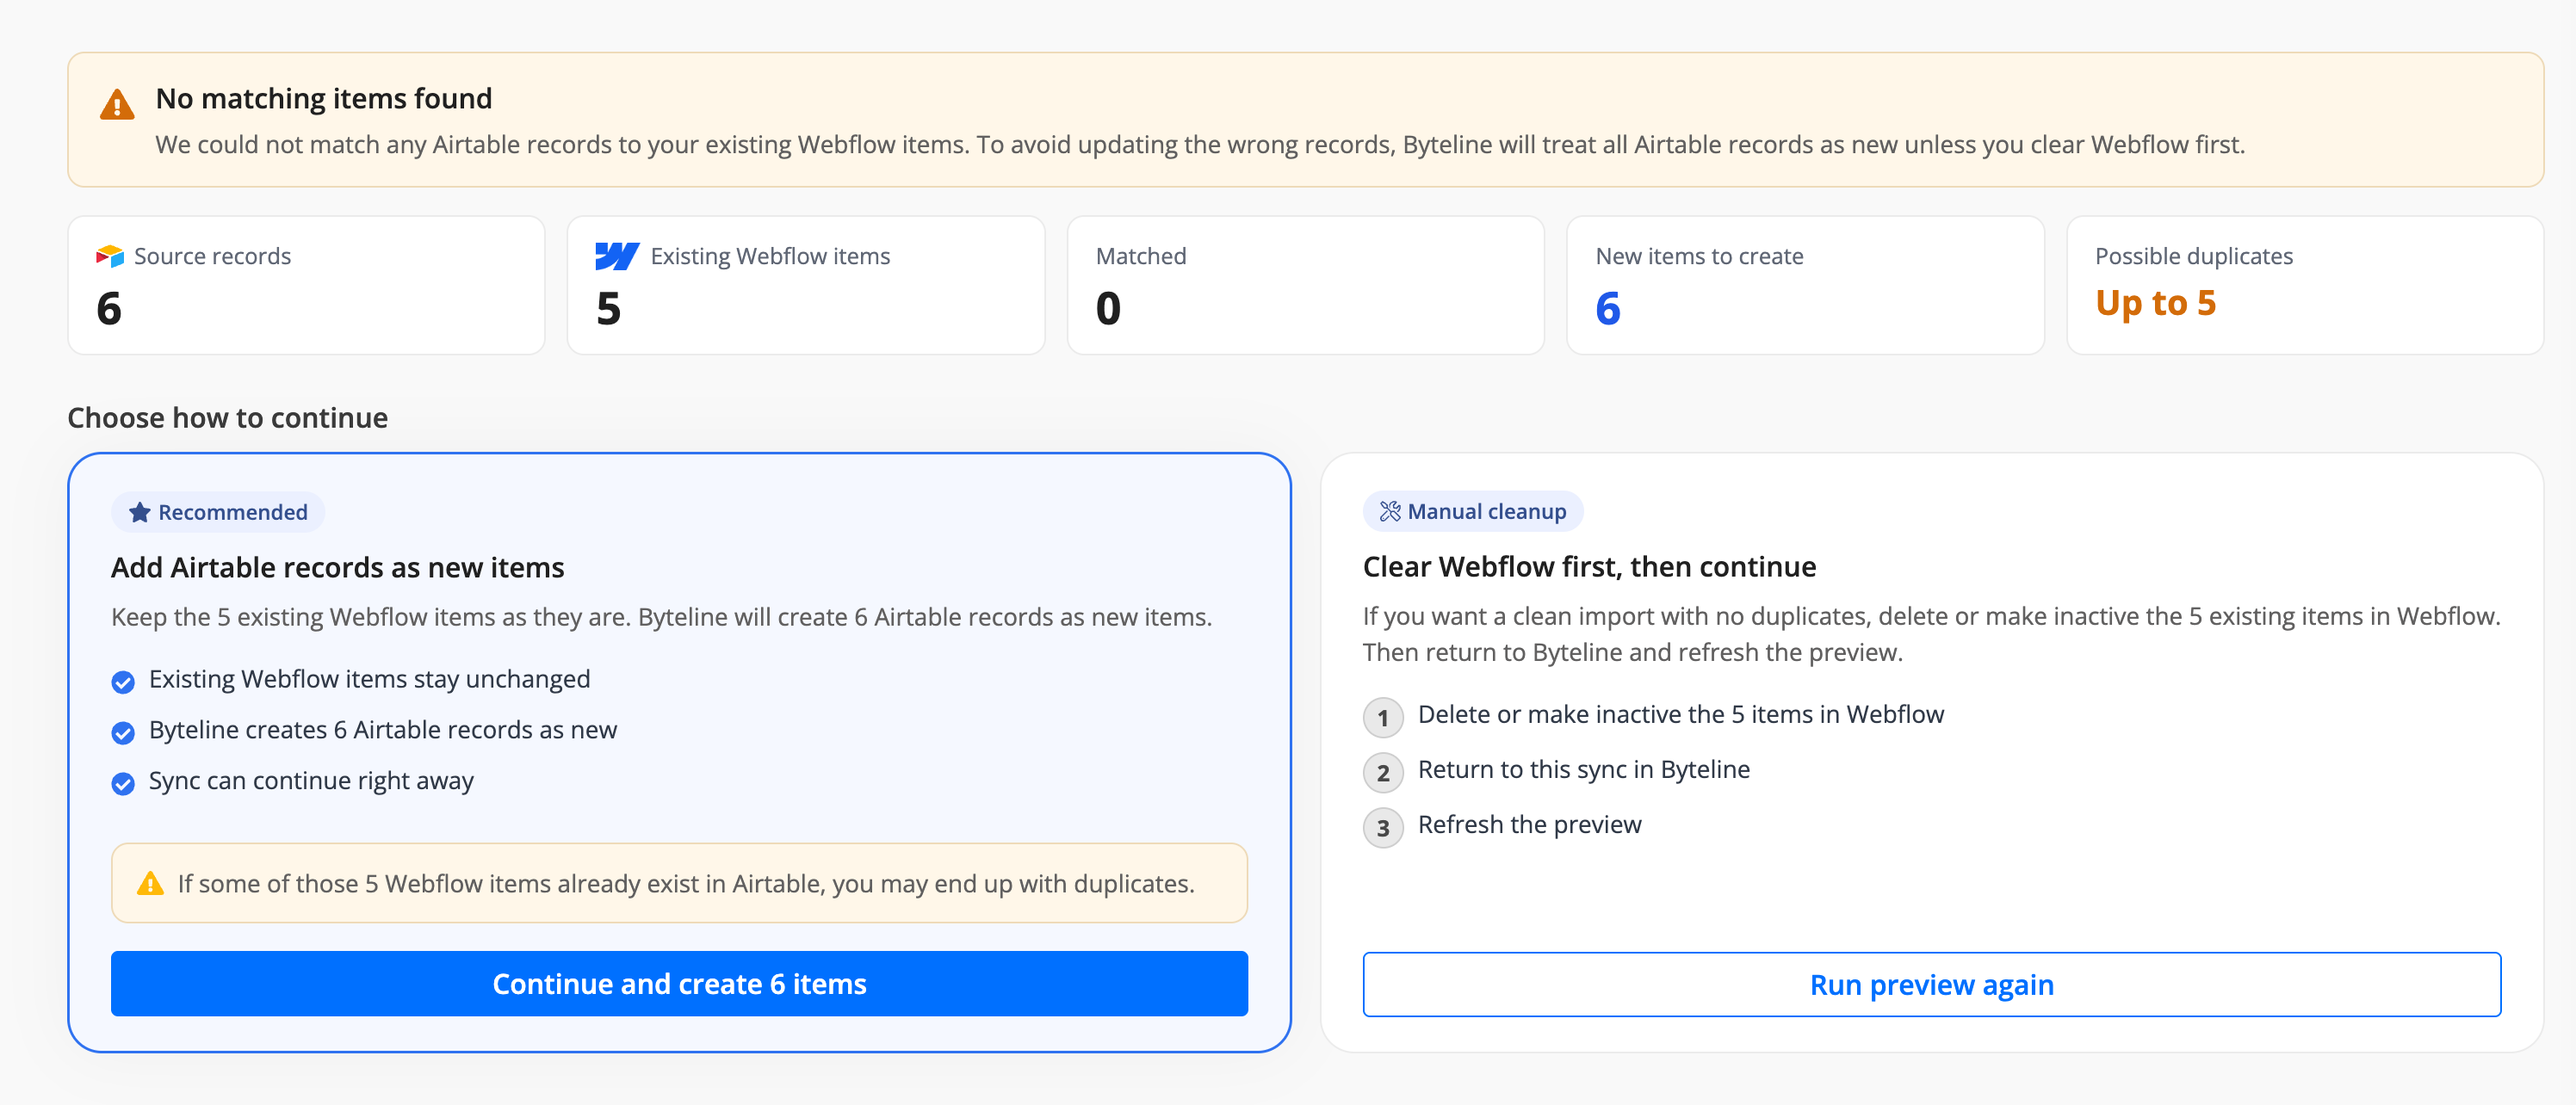
Add records as new Choose this if you want to keep the existing records in the destination app. Byteline will create the source records as new records. This is the fastest option, but it may create duplicates if some records already exist in the destination app.
Clear the destination app first Choose this if you want a clean import with no duplicates. Remove the existing records directly in the destination app, then return to Byteline and check again.
Byteline does not remove existing destination records for you during this step. Existing records stay unchanged unless you remove them in the destination app.
After you're satisfied with the Preview results, click on the Start Sync button.

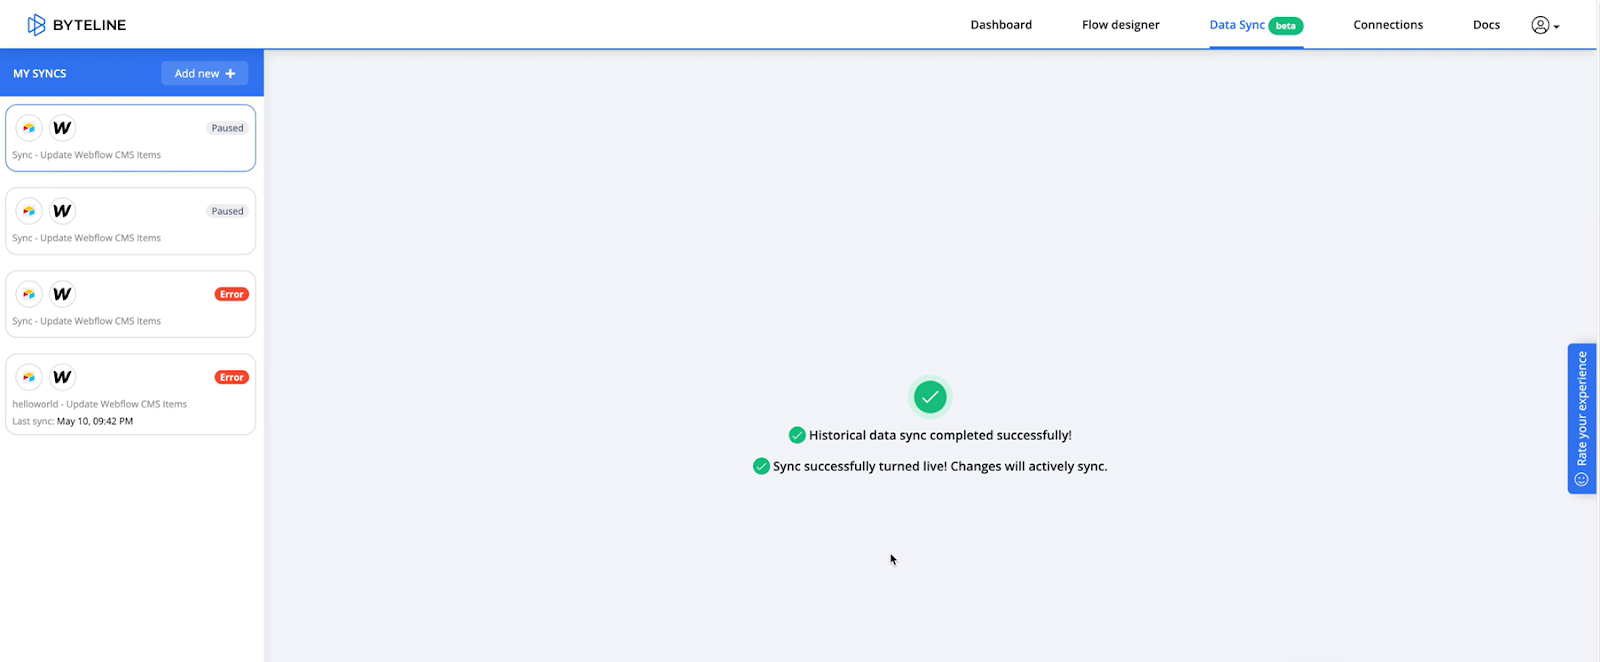
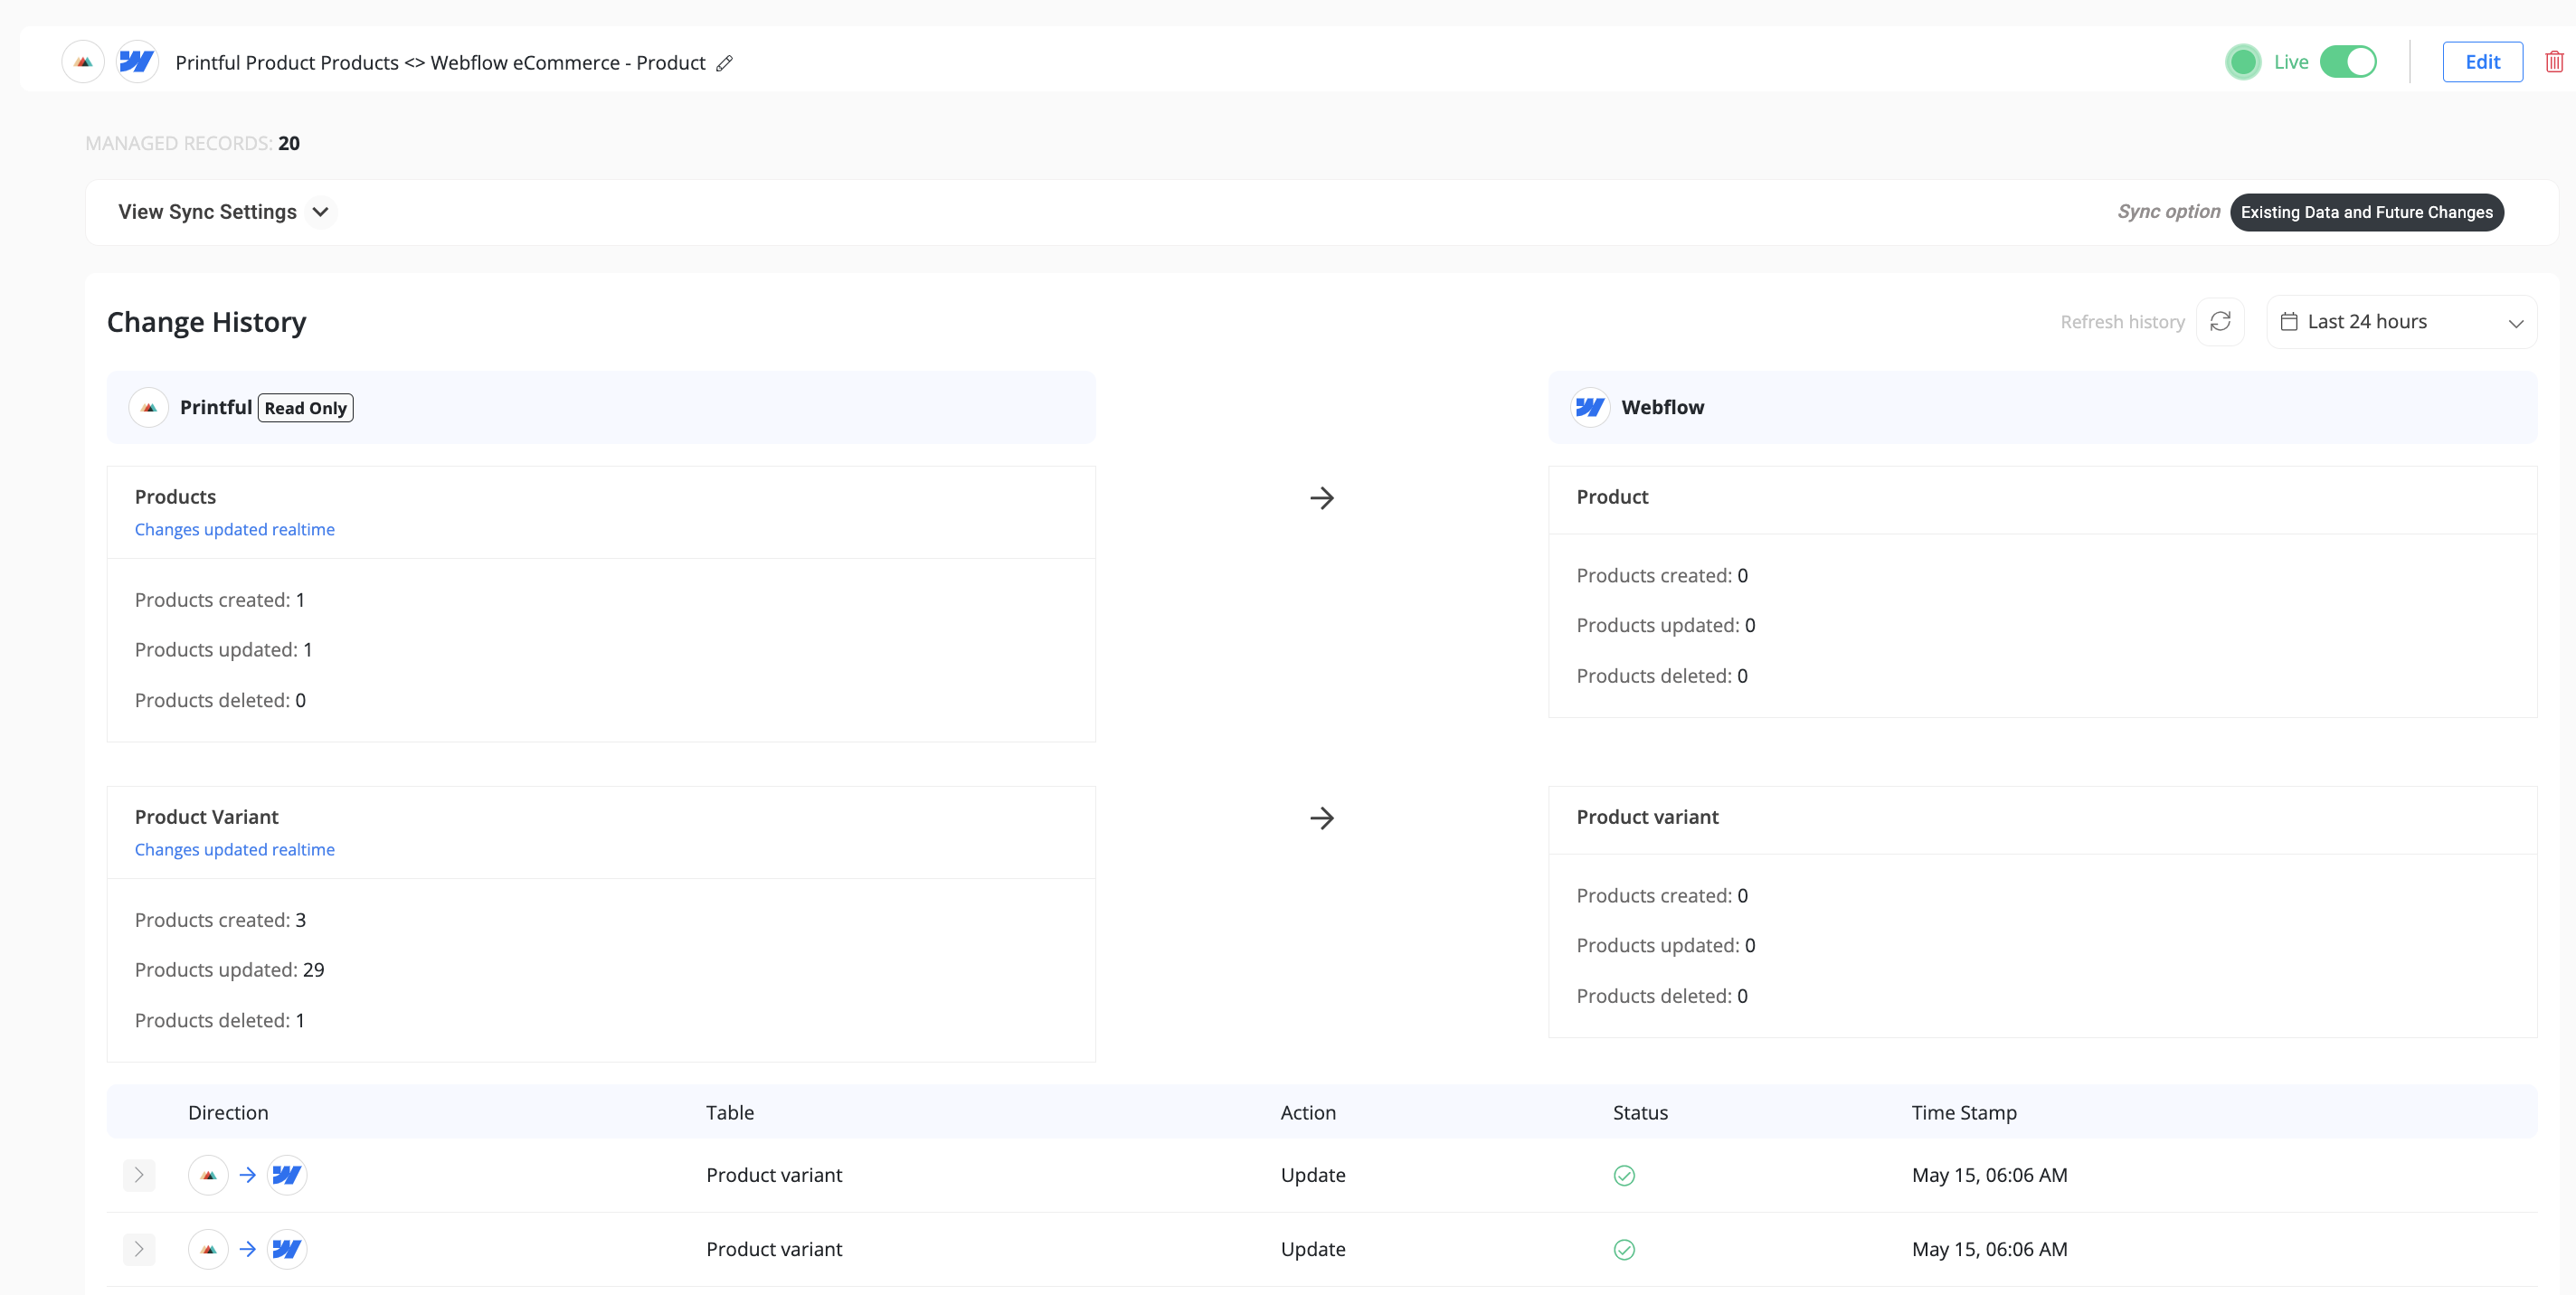
Once the synchronization is complete, a message will appear on the screen saying, Historical data sync completed successfully! and Sync successfully turned live! Changes will actively sync. After a few seconds, you will be automatically redirected to the Change History page.
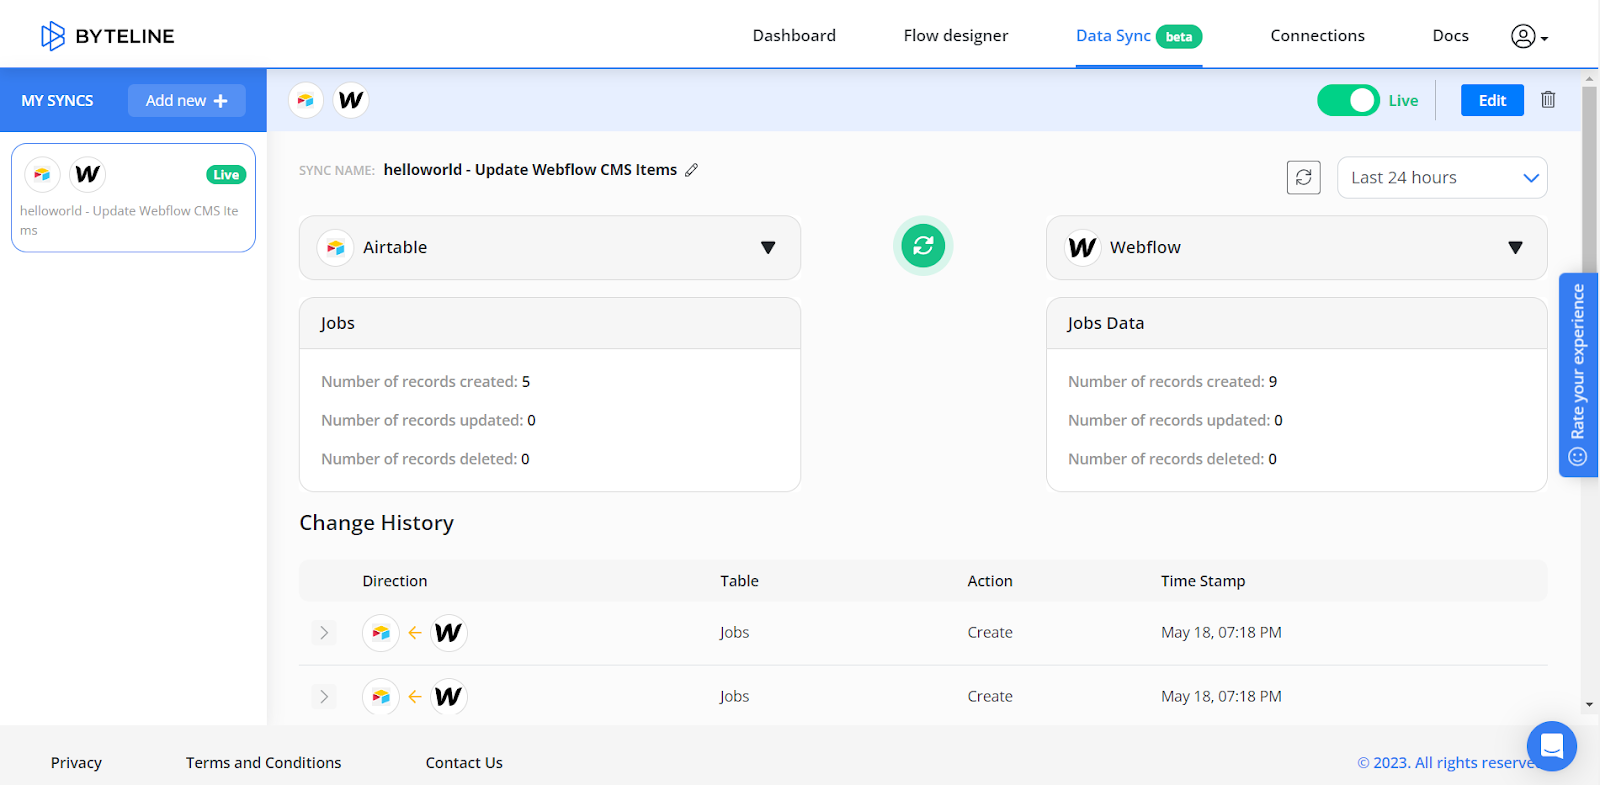
Byteline allows the users to view the record-level history of all the data synchronization made between CMS systems with ease.
On the Change History page, you can view the history of any of the changes made in both Airtable or Webflow. For example, if you make any change in one of the CMS systems, it will be automatically reflected on the other system that you have connected for data synchronization.
In this case, whether you make any changes in Airtable or Webflow, it automatically changes in the other one. You do not need to make changes in both tables manually.
If a source field (such as phone numbers or emails) contains multiple values, and you map it to a single-value field on the destination, Byteline will sync only one value.
– When the source has a “primary” value (e.g., primary phone), the primary is used.
– If no primary is defined, the first value in the list is used.
This ensures predictable results for your syncs.
Byteline handles empty field values differently when creating a new record versus updating an existing record.
When Byteline creates a new record in the destination app, empty source fields are skipped by default. This means Byteline does not send empty values just to clear or overwrite fields in the destination app.
This helps protect default values, required setup, or app-specific behavior in the destination app.
For example, if a source record has a name but its description is empty, Byteline will create the destination record with the name and leave the description field untouched.
Source record:Name: Blue ShirtDescription: emptyDestination record created:Name: Blue ShirtDescription: left unchanged or handled by the destination appAfter a record has already been created or matched, mapped fields stay in sync. If a user later clears a mapped field in the source app, Byteline will also clear the corresponding field in the destination app.
For example:
Before update:Source Description: Lightweight cotton shirtDestination Description: Lightweight cotton shirtUser clears Description in the source app.After sync:Source Description: emptyDestination Description: emptyThis behavior keeps synced records accurate while avoiding unwanted overwrites during record creation.
Important: Byteline only clears a destination field when the source field is clearly emptied. If a field is missing from an app response, unavailable, or not included in the sync, Byteline does not treat that as a cleared value.
When Byteline syncs your data between two apps, it occasionally runs into something it can't complete on its own — for example, a required field is empty, an app rejects a value, or a connection needs to be reauthorized. Instead of burying you in hundreds of individual record errors, Byteline groups these into a small number of clear, actionable Sync Issues.
Think of a Sync Issue as a single, plain-English summary of one problem, along with the list of records it's affecting and, where possible, a one-click button to fix it.
As your sync runs, any record that can't be synced generates an error or a warning. Rather than showing each one separately, Byteline rolls related errors up into a single issue so it's easy to understand and fix.
The grouping is smart — errors are combined by what actually caused them, for example:
Each issue shows:
As the same problem recurs, Byteline keeps adding the newly affected records to the same issue and updates the count — so the issue list stays short and meaningful.
Most issues need you to take action to fix them — but some clear on their own once the underlying cause is resolved, so you won't have to chase down every record manually. Here's when an issue resolves automatically:
Good to know: An affected record is cleared only when that specific record syncs again cleanly. If a record that previously failed doesn't change again, it won't re-sync on its own — so an issue can keep showing older affected records until those records are re-synced or you resolve the issue manually. If you've fixed the root cause and just want the issue gone, you can mark it as Resolved yourself.
Wherever Byteline can fix a problem for you, the issue includes an action button so you don't have to leave the app or edit anything by hand.
A common example is a missing dropdown/select option in your target app. When a value coming from the source app doesn't exist as an option in the target field, you'll see a button like:
Add 'Marketing' option and retry 12 records
Clicking it does both steps for you:
Other issues offer similar helpers depending on the problem — for example, reconnecting an app, adjusting a field mapping, or marking an issue as resolved once you've fixed it elsewhere. You'll only see the buttons that make sense for that particular issue.
Byteline emails you about open issues so you don't have to keep checking the dashboard — but it batches them so you're never spammed:
Each email summarizes the pending issues for your sync, so you can jump straight in and resolve them.
Field mapping tells Byteline which fields contain corresponding information in your connected apps. For example, you can map Email in one app to Email Address in the other, even though their names differ.
For each mapping, you choose which fields to connect and, where supported, which direction future changes should travel.
After selecting the tables or collections to sync, review their field mappings.
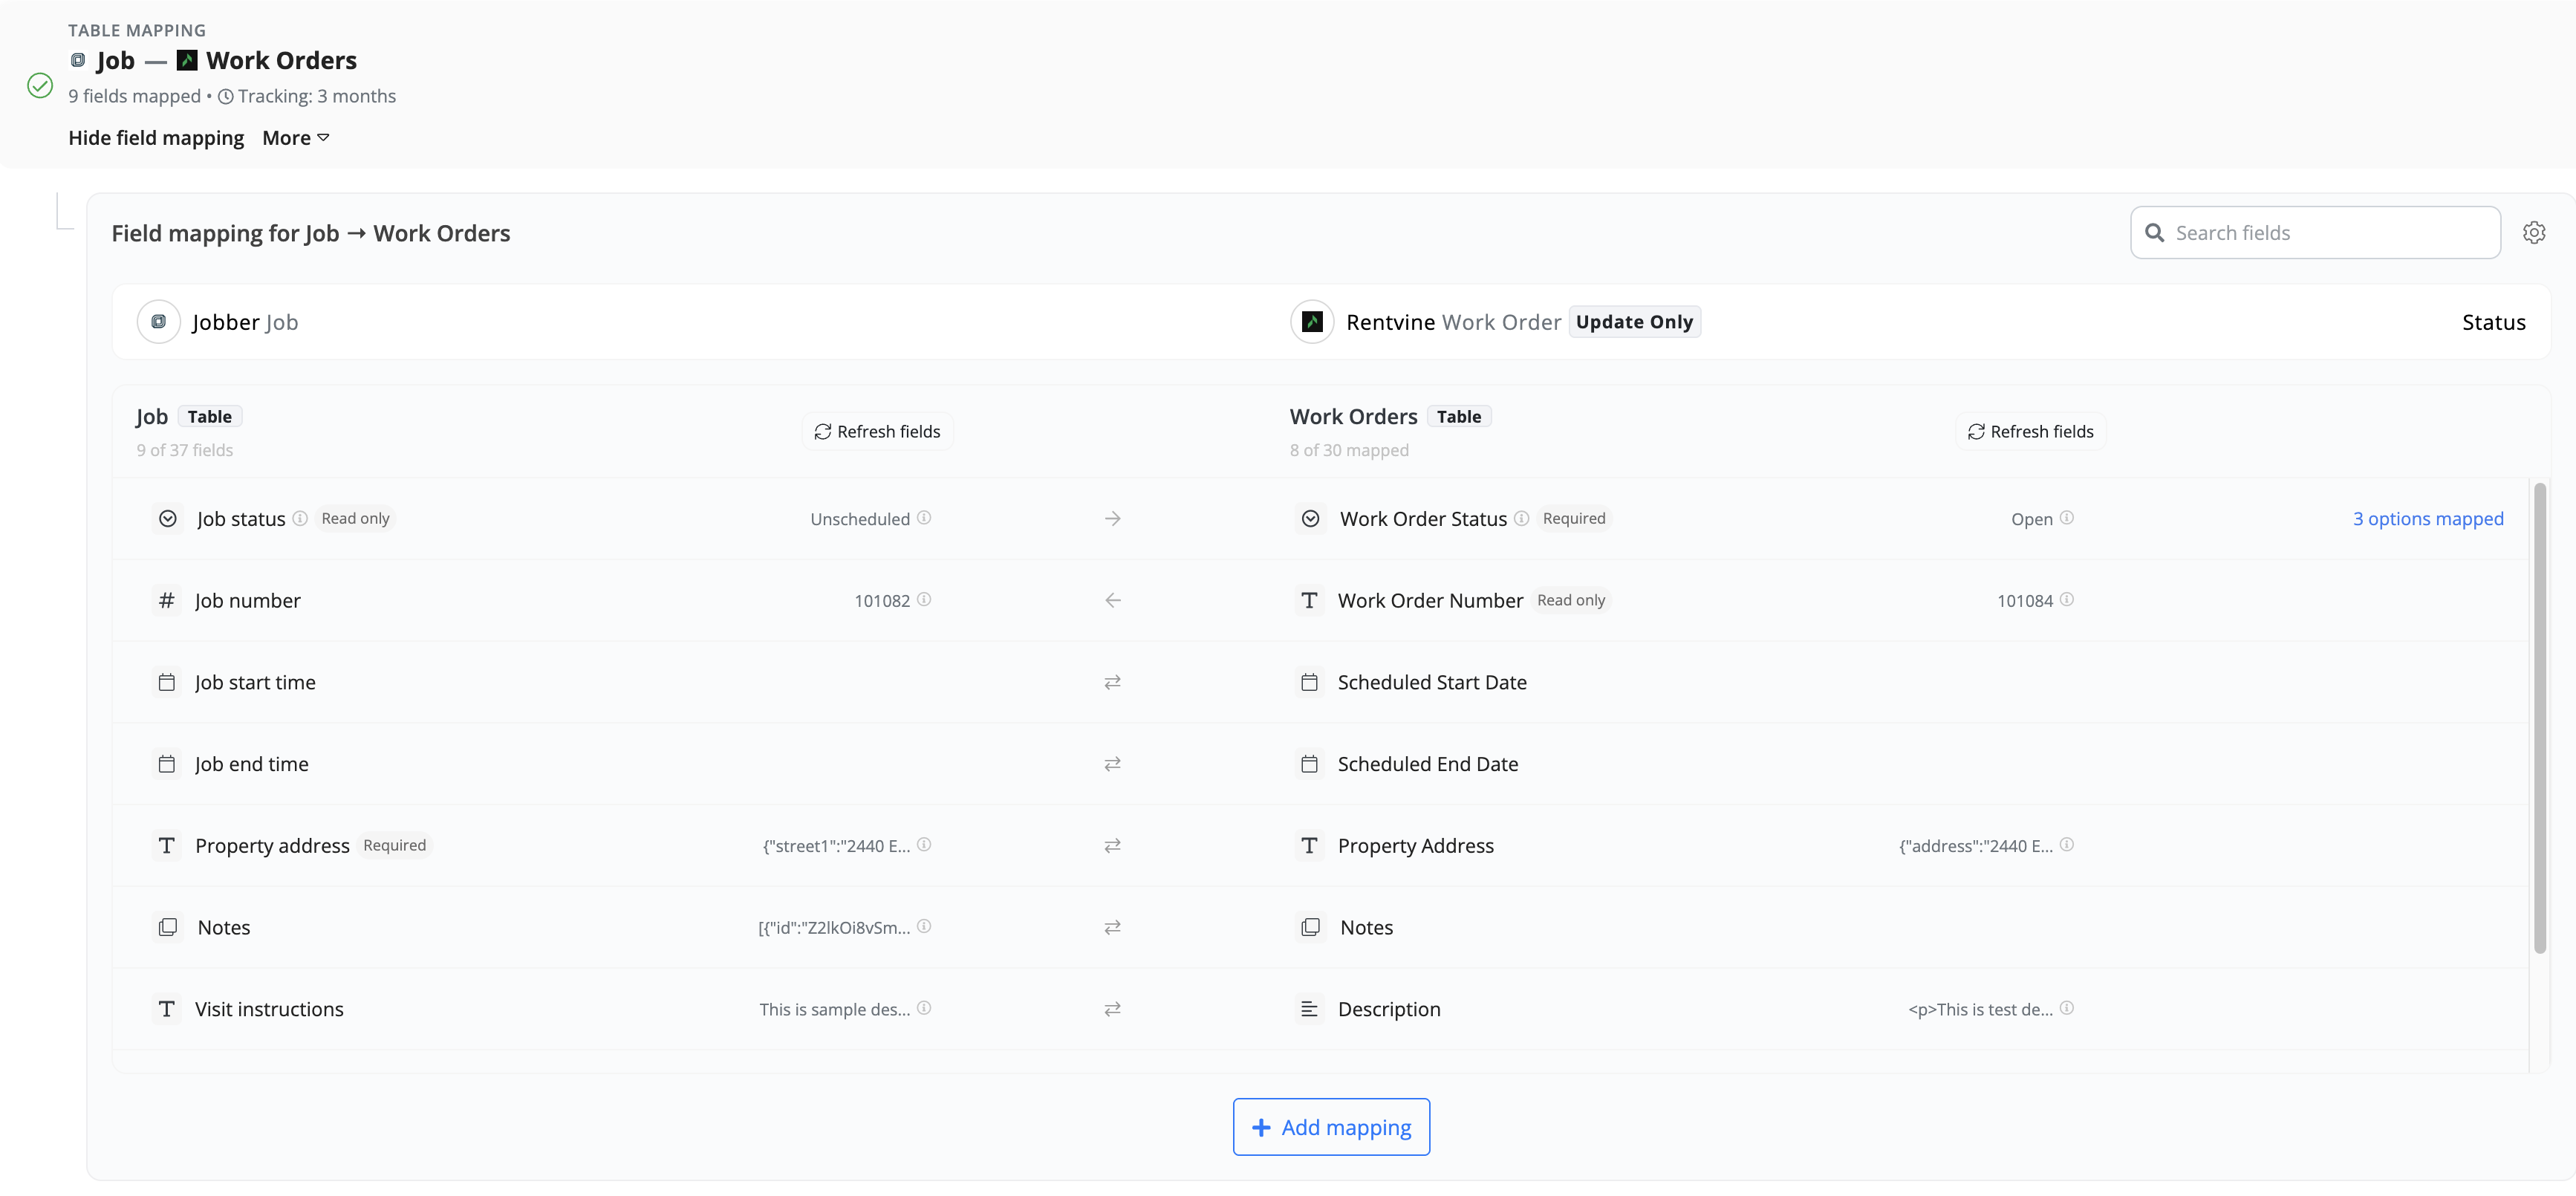
For example:
| Field in the left app | Field in the right app | Information synced |
| Full Name | Name | The person's name |
| Email Address | The person's email address | |
| Company | Company Name | The person's company |
Choose fields that represent the same information and can accept the values being sent. Similar field names do not always mean the fields belong together.
When syncing existing records, mapped destination fields may be overwritten with source values. Review your mappings and the initial sync preview before starting.
Field-level direction controls how future changes move between mapped fields during ongoing sync. Use the direction control on the mapping to select an available direction.
| Direction | What happens during ongoing sync |
| Left → Right | Changes to the left field are sent to the right field. Changes to the right field are not sent back. |
| Left ← Right | Changes to the right field are sent to the left field. Changes to the left field are not sent back. |
| Left ↔ Right | Changes to either field can update the corresponding field in the other app. |

For example, in a two-way sync, you might keep contact details synchronized in both directions while allowing a reporting field to receive updates from only one app.
The available directions depend on the connected apps, fields, and sync configuration.
The initial sync of existing records runs in one direction, selected for the table or collection. Field-level directions configure ongoing updates; choosing a two-way field mapping does not make the initial sync two-way.
Check both the initial sync direction and the field-level directions before starting.
Fields marked Required must be mapped. Make sure the source provides valid values for these fields. A mapping alone does not prevent an error if a required value is empty or rejected by the destination app.
If every record should receive the same value, you can use a fixed value instead of a source field.
Read-only fields, such as record IDs and calculated fields, can supply values but cannot receive updates from the other app.
For example:
Notion ID → Airtable “Notion ID”
Byteline can copy the Notion record ID into a writable Airtable field. Editing that Airtable field does not change the original Notion ID.
When a read-only field is mapped, its direction is restricted so that it acts as the source.
Use a fixed value when a destination field should receive the same value for every synced record. For example, set a Source field to Byteline.

The input depends on the destination field type: text fields accept text, number fields accept numbers, boolean fields accept true or false, and select fields let you choose an allowed option.
Fixed values are one-way. There is no source field in the other app to receive changes back.
You can send one source field to more than one field in the connected app.
For example, you might use the same source Email field to populate both Contact Email and Notification Email in the destination.
These mappings follow three rules:
For example:
| Mapping | Direction |
| Email ↔ Contact Email | Two-way |
| Email → Notification Email | One-way |
Select fields may use different labels for the same choice. For example, one app might use Active, while the other uses Open.
To pair different labels:

Options with matching names do not need an explicit pair.
By default, Byteline automatically creates missing options when the destination app supports it. You can turn off Automatically create missing options under Map options if the destination's option list should stay fixed.
If a missing option cannot be created, its value is skipped and a sync issue is raised. For multi-select fields, each value is handled separately. Previewing a sync does not create options; they are created when the sync writes data.
See Automatically creating select options for details.
Some source fields contain several values, such as multiple phone numbers or email addresses. If you map one of these to a destination field that accepts only one value, Byteline sends:
For example, a contact's primary phone number is used when syncing several source phone numbers into one destination phone field.
Byteline treats empty values differently when creating a record and when updating a record that has already been created or matched.
| Situation | Behavior |
| Creating a record with an empty source field | Byteline skips that empty field by default, allowing the destination app to handle defaults or other field behavior. |
| A user clears a mapped source field on an already-created or matched record | Byteline also clears the corresponding destination field, following the mapping's sync direction. |
| A field is missing from an app response, unavailable, or not included in the sync | Byteline does not interpret this as the user clearing the field. |
For example, if a synced description contains Lightweight cotton shirt and you later clear the source description, Byteline clears the corresponding destination description too.
If your app stores languages in separate fields, map each one to its corresponding destination field. For example, map Title_EN to the English title field and Title_FR to the French title field.
See Multilingual Content Support for details, including considerations for apps with native localization features.
Open the sync from My Syncs, click Edit, and update the field mappings. The running sync continues using its current settings while you edit.
Review the save screen to see how your changes will apply. Saving a mapping change for future activity does not automatically update already-synced records. Where available, choose Update already-synced records to apply the changed mappings to records the sync has already connected.
Some changes require a restart. Follow the action shown on the save screen.
See Editing a Live Sync for the full workflow and available save options.
When you map a single-select or multi-select field, Byteline matches values by option name. Options with the same name sync on their own. If the source has a value the target field does not have, Byteline can add that option to the target field and then write the value.
This is on by default for mappings whose target app can add select options. You can turn it off from Map options on the field mapping.
For a multi-select field, each value is handled on its own. Values that already have an option are written; only the missing ones are created (or reported).
A sync preview does not add options. Options are added only when the sync actually writes.
Use Map options when the two sides use different labels for the same choice — for example, Active → Open.
Options with matching names do not need a row. Add a mapping only when the names differ.
Use this when you do not want Byteline to add options to the target app — for example, a Status field whose list should stay fixed.

The mapping link then reads Options not auto-created. Missing values raise a sync issue instead of adding an option.
Turn the toggle back on to restore automatic creation. The toggle appears only when at least one write-target app for that mapping can add select options.
A sync issue is created when:
From the issue you can add the option and retry, map the value to an existing option, or ignore the records
Once a sync is live, you can change its configuration without stopping it first. Byteline keeps the sync running on its current settings while you edit, then shows you exactly what saving will do before anything changes.
Use this when you need to:
For first-time setup, see Data Sync - Getting Started. For how ongoing updates work after go-live, see Ongoing Sync (Real-Time & Scheduled Updates).
If the sync is running, Byteline creates a draft of your configuration. The live sync continues using its current settings until you save.
While you edit, a banner at the top confirms:
Editing a live sync
This sync will continue running while you make changes. Saved changes will apply after you save.
You can click Resume editing to return to your draft and finish.
When you finish editing a live sync, Byteline shows a save review screen instead of a preview run. A preview is useful when setting up a sync for the first time; for a live sync, what matters is how your changes will be applied.
Byteline analyzes your changes and tells you:
Then you choose how to save.
Depending on what you changed, you'll see one of the following.
1. Save changes (applies to future sync activity)
When: Your change is a field mapping update that does not require restarting the sync.
What it does:
This is the recommended option for most field mapping tweaks when you only care about new activity going forward.
2. Update already-synced records
When: You changed field mappings on a sync that keeps matched records (not “Future data only” or “Historical only”).
What it does:
Use this when you fixed a mapping and want that fix reflected on data that's already synced.
3. Stop and restart sync
When: Your change affects the sync setup in a way that requires listeners or existing data to be rebuilt.
What it does:
You'll see this when changes affect things like:
The save review lists Tables affected and marks each as Restart needed or Re-import needed. Unaffected tables keep syncing until the restart completes.
| Change | Typical result |
| Edit field mapping (same direction) | Save without stopping; optional update of already-synced records |
| Add or remove a field mapping | Save without stopping; optional update of already-synced records |
| Change option/value mapping on a field | Save without stopping; optional update of already-synced records |
| Change sync direction on fields (e.g. one-way → two-way at table level) | Stop and restart sync |
| Change matching keys (manual) | Stop and restart sync; may re-import existing data |
| Change record filters | Stop and restart sync; may re-import existing data |
| Add or remove a table pair | Stop and restart sync |
| Change sync mode | Stop and restart sync |
| Change app object type (e.g. different Webflow collection type) | Stop and restart sync |
If you're unsure, complete your edits and review the save screen — Byteline tells you the required action before you commit.
Changes applied without restart
You'll see a confirmation such as:
Changes saved. Your sync picked them up without stopping.
If you chose Update already-synced records, you'll also see progress while existing records are updated. The sync stays live throughout.
Changes that need a restart
If your change requires a restart, the sync keeps running on the old configuration until you stop and start it. You'll see:
Your changes are saved and take effect on the next start. The sync keeps running on its current settings until then. Please stop and start the sync to apply them.
Click Stop & Restart Sync to apply the saved changes.
If the sync is already stopped when you save, you'll see:
Your changes are saved and take effect when you start this sync.
Start the sync when you're ready.
On the save review screen, click Discard changes to throw away your draft and return to the live configuration. The running sync is unaffected.
If the sync is not live, Edit opens the same wizard, but there is no “editing live” banner and you'll get a normal preview on the last step (when applicable) rather than save review.
Ongoing Sync keeps your connected apps continuously up to date after the sync goes live. Once enabled, Byteline listens for changes in your source app and automatically applies those changes to the destination app based on your configured sync direction and field mappings.
Byteline supports ongoing sync through both real-time webhooks and scheduled polling. Depending on the app, changes may sync instantly or within up to 15 minutes. The exact timing depends on how the source app exposes changes.
Ongoing sync applies only to new, updated, or deleted records going forward. It does not reconcile existing data or re-evaluate matching keys—that process is handled separately by Historical Sync. Once ongoing sync is active, Byteline tracks changes using the established record links created during setup or historical sync.
Byteline detects changes in connected apps using one of two methods: webhooks or scheduled polling. The method used depends on what the source app supports and requires no configuration from you.
For apps that support webhooks, changes are sent to Byteline as soon as they happen. This allows updates—such as new records or field changes—to sync in near real time, often within seconds.
For apps that do not support webhooks, Byteline uses scheduled polling to check for changes at regular intervals. In these cases, updates may take up to 15 minutes to sync. Polling runs automatically in the background and ensures changes are eventually captured even when instant notifications are not available.
Regardless of the detection method, all changes go through the same validation, mapping, and delivery process before being applied to the destination app.
During ongoing sync, Byteline monitors the source app for record changes and syncs them to the destination app based on your configured sync direction and field mappings.
The following types of changes are synced:
Record creation
When a new record is created in the source app, Byteline creates a corresponding record in the destination app and populates it using your configured field mappings.
Record updates
When an existing record is updated in the source app, Byteline syncs the changes to the corresponding record in the destination app. Only mapped fields and fields with an active sync direction are updated.
Record deletion
When a record is deleted in the source app, the corresponding record is also deleted in the destination app. This ensures both apps remain consistent and prevents orphaned or outdated records from persisting in the destination.
All changes are applied using the existing record linkage established during setup or historical sync. Byteline does not attempt to re-match records during ongoing sync.
In ongoing sync, Byteline does not use a single one-way or two-way setting at the sync level. Instead, sync direction is defined at the field level, and ongoing sync behavior is computed based on those field-level rules.
For each mapped field, you choose the direction in which changes are allowed to flow between apps. When a record changes, Byteline evaluates the modified fields and syncs only the changes that match the configured direction for each field.
Fields not included in the field mapping are ignored during ongoing sync. Changes to unmapped fields do not trigger updates and are not synced to the other app.
This field-level approach allows different apps to remain the system of record for different parts of the same record, while preventing unintended updates to fields you have not explicitly mapped.
Ongoing sync in Byteline operates strictly based on field mappings. Only fields that are explicitly mapped between the source and destination apps are considered during sync.
For each mapped field, the configured direction determines whether a change is eligible to be synced. If a change occurs in a field that does not allow syncing in that direction, the change is detected but intentionally ignored.
Fields that are not included in the field mapping are excluded entirely from ongoing sync. Changes to these fields do not trigger updates and are never applied to the other app.
Some fields in destination apps are read-only or system-managed, meaning they cannot be written to through the destination app’s API. For such fields, Byteline only allows the field to be mapped in the direction from the read-only app to the other app. Changes to read-only fields are still detected in the source app, and they can be synced outward to the other app—but Byteline will not attempt to write to that read-only field.
This field-level control ensures that only the intended data flows between apps, prevents accidental overwrites, and allows each app to remain authoritative for specific fields.
If a change cannot be synced during ongoing sync, Byteline records the failure and surfaces a detailed error message explaining why the change was not applied. Common reasons include API validation errors, permission issues, rate limits, or destination app constraints.
Failed changes do not stop the overall sync. Byteline continues processing subsequent changes while tracking failures independently.
All failed changes are visible in the sync activity or change history, where you can review the exact error returned by the destination app. Once the underlying issue is resolved, you can resync failed records to retry syncing those changes without rerunning historical sync or affecting successfully synced records.
Resyncing reprocesses only the failed changes using the latest field mappings and sync rules, ensuring a safe and targeted recovery.
When a change fails during ongoing sync, Byteline marks the affected record as failed and provides a detailed error explaining what went wrong. You can review the failure reason, resolution tips, and technical details directly from the failed record view.
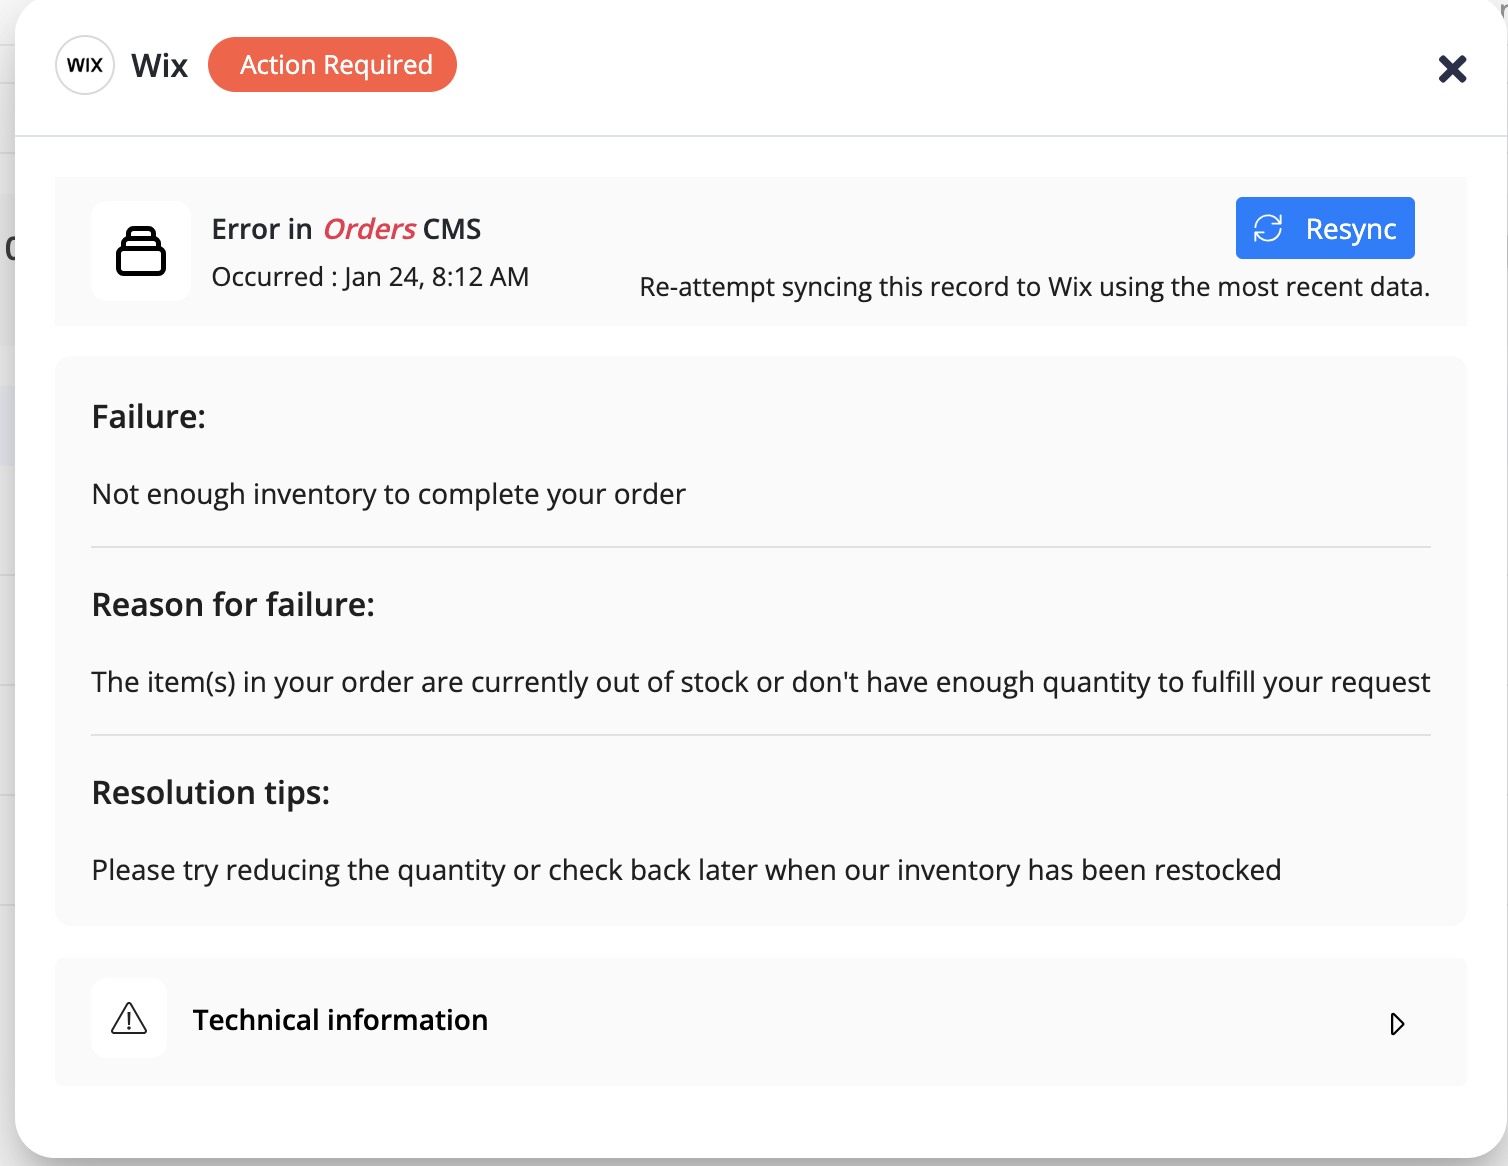
Once the underlying issue is resolved—such as fixing validation errors, adjusting inventory, updating permissions, or correcting field values—you can use the Resync button to retry syncing the record.
Clicking Resync re-attempts syncing the record using the most recent data and the current field mappings and sync rules. Only the failed record is retried; other records are not affected.
Resyncing does not rerun historical sync and does not re-evaluate matching keys. It is a targeted recovery mechanism designed to safely retry a single failed change without disrupting the rest of the ongoing sync.
Before enabling ongoing sync, ensure your field mappings and sync directions are configured correctly. Since ongoing sync relies on these rules to determine how changes flow between apps, careful setup helps prevent unintended updates later.
If you make schema changes, update permissions, or modify field mappings, it’s recommended to review recent sync activity and address any failed records promptly. Use the Resync option to retry failed records once issues are resolved, rather than rerunning historical sync.
Remember that ongoing sync applies only to future changes. If you need to reconcile existing data or establish record relationships, use Historical Sync before relying on ongoing sync.
By combining historical sync for initial alignment and ongoing sync for continuous updates, Byteline ensures your connected apps remain consistent, reliable, and up to date over time.
When you create a new Sync in Byteline, the first step is to choose the two apps you want to connect. Based on the selected apps, Byteline automatically shows you a set of pre-built Sync templates that are designed to get you up and running quickly. If no template is available for the selected app pair, Byteline will take you directly into the Sync configuration so you can build it from scratch.
Sync templates save time by providing a fully pre-configured setup specific to the apps you are integrating. Instead of manually configuring every mapping, field, and workflow step, templates let you start with a complete blueprint—so you only provide the few details that are unique to your environment.
Once you select your two apps, Byteline displays the templates available for that particular app combination. For example, when you select Webflow and Printful, you’ll see the following templates:
Templates save you significant setup time by providing a ready-made configuration tailored to the selected apps. Each template includes:
With templates, you skip the detailed configuration work. Just provide the few inputs specific to your setup, and Byteline handles everything else.
Choose this option if:
This option gives you the highest flexibility but requires more setup effort.
Byteline Data Sync efficiently synchronizes existing data in both apps so that you can keep valuable data. This process is called historical sync. The process involves getting existing data from both apps and then updating, creating and deleting records to make the data in sync.
For 2-Way sync, records can be updated on both apps. However, for 1-Way sync, records are updated only on the target app.
When you're syncing data between two different apps using Byteline's Data Sync, you want to make sure that the information is matched up correctly. This is where matching keys come into play. Don't worry if you're not a tech expert—this guide will break it down for you in simple terms.
Think of matching keys as special identifiers for your data. Imagine you have two lists—one from App A and one from App B—and each list contains names and email addresses. A matching key could be something like an email address because it’s a piece of information that is unique to each person on your list. No two people should have the same email address, right? So, this unique piece of information helps Byteline figure out who’s who when syncing the data between your two apps.
Matching keys might sound technical, but they’re really just a simple way to make sure your data stays accurate when syncing between apps. By using matching keys, Byteline ensures that your information is always matched up correctly, saving you time and hassle.
When you’re syncing data, you might have records in both App A and App B that need to be matched up. If you don’t use matching keys, Byteline won’t know how to correctly pair the records from one app to another. Matching keys ensure that the information for "John Doe" in App A matches up with the information for "John Doe" in App B, even if the two apps store the data slightly differently.
Matching keys are only considered for the historical sync, i.e., to sync existing data. Once a sync is active, matching keys are not checked.
To manually select matching keys for real-time sync:


The historical sync is automatically performed when a sync is started. The only exception is if you choose the "Future data only" option, in which case historical sync is skipped. Once a sync is live, our ongoing sync process will keep your data in sync.
If you're planning to change the structure of your tables and want to perform historical sync afterward. You should follow the below steps:
Historical sync is a one-way process, allowing you to sync data either from left to right or right to left. If the target app contains more records than the source, these extra records are considered unmatched. You can choose to either leave these records unchanged or delete them.
If your sync includes multiple tables, you can configure this setting individually for each table.
If at least one unmatched record is detected, an option to manage these records appears. To delete the unmatched records:
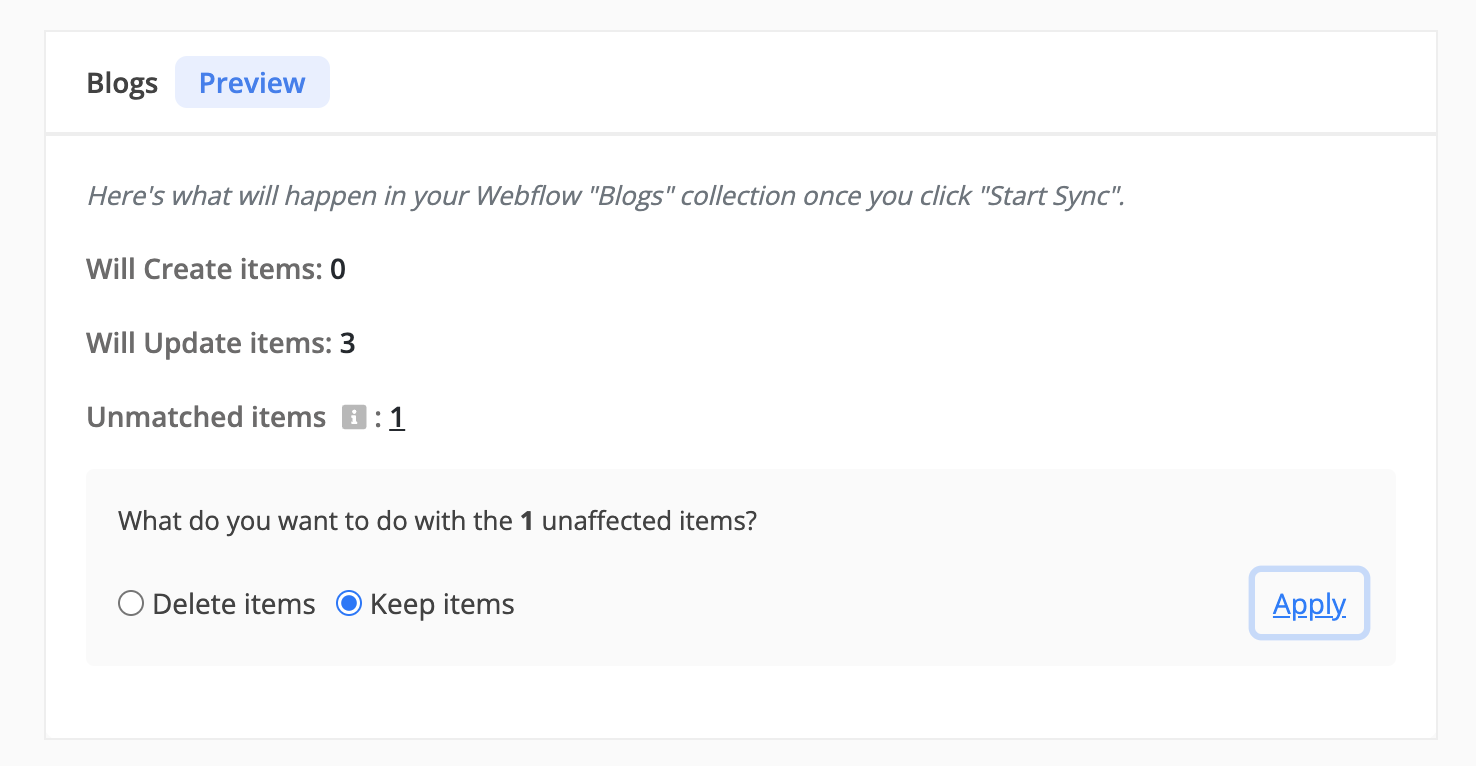
When the historical sync runs, it will automatically remove the unmatched records from the target app.
Note: You can click on the unmatched record count to view details of the records before making a decision
Historical sync copies your existing records from one app into the other, in a single direction that you choose. We'll use a common example throughout: a sync that copies records from Airtable into Notion. In this case Airtable is the source (the app being copied from) and Notion is the destination (the app being copied into). The same behavior applies to any pair of apps — for example, HubSpot and Google Sheets.
While this one-time catch-up is running, here's what happens to any new changes people make.
You don't have to stop working. If someone adds or edits a record in Airtable after the historical sync has started, Byteline still picks up that change and syncs it to Notion.
And if you happen to edit the same record that the historical sync is also working through, your most recent change wins. Byteline recognizes that your live edit is newer than the data the historical sync started with, keeps your latest version, and won't create a duplicate.
If you have a two-way sync between Airtable and Notion, changes normally flow in both directions. But while the historical sync from Airtable → Notion is running, Byteline temporarily ignores changes made in Notion (the Notion → Airtable direction is paused).
This is intentional. During the initial catch-up, Byteline is writing a large number of records into Notion. Pausing the Notion → Airtable direction keeps those sync-generated writes from bouncing back and causing conflicts, loops, or duplicate records. Two-way syncing turns back on automatically as soon as the historical sync finishes — you don't need to do anything.
Tip: Because edits made in Notion won't sync back to Airtable until the historical sync completes, it's best to hold off on important changes in Notion (the destination) while the initial sync is running. Make your edits in Airtable, or wait until the sync finishes.
You don't need to keep your browser open or wait around — the sync runs on Byteline's servers. While it's working:
When the sync reaches 100%, the catch-up is complete: real-time syncing (including Notion → Airtable for two-way syncs) is fully active, and your sync history reflects everything that was processed.
Historical sync is designed to reconcile and align existing data between your connected apps. It establishes record relationships, applies matching rules, and ensures both sides start from a consistent state.
If your sync is configured in Existing Data and Future Changes mode, Byteline automatically transitions from historical sync to ongoing sync once the historical sync completes successfully. No additional action is required.
During ongoing sync, Byteline uses the record relationships established during historical sync to keep your apps up to date with new creates, updates, and deletes. Matching keys are not re-evaluated once the sync is live. You can learn more about how ongoing updates work in the Ongoing Sync (Real-Time & Scheduled Updates) documentation.
If your sync is configured in Existing Data Only mode, the sync stops after historical sync completes and no ongoing updates are applied.
Using historical sync for initial alignment and ongoing sync for continuous updates ensures your connected apps remain consistent over time without repeatedly reprocessing existing data.
You have completed the historical sync but subsequently discovered a discrepancy in the record counts between the tables of the two apps. This situation often arises when incorrect unique key(s) are selected. Occasionally, a field designated as a unique key may not be truly unique. To ensure accuracy, you can verify the validity of the unique key(s) by counting the distinct values across all rows. The resulting count should match the total number of rows.
Please note that you have the option to select multiple fields as unique. In such cases, Byteline considers the values of both fields as criteria for matching records (using an AND condition).
This comprehensive document will walk you through the step-by-step configuration process for Airtable data sync and address specific use cases tailored to Airtable.
Please refer to Data Sync - Getting Started for the standard data sync functionality. The getting started document covers usages of data sync features valid for all integrations.
Follow these steps to configure your Airtable sync. After completing the setup, Byteline will generate a preview of the changes that will be made when the sync starts.
Select Airtable as one of the apps in your sync.
You can choose Airtable as either the first or second app, depending on the direction in which you want your data to move.
After selecting both apps, click Set up sync.

Choose how you want to configure the sync:
Templates can make setup faster when one matches your requirements. In this guide, we will select Start from scratch.

Some apps contain multiple types of data, such as contacts, products, orders, or collection items. When prompted, select the type of data you want to sync.
You do not need to select a data type for Airtable. You will choose the Airtable base and tables later during setup.

Select which records Byteline should include:

A sync preview is generated when your configuration includes existing data. If you select future changes only, you can start the sync without reviewing an initial data preview.
Select whether to sync existing records, future changes, or both.
Select the direction in which data should move between the two apps.

Depending on the apps and data types selected, you may be able to choose:
The initial sync of existing records can only run in one direction. Therefore, when you select a two-way sync, you must also choose which app should be the source for the initial data sync.
For example, you can initially copy existing records from Airtable to Webflow and then keep future changes synchronized in both directions.
Next, connect the accounts that Byteline will use for the sync.

If Airtable is not already connected, click Connect Airtable. You will be taken to Airtable’s authorization screen, where you can approve the bases and workspaces that Byteline is allowed to access.

After the connection is complete

In this step, you will choose which tables should be synced and how their fields should be matched.

Review the table mapping
Byteline automatically suggests table mappings based on table names and the data available in each app.
Review the suggested mapping before continuing. To change the selected table or its settings, click More, and then select Edit table settings.
Review the field mapping

After a table is selected, Byteline automatically suggests mappings between fields that appear to contain similar information.
The field mapping is initially shown in a collapsed view. Click Show field matching to review the complete mapping.
From the detailed field-mapping view, you can:
Make sure important fields are mapped correctly before continuing. During the initial sync, mapped destination fields may be overwritten with values from the source app.
After reviewing the table and field mappings, click Continue.
Byteline will analyze the records in both apps and generate a preview showing how many records will be created, updated, or deleted.
No records are changed while the preview is being generated or reviewed. Changes begin only after you review the preview and start the sync.
When your sync includes existing data, Byteline shows a preview before the sync starts. The preview explains what will happen to your current records and how future changes will be handled.
Nothing is changed while you are reviewing the preview. Changes begin only after you select Start sync now.
A preview is not shown when you choose to sync future changes only, because no existing records will be added, updated, or deleted. In that case, you can start the sync directly.

This section shows the changes Byteline will make during the initial sync of your existing data.
For each table or collection, you will see the number of records that will be:
Expand a table or collection to review more information about the affected records. Pay particular attention to updates and deletes before starting the sync.
The summary also shows:
This section explains what will happen after the initial sync finishes and the sync becomes live.
Depending on the direction and settings you selected, Byteline can automatically:
For a two-way sync, changes may move in either direction. For a one-way sync, changes move only from the source app to the destination app.
The Sync settings section provides a summary of your configuration, including:
Select Review full settings to see additional details. Select Edit settings when you need to change the sync configuration before starting.
After changing the settings, return to the preview and make sure the results are still what you expect.
The preview is based on the records and settings available when it was generated. The results may change when:
Select Refresh preview to recalculate the creates, updates, and deletes using the latest data.
Once you have reviewed the preview and confirmed that the changes look correct, select Start sync now.
You can monitor sync progress, view logs, or make changes anytime from the Syncs page. If you need to pause or edit the sync, simply open it from your dashboard.
✅ That’s it! Your Airtable sync is now live.
You can sync data that is specific to an Airtable view, which is used to filter and organize your data. When you configure an Airtable data sync, Byteline requires a view to be specified. By selecting a specific view, only the relevant data contained within it will be synced. This applies to both historical syncing, for existing data, and ongoing synchronization.
You can configure a view during the sync creation as shown in the below screenshot.

When your Airtable sync is configured using a filtered view, most filters work perfectly because Airtable sends a webhook whenever a record is created, updated, or deleted — and Byteline Sync reacts immediately.
However, if your view includes conditions that can change without the record itself being modified, Airtable does not fire a webhook for those transitions. Examples include:
What happens in this case?
If a record stops matching the view due to one of these non-record-change conditions:
Recommended Workarounds
You can use either of the following approaches to avoid this limitation.
Option 1: Use Byteline Sync Filters
Instead of using a filtered Airtable view to control which records are included in the sync, you can select an unfiltered Airtable view and configure the filtering conditions directly in Byteline.
For example, instead of creating an Airtable view that only includes records where:
you can configure the same conditions using Byteline Sync Filters.
This keeps the rules that determine which records participate in the sync directly within your Byteline sync configuration and avoids relying on Airtable view membership changes.
Recommended: If your Airtable view is mainly being used to control which records should be synced, consider using Byteline Sync Filters instead.
Option 2: Use a Helper Field in Airtable
If you prefer to continue using a filtered Airtable view:
Because the helper field is actually updated on the record, Airtable generates a change event that Byteline can detect and sync.
Airtable select and multi-select fields can receive missing options automatically. See Automatically creating select options.
You need to have Airtable Creator access to create a Byteline data sync.
This comprehensive document will walk you through the step-by-step configuration process for Greenhouse data sync and address specific use cases tailored to Greenhouse.
Please refer to Data Sync - Getting Started for the standard data sync functionality. The getting started document covers usages of data sync features valid for all integrations.
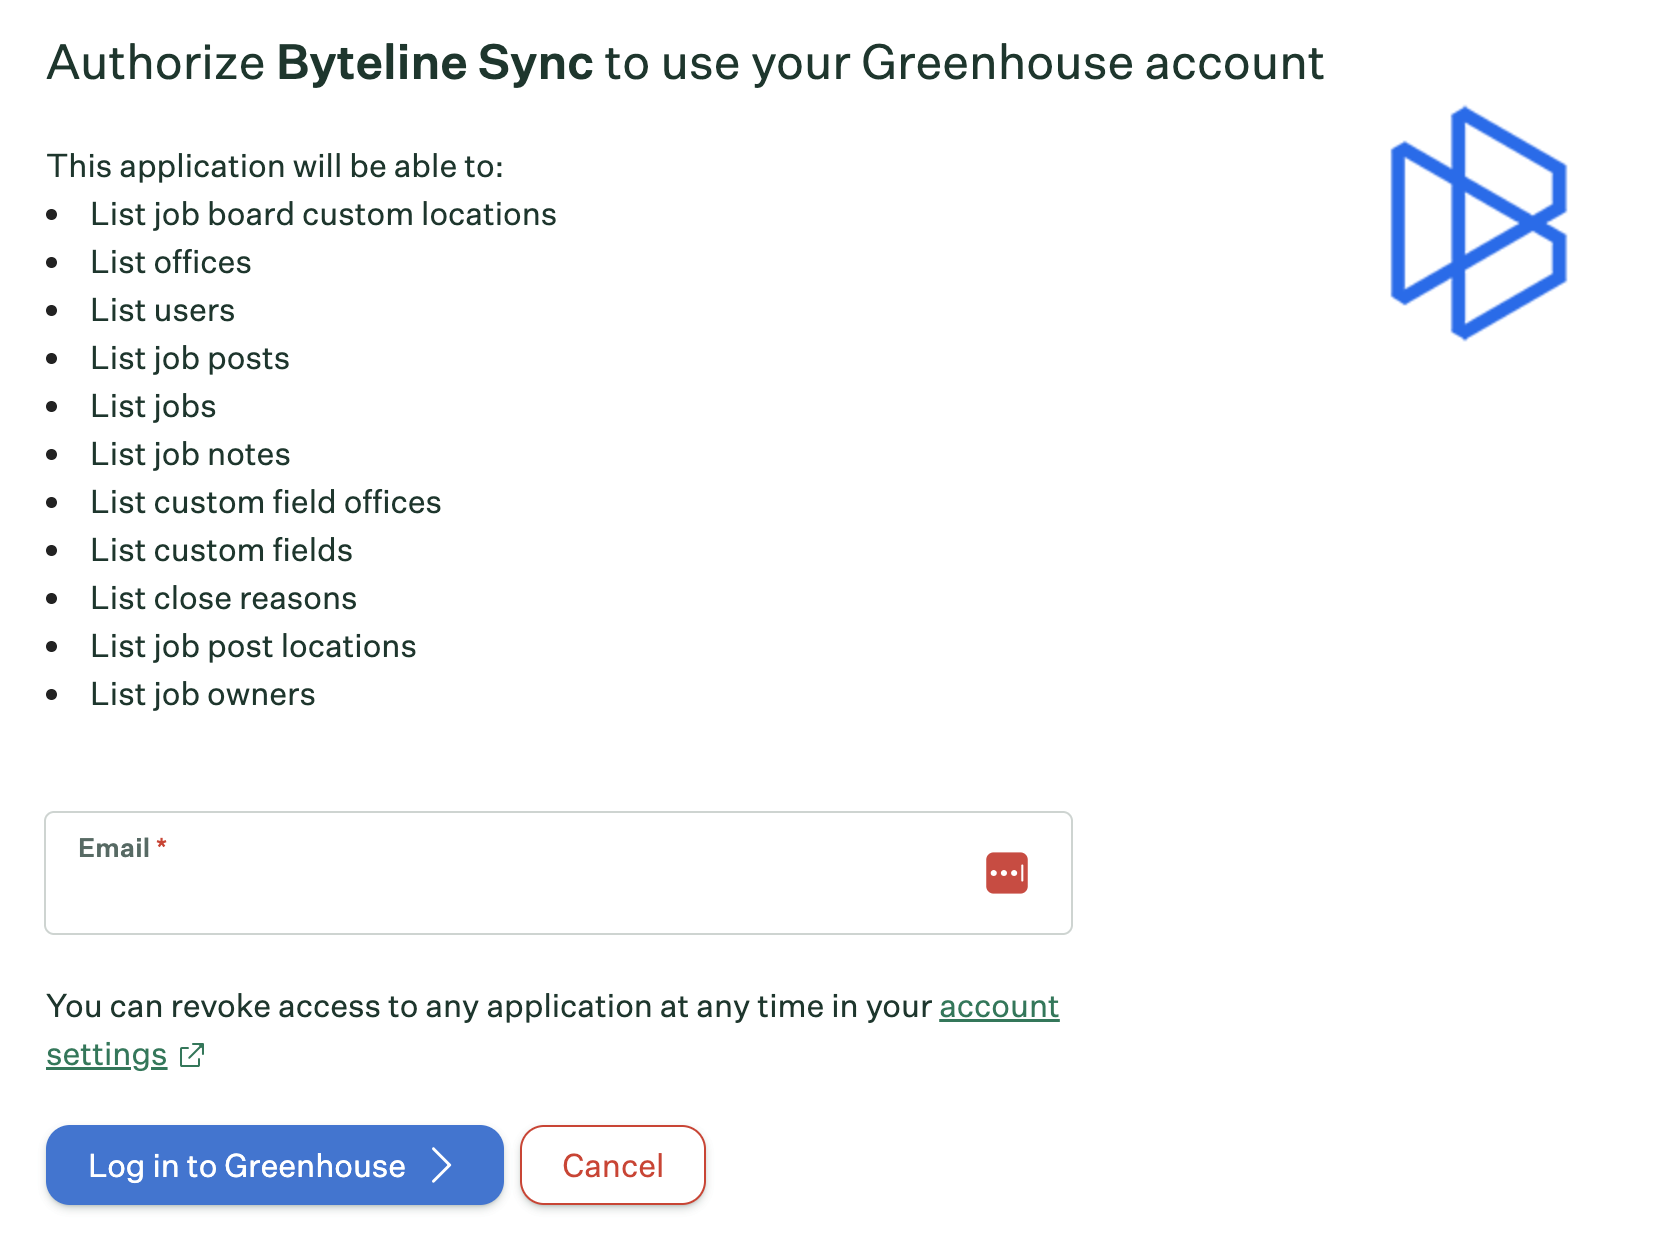
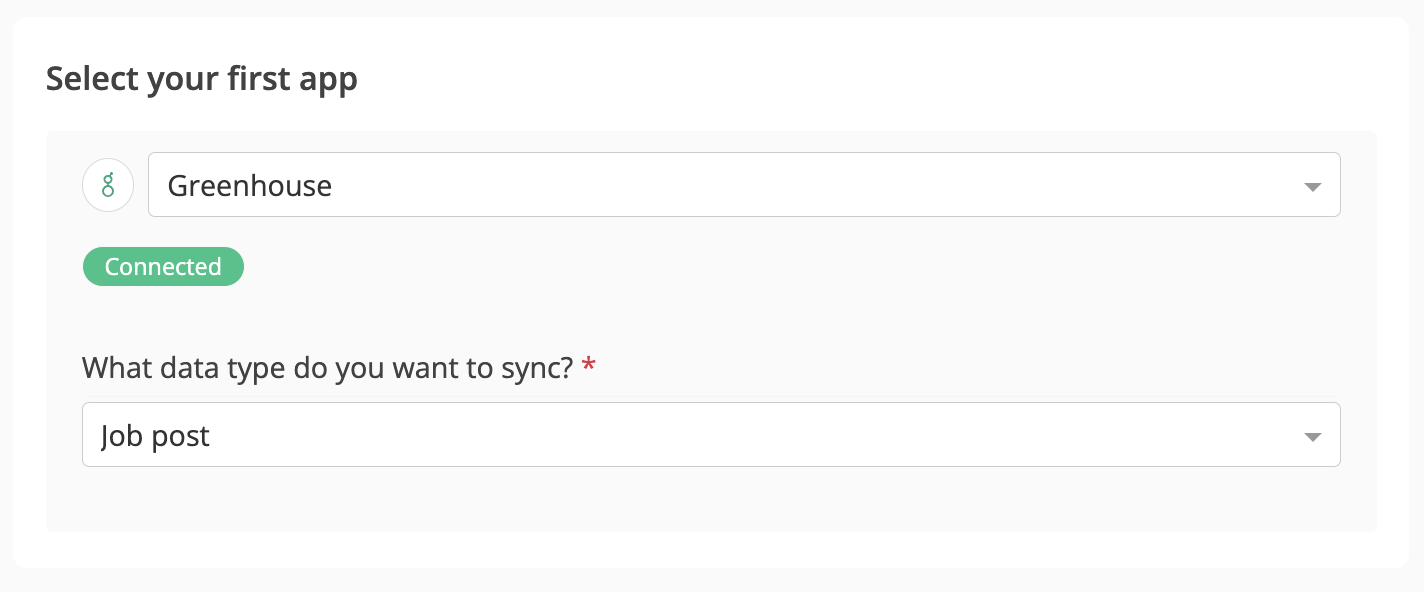
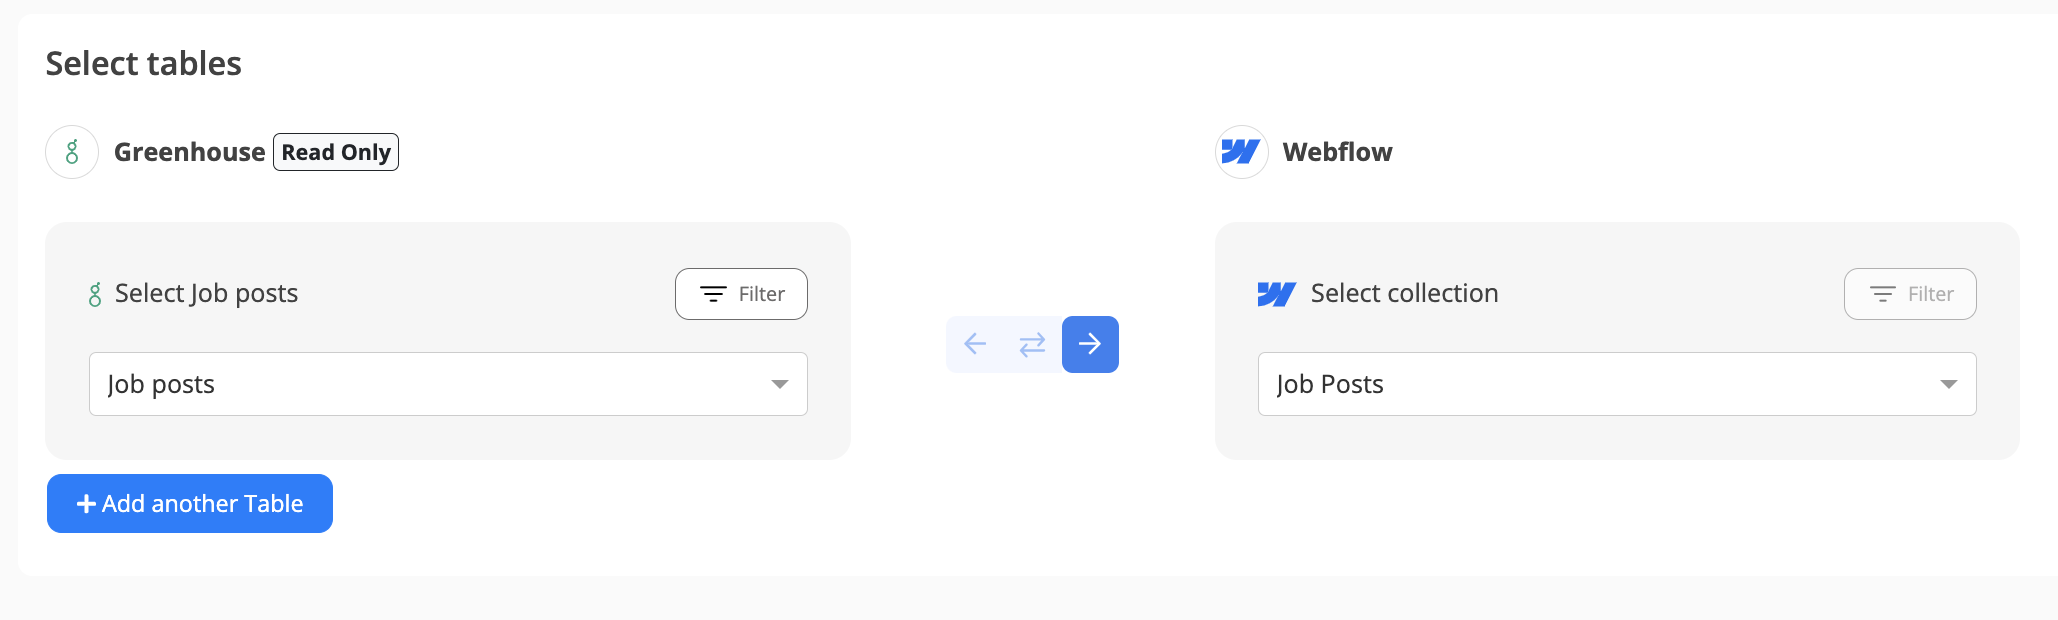
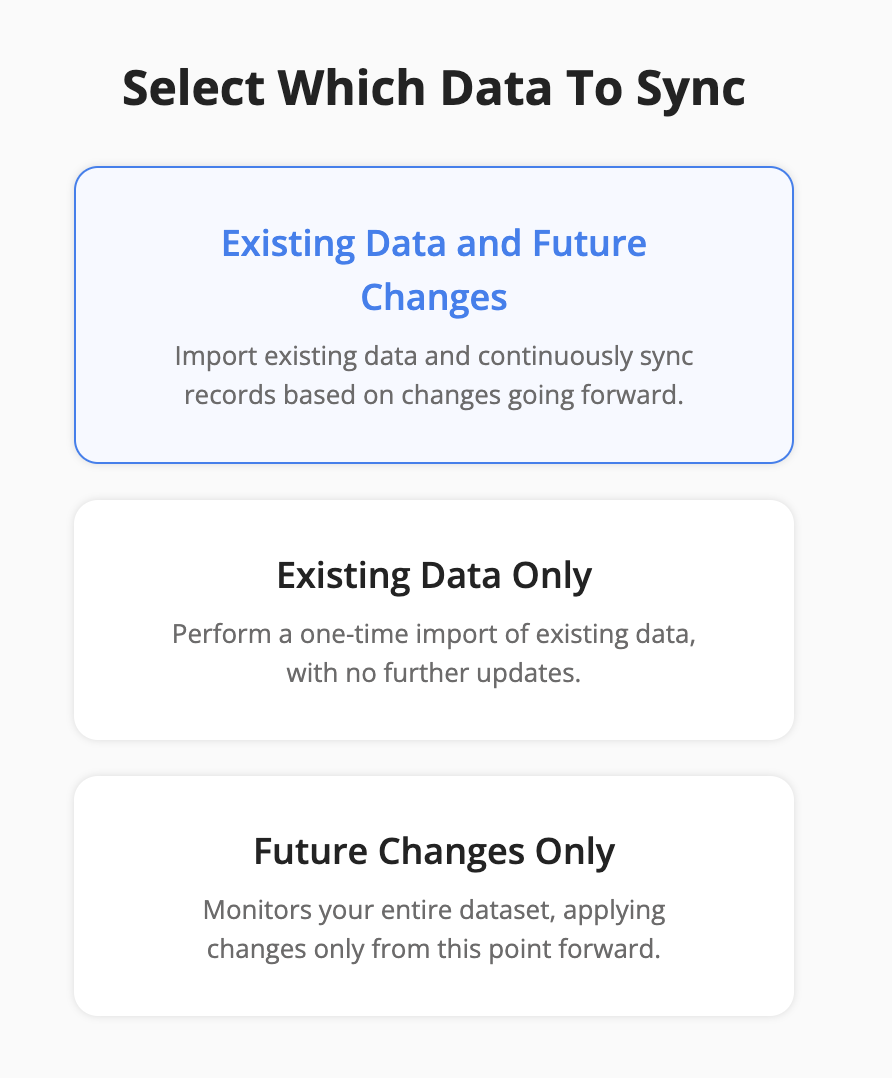
For each sync, you'll need to select whether to sync existing records, future changes, or both.
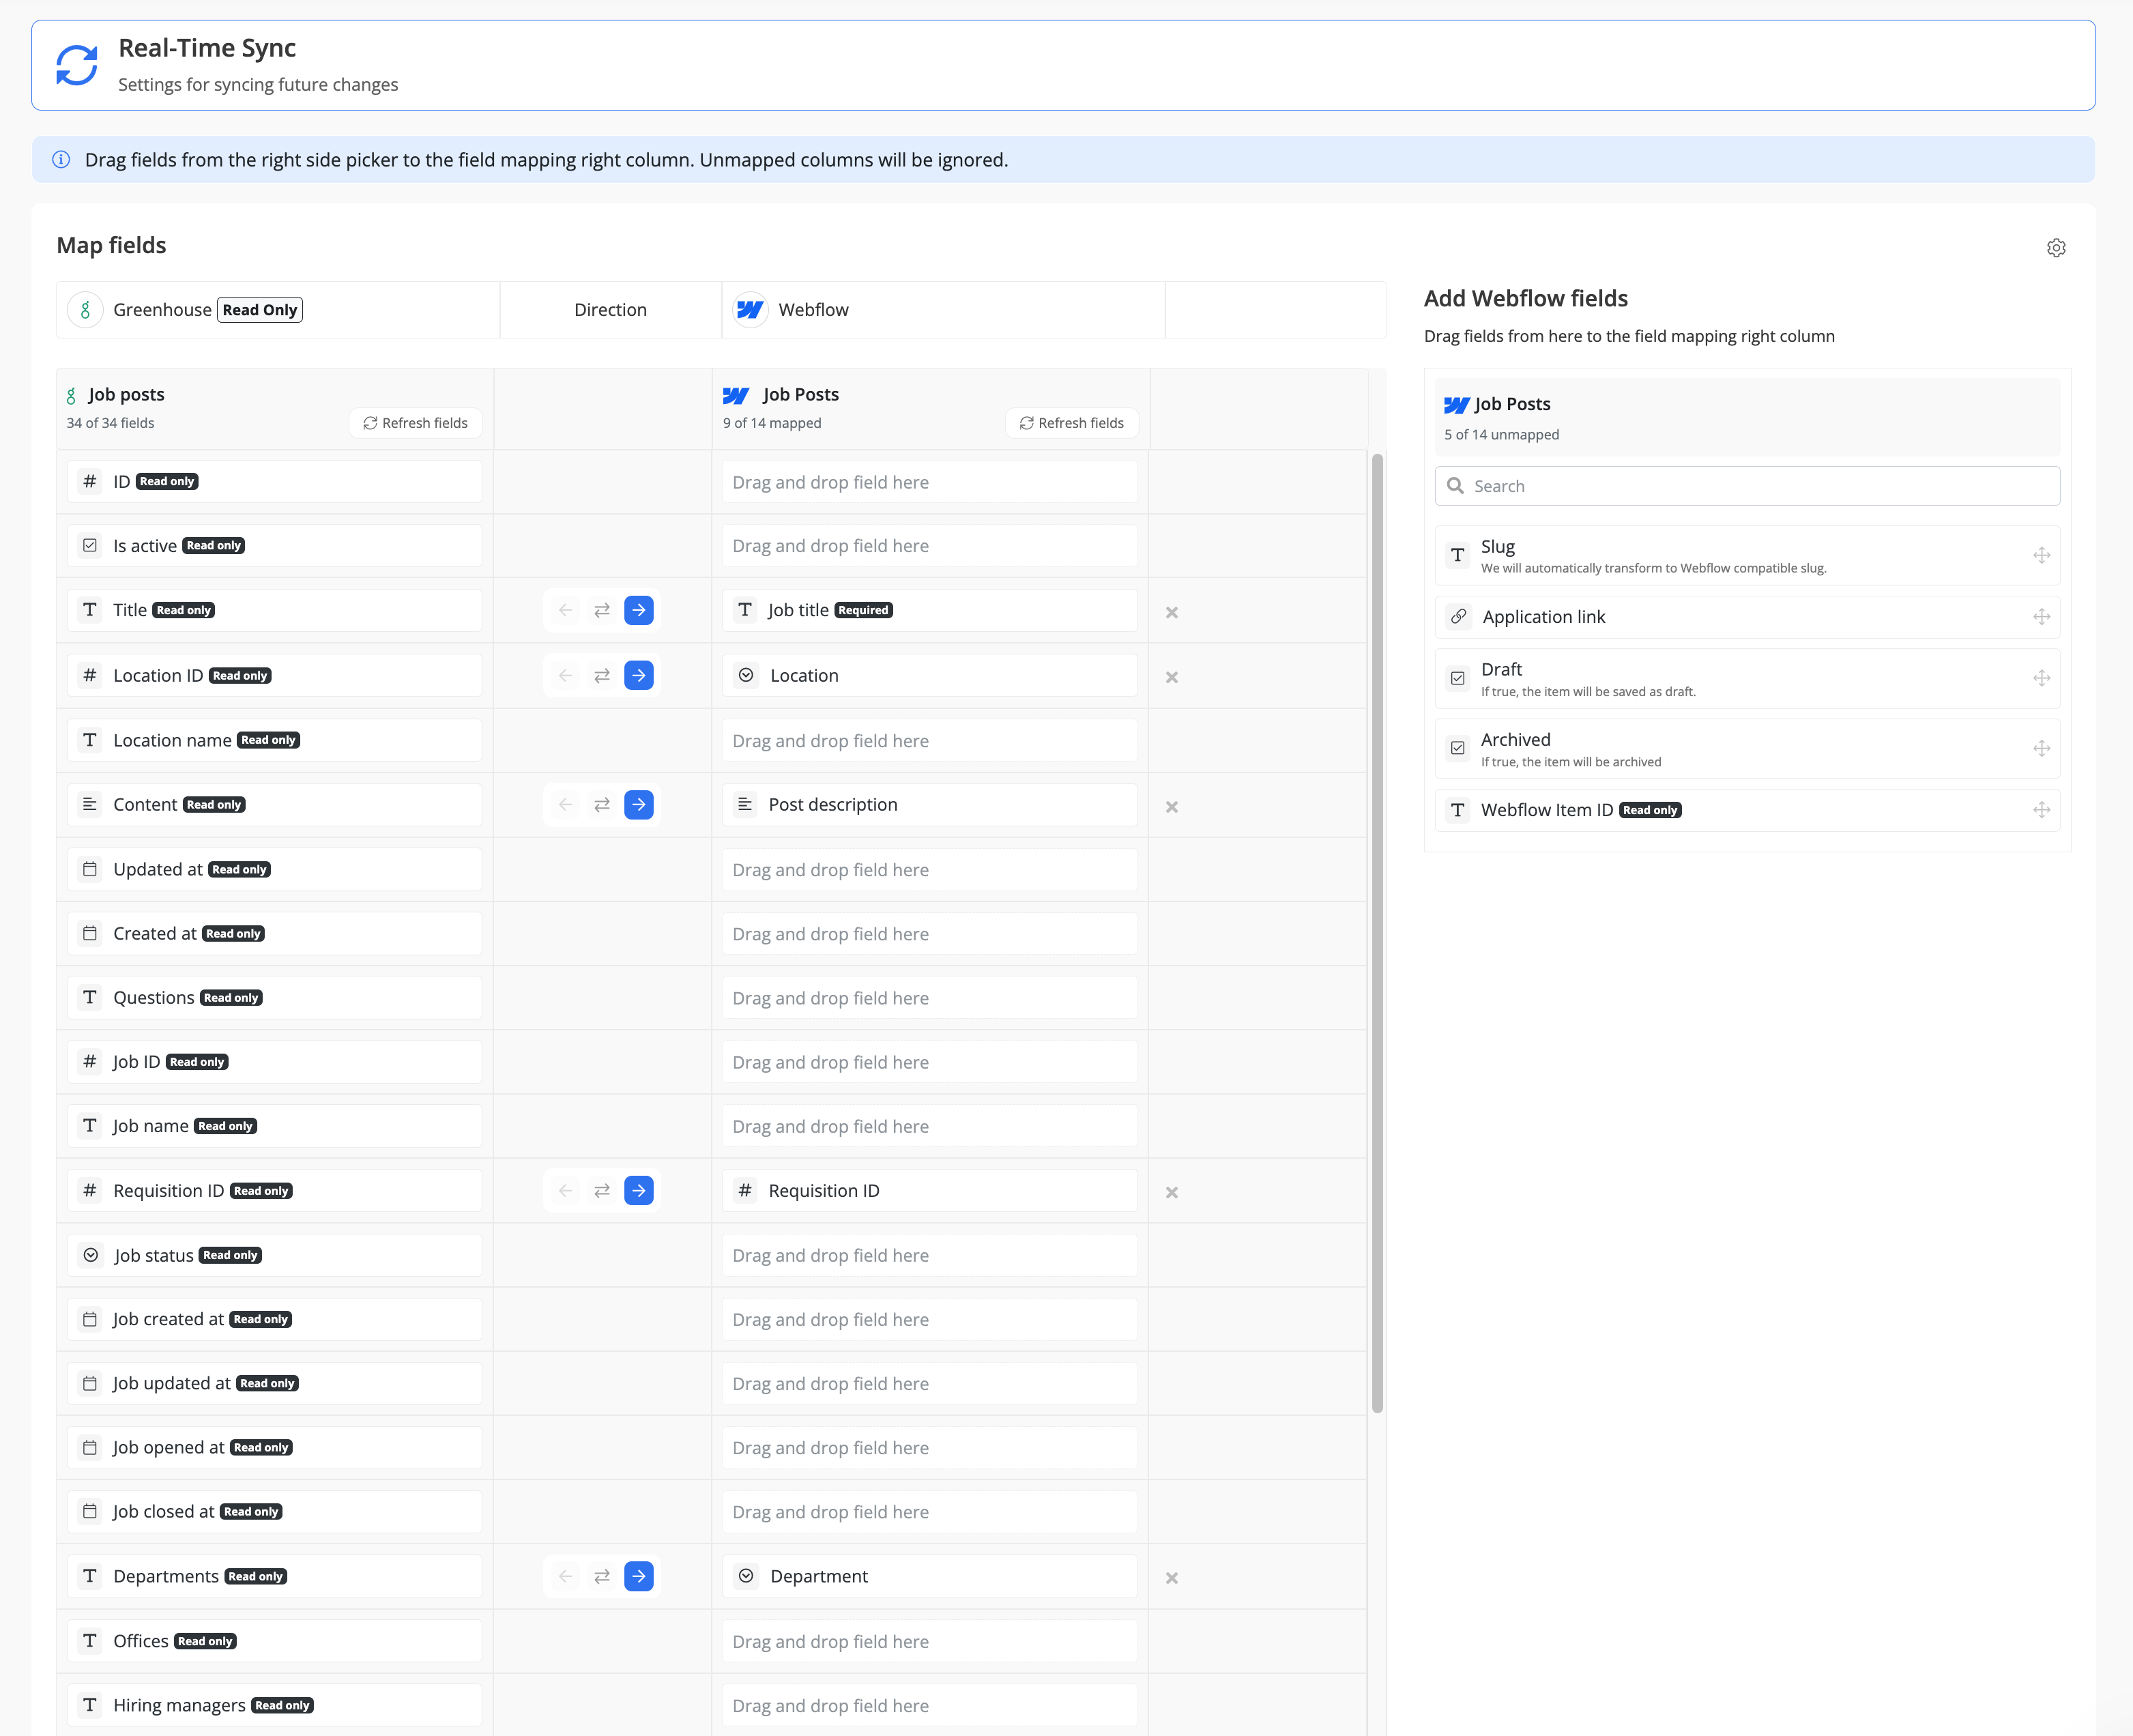
Select the sync direction for your existing data.


You can monitor sync progress, view logs, or make changes anytime from the Syncs page. If you need to pause or edit the sync, simply open it from your dashboard.
✅ That’s it! Your Greenhouse sync is now live.
You can easily generate a Greenhouse job application link using the Job Post ID field available in your sync configuration. This link directs candidates straight to the job posting and application form.

The standard format is:
https://boards.greenhouse.io/<your_company_board>/jobs/<job_post_id>✅ Example: If your company's greenhouse board is acme_company and the job post Id is 4900012345, the application link will be:
https://boards.greenhouse.io/acme_company/jobs/4900012345This link can be shared directly with applicants or embedded on your careers page.
To generate job application links, you’ll need your company’s Greenhouse job board URL (also called the board name). You can find it directly in your Greenhouse settings:

A Greenhouse job post can still sync even if the Greenhouse user connected to Byteline does not have permission to view the underlying job.
The Location and Offices fields come from the job itself, not directly from the job post. If the connected Greenhouse user does not have access to the job, Greenhouse may return the job post while leaving Location and Offices empty.
To resolve this:
After updating the permissions, run the sync again.
No additional permission is required for the job post itself.
Byteline lets you automatically sync Jobber clients, jobs, and invoices with Google Sheets and other supported apps.
You can import existing Jobber records, keep future changes synchronized, or configure a two-way sync so updates made in either app are reflected in the other. No coding or complex workflow automation is required.
This guide explains how to install Byteline Sync in Jobber and configure your first Jobber data sync.
Byteline supports the following Jobber data types:
Clients
Sync customer information from Jobber, including contact details and related client information.
Jobs
Sync Jobber jobs and work orders, including details such as assigned team members, timing, status, title, and customer information.
Invoices
Sync Jobber invoices, including invoice details, totals, payment status, line items, and related customer information.
Invoice Line Items
Sync individual line items from Jobber invoices, including descriptions, quantities, unit prices, and amounts. Each line item is synced as a separate record, making it easy to analyze invoice details, track services sold, and create detailed revenue reports in Google Sheets or other supported apps.
Visits
Scheduled visits and appointment details, including both recurring and non-recurring visits.
Requests
Requests in Jobber represent inquiries from potential or existing customers for services. They capture details such as customer information, requested services, and scheduling preferences, helping businesses track new opportunities before converting them into jobs.
You will need:
For information about features available across all Byteline integrations—including field mappings, filters, sync directions, previews, and issue resolution—see Data Sync - Getting Started
Before configuring your sync, install the Byteline Sync app from the Jobber App Marketplace.


Choose the types of Jobber data you want to sync to Google Sheets. You can select one or more of the following:
Each selected data type creates a separate sync and a dedicated tab in your Google Sheets spreadsheet.
Once you've made your selections, click Continue to proceed with the setup.

After selecting the Jobber data you want to sync, you'll need to connect your Google account.

Note: No data will be synced at this stage. You'll have a chance to review your selections before starting the sync.
Review the Jobber data types you've selected to sync with Google Sheets.
You can optionally change the Spreadsheet name or keep the default name, "Jobber data."
Click Start syncing to begin. Byteline will create a new Google Sheets spreadsheet with a separate tab for each selected data type and automatically keep your data up to date.

After clicking Start syncing, you'll be taken to the Data Sync page, where you can monitor the progress of each sync.

Byteline starts syncing your selected Jobber data types one at a time.
As each sync becomes Live, the next queued sync starts automatically. No further action is needed.
Your Jobber Syncs Are Live

Once the initial data transfer is complete, all your syncs will show a green Live status.
This means your Jobber data has been transferred to Google Sheets, and Byteline will automatically keep it updated as changes occur in Jobber.
You can open your Google Sheets spreadsheet to view your data, with a separate tab for each selected data type.

You're all set! No further action is required.
By default, Byteline creates your Jobber → Google Sheets syncs using recommended settings, so you can get started without additional configuration.
If you need more control, you can customize each sync individually.
For example, you can:
To make changes, go to the Data Sync page, select the individual sync you want to customize, and edit its settings.

Each sync can be configured independently, allowing you to customize Jobs, Clients, Invoices, Requests, and Visits separately.
After the sync becomes live, open its details page to review:

Use the Issues section to review records that could not be synchronized and follow the displayed resolution instructions.
Can I sync Jobber with Google Sheets?
Yes. Byteline can sync supported data with Google Sheets. You can import existing records, synchronize future changes, and configure one-way or two-way behavior where supported.
Can I export existing Jobber records?
Yes. Select Existing Data Only for a one-time export, or Existing Data and Future Changes to import existing records and keep them updated afterward.
Does the Jobber sync run automatically?
Yes. Byteline automatically checks for supported changes and synchronizes them according to your settings.
Can Google Sheets update Jobber?
Yes, when you configure a direction from Google Sheets to Jobber or choose a two-way sync. Only writable Jobber fields can be updated. Read-only fields are shown during field mapping.
Will connecting Jobber immediately change my data?
No. Connecting your account only authorizes access. Byteline does not begin modifying records until you review the preview and start the sync.
Can I change the mapped Jobber fields?
Yes. During setup, expand the field mapping to add, remove, or change fields. You can also edit the sync settings later. Changes to a live sync apply according to the options shown when editing.
Why can’t I update a particular Jobber field?
Some Jobber fields are read-only or cannot be changed through the Jobber API. Byteline identifies read-only fields in the mapping screen and prevents unsupported updates.
Use the Chat option in the bottom-right corner of the Byteline console for assistance with choosing the right Jobber data type, configuring field mappings, reviewing the sync preview, or resolving sync issues.
This comprehensive document will walk you through the step-by-step configuration process for Notion data sync and address specific use cases tailored to Notion.
Please refer to Data Sync - Getting Started for the standard data sync functionality. The getting started document covers usages of data sync features valid for all integrations.
1. Click on the 'Add New' button
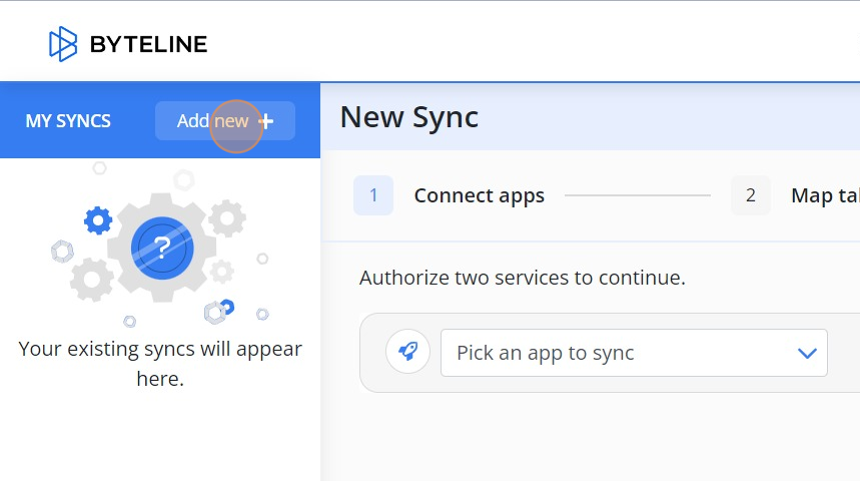
2. Pick the 'Notion' from dropdown.
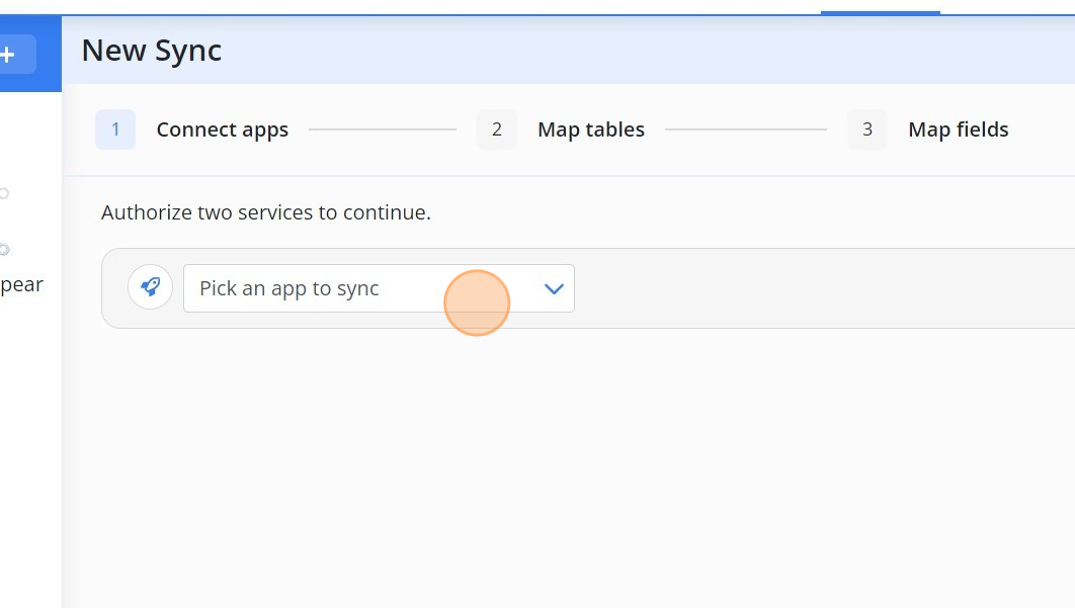
3. Pick the app that you want to sync with Notion.
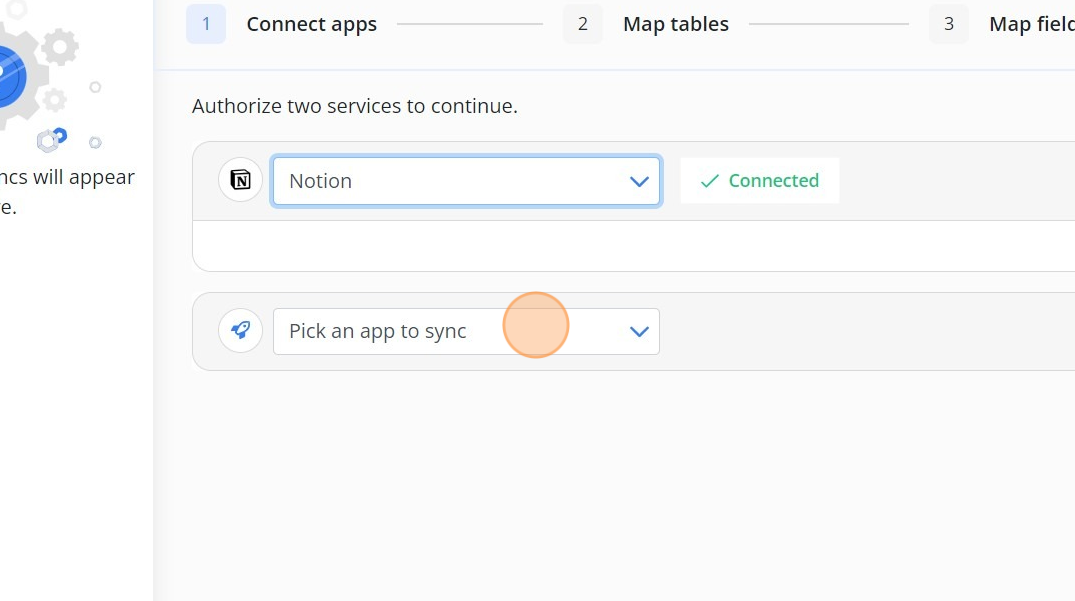
4. Select the 'Airtable base' from dropdown.
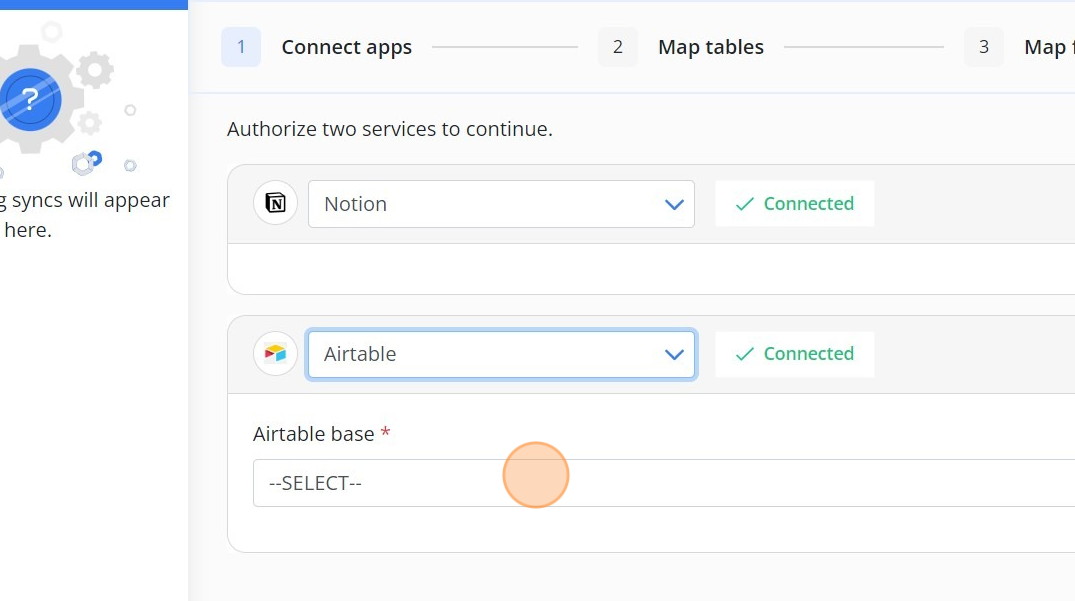
5. Click on 'Next' button
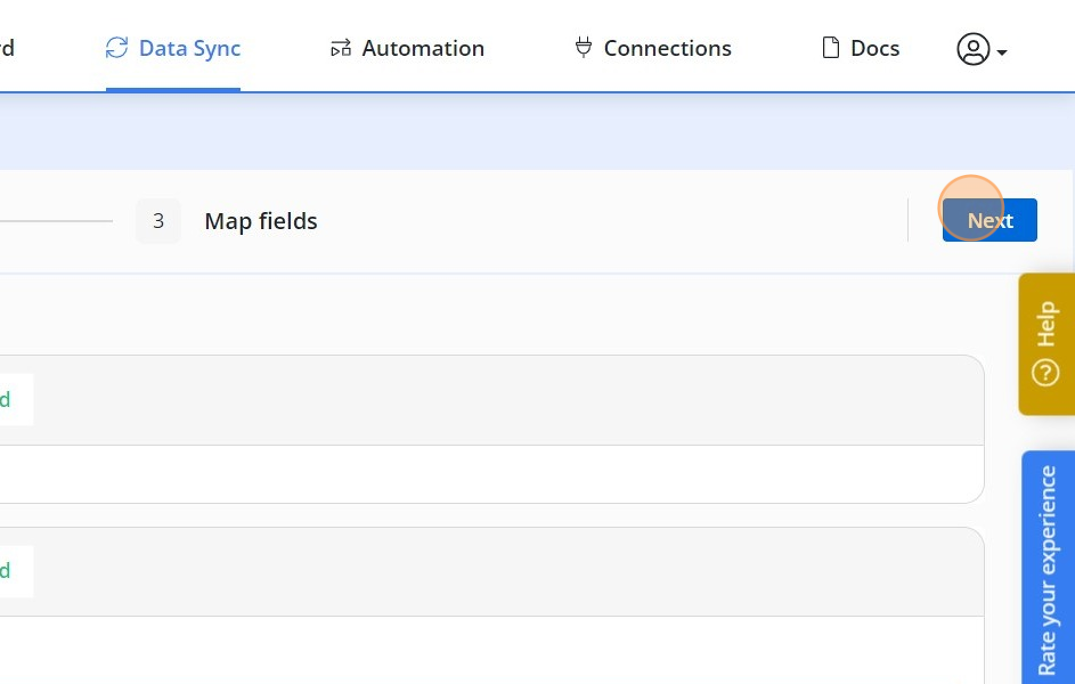
6. Delete any tables that you don't want to sync. If the table you want to sync is not displayed, add it using "Add table" button.
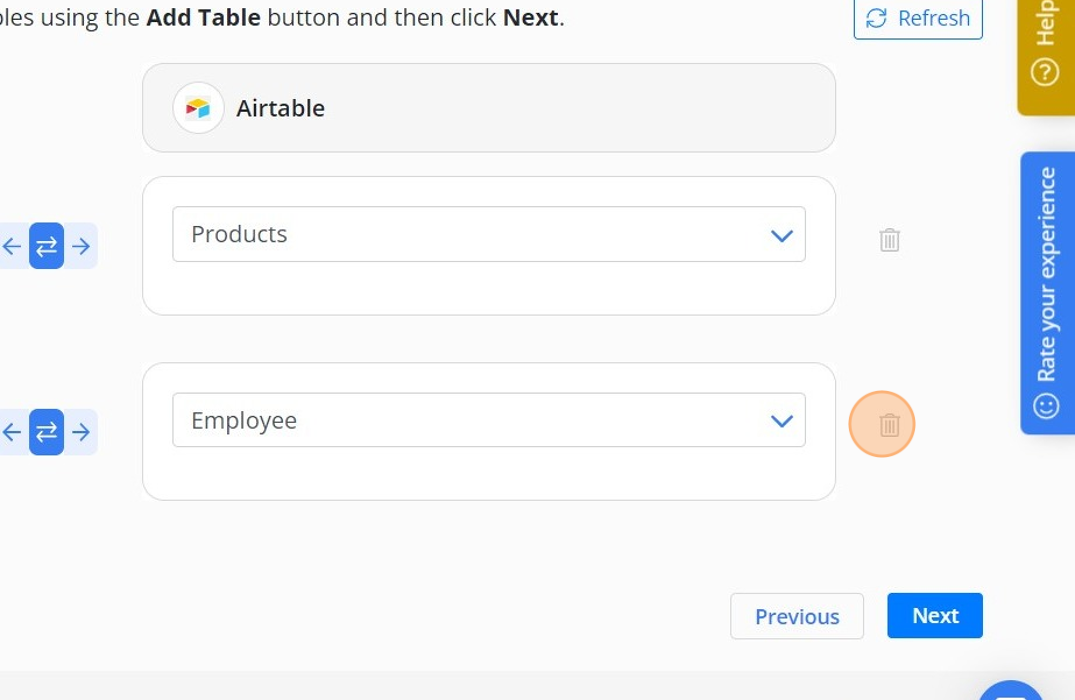
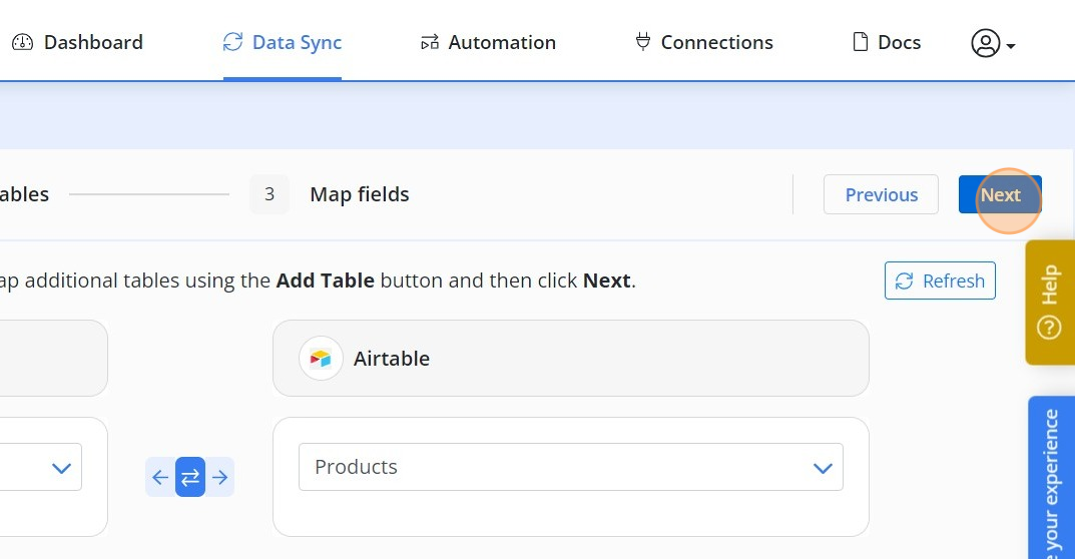
7. Click on 'Next' button.
8. Delete any fields that you don't want to sync. If the field you want to sync is not displayed, add it using "Add field" button.
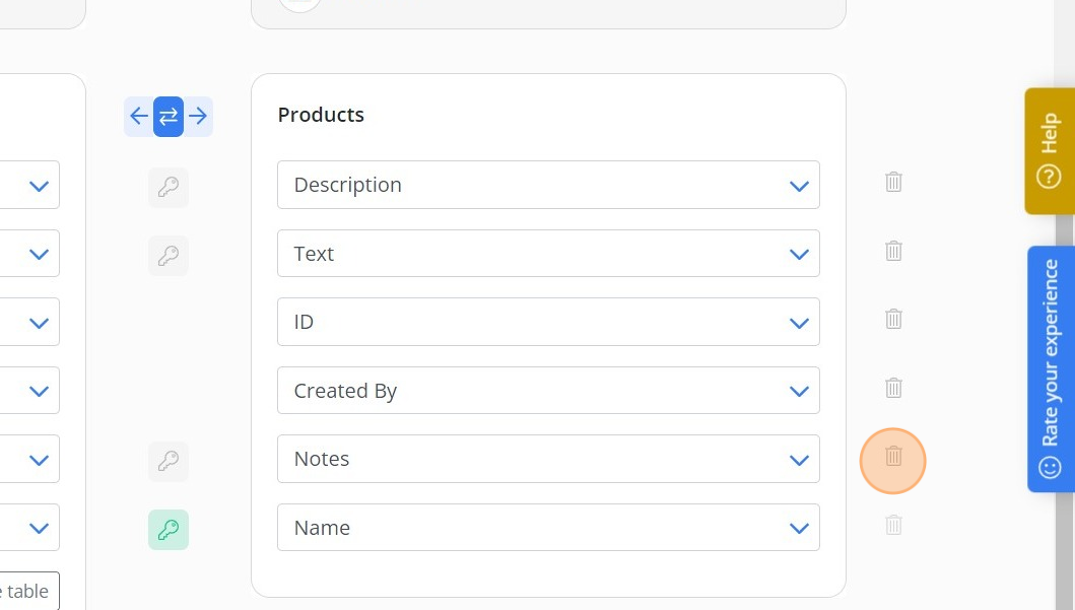
9. Click on 'Save' button

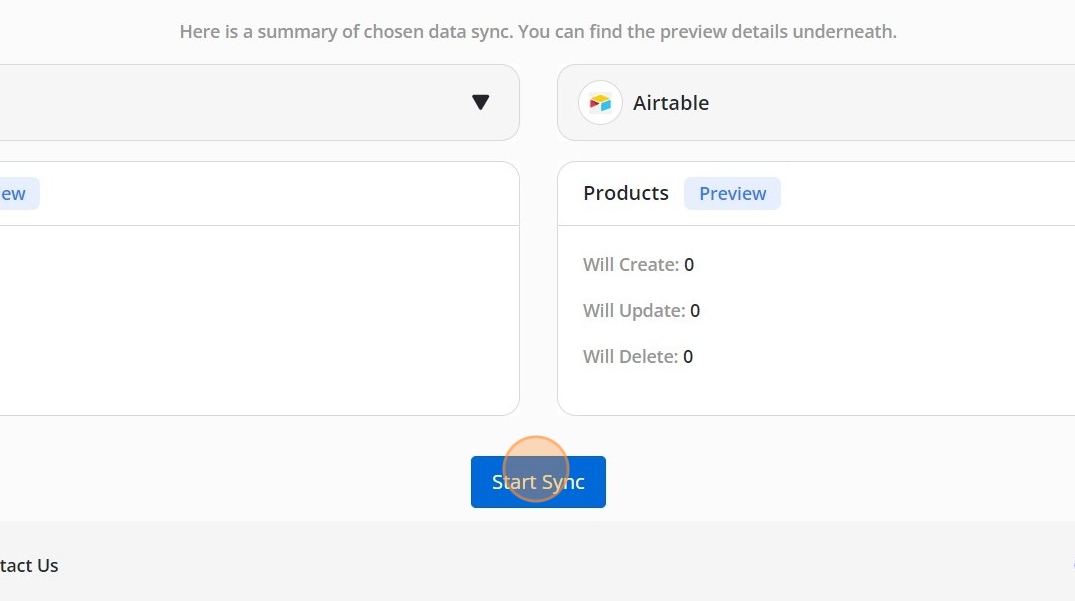
10. Carefully review the number of creates, updates, and deletes. Then click "Start Sync". If the numbers are not correct, it means your unique key selection needs to be changed.
Every Notion database record has a corresponding page content that can be synced. Byteline uses pageContent field to represent the HTML content of a Notion page. Take a look at the screenshot below to see an example of the latter:
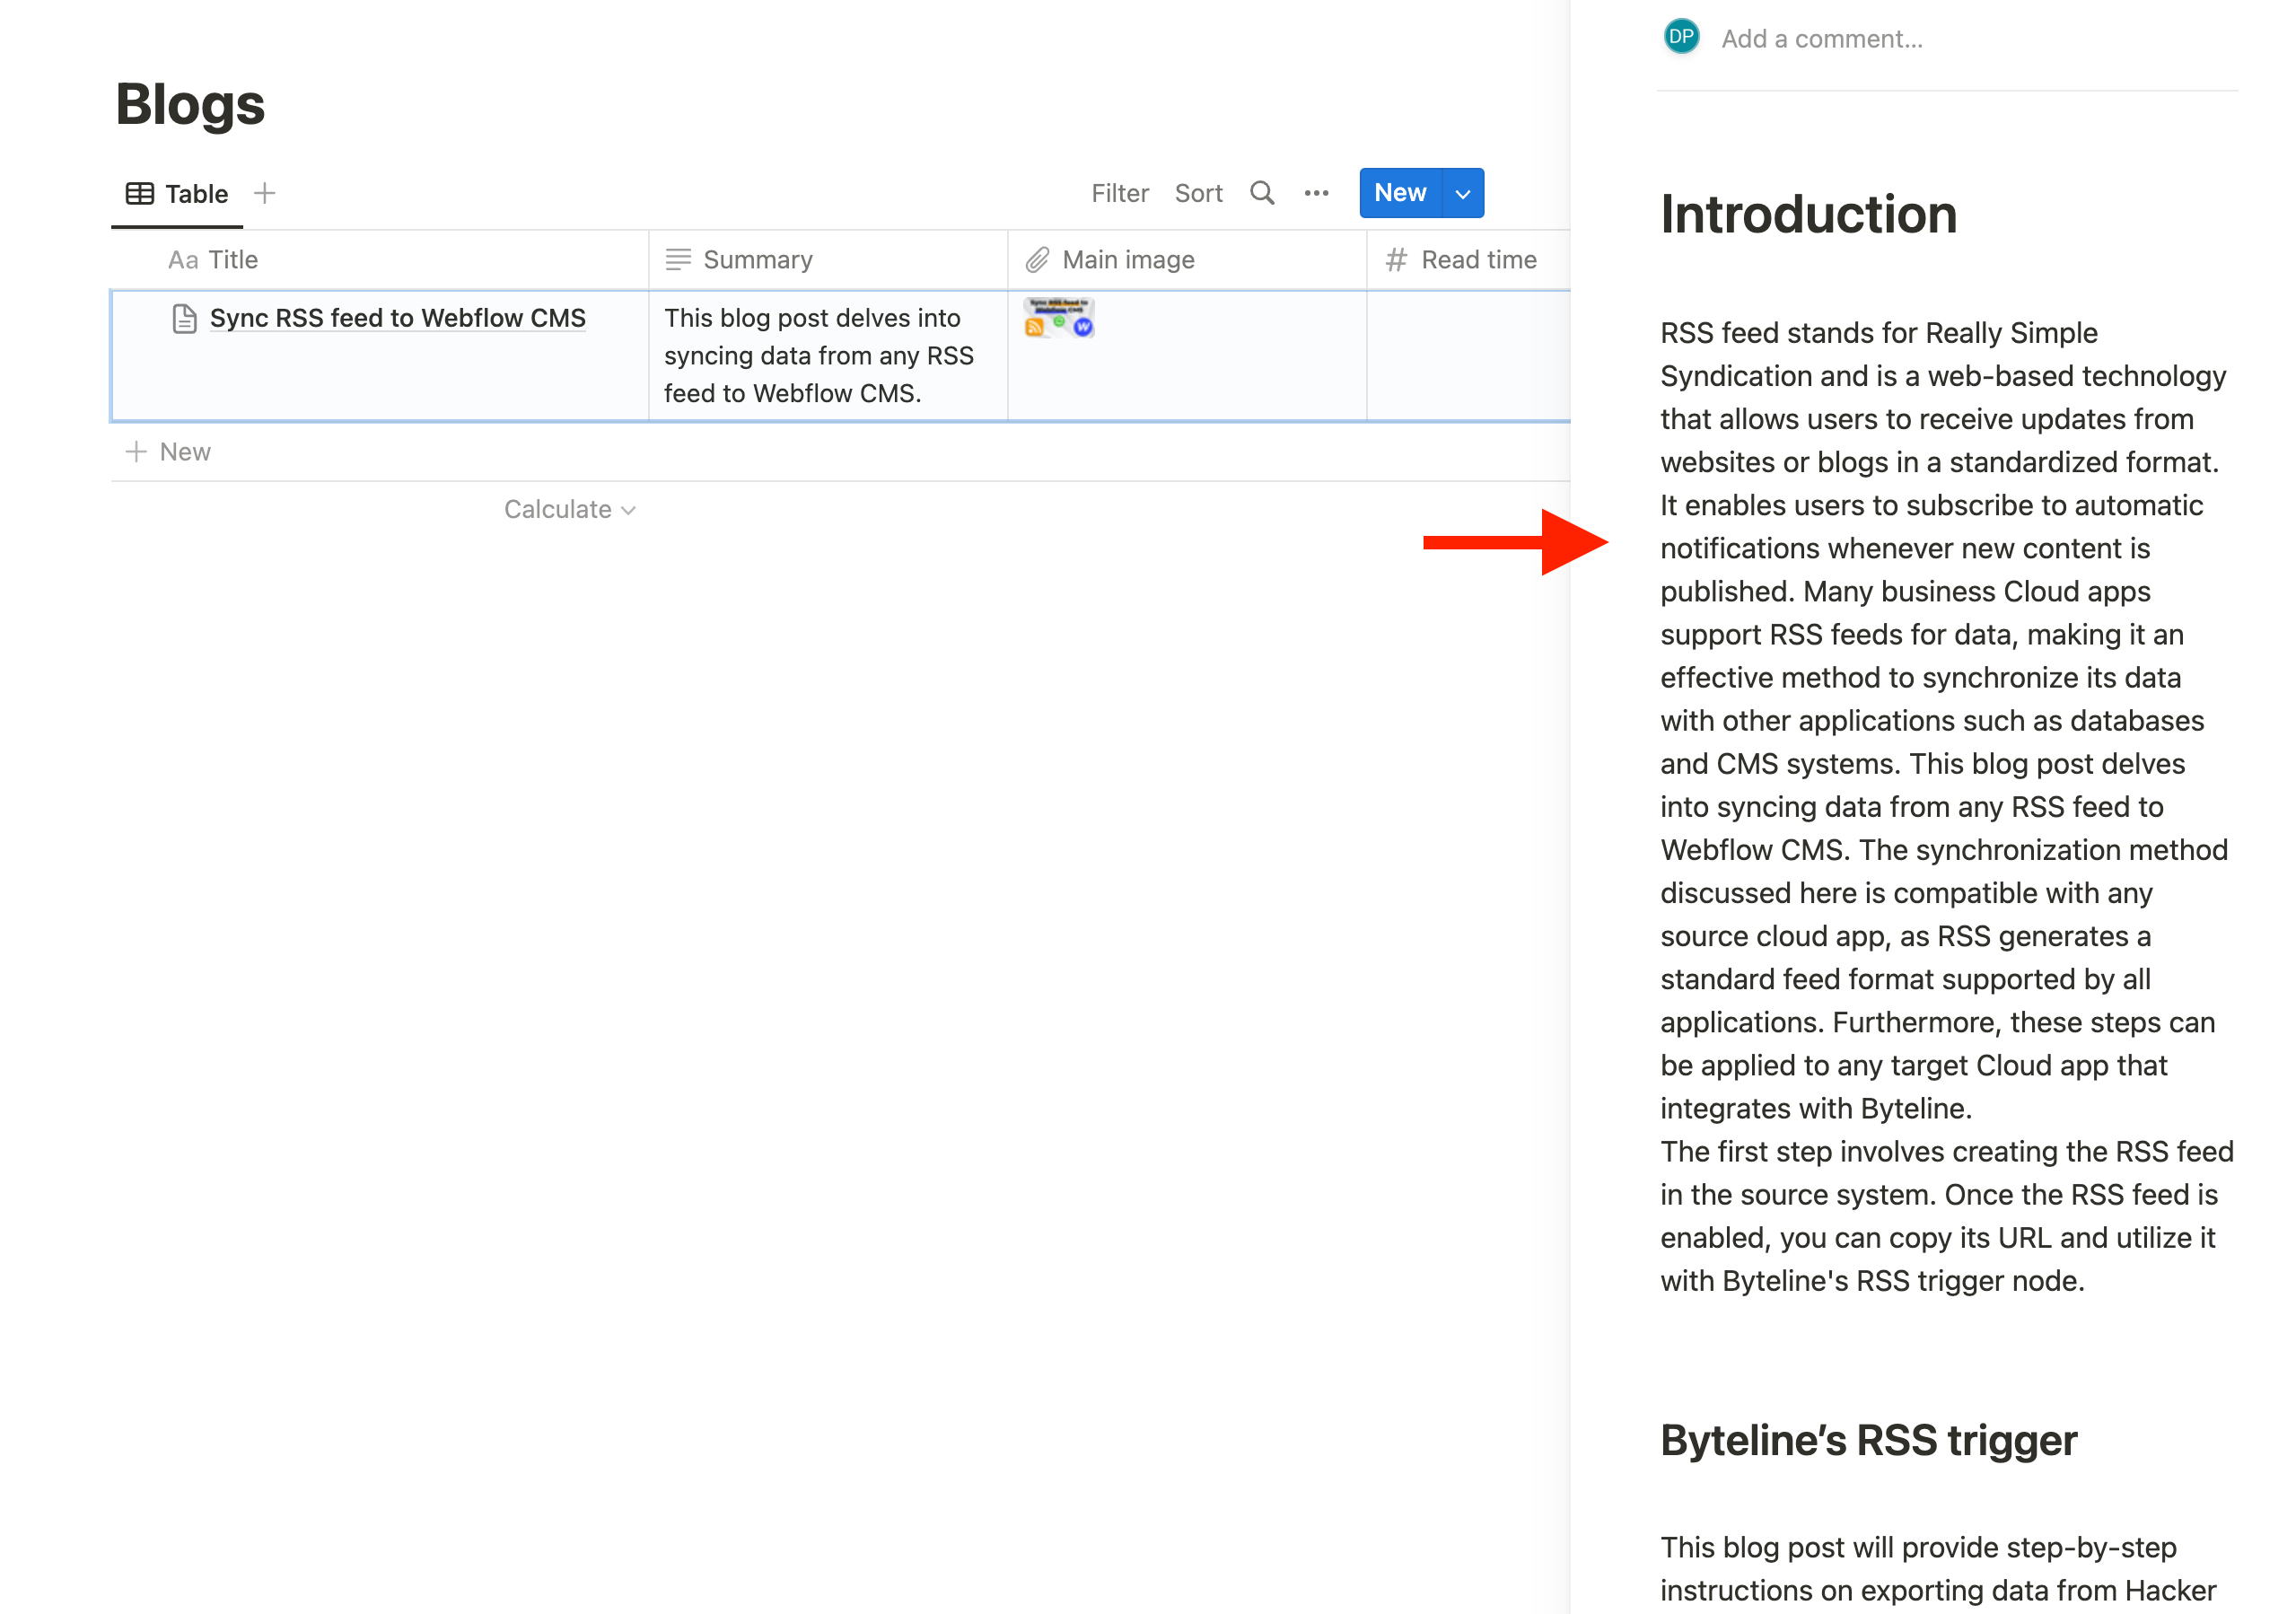
This read-only field can be synced from Notion to other apps by easily mapping from the data sync screens, shown below.

Byteline relies on the last_edited_time property to detect changes in Notion pages. However, Notion has a limitation where the last_edited_time is not updated if a page is automatically changed due to relationships linked to the same table. For instance, if you modify one record, such as Parent, the change might automatically update a related record, such as Child, because of the parent-child relationship. Despite this, the last_edited_time of the automatically updated record remains unchanged, making it undetectable by Byteline.
Solutions
By implementing these solutions, particularly automation, users have resolved this issue, allowing Byteline to detect and synchronize modified records without any problems.
The following Notion page fields are fully supported.
| Notion Page Field | Supported | Comments |
| Richtext | ✅ | |
| To-do list | ✅ | Displayed as either checked or unchecked checkbox, based on the value. |
| Bulleted list | ✅ | |
| Numbered list | ✅ | |
| Quote | ✅ | |
| Image | ✅ | |
| Video (YouTube & Wistia) | ✅ | |
| Audio embed (Spotify) | ✅ | |
| Code | ✅ | |
| Bookmark | ✅ | |
| Table | ✅ |
Notion select and multi-select fields can receive missing options automatically. See Automatically creating select options.
If you've created a table in Notion but don't see it listed in the dropdown when setting up your sync, here's what's likely happening:
🚫 The Table Isn't a Database Yet
In Notion, you can create something that looks like a table, but it may not actually be a database. Our dropdown only shows Notion databases, because those are what support syncing.
If your table was added using the “/table” command or the + menu, it may just be a regular table, not a database.
✅ How to Fix It
You need to convert your table into a database in Notion:

This comprehensive guide walks you through the step-by-step configuration process for syncing Webflow eCommerce data using Byteline.
Byteline currently supports syncing the following Webflow eCommerce data objects:
If you're looking to sync data with Webflow CMS (such as blog posts, authors, or other CMS collections), the setup process is different from Webflow eCommerce.
➡️ Please follow the instructions in the Webflow CMS Data Sync for detailed steps.
This guide is specifically focused on syncing Webflow eCommerce data, such as Products and Orders.
Please refer to Data Sync - Getting Started for the standard data sync functionality. The getting started document covers the usage of data sync features valid for all integrations.
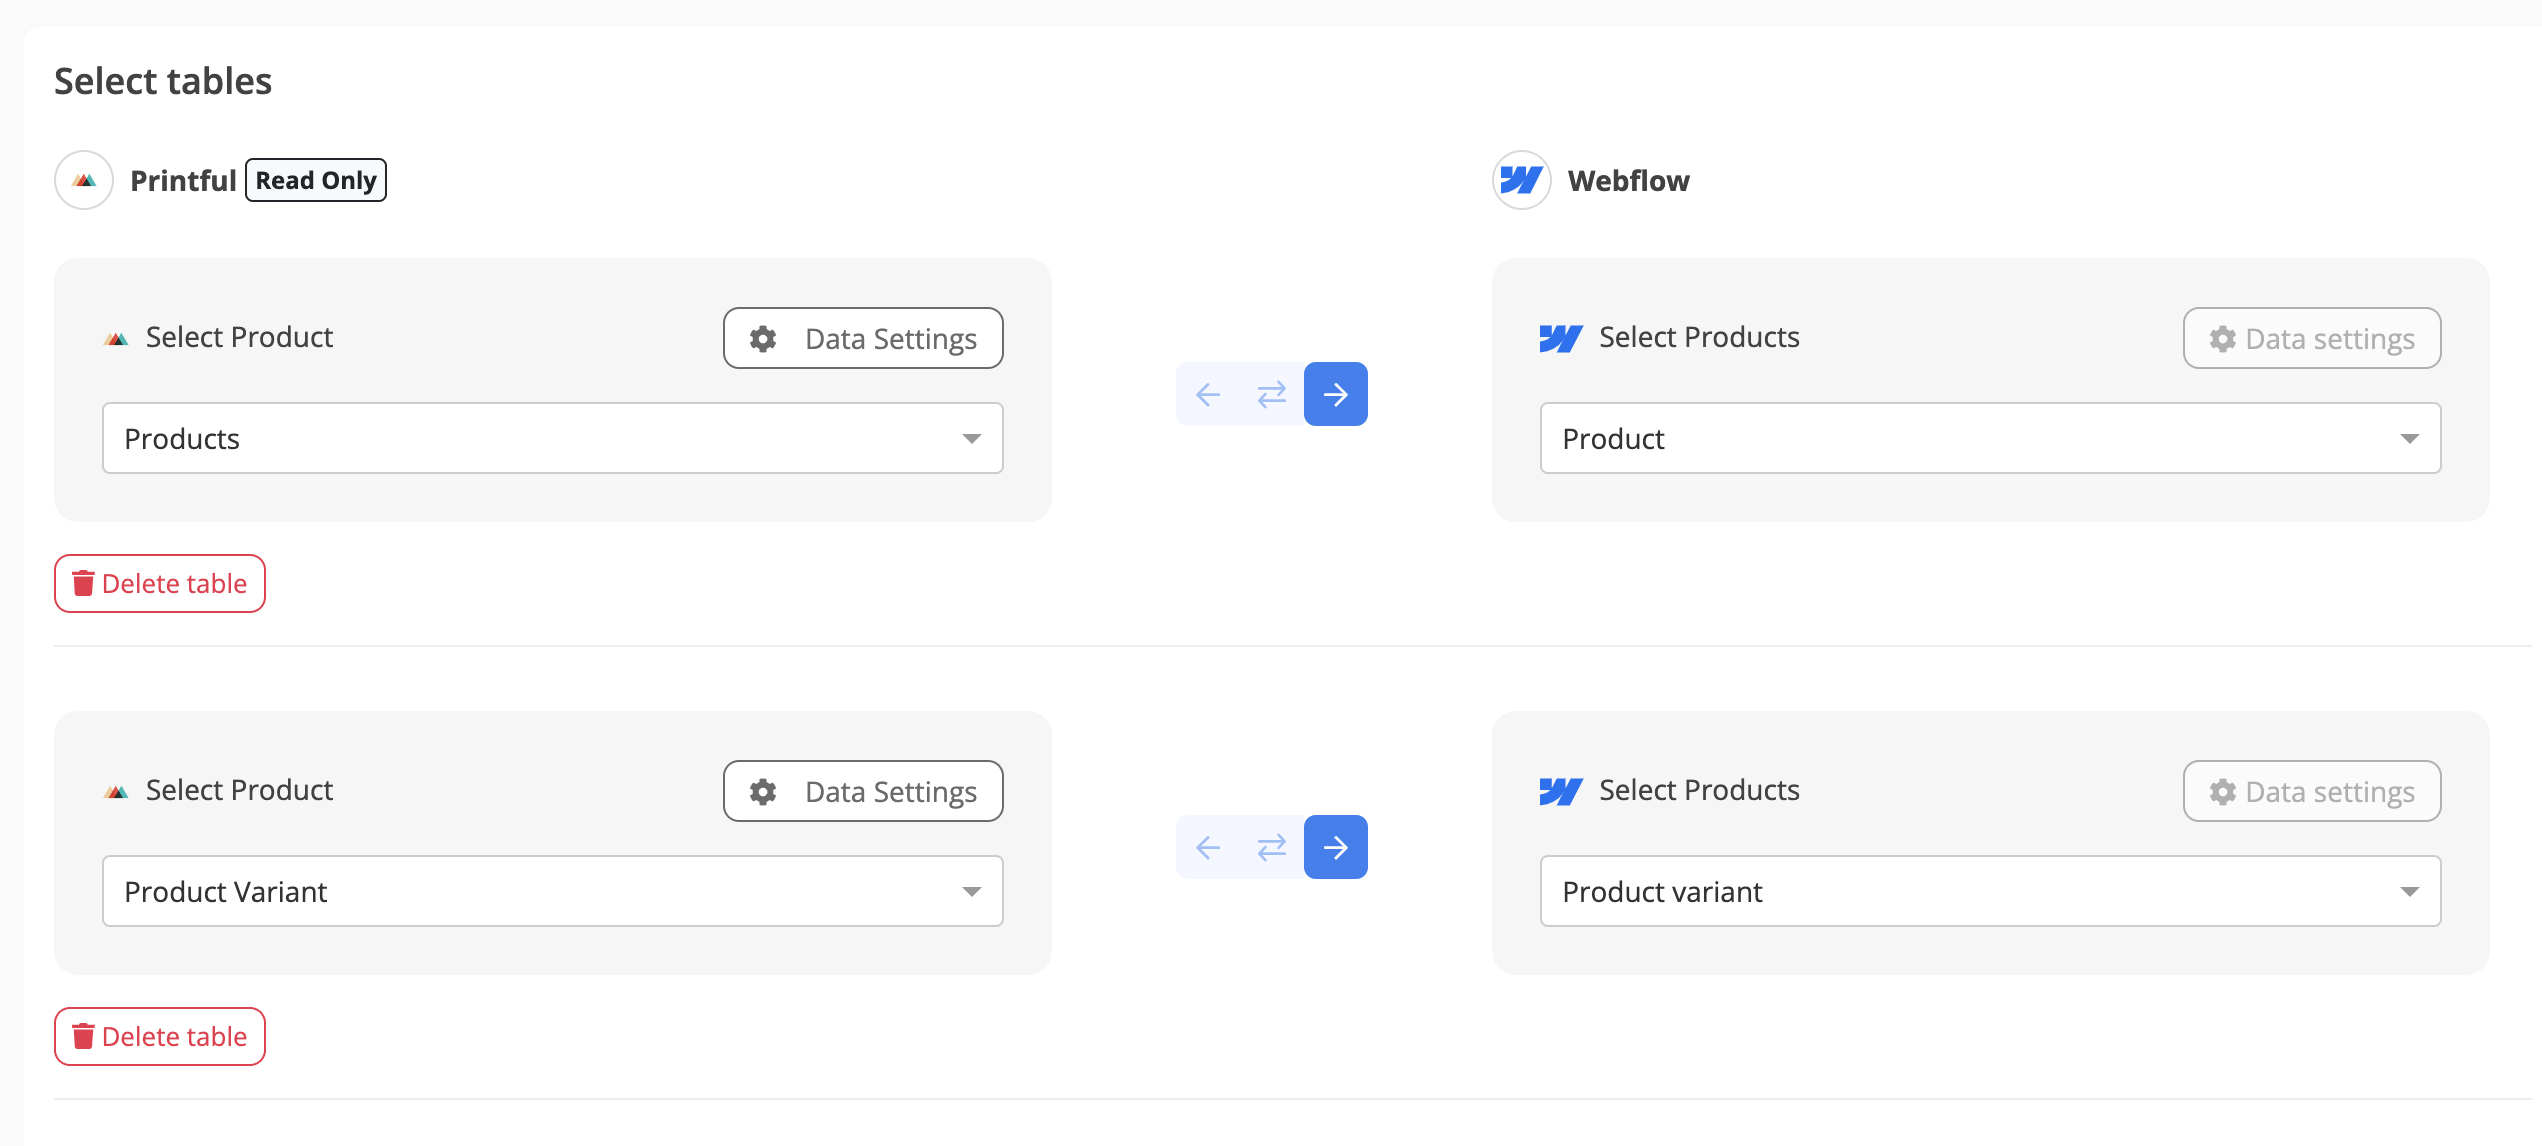
Follow these steps to configure data sync for Webflow eCommerce Products using Byteline. You can follow a similar process to sync Webflow eCommerce Orders.
Note: In the instructions below, Webflow is configured as the right-side app in the sync setup.
This means you’ll be mapping fields from the other app (left side) to the corresponding fields in Webflow eCommerce (right side).
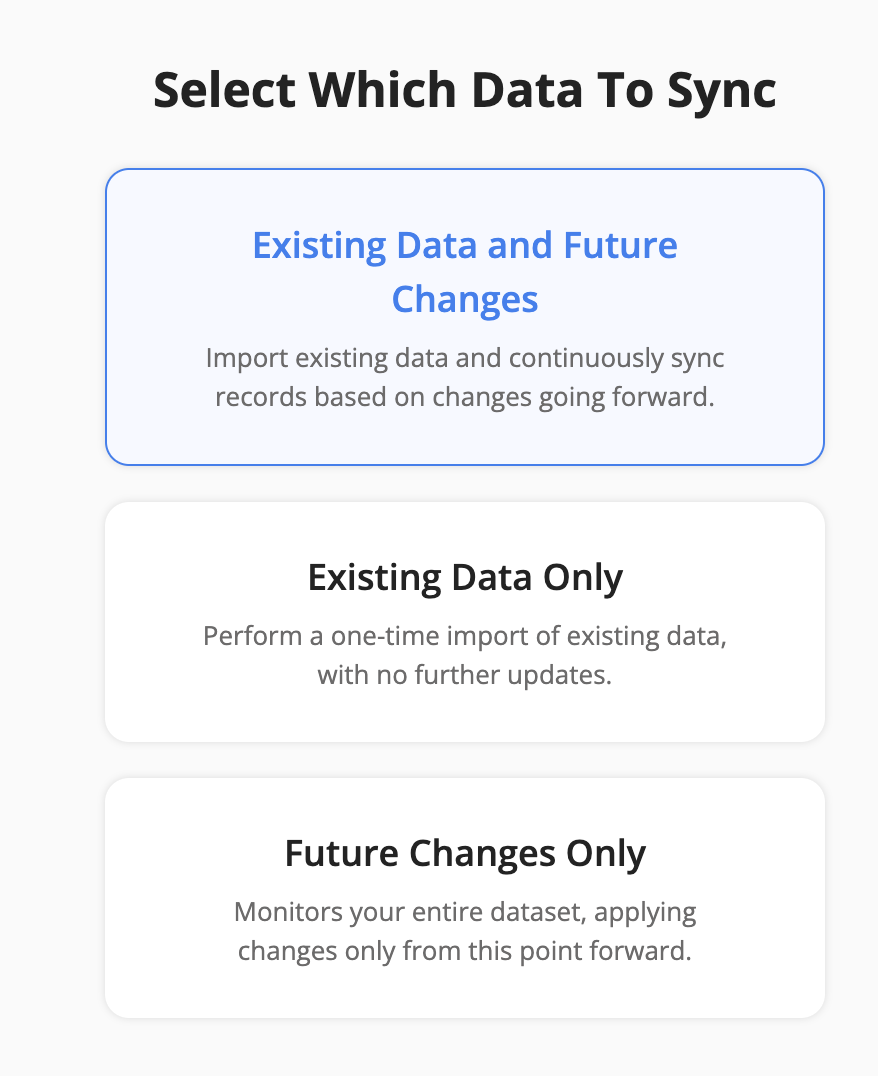
For each sync, you'll need to select whether to sync existing records, future changes, or both.
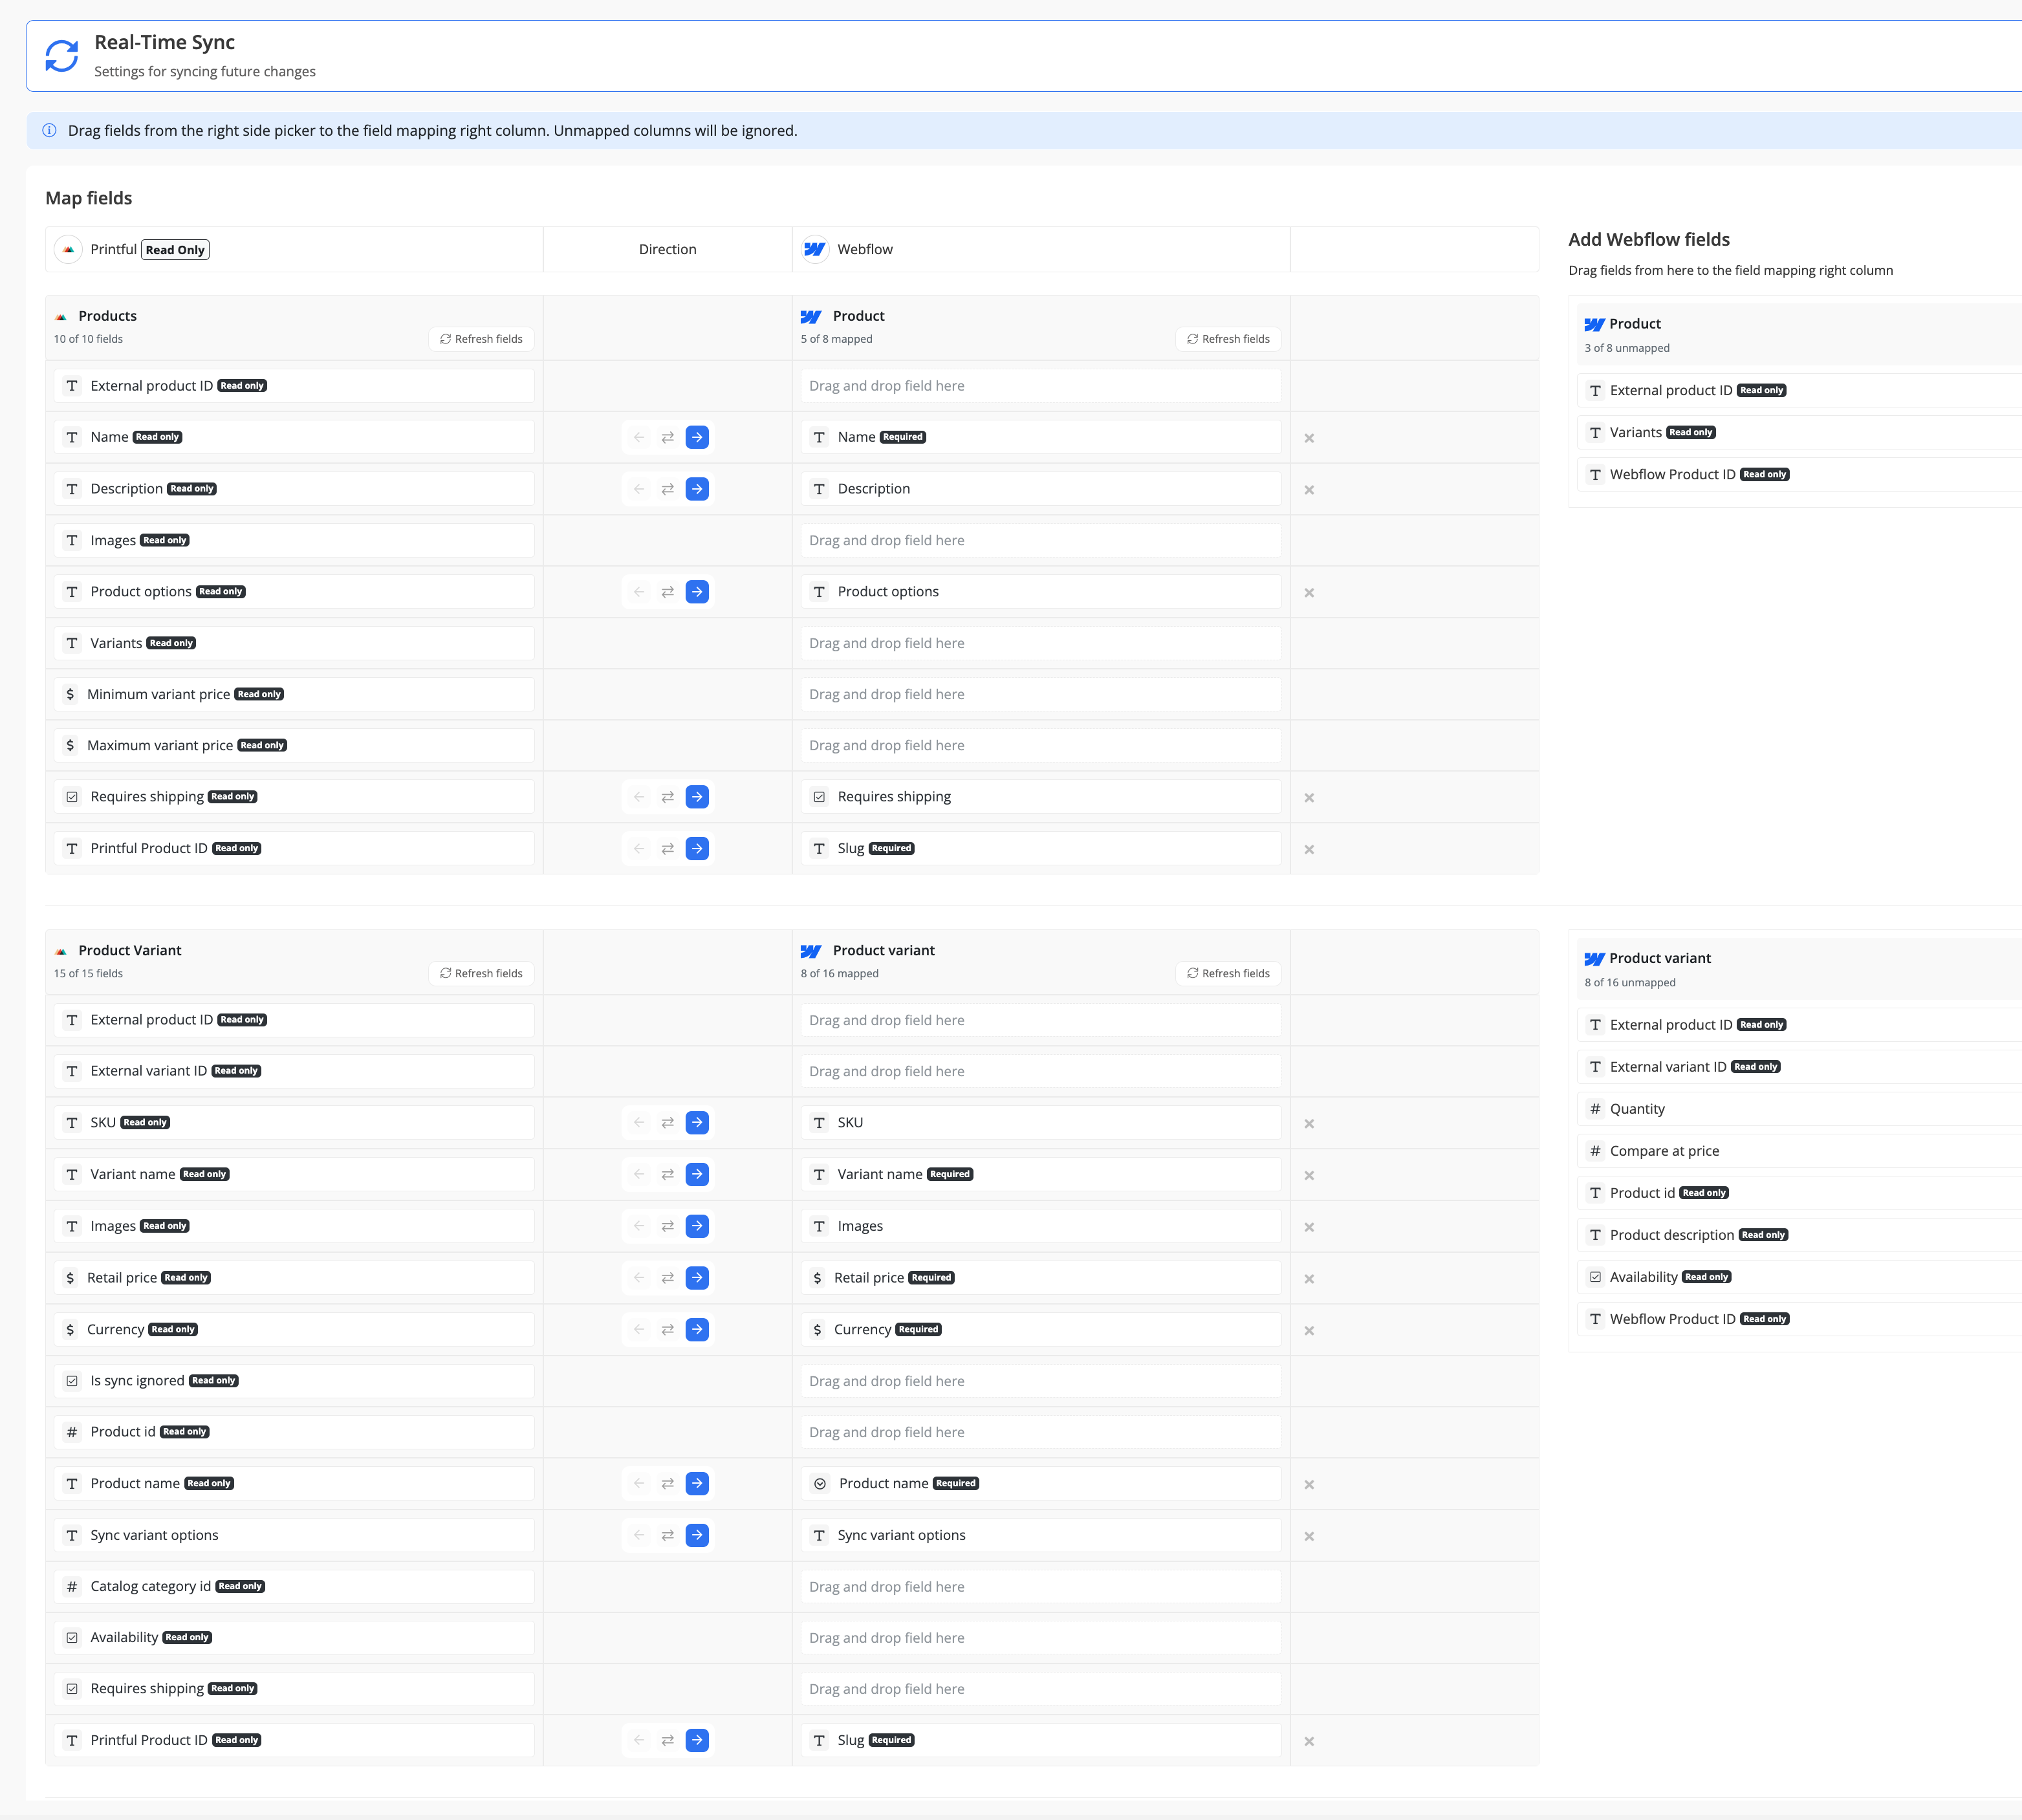
Select the sync direction for your existing data.
When syncing products to Webflow eCommerce, you must configure the Requires Shipping field appropriately.
This is important to avoid shipping-related issues for non-physical products.
Webflow enforces a strict limit of 50 variants per product. This is a platform-level restriction and cannot be overridden by Byteline.
A product’s total variants are calculated by multiplying all option values. For example:
If a product exceeds 50 variants, Webflow will not allow it to be created or updated, and the sync will fail.
Recommendation: Before syncing multi-variant products to Webflow, ensure the total number of variants in the paired app, such as Printful, does not exceed 50. If necessary, reduce the number of sizes, colors, or other option values in your source product to comply with Webflow’s limitation.
Error: Product not found. This can sometimes happen if the data sync ran into an issue while adding the product.
This error can occur while syncing product variants to Webflow when the parent product was not successfully created during an earlier sync.
Because variants are always linked to a product, Webflow cannot accept a variant unless its product already exists. If the product failed to sync, any attempt to add or update its variants will result in this error.
Why this happens
How to resolve the issue
Follow these steps to fix the problem in the correct order.
1. Find products that failed to sync
Use the Record Change History to identify product-level errors.
Apply the following filters:
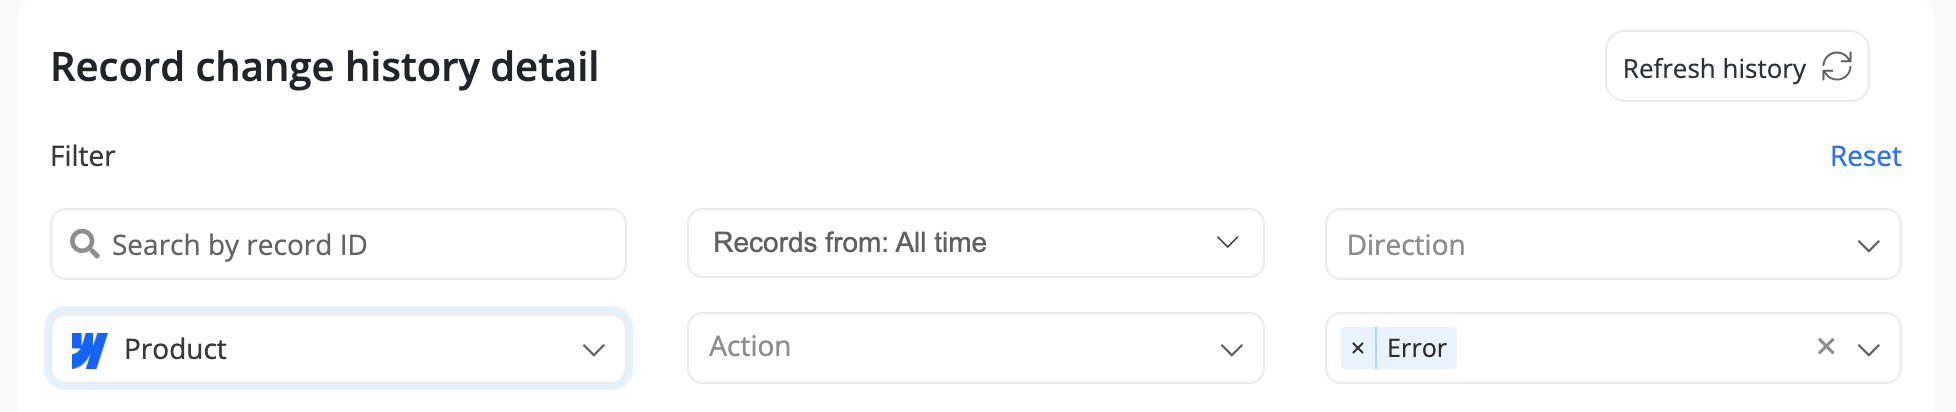
This will show all product records that failed to sync to Webflow.
2. Fix the product sync error
⚠️ Variants cannot be added until the product exists in Webflow.
3. Resync the product variants
Once the product is successfully synced:
The variant sync should now succeed since the product is available.
Key takeaway
Always resolve product-level errors first. Variant errors like “Product not found” are usually a downstream effect of a failed product sync.
If you continue to see issues after resyncing the product, please reach out to Byteline support with the error details.
When syncing products to Webflow eCommerce, some product variants may appear in Webflow with Quantity set to 0.
This usually means the variant is unavailable in the source app. Byteline translates unavailable product variants into Webflow by setting their inventory quantity to 0.
For example, if you sync a product from Printful and a specific size, such as XS, is not available for that product, the matching Webflow variant is synced with quantity 0.
This is expected behavior. In Webflow eCommerce, unavailable variants are represented as out of stock by setting the quantity to 0.
Why this happens
Key takeaway
A Webflow quantity of 0 does not always mean the sync failed. It can simply mean the variant is unavailable in the source app, and Byteline has correctly synced that unavailability to Webflow.
This comprehensive guide walks you through the step-by-step configuration process for syncing Printful data using Byteline.
Byteline currently supports syncing the following Printful data objects:
Please refer to Data Sync - Getting Started for the standard data sync functionality. The getting started document covers usages of data sync features valid for all integrations.

Byteline can only connect to Printful stores created under the “Manual order platform / API” type. If your current Printful store is connected to another platform (like Shopify, Etsy, or WooCommerce), you’ll need to migrate your products to a “Manual order platform / API” store before using Byteline.
The good news is that Printful makes this process simple — you can duplicate your existing products in bulk (if supported by your store) and publish them to the new store type.
Follow the steps below to complete the migration. All actions are performed within your Printful Dashboard, and the process must be repeated for each product you wish to migrate.


Once all products are published to your “Manual order platform / API” store, you can connect it to Byteline and start syncing products to other platforms — such as Webflow eCommerce or any other supported app.


This section shows the steps for Printful products, but the steps are applicable to any data type.
Byteline products provide two tables for products:
To fully sync your Printful catalog, you should sync both tables.


This step is shown only when the historical sync is selected in the data to sync. Pick the sync direction for your existing data.


Once the sync is live, any changes made to records in either app will automatically sync to the other app in real-time.
Byteline simplifies the process of syncing data between Printful and other apps, ensuring:
Printful allows only one active webhook URL per store. This limitation has a direct impact on Byteline Data Sync functionality.
If you connect your Printful store to another product or service that sets up its own webhook, it will overwrite the webhook configured by Byteline, which is essential for detecting and syncing changes in your products.
As a result, any changes made to your Printful store will no longer be picked up by Byteline, and your sync may stop functioning correctly.
📄 From Printful’s Official Documentation:
“Note that only one webhook URL can be active for a store, so calling this method disables all existing webhook configuration.” — Printful Webhook API Documentation
Recommendation:
To ensure continued and reliable syncing with Byteline, do not connect your Printful store to other systems that use webhooks
Byteline supports syncing only specific types of Printful stores based on API availability.
✅ Supported Stores
The following store types are supported:
These stores provide API access from Printful, which allows Byteline to:
❌ Unsupported Stores
The following store types are not supported:
These stores are not supported because Printful does not expose the required API access for third-party syncing tools like Byteline.
Byteline can only connect to Printful stores created using the Manual order platform / API option. Stores connected to platforms like Shopify or Etsy are restricted to those specific platforms and cannot be used with Byteline.
To resolve this, create a new Printful store using the Manual order platform / API option. For step-by-step instructions, see the section above: Creating a Printful Store to Use with Byteline.
Possible Cause:
If your Printful sync suddenly stops working, it's likely that the webhook configured by Byteline was overwritten by another service connected to your store.
For more details, see the Webhook Limitation in Printful section above.
How to Fix It:
This comprehensive document will walk you through the step-by-step configuration process for Supabase data sync and address specific use cases tailored to Supabase.
Please refer to Data Sync - Getting Started for the standard data sync functionality. The getting started document covers usages of data sync features valid for all integrations.


For each sync, you'll need to select whether to sync existing records, future changes, or both.

Select the sync direction for your existing data.

You can monitor sync progress, view logs, or make changes anytime from the Syncs page. If you need to pause or edit the sync, simply open it from your dashboard.
✅ That’s it! Your Supabase sync is now live.
For Byteline to reliably track and sync records, each row in a Supabase table must have a unique identifier (Record ID). Byteline determines the Record ID using the following logic:
Using an Existing Primary Key (Recommended)
If your Supabase table already has a primary key column, Byteline will automatically use that column as the Record ID.
Auto-Generated Record ID (When No Primary Key Exists)
If no primary key is defined on the table, Byteline will automatically add a new column:
byteline_row_id
Important Notes
To securely connect your Supabase data and keep it in sync, Byteline adds three small helpers to your database.
These helpers are safe, lightweight, and do not change your existing data.
By default, Supabase exposes the public schema for API access. If you choose to sync data from a non-public schema, additional database privileges are required for Byteline to operate correctly.
When a non-public schema is selected, Byteline automatically verifies whether the required permissions already exist. If they do not, Byteline securely applies the necessary grants on your behalf — no manual SQL execution is required.
This is done purely for convenience and to ensure the sync works out of the box.
What permissions are granted (and why)
Byteline requests only the minimum privileges required to support data sync functionality:
No unrelated or broad permissions are granted.
Automatically applied privilege script
When needed, Byteline applies a schema-scoped permissions script similar to the following (shown here for transparency):
GRANT USAGE, CREATE ON SCHEMA '<schema>' TO service_role;GRANT SELECT, INSERT, UPDATE, DELETE, TRIGGERON ALL TABLES IN SCHEMA '<schema>' TO service_role;GRANT USAGE, SELECT, UPDATEON ALL SEQUENCES IN SCHEMA '<schema>' TO service_role;GRANT EXECUTEON ALL FUNCTIONS IN SCHEMA '<schema>' TO service_role;GRANT USAGE ON LANGUAGE plpgsql TO service_role;ALTER DEFAULT PRIVILEGES IN SCHEMA '<schema>' GRANT SELECT, INSERT, UPDATE, DELETE, TRIGGER ON TABLES TO service_role;ALTER DEFAULT PRIVILEGES IN SCHEMA '<schema>' GRANT USAGE, SELECT, UPDATE ON SEQUENCES TO service_role;ALTER DEFAULT PRIVILEGES IN SCHEMA '<schema>' GRANT EXECUTE ON FUNCTIONS TO service_role;This approach allows you to use custom schemas safely while keeping your Supabase setup clean, secure, and low-friction.
This comprehensive document will walk you through the step-by-step configuration process for Webflow data sync and address specific use cases tailored to Webflow.
Please refer to Data Sync - Getting Started for the standard data sync functionality. The getting started document covers usages of data sync features valid for all integrations.
If your goal is to sync Webflow eCommerce data—such as Products or Orders—this guide does not apply, as the configuration differs from CMS collections.
➡️ Please refer to the Webflow eCommerce Data Sync for detailed instructions.
This document specifically covers syncing Webflow CMS collections like blog posts, team members, and other custom content.
1. Click "Add new" to create a new sync.
2. Pick the app that you want to sync with Webflow.
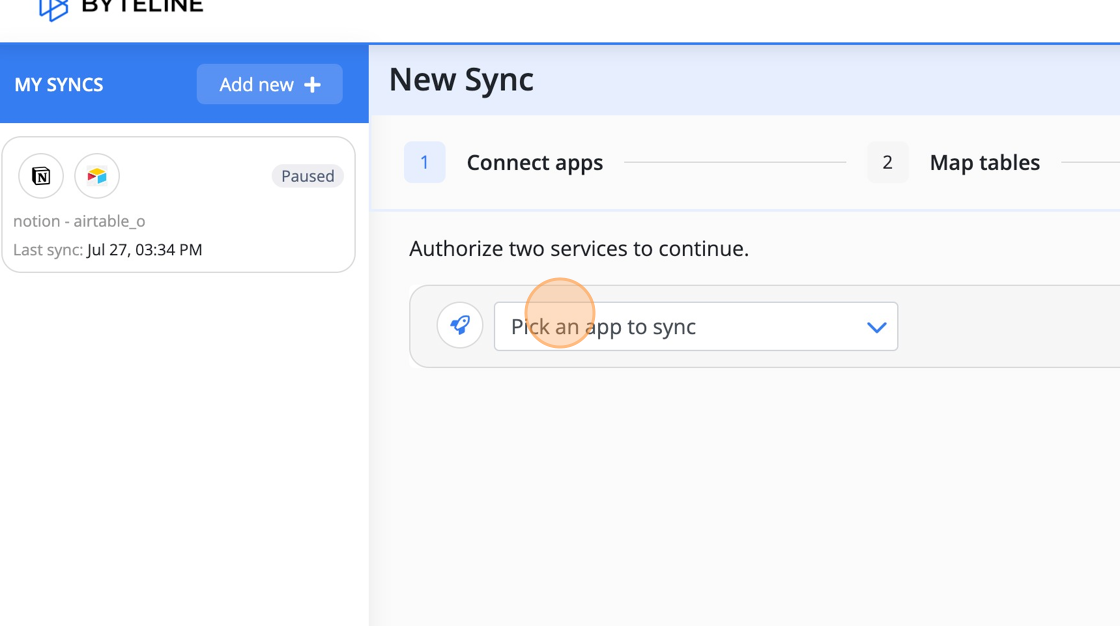
3. Pick Webflow and select the site to sync. Note: The order doesn't matter; you can choose Webflow as the first or second app.
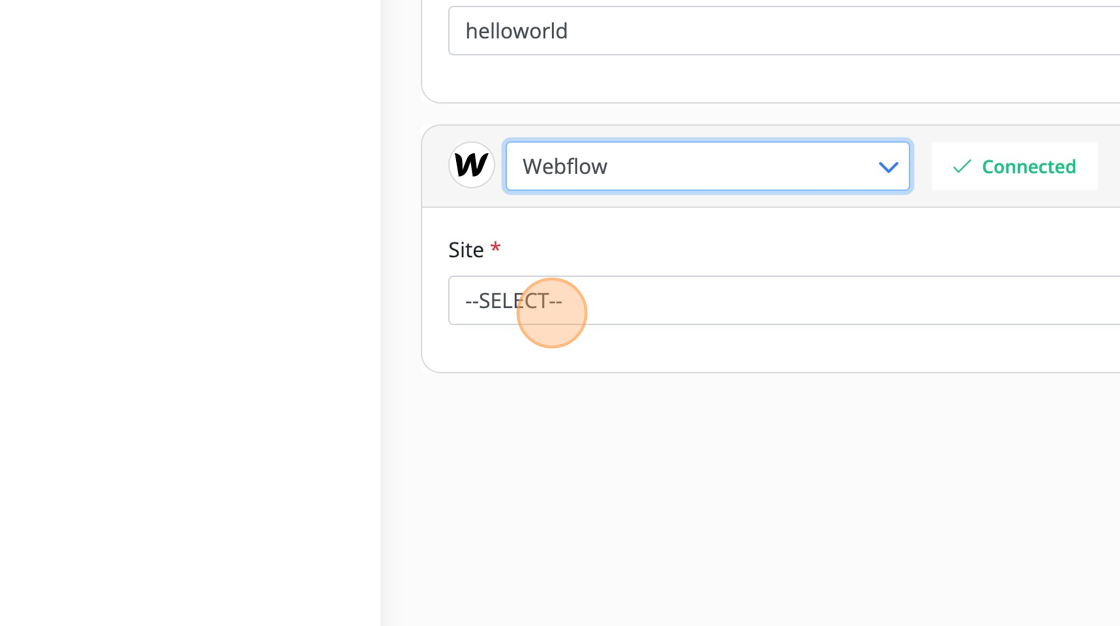
4. Click "Next"

5. Delete any tables that you don't want to sync. If the table you want to sync is not displayed, add it using "Add table" button.
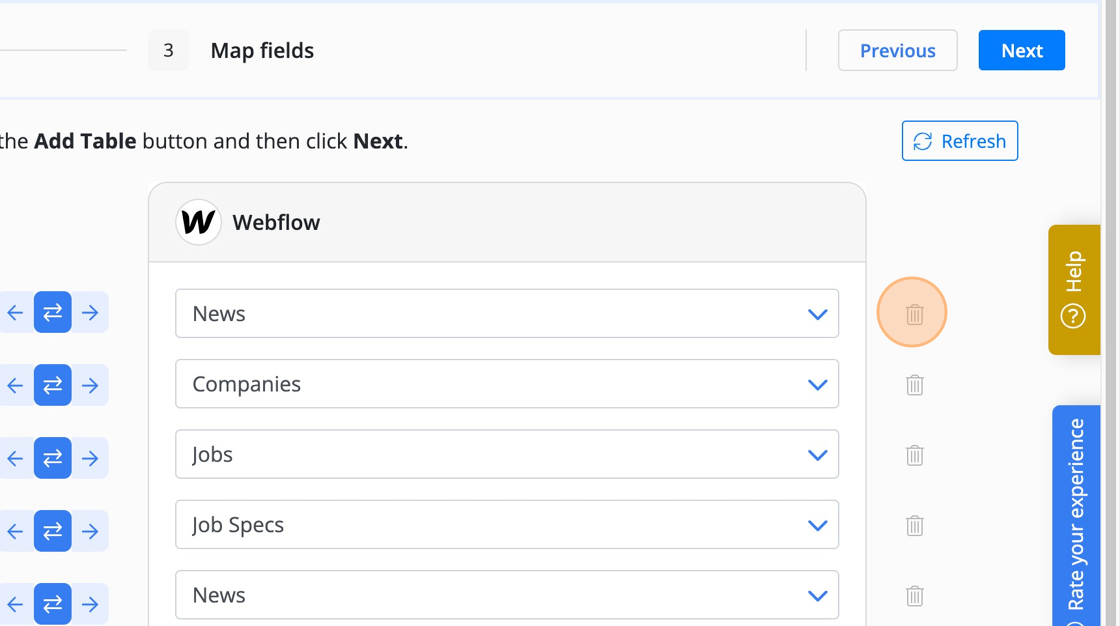
6. Click "Next"
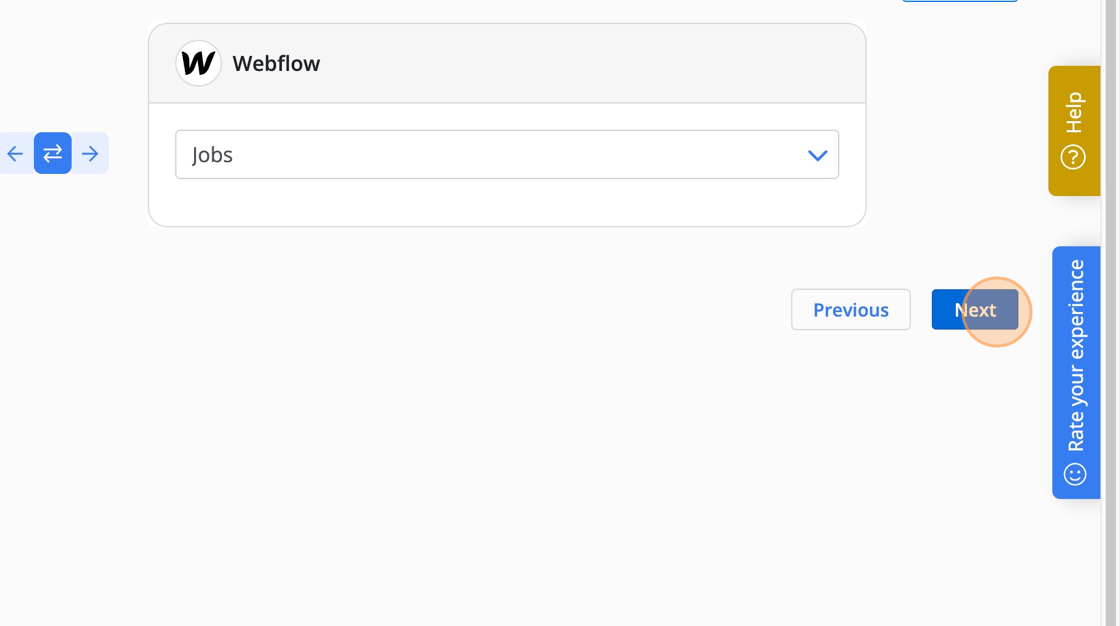
7. Now configure your field mappings. Click "Add field" to add any fields that are not shown by default.
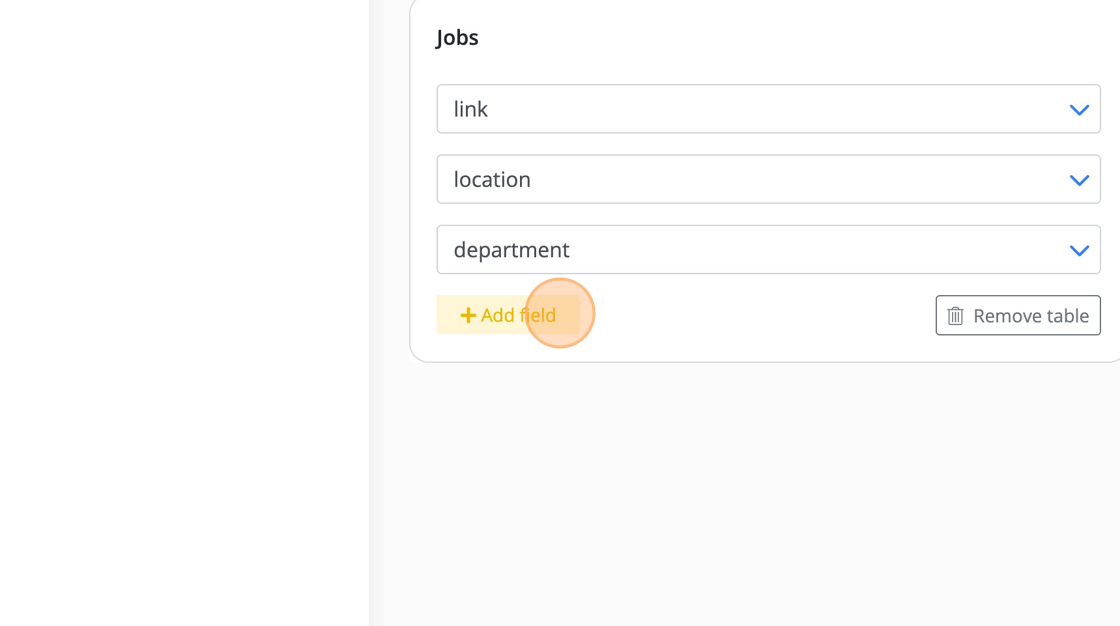
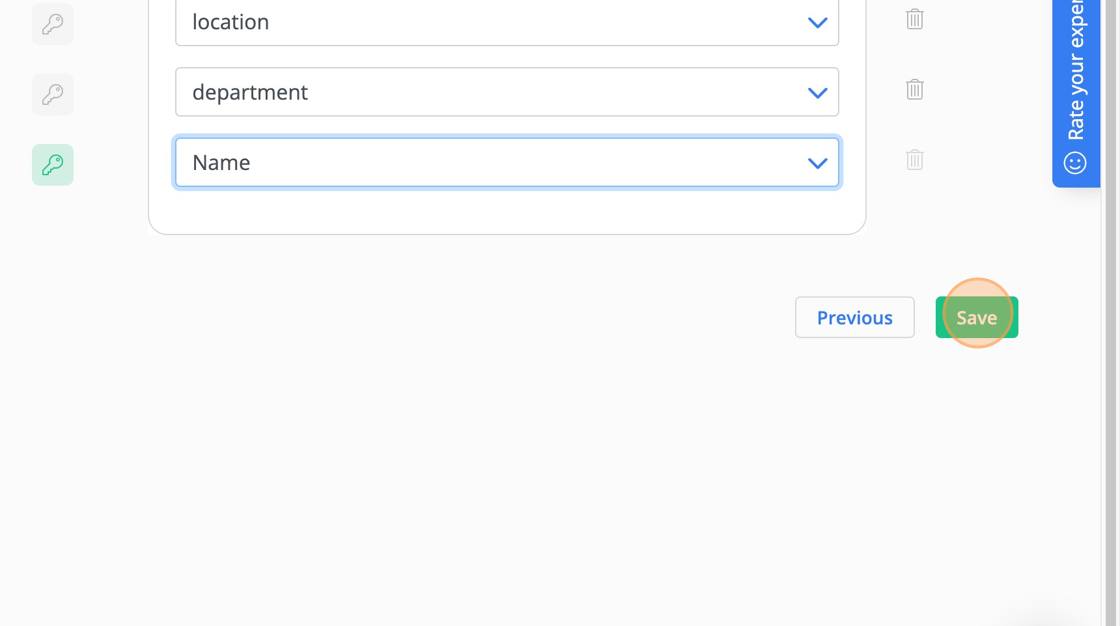
Tip! Historical syncs your existing data. This functionality works based on the unique keys. So pay close attention to the selected keys (in green) to ensure they are unique. You can select multiple keys.
8. Click "Save"
9. Carefully review the number of creates, updates, and deletes. Then click "Start Sync". If the numbers are not correct, it means your unique key selection needs to be changed.

Let's explore the process of saving synchronized Webflow items as drafts. This can be achieved by mapping the "Draft" Webflow column to a corresponding boolean or checkbox column in your other chosen application. Once the mapping is complete, set the value of this column in the other app to "true" or "checked" for all rows.

Byteline's data sync stores Webflow item IDs for its sync logic. But when a Webflow backup is restored, the IDs of the Webflow items change, and as a result, the data sync will run into unexpected behavior. So please follow the below steps to restore a Webflow site when using Byteline's data sync for the site.
If your source app stores content in separate language fields (for example: Title_EN, Title_FR, Title_DE), you can map each field normally during sync.
See Multilingual Content Support for full details.
Using the Webflow designer or editor, check if any collection items have a status other than "Published." If you do find any such items, this could be the reason why certain records are not synchronizing in the Published state. In these cases, the live update from Byteline may fail.
To resolve this issue, ensure all items are set to the "Published" status within your Webflow site to resolve this issue. You can either publish your Webflow site or non-published items to update the status. Once you've done this, your items should automatically be published for ongoing sync changes.
You need to change the Webflow CMS field to allow multiple lines. It can easily be done by following the below steps:

This comprehensive guide walks you through the step-by-step configuration process for syncing Foxy data using Byteline.
Byteline currently supports syncing the following Foxy data objects:
Please refer to Data Sync - Getting Started for the standard data sync functionality. The Getting Started document covers the usage of data sync features that are valid for all integrations.
Follow these steps to configure data sync for Foxy Transactions using Byteline. You can follow a similar process to sync other Foxy data types.
Note: Foxy transactions is a read-only connector, meaning it can only act as the source in a sync.
Foxy transactions include a Record Tracking Time Frame feature, which lets you define how long a transaction should be monitored. For example, if your transactions typically remain unchanged after 3 months, you can set the tracking time frame to 3 months.Once the specified time has passed, the transaction is no longer managed or included in billing. Any updates made to the record after this period will be ignored by Byteline

For each sync, you'll need to select whether to sync existing records, future changes, or both. When syncing transactions, the most common choice is to sync future changes only.


Click Start Sync at the bottom of the field mapping section to activate your sync. From this point on, any transaction processed in Foxy will automatically be sent to Wix orders (as shown in this guide’s example).
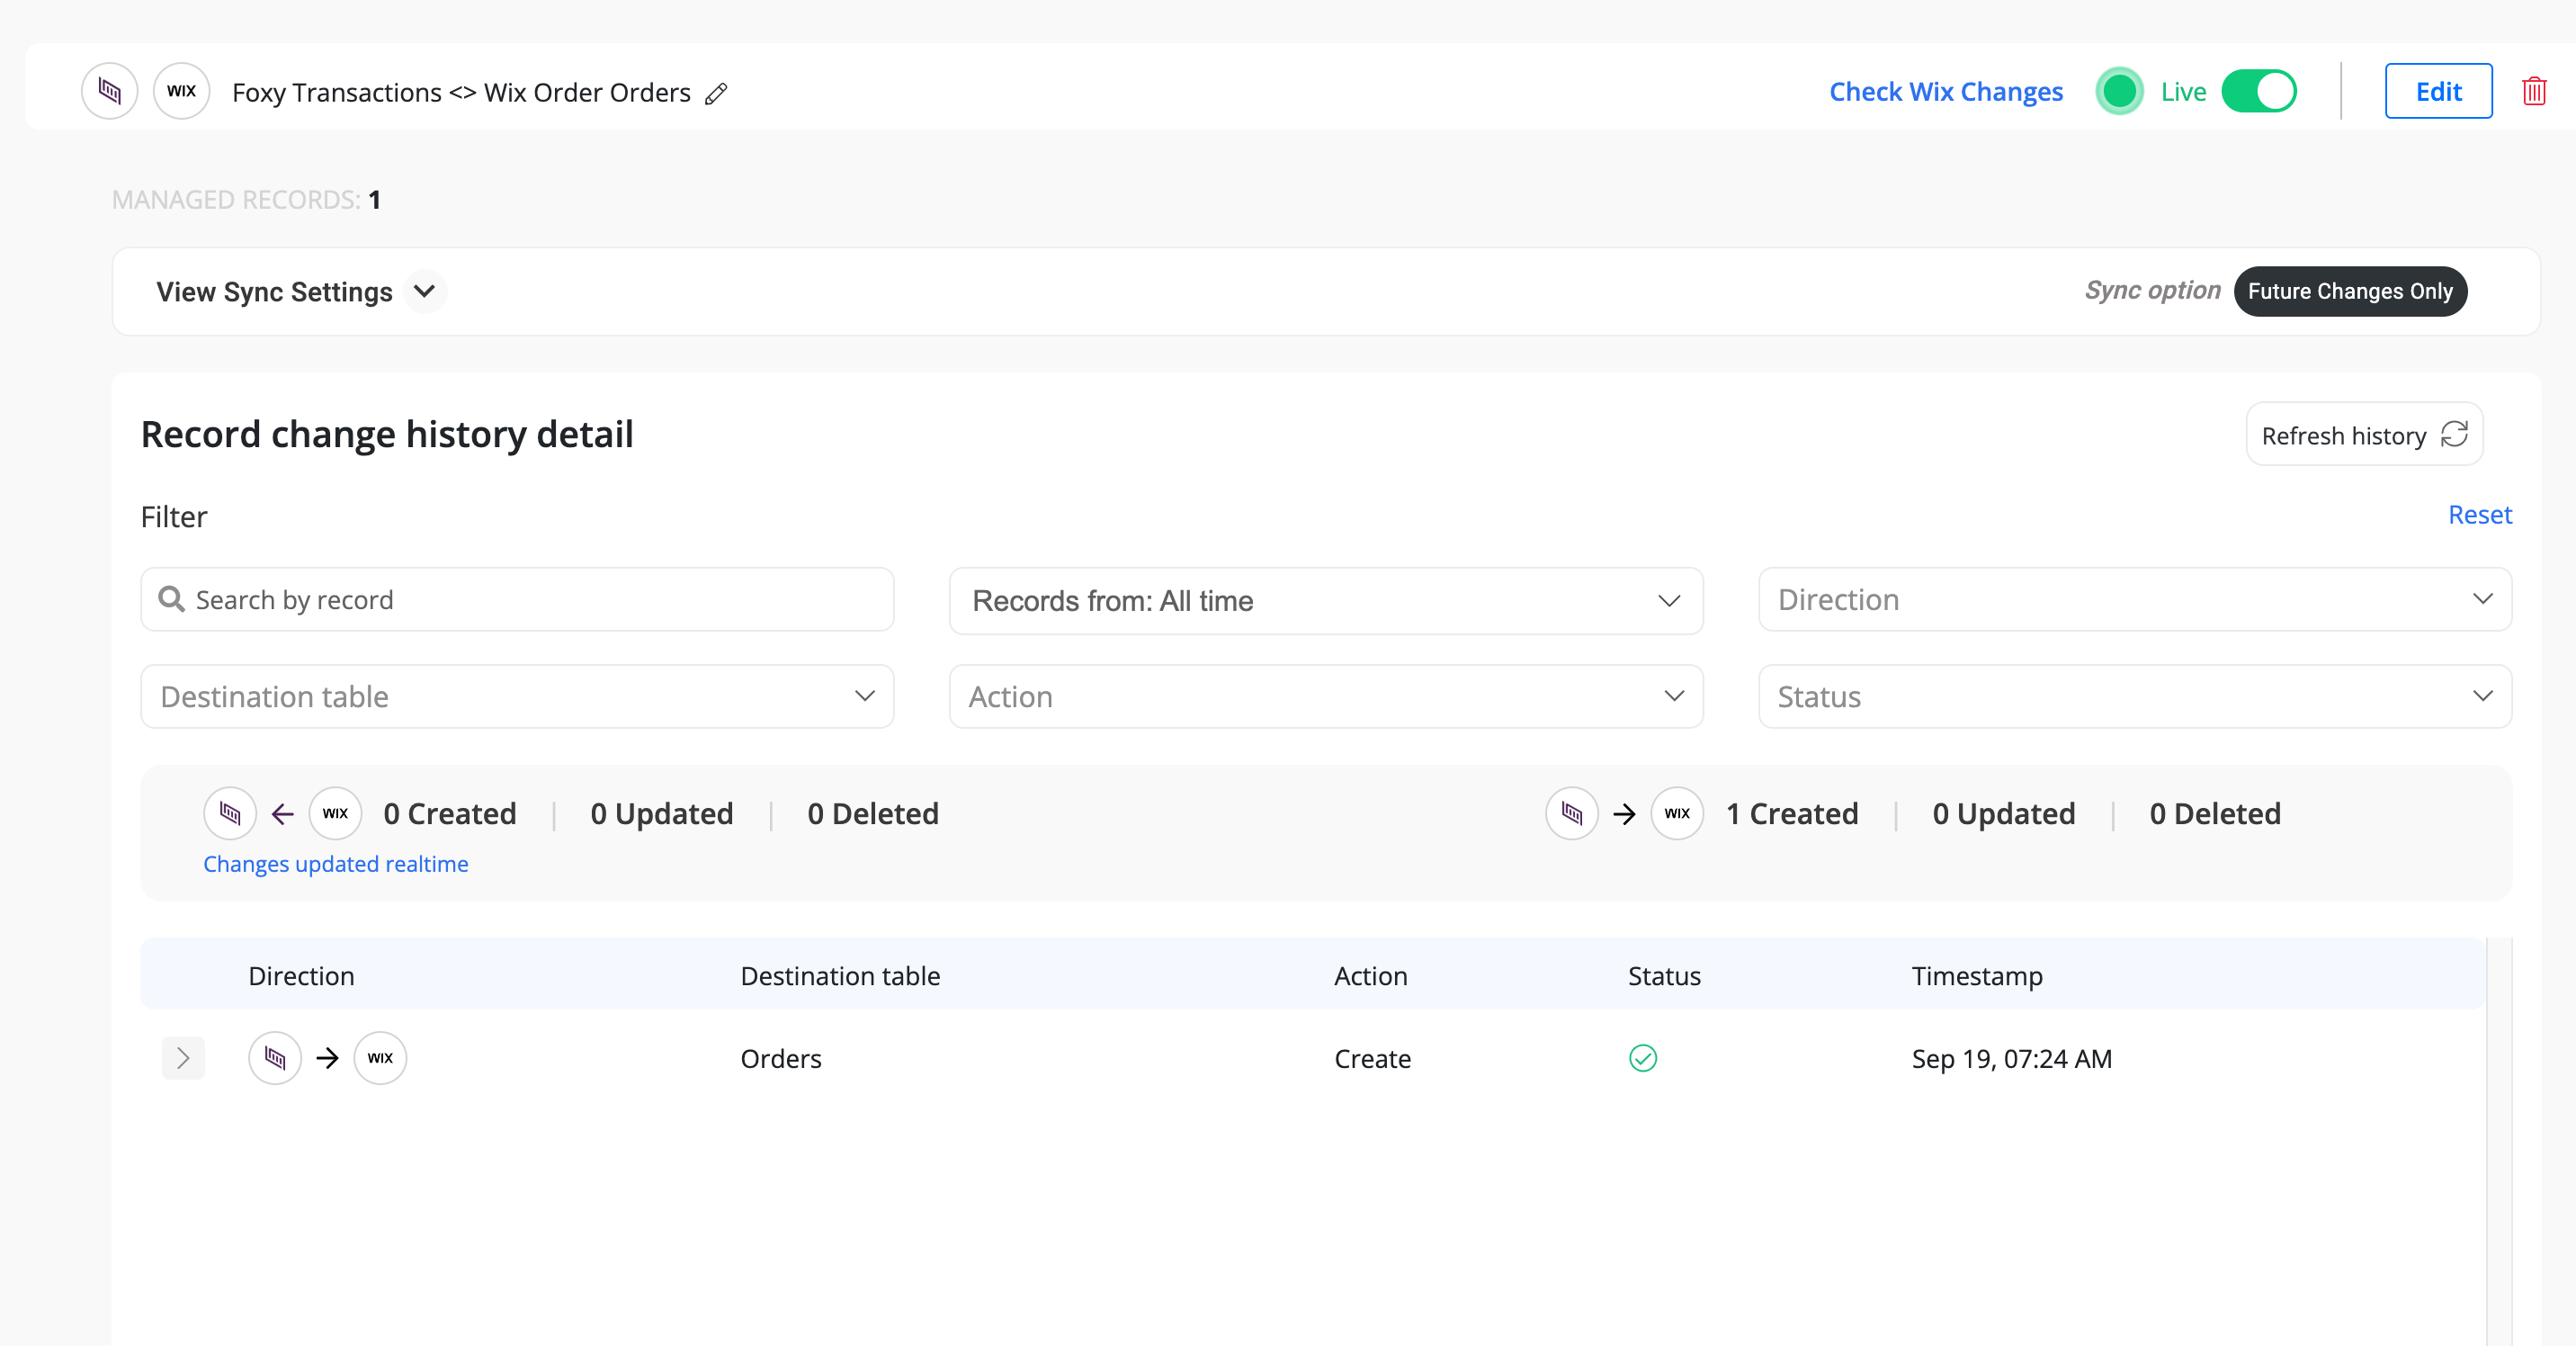
You can monitor sync progress, view logs, or make changes anytime from the Syncs page. If you need to pause or edit the sync, simply open it from your dashboard.
✅ That’s it! Your Foxy sync is now live.
When you sync Foxy transactions with Wix orders, your Wix product catalog inventory is automatically updated. To enable this, the code field in Foxy transaction line items must be mapped to the SKU value. This setup is handled in your Foxy account. If you need help configuring it, please reach out to Foxy customer support.
Byteline supports syncing multilingual content across all connectors.
If your source app stores content in separate fields for different languages (for example: Title_EN, Title_FR, Title_DE), you can map each field to a corresponding field in your destination app.
Byteline treats language-specific fields like any other field during sync.
This comprehensive guide walks you through the step-by-step configuration process for syncing Stripe data using Byteline.
Byteline currently supports syncing the following Stripe data objects:
Please refer to Data Sync - Getting Started for the standard data sync functionality. The Getting Started document covers data sync features that are valid for all integrations.
Follow these steps to configure data sync for Stripe Customers using Byteline. You can follow a similar process to sync other Stripe data types.
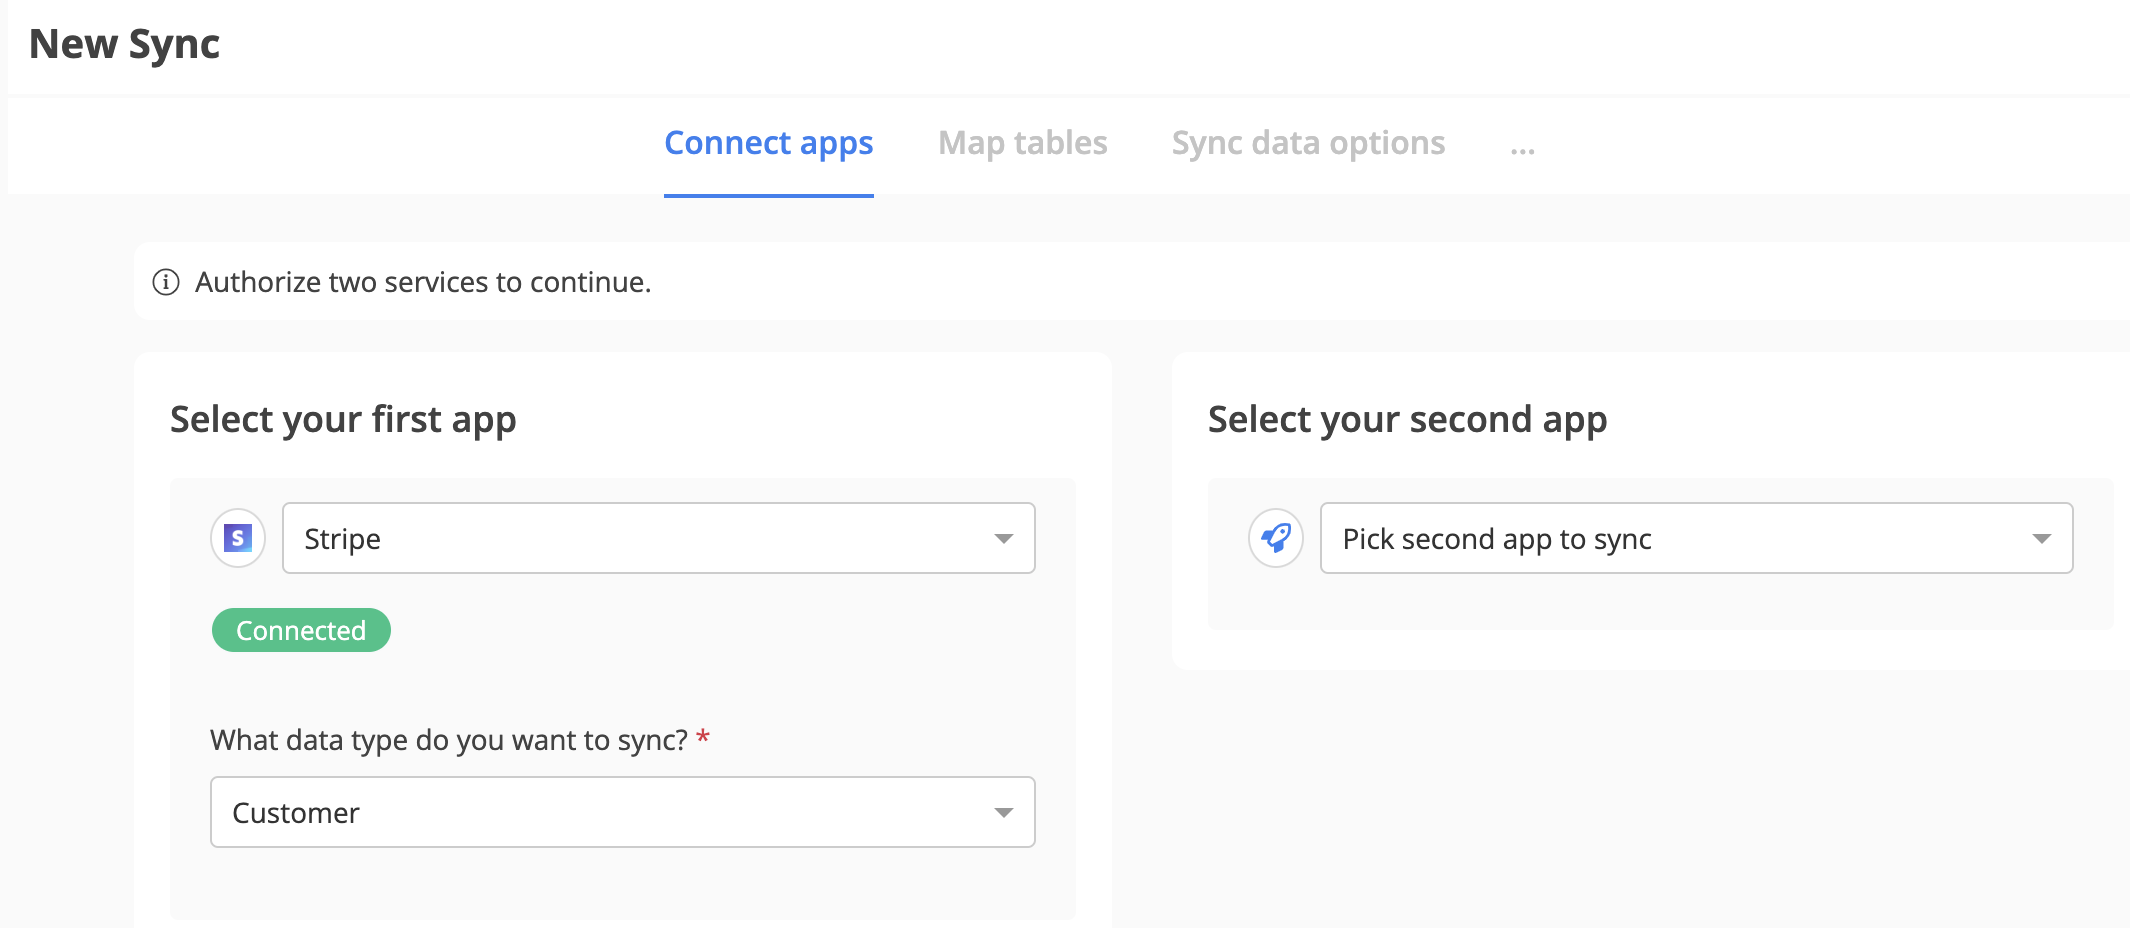
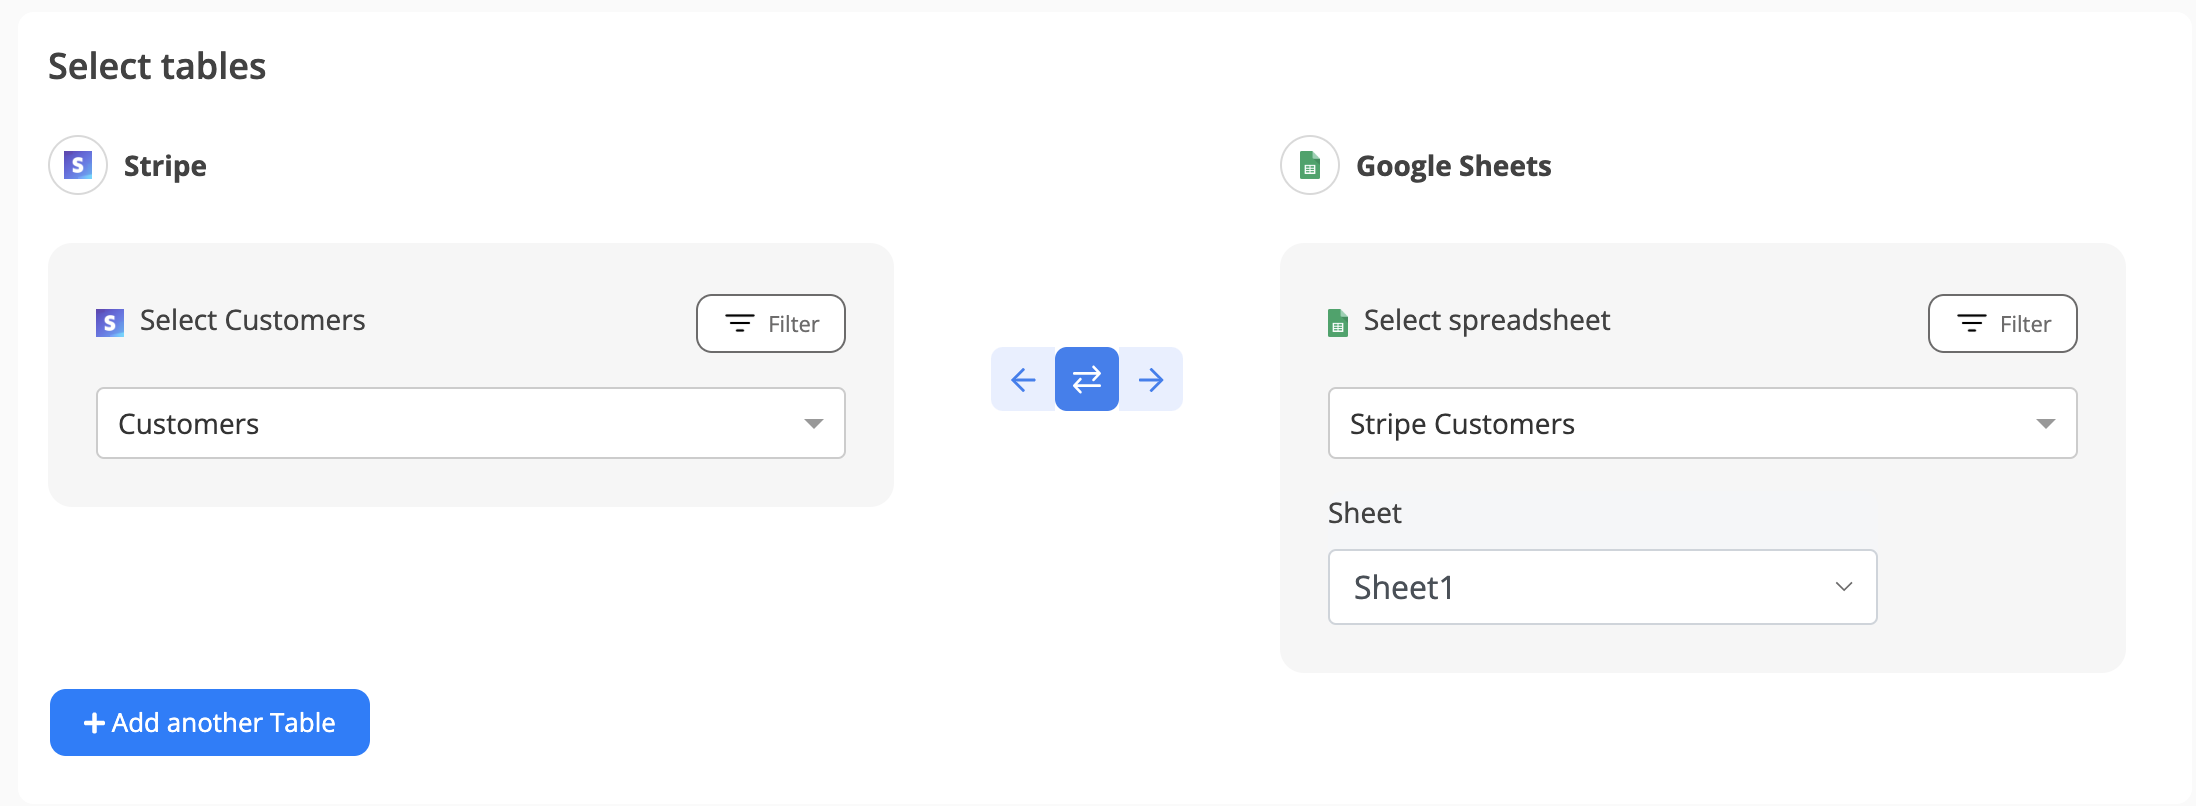
For each sync, you'll need to select whether to sync existing records, future changes, or both.
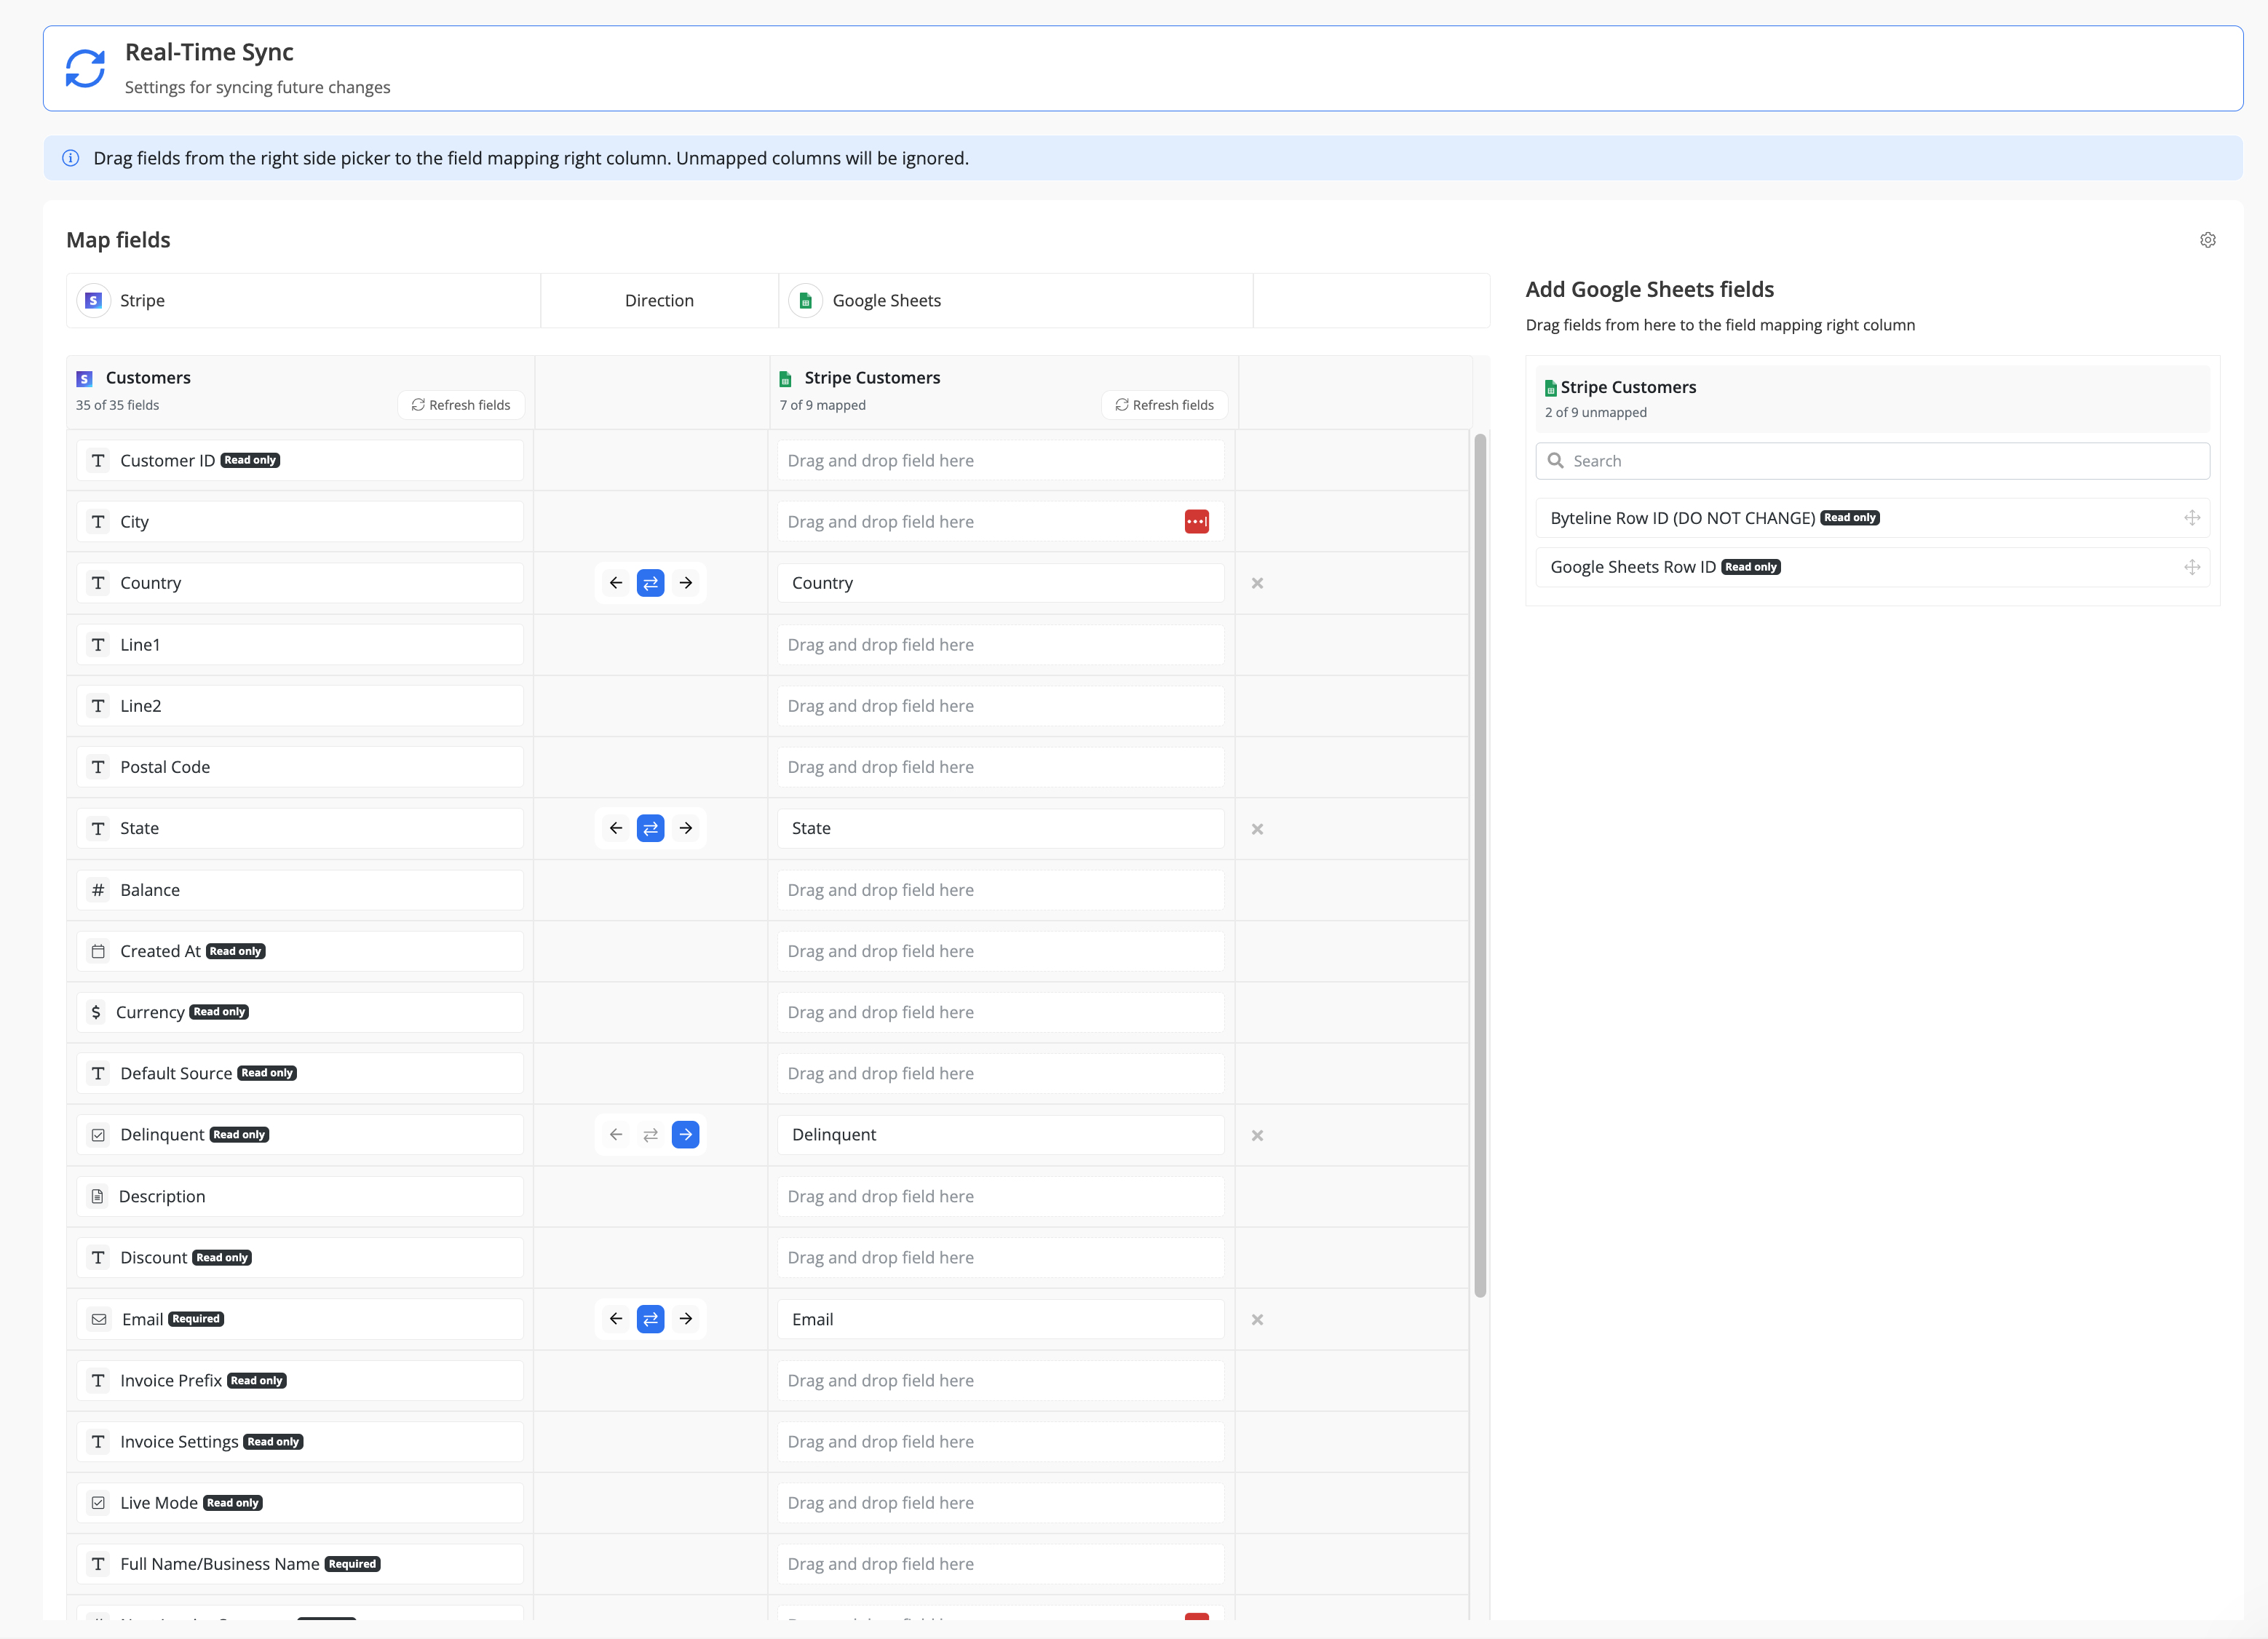
Select the sync direction for your existing data.

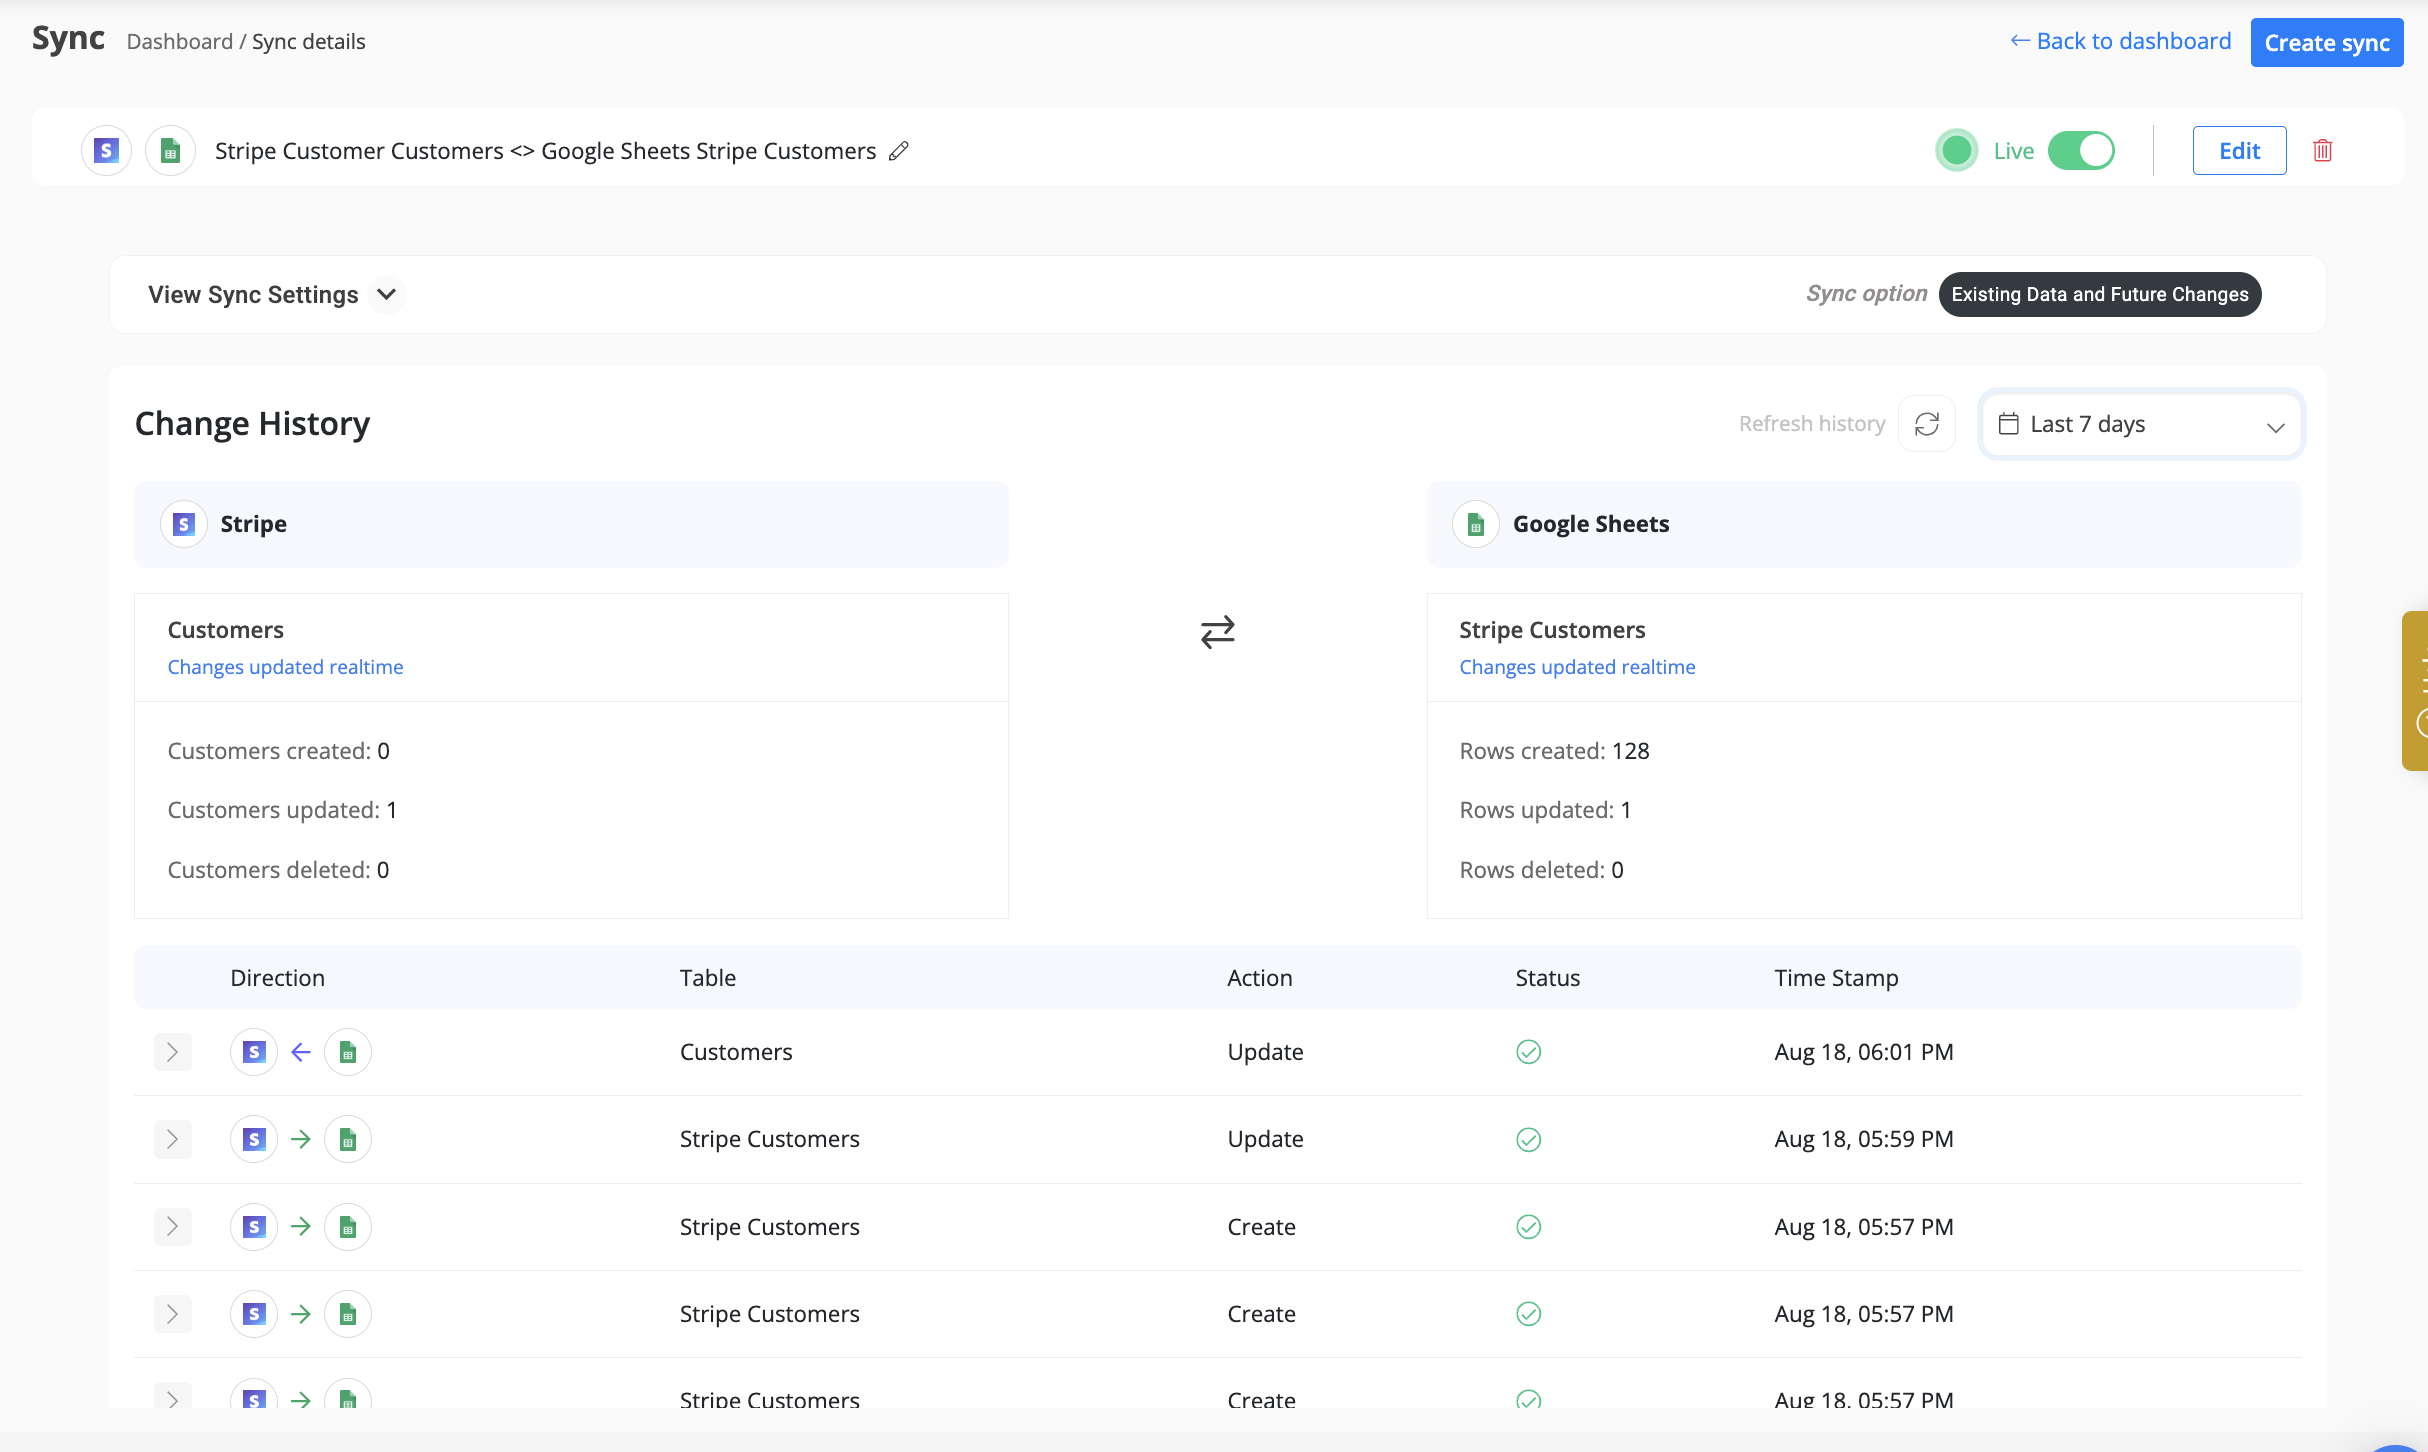
You can monitor sync progress, view logs, or make changes anytime from the Syncs page. If you need to pause or edit the sync, simply open it from your dashboard.
✅ That’s it! Your Stripe sync is now live.
This comprehensive document will walk you through the step-by-step configuration process for Framer data sync and address specific use cases tailored to Framer.
Please refer to Data Sync - Getting Started for the standard data sync functionality. The getting started document covers usages of data sync features valid for all integrations.
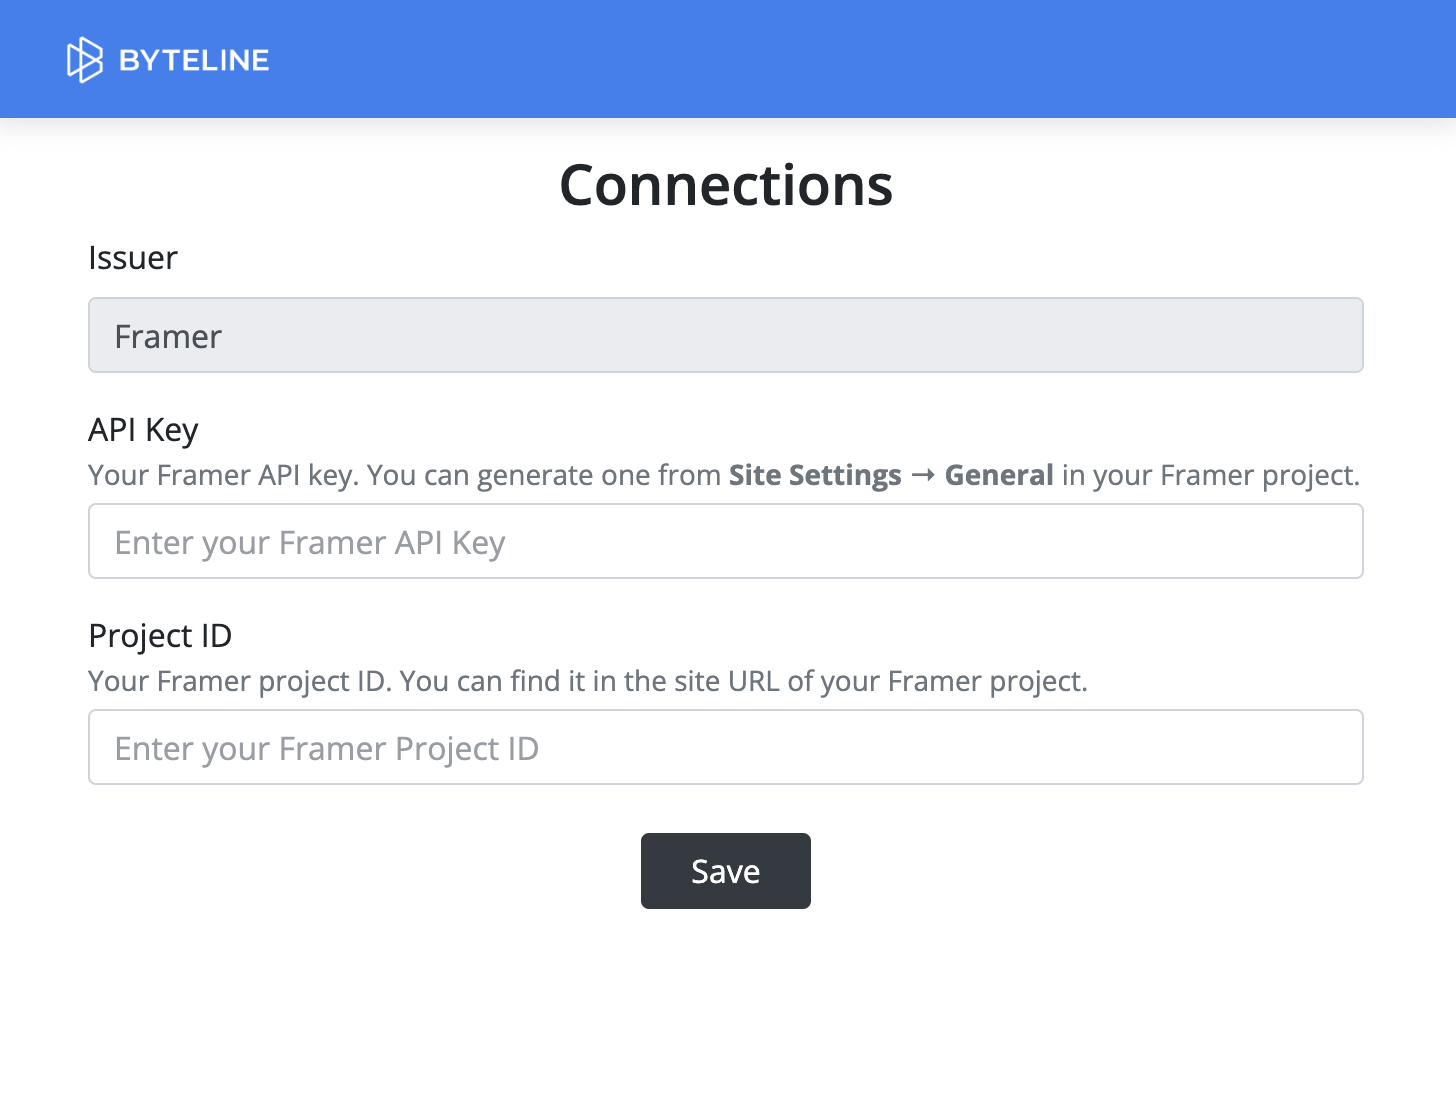
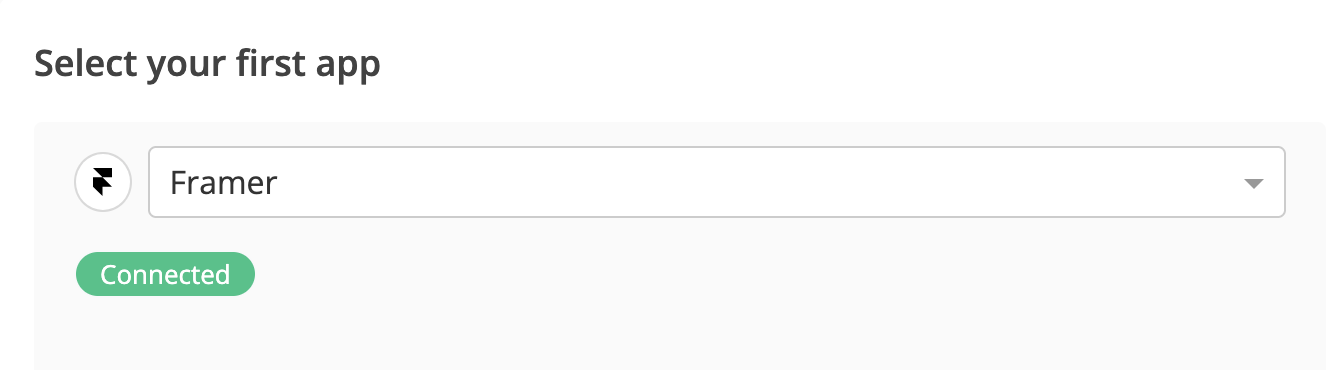
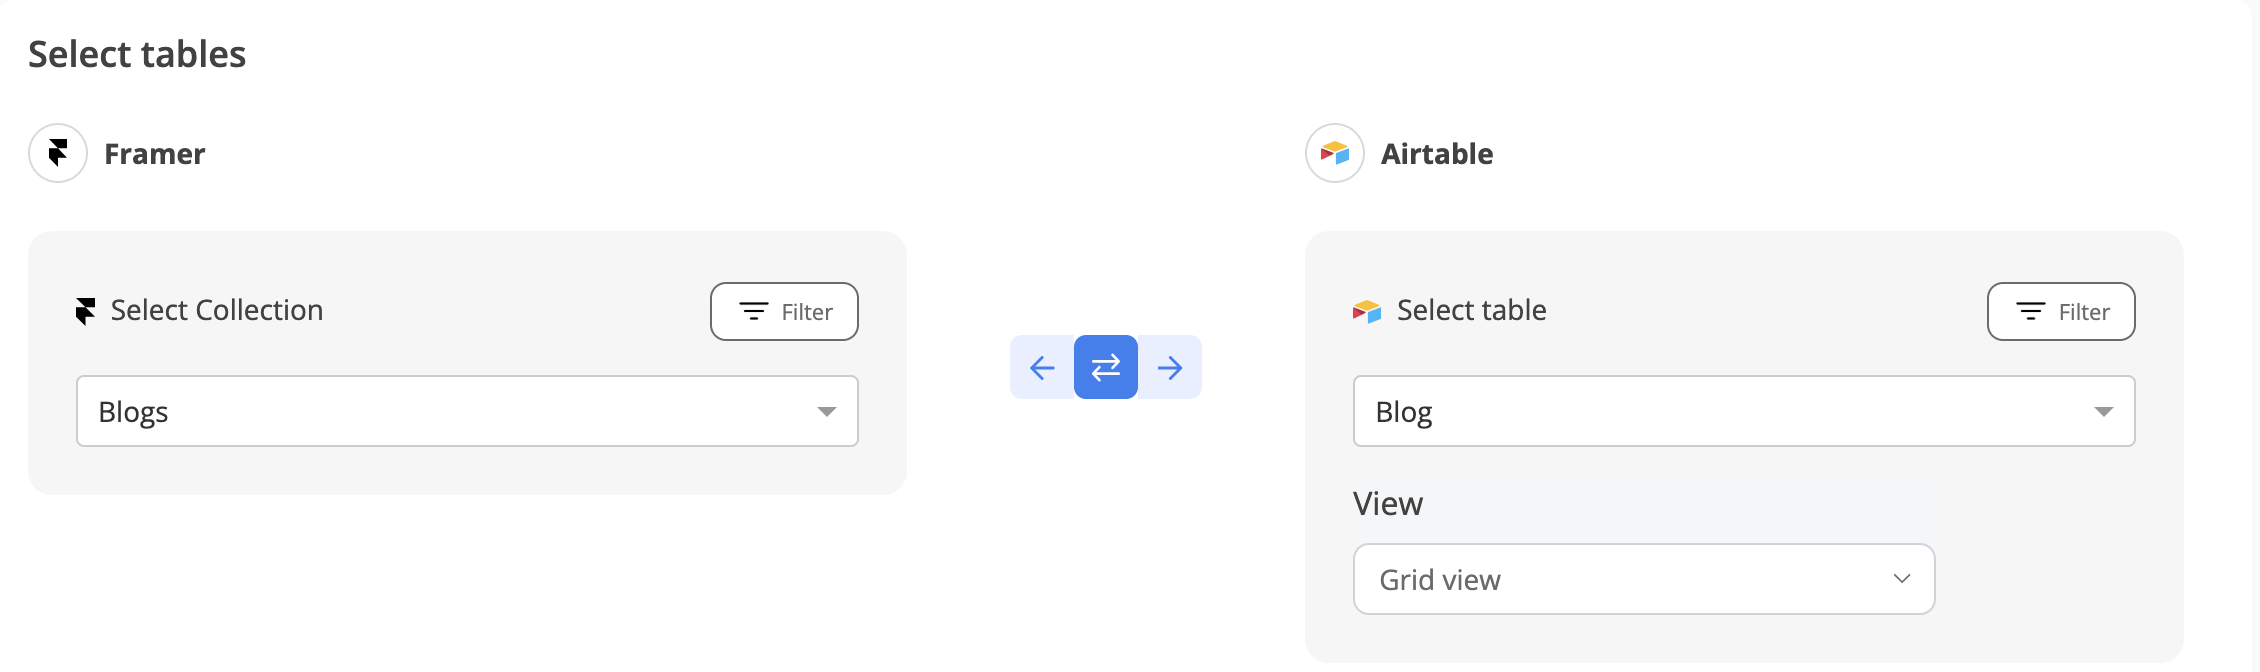
For each sync, you'll need to select whether to sync existing records, future changes, or both.
For a two-way sync, select the two-way option and then choose the direction for syncing existing data. For a one-way sync, the direction for real-time and historical sync remains the same.
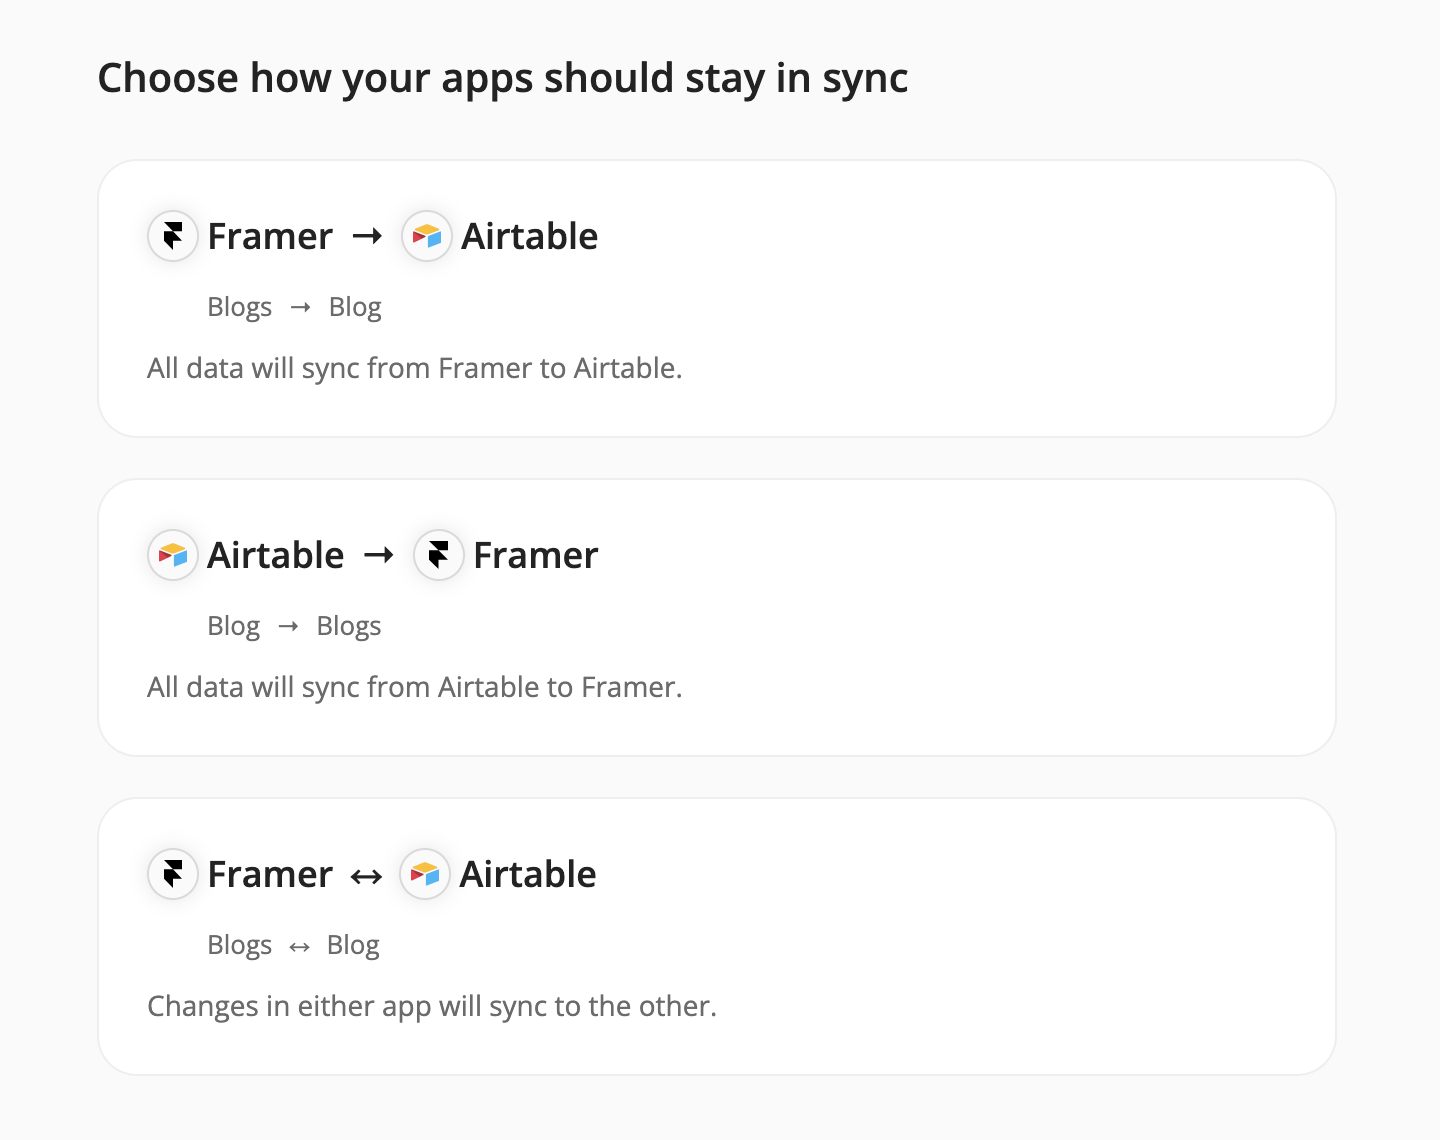
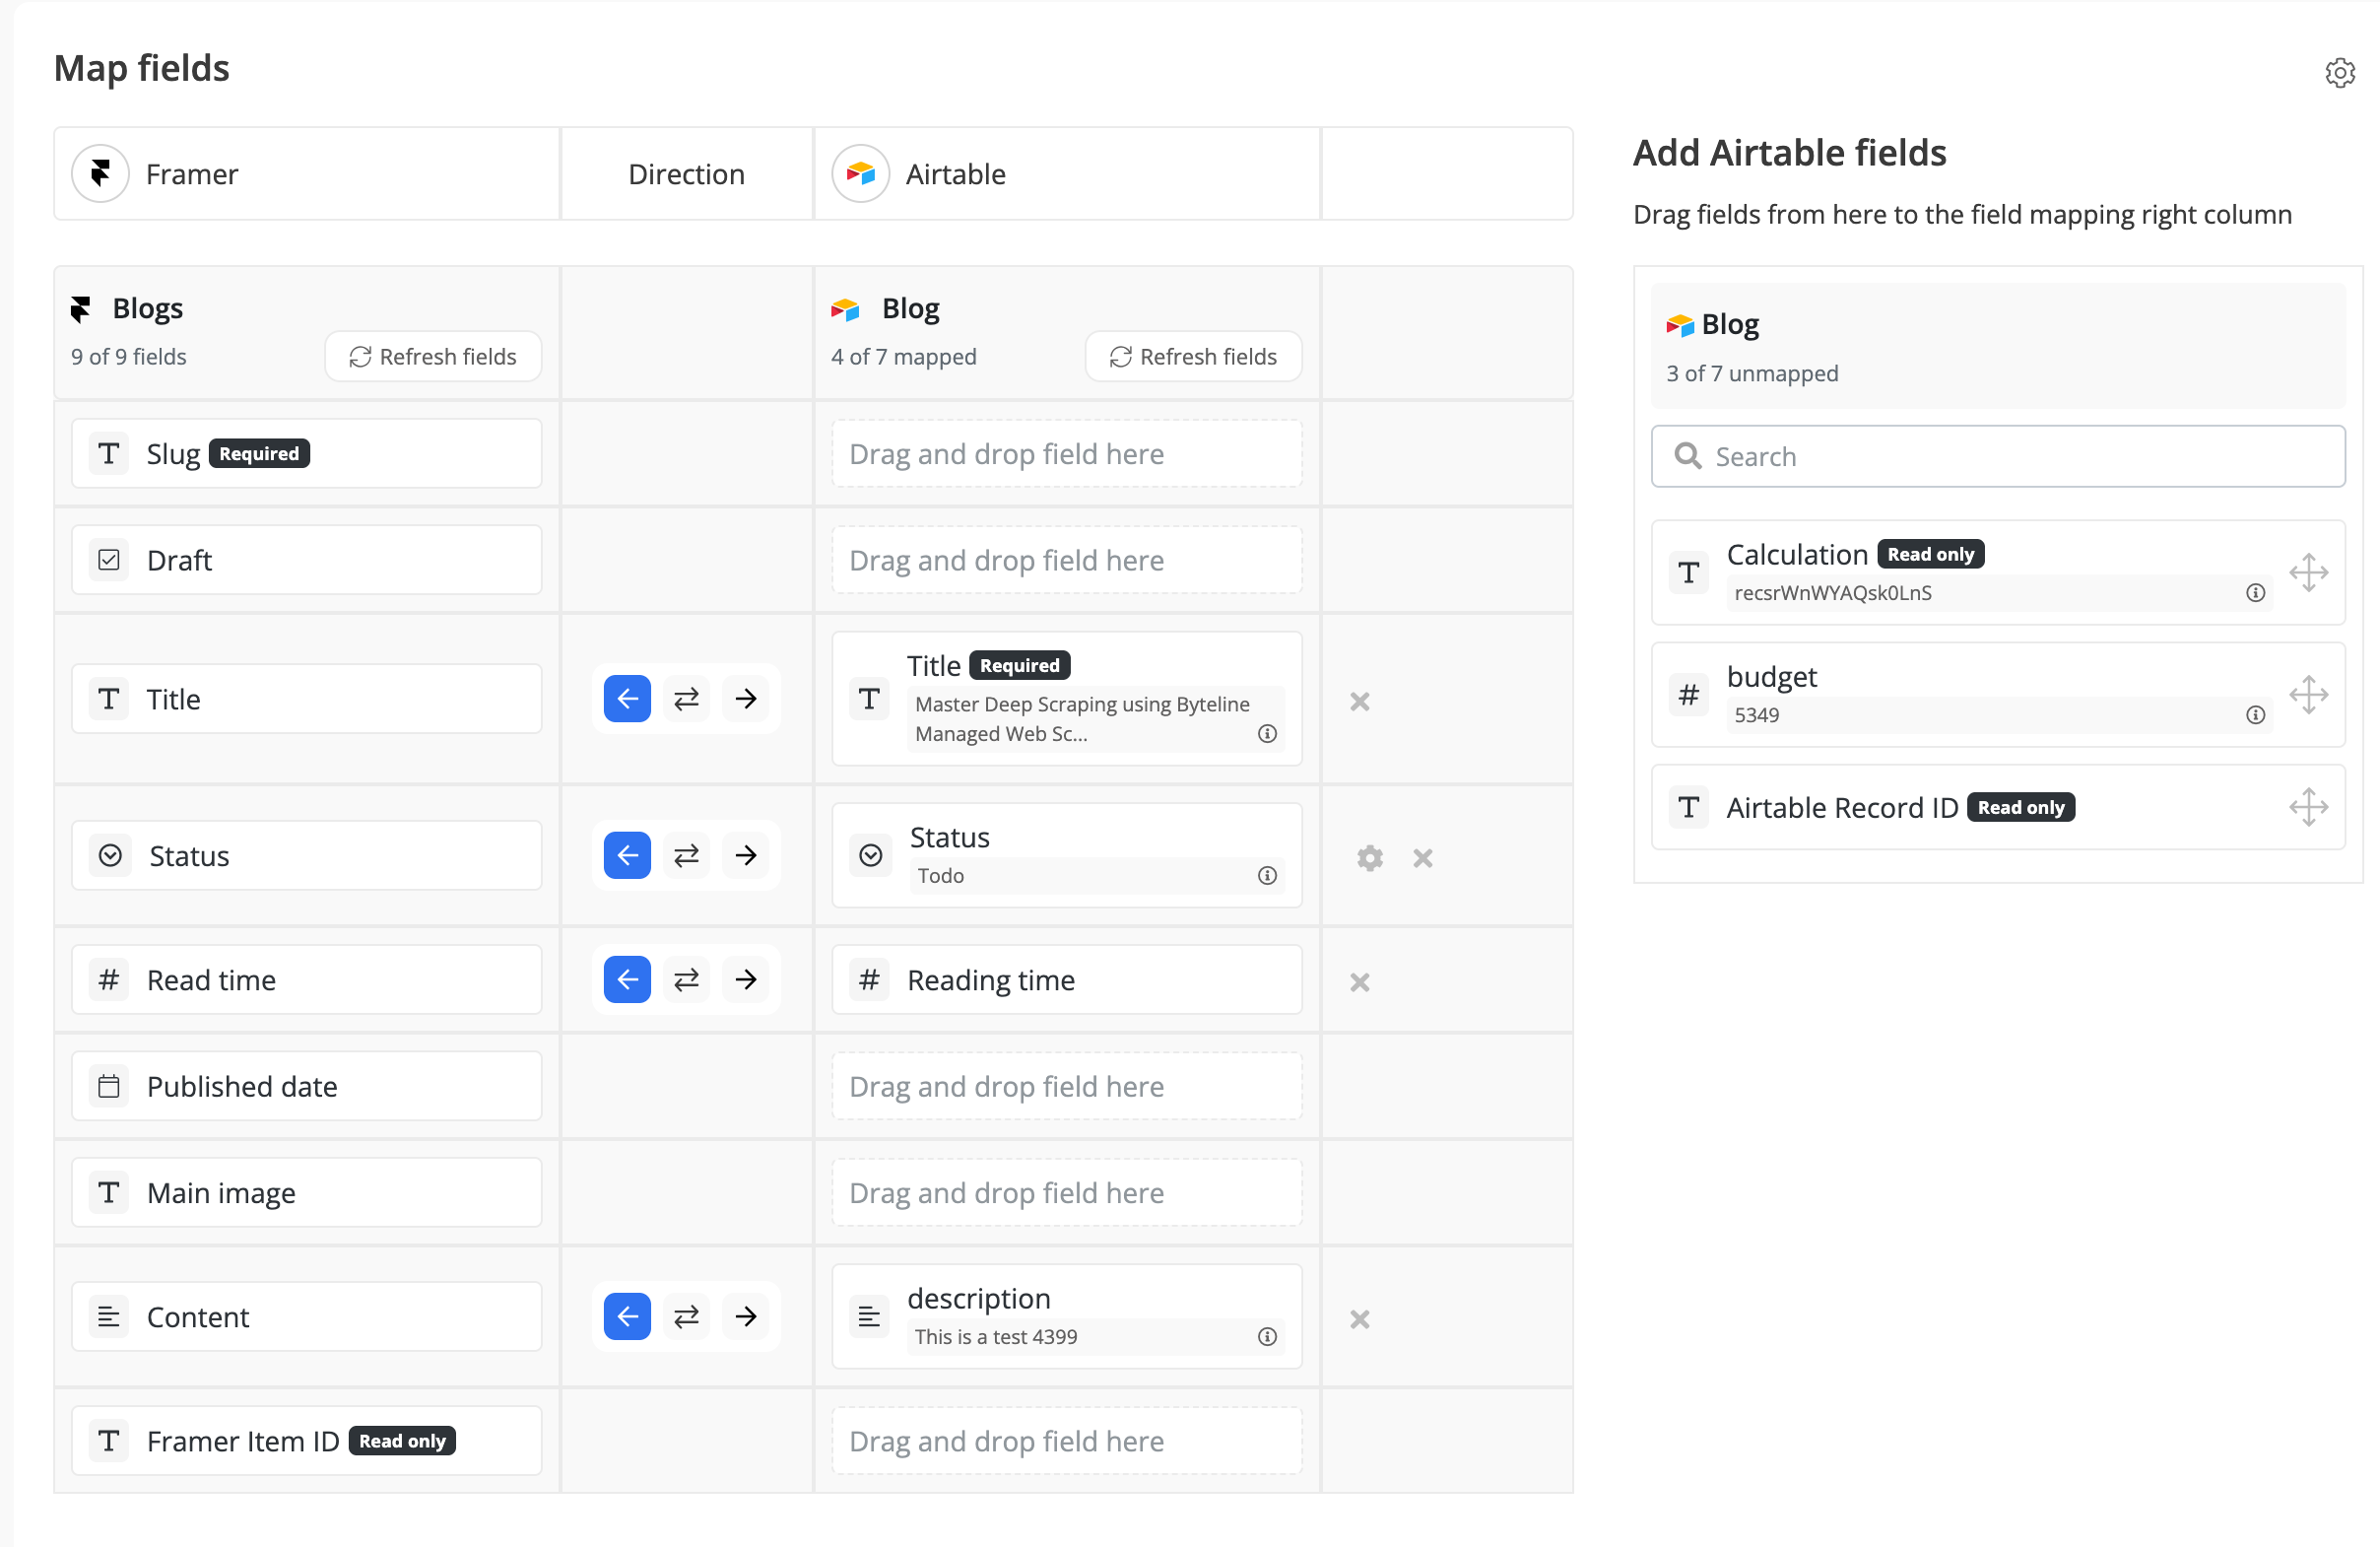
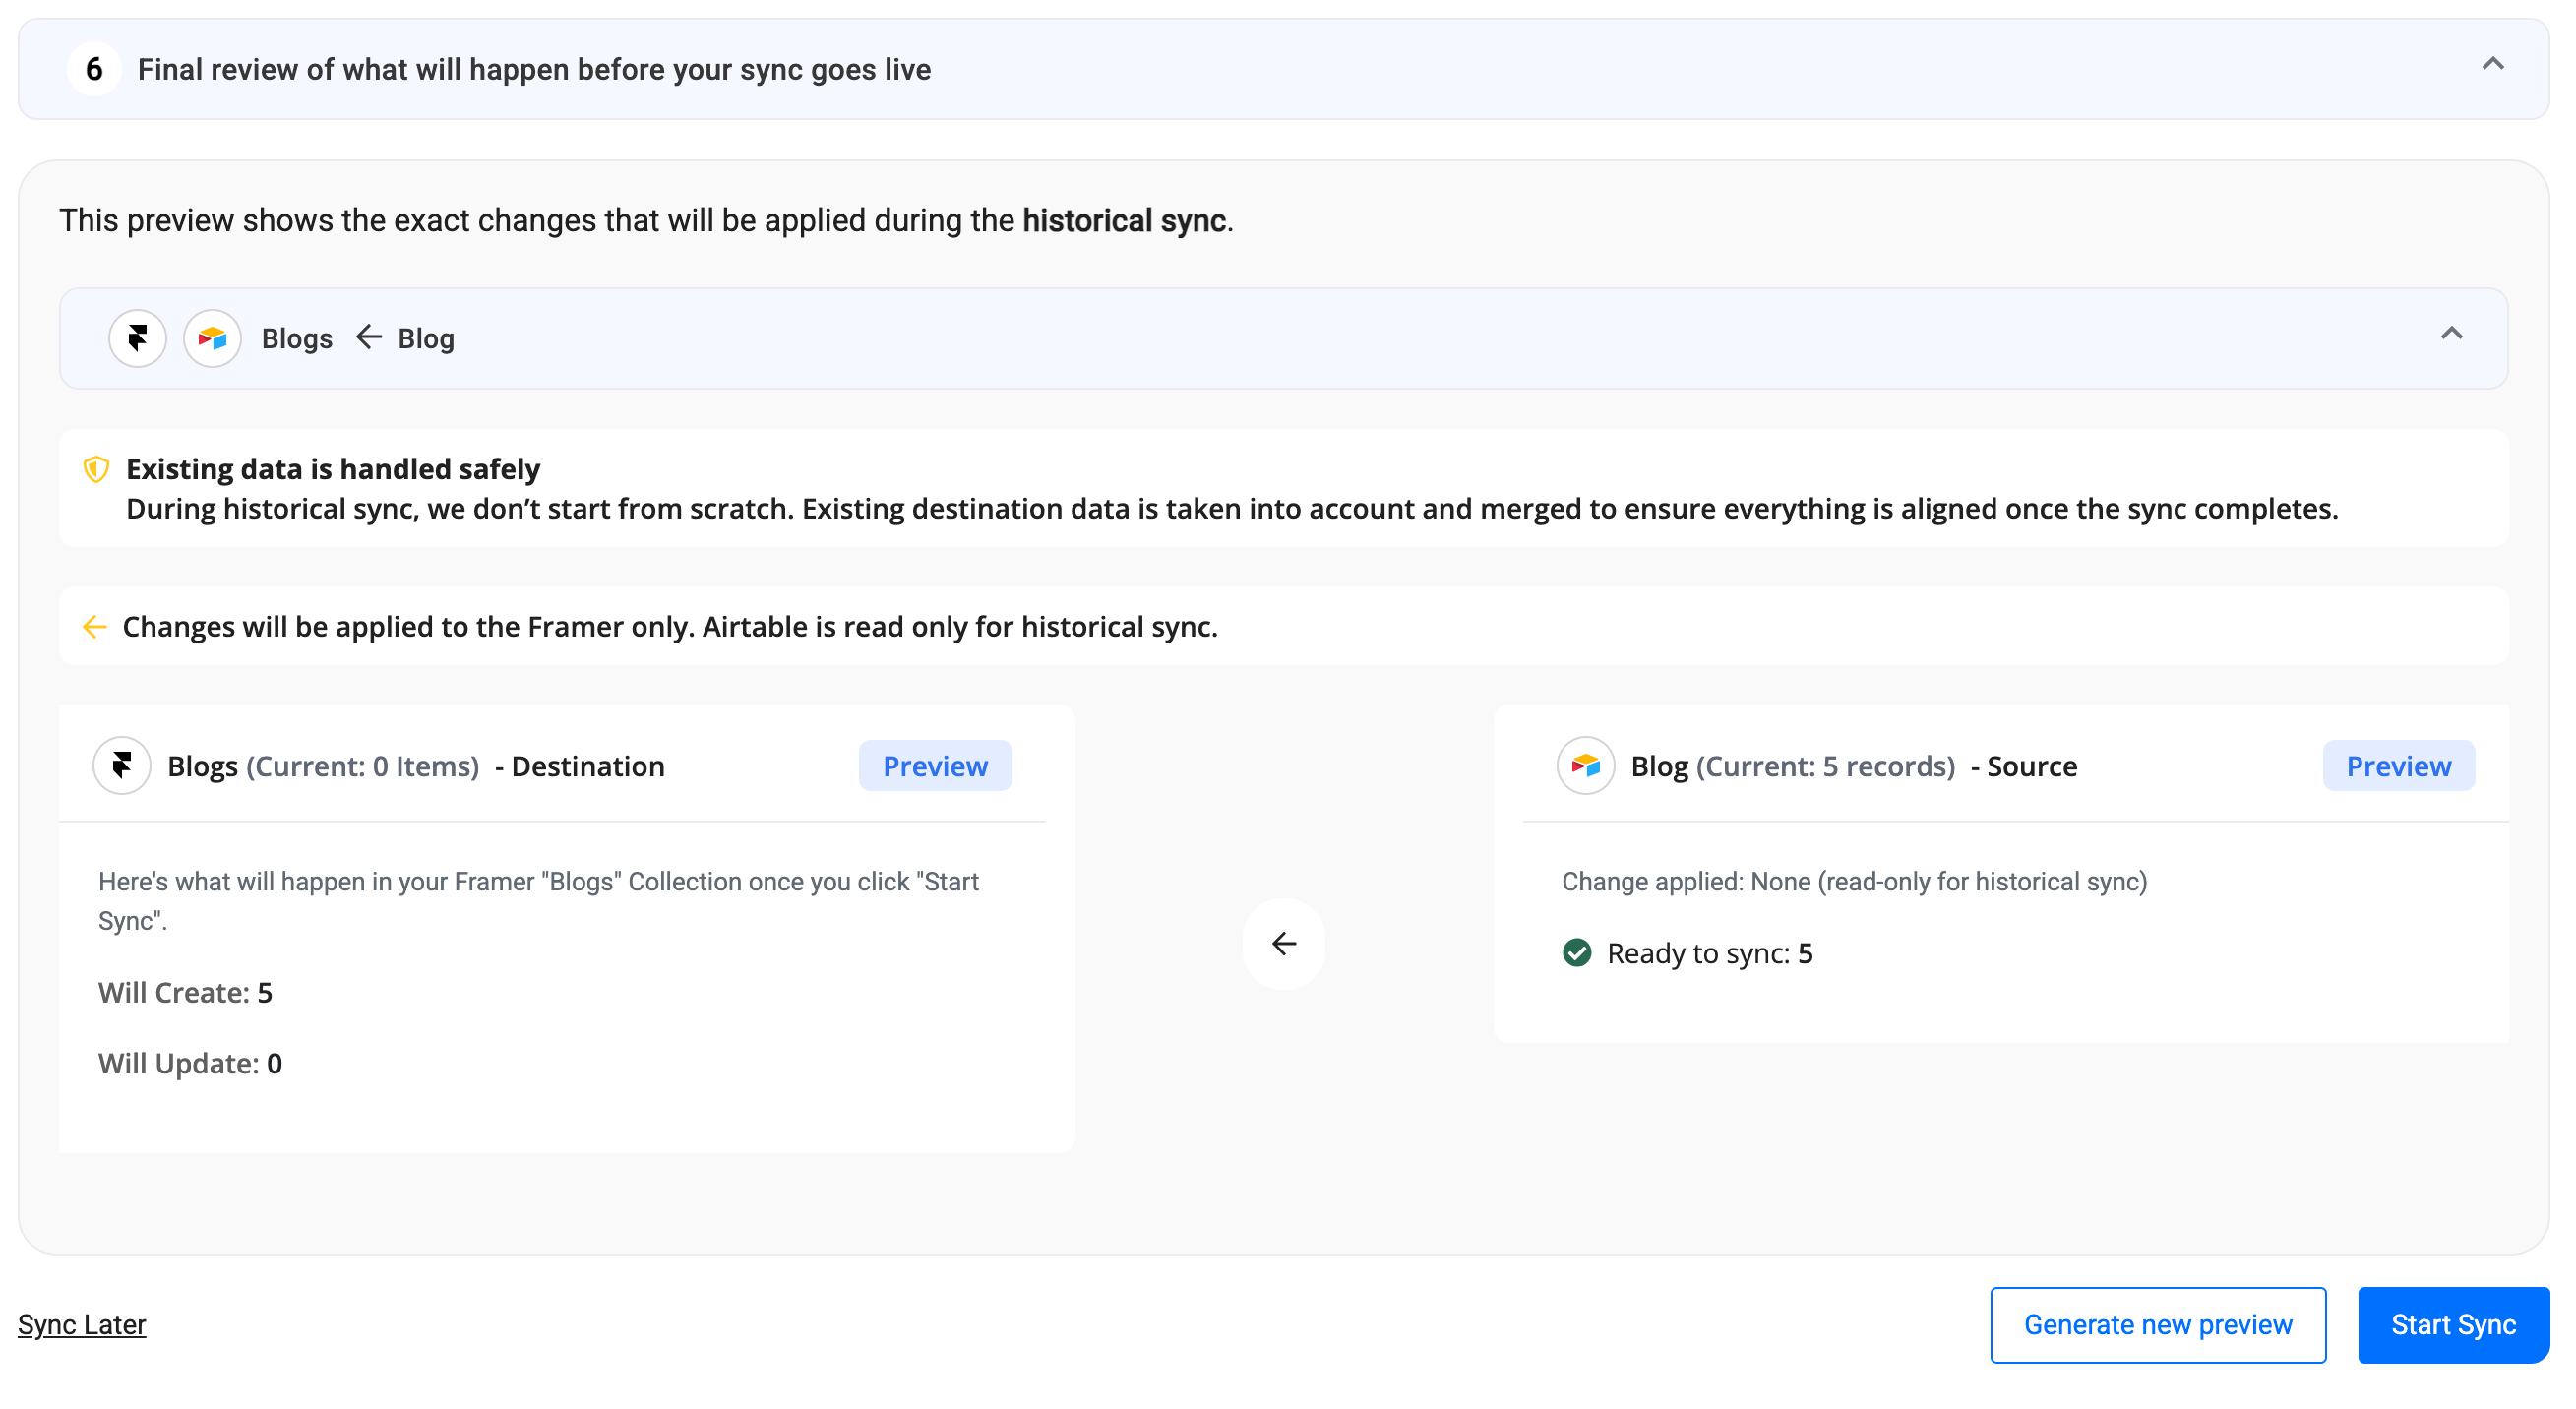
You can monitor sync progress, view logs, or make changes anytime from the Syncs page. If you need to pause or edit the sync, simply open it from your dashboard.
✅ That’s it! Your Framer sync is now live.
This comprehensive guide walks you through the step-by-step configuration process for syncing Wix data using Byteline.
Byteline currently supports syncing the following Wix data objects:
Please refer to Data Sync - Getting Started for the standard data sync functionality. The Getting Started document covers the usage of data sync features that are valid for all integrations.
Follow these steps to configure data sync for Wix CMS using Byteline. You can follow a similar process to sync other Wix data types.
Note: In the instructions below, Wix is configured as the left-side app in the sync setup.
This means you’ll be mapping fields from the Wix (left side) to the corresponding fields in the other app (right side).

For each sync, you'll need to select whether to sync existing records, future changes, or both.
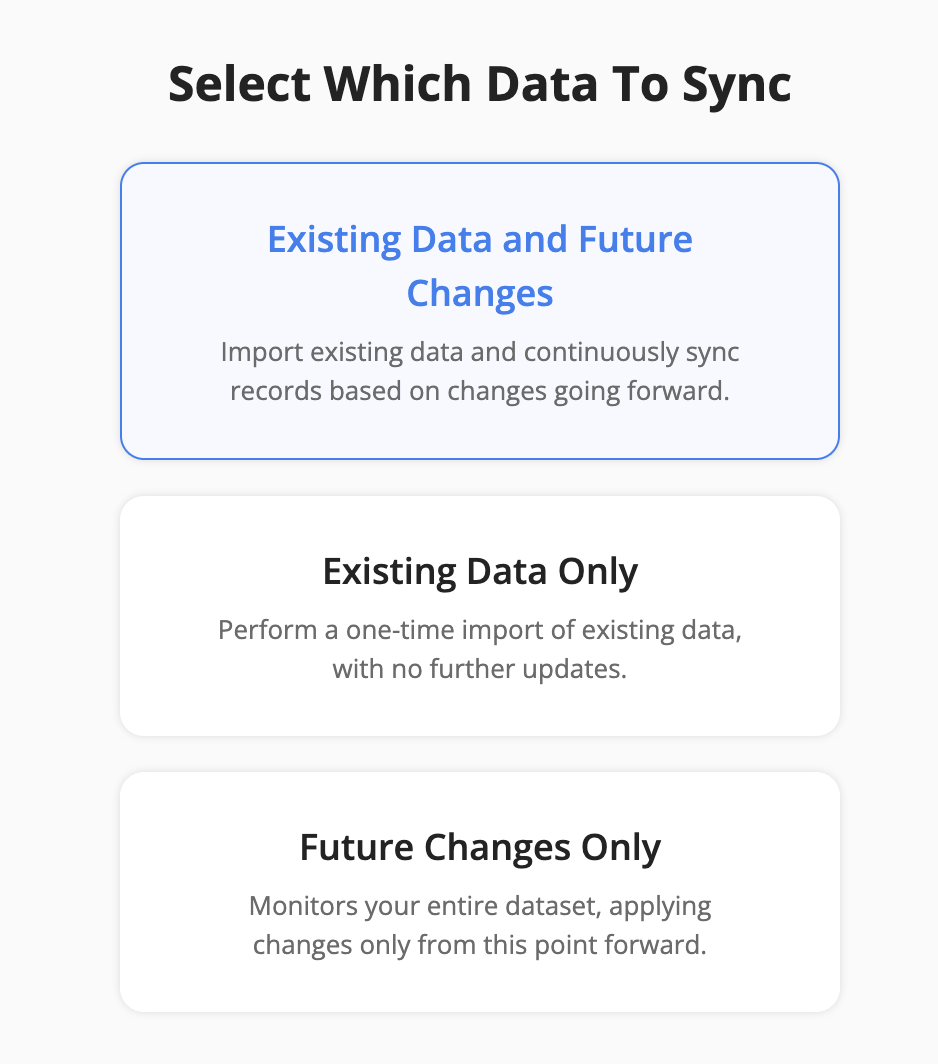

Select the sync direction for your existing data.

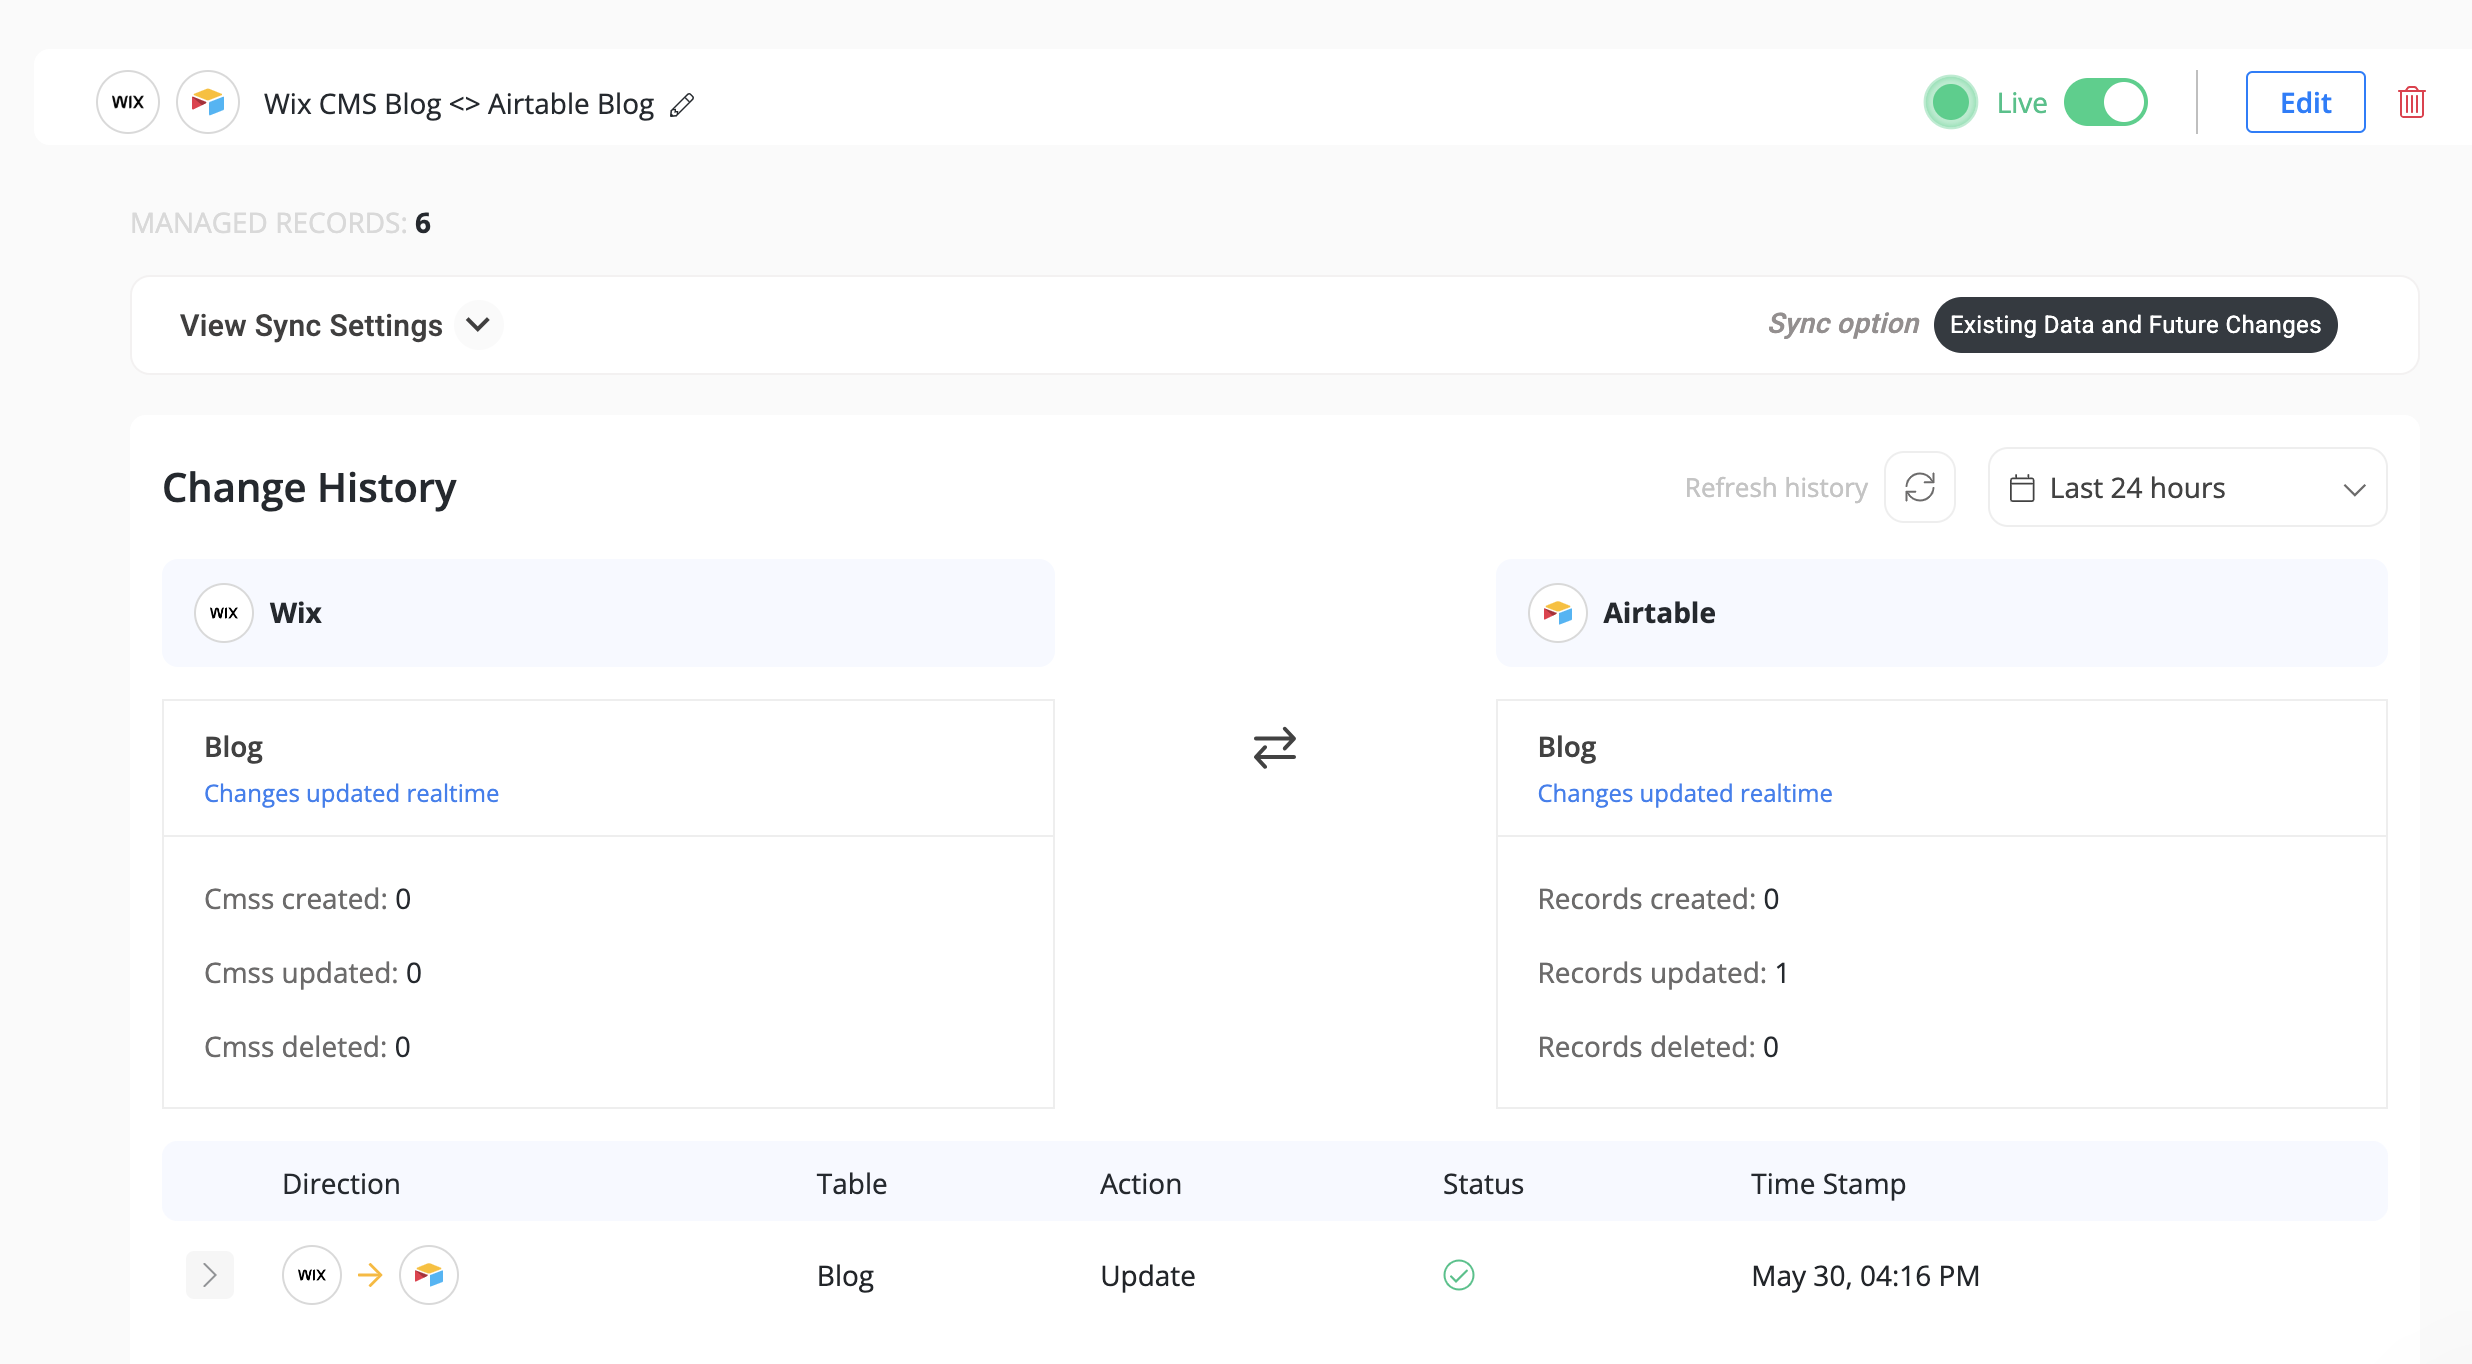
You can monitor sync progress, view logs, or make changes anytime from the Syncs page. If you need to pause or edit the sync, simply open it from your dashboard.
✅ That’s it! Your Wix sync is now live.
Byteline makes it easy to work with Wix CMS reference and multi-reference fields by allowing you to map them using human-readable text values. These values must exactly match the primary field of the referenced collection. The primary field is the one displayed in the Wix CMS dashboard for each item.
You can view which field is set as primary by clicking the Manage Fields button.

Clicking Manage Fields opens the following screen

If needed, you can change the primary field by clicking the three-dot menu next to a text field and selecting Make Primary.

We support syncing all major elements from Wix’s rich content field, including:
This comprehensive document will walk you through the step-by-step configuration process for Google Sheet data sync and address specific use cases tailored to Google Sheet.
Please refer to Data Sync - Getting Started for the standard data sync functionality. The getting started document covers usages of data sync features valid for all integrations.
Byteline no longer uses the Byteline Last Modified Time (DO NOT CHANGE) column. If this column exists in your spreadsheet, you can safely ignore its values.


Byteline provides real-time updates from Google Sheets. Any time you create a row, update cells, or delete a row, the changes are instantly synchronized.
Note: Real-time updates are only available for manual changes to your Google Sheets. If a formula-based column updates due to a manual change, that update will also be captured immediately.
If you have been using our Google Sheets add-on before real-time updates were supported, follow these steps to reauthorize the Byteline add-on:

After completing these steps, any manual changes to your Google Spreadsheet will be instantly available in a live sync.
Byteline fully supports rows that are created, updated, or deleted through non-manual methods such as automations, form submissions, or other connected apps. No additional setup is required to handle this data. However, please note that these changes are not processed in real time—they will be picked up within 5 to 15 minutes, depending on your subscription plan.
Do not delete the header row of your Google Sheets, as it is essential for mapping and syncing data.
By following these guidelines, you can maintain accurate data synchronization with Byteline and ensure that your Google Sheets data is up-to-date with non-manual changes.
This comprehensive document will walk you through the step-by-step configuration process for QuickBooks data sync and address its specific use cases.
Byteline supports syncing the following data objects from QuickBooks:
More object types will be supported in the future.
Please refer to Data Sync - Getting Started for the standard data sync functionality. The getting started document covers usages of data sync features valid for all integrations.

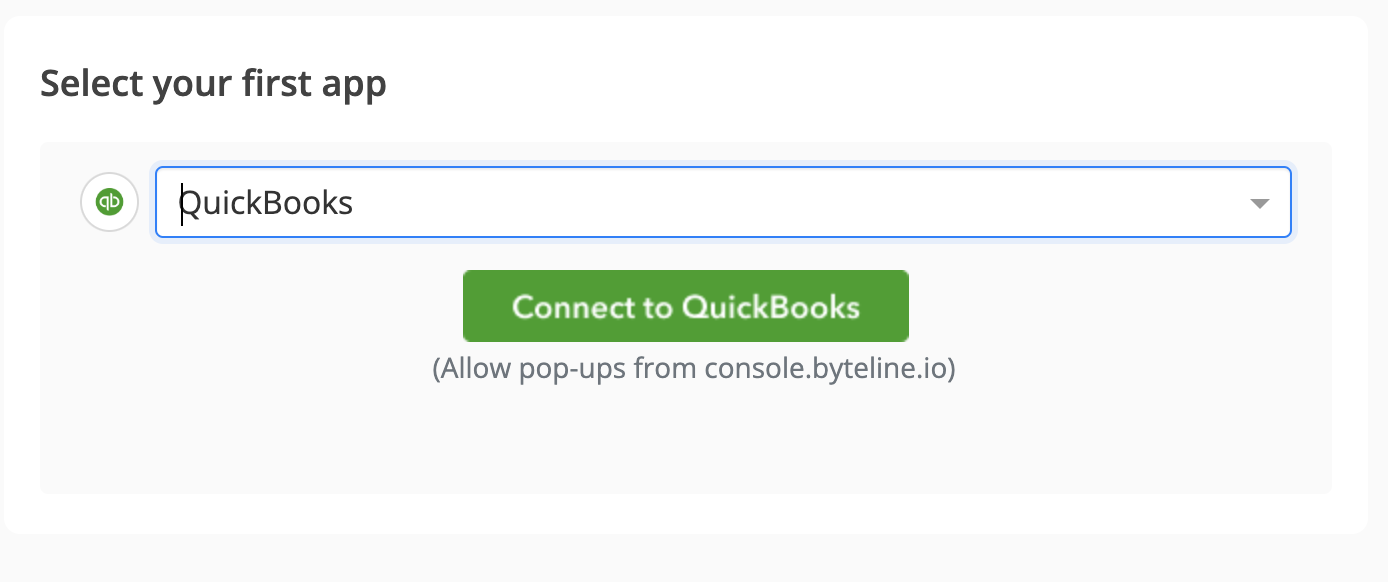

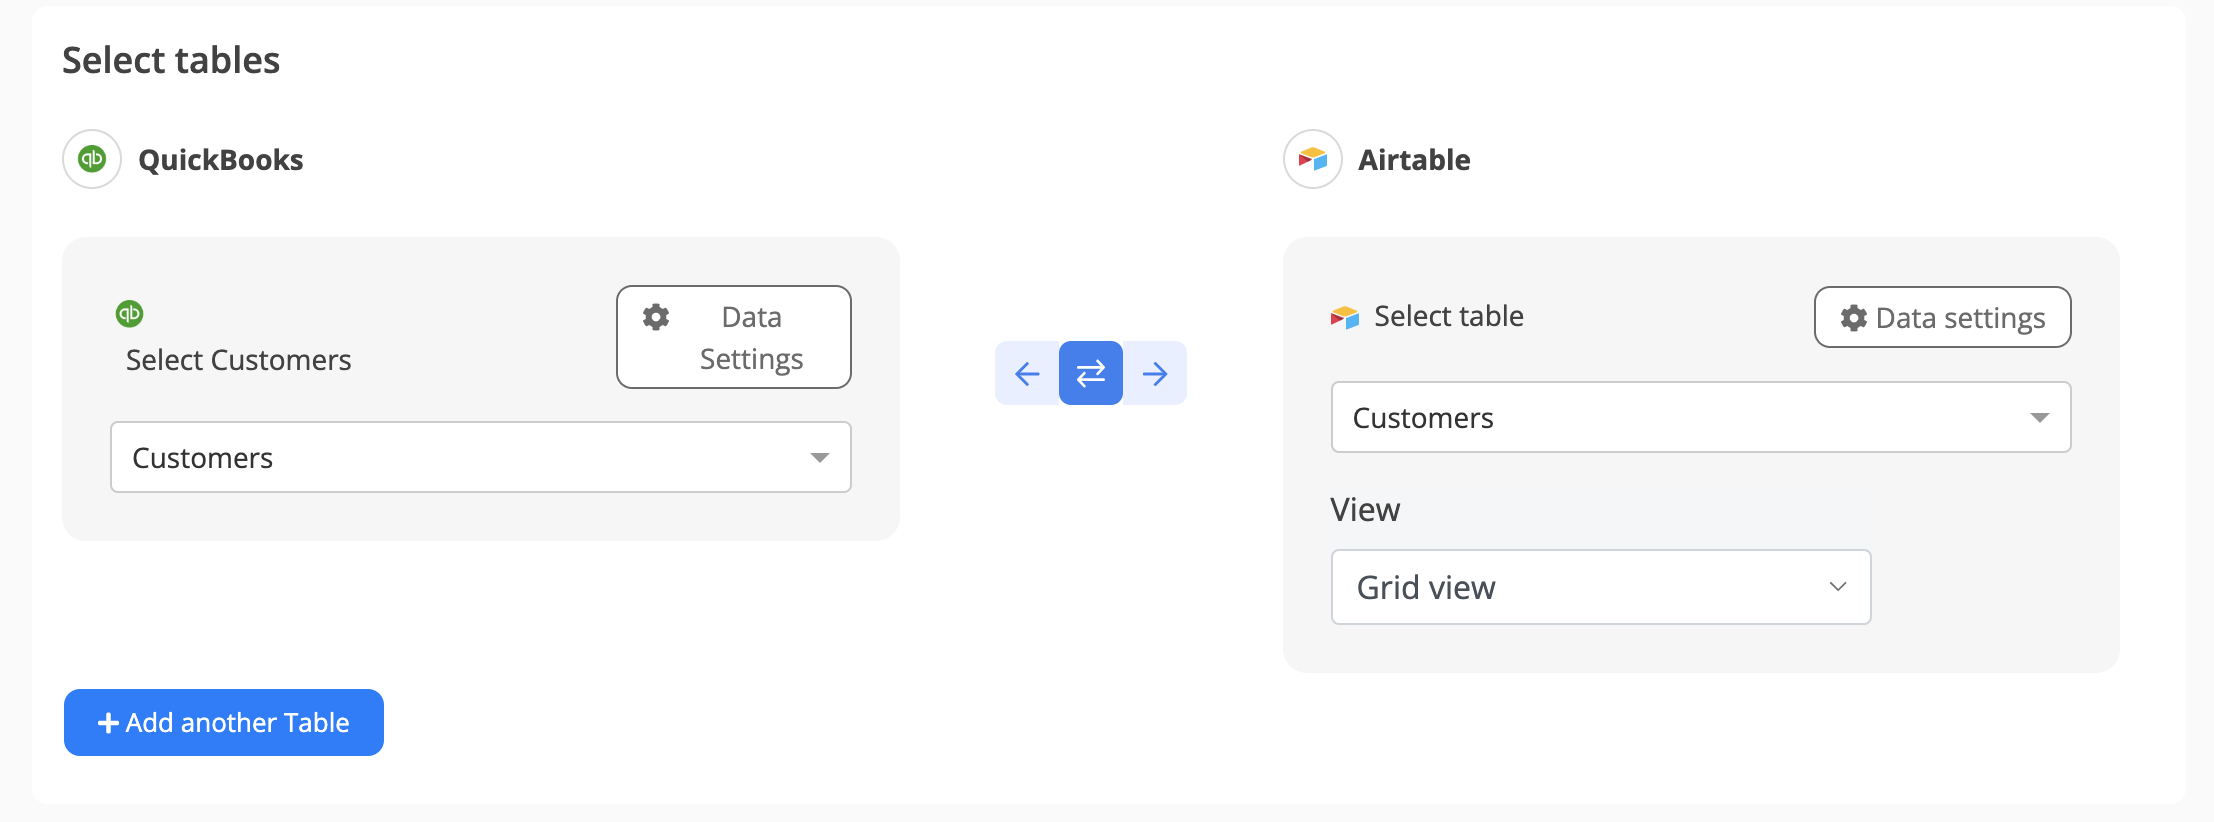
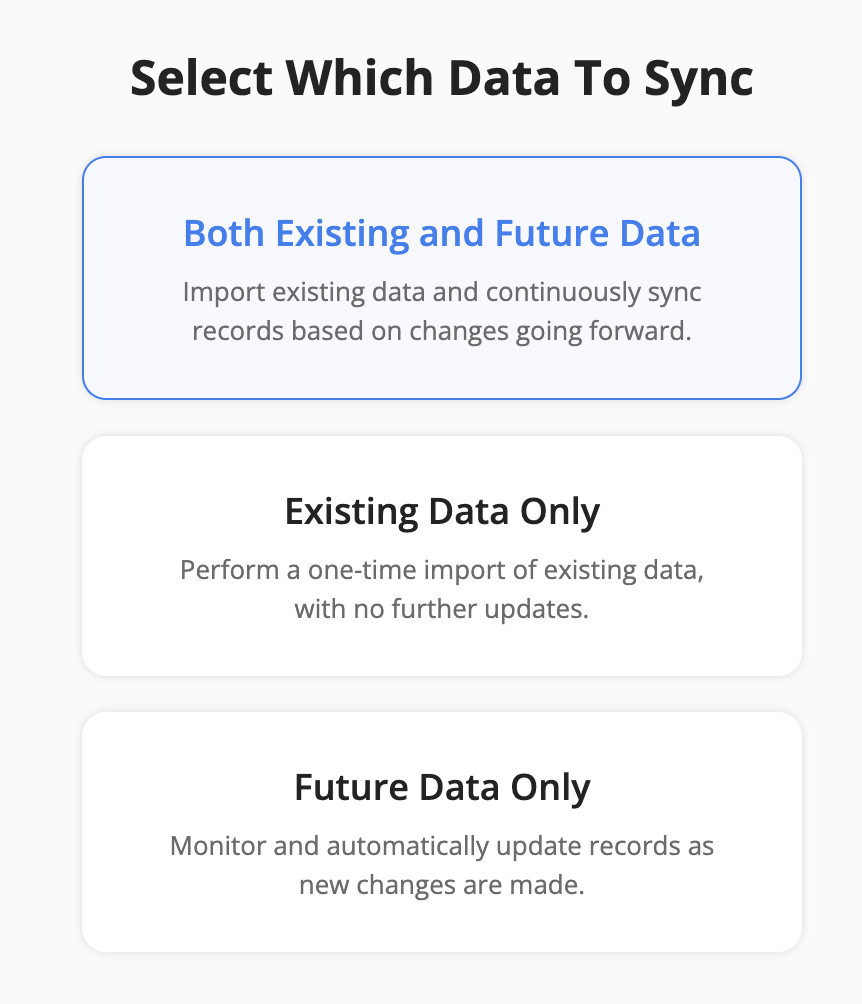


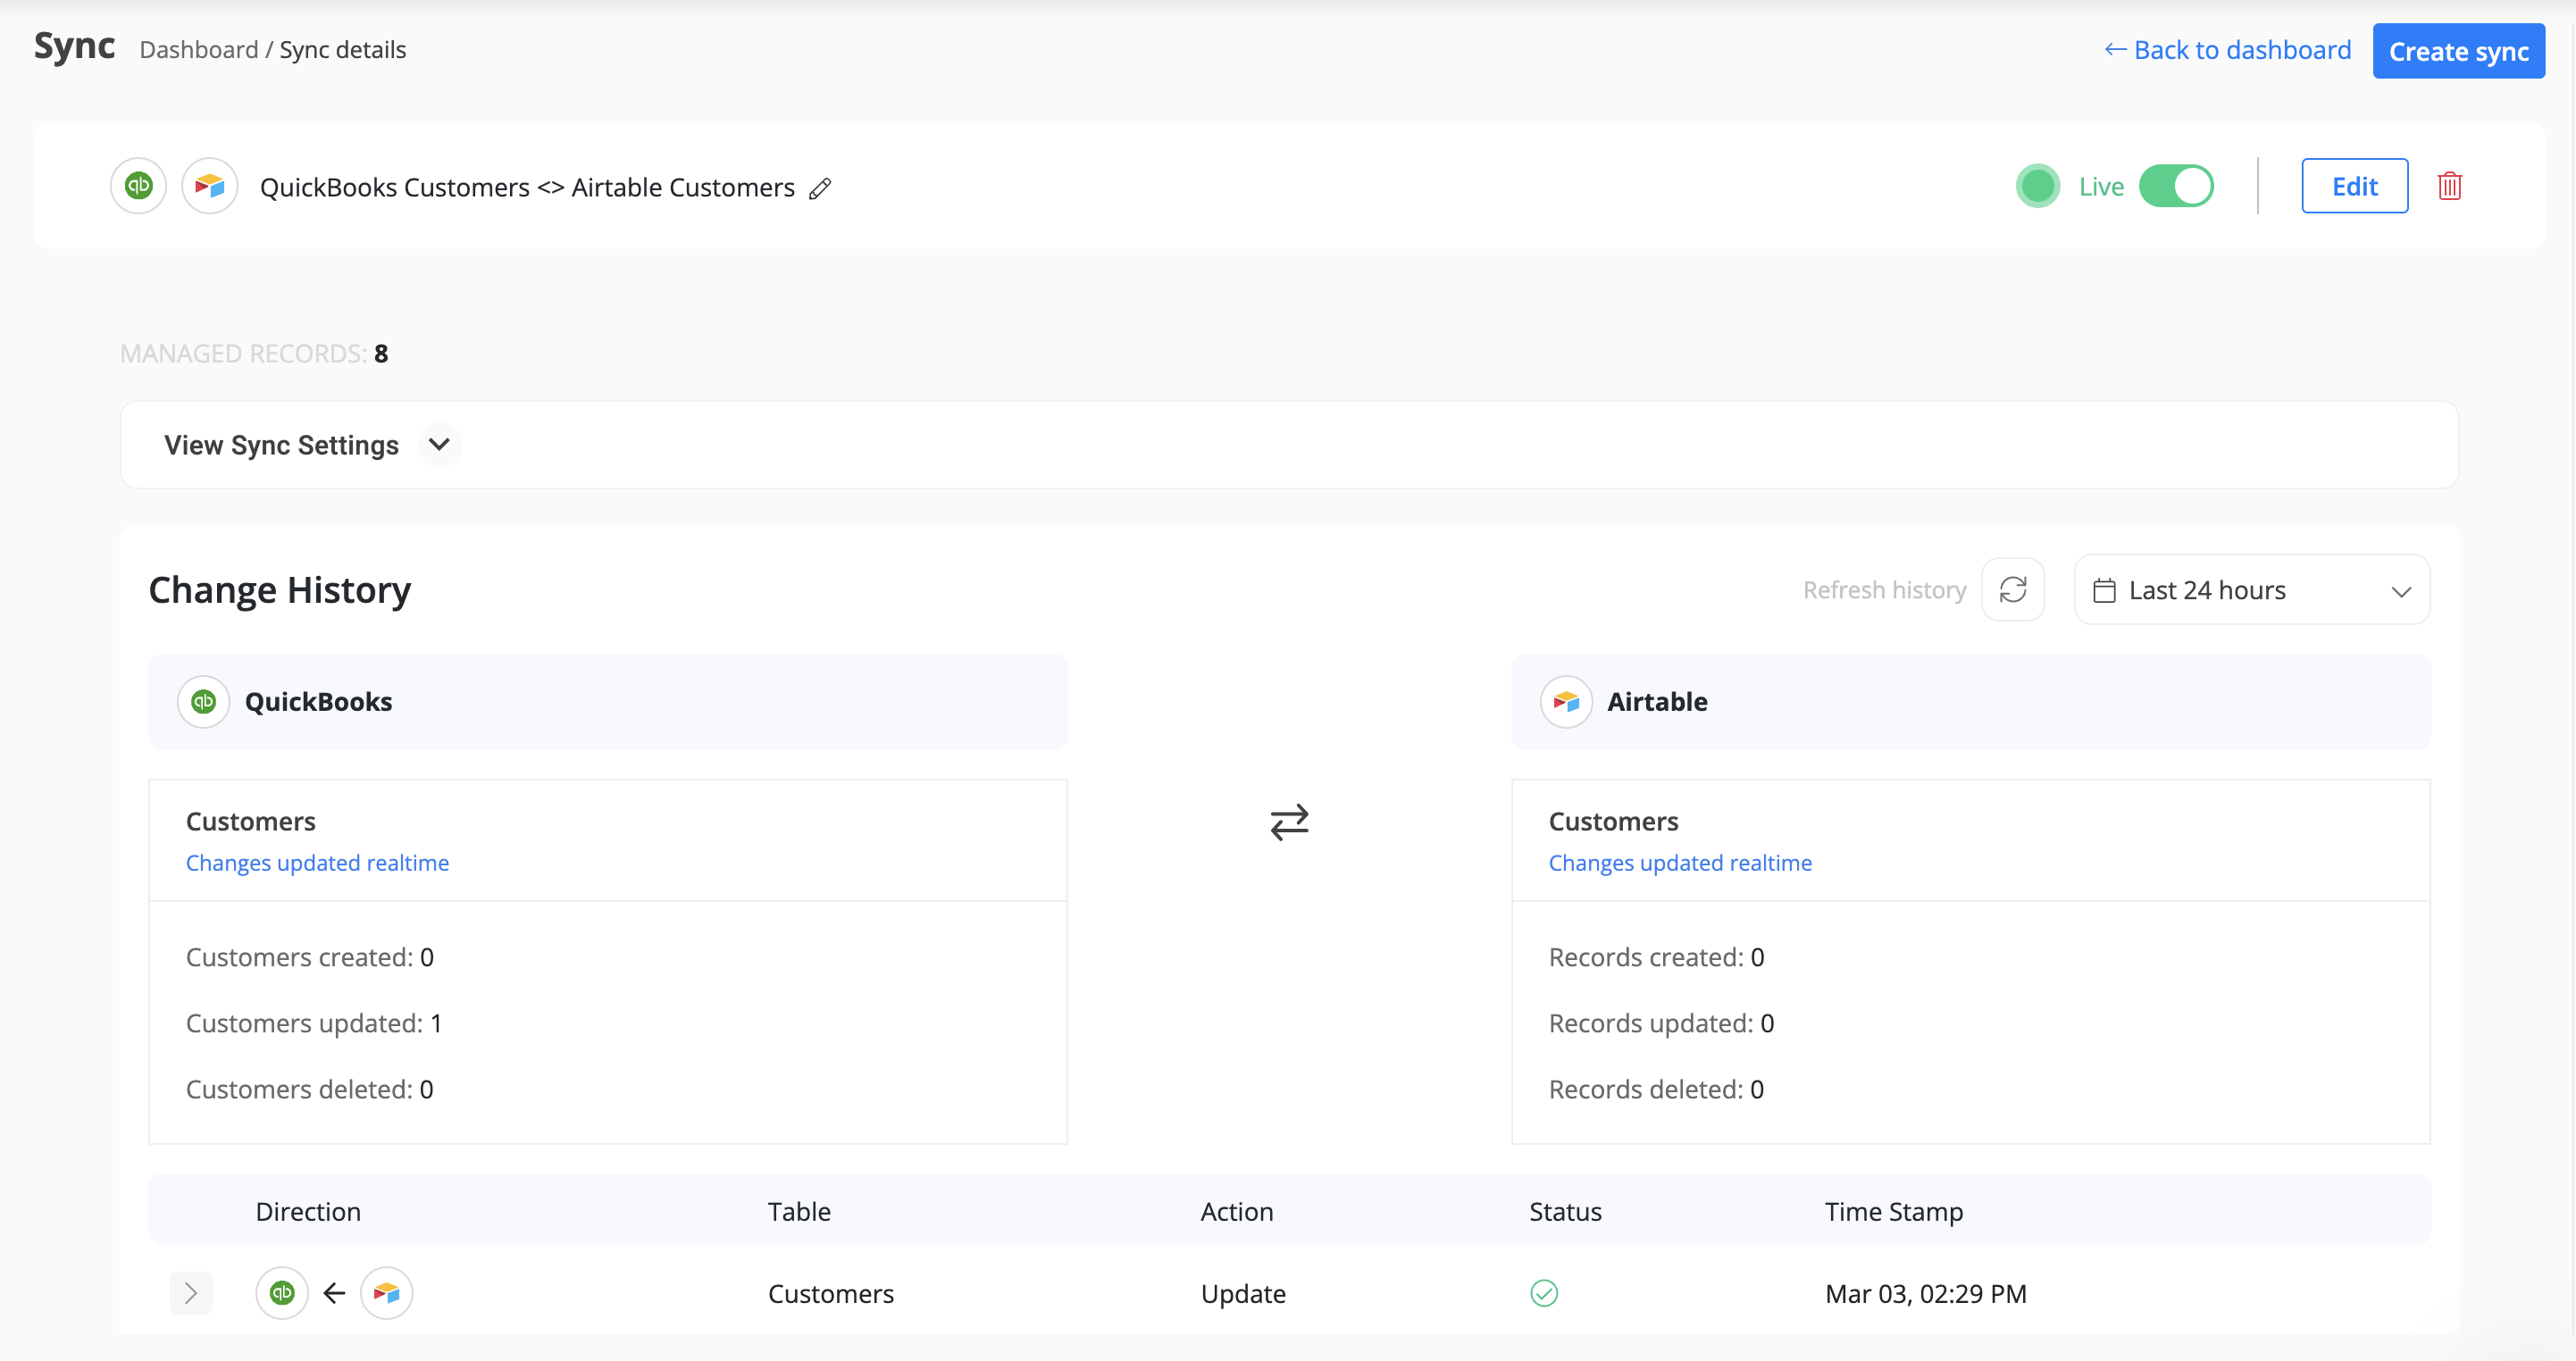
Once the sync is live, any changes made to records in either app will automatically sync to the other app in real time.
Byteline simplifies the process of syncing data between QuickBooks and other apps, ensuring:
This comprehensive document will walk you through the step-by-step configuration process for PostgreSQL data sync and address specific use cases tailored to PostgreSQL .
Your PostgreSQL tables must have a primary key column. If you don't have it, please refer to the section below on adding it.
Please refer to Data Sync - Getting Started for the standard data sync functionality. The getting started document covers the usage of data sync features valid for all integrations.
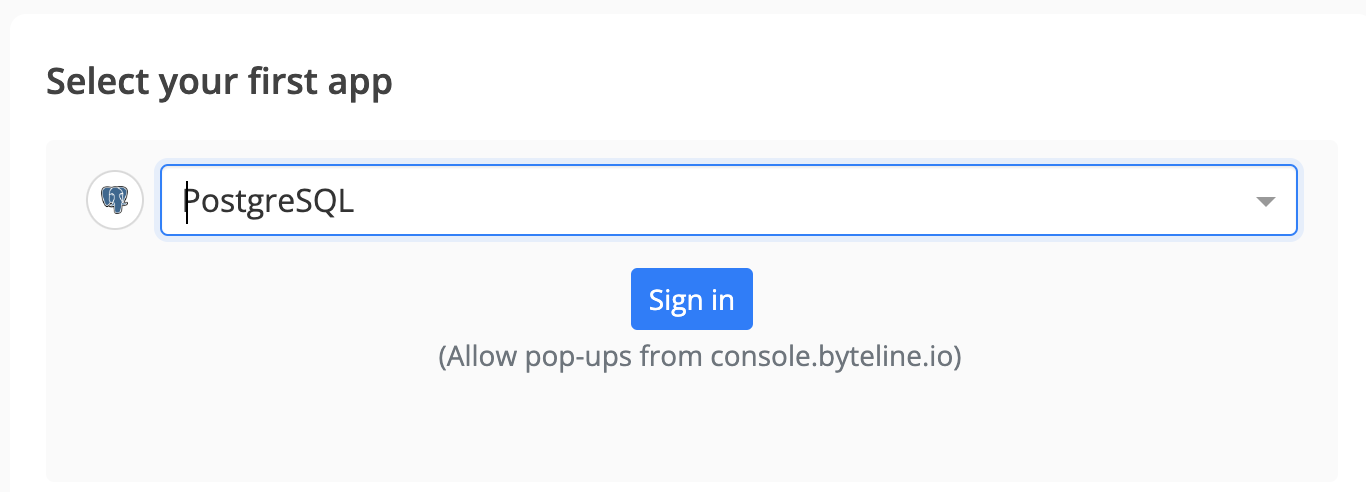
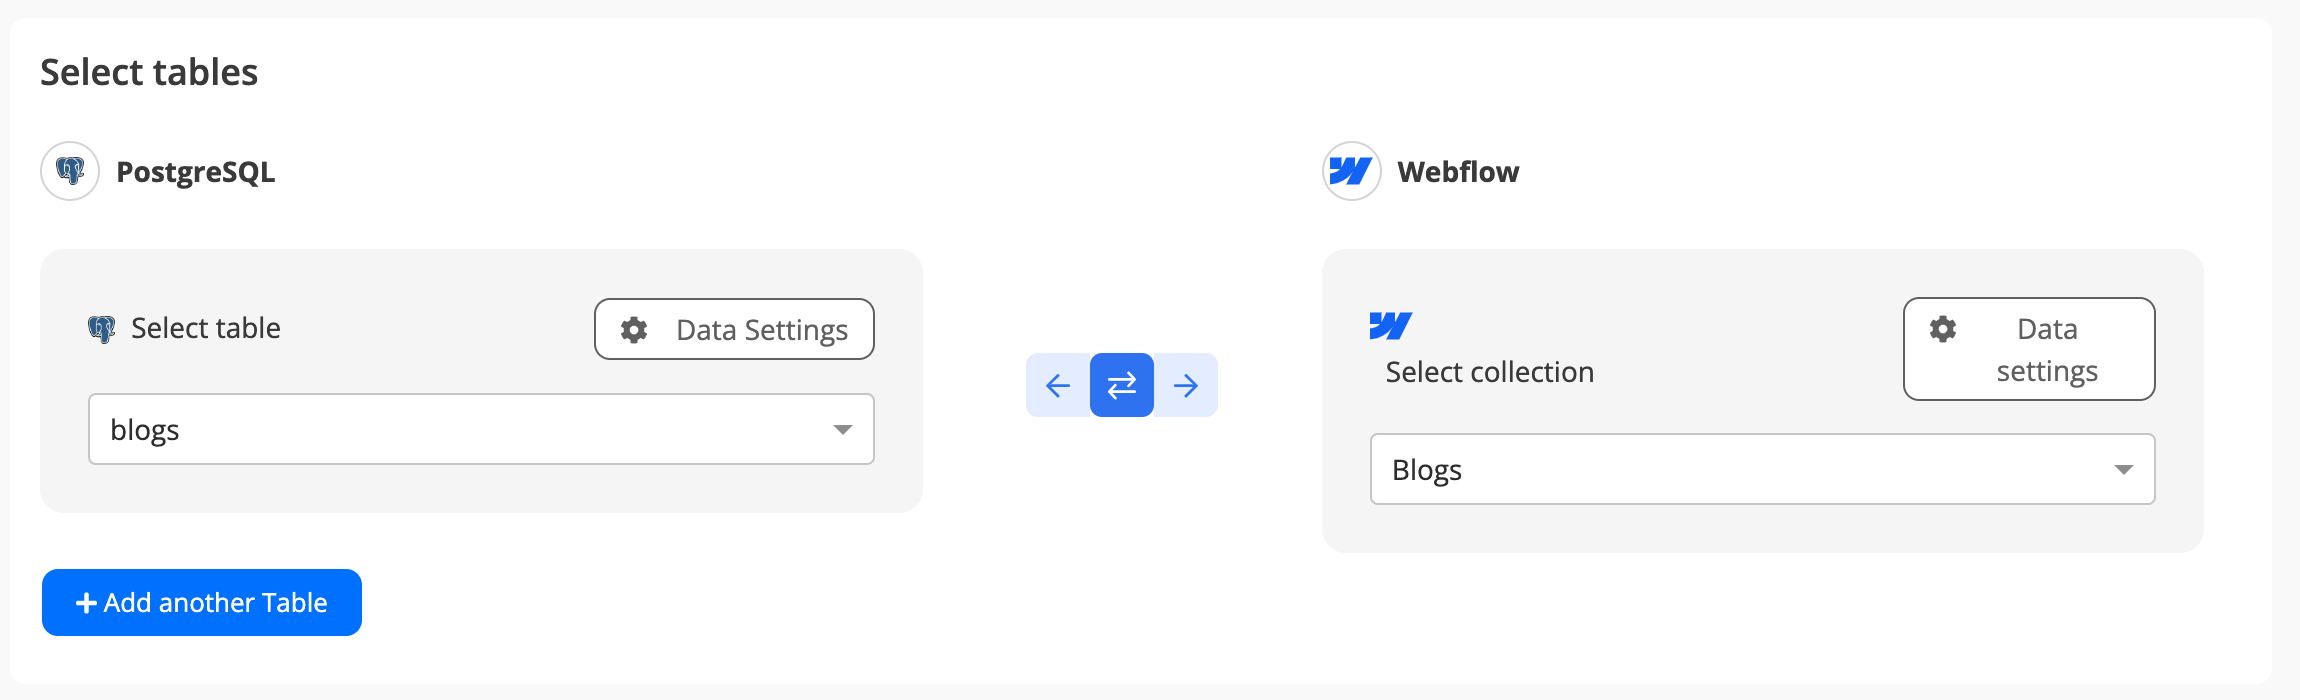
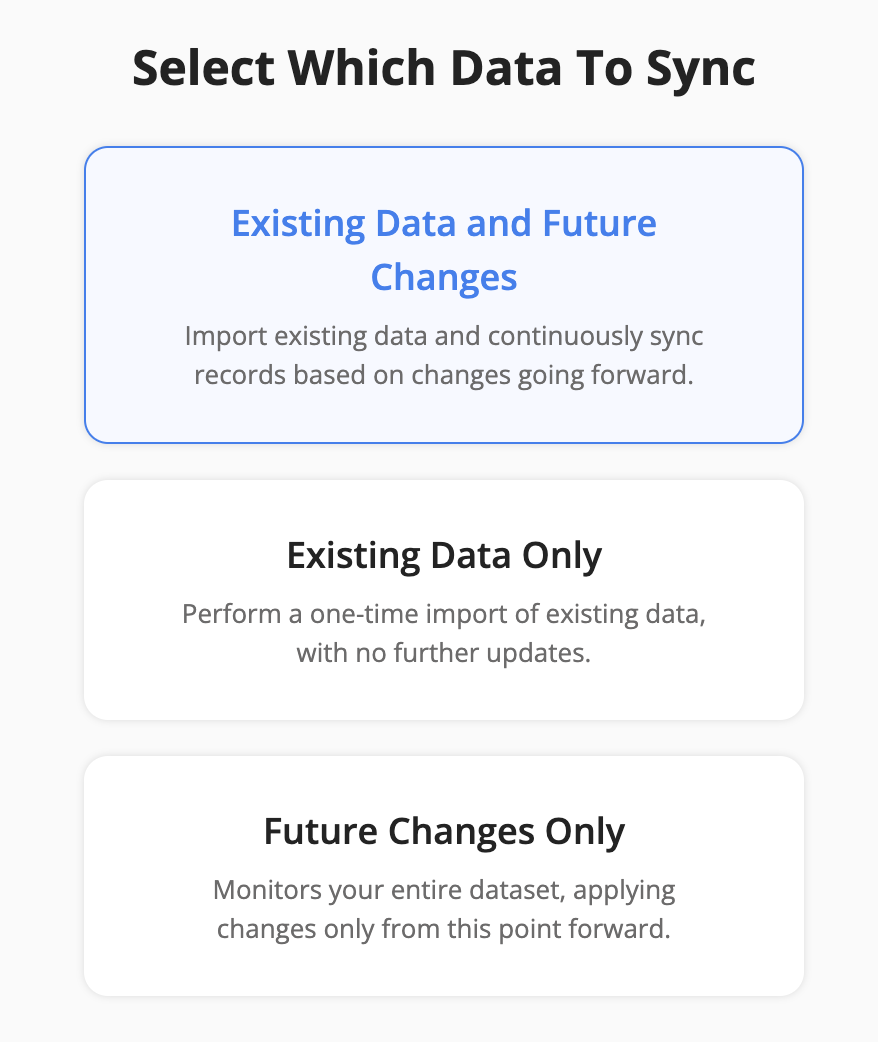
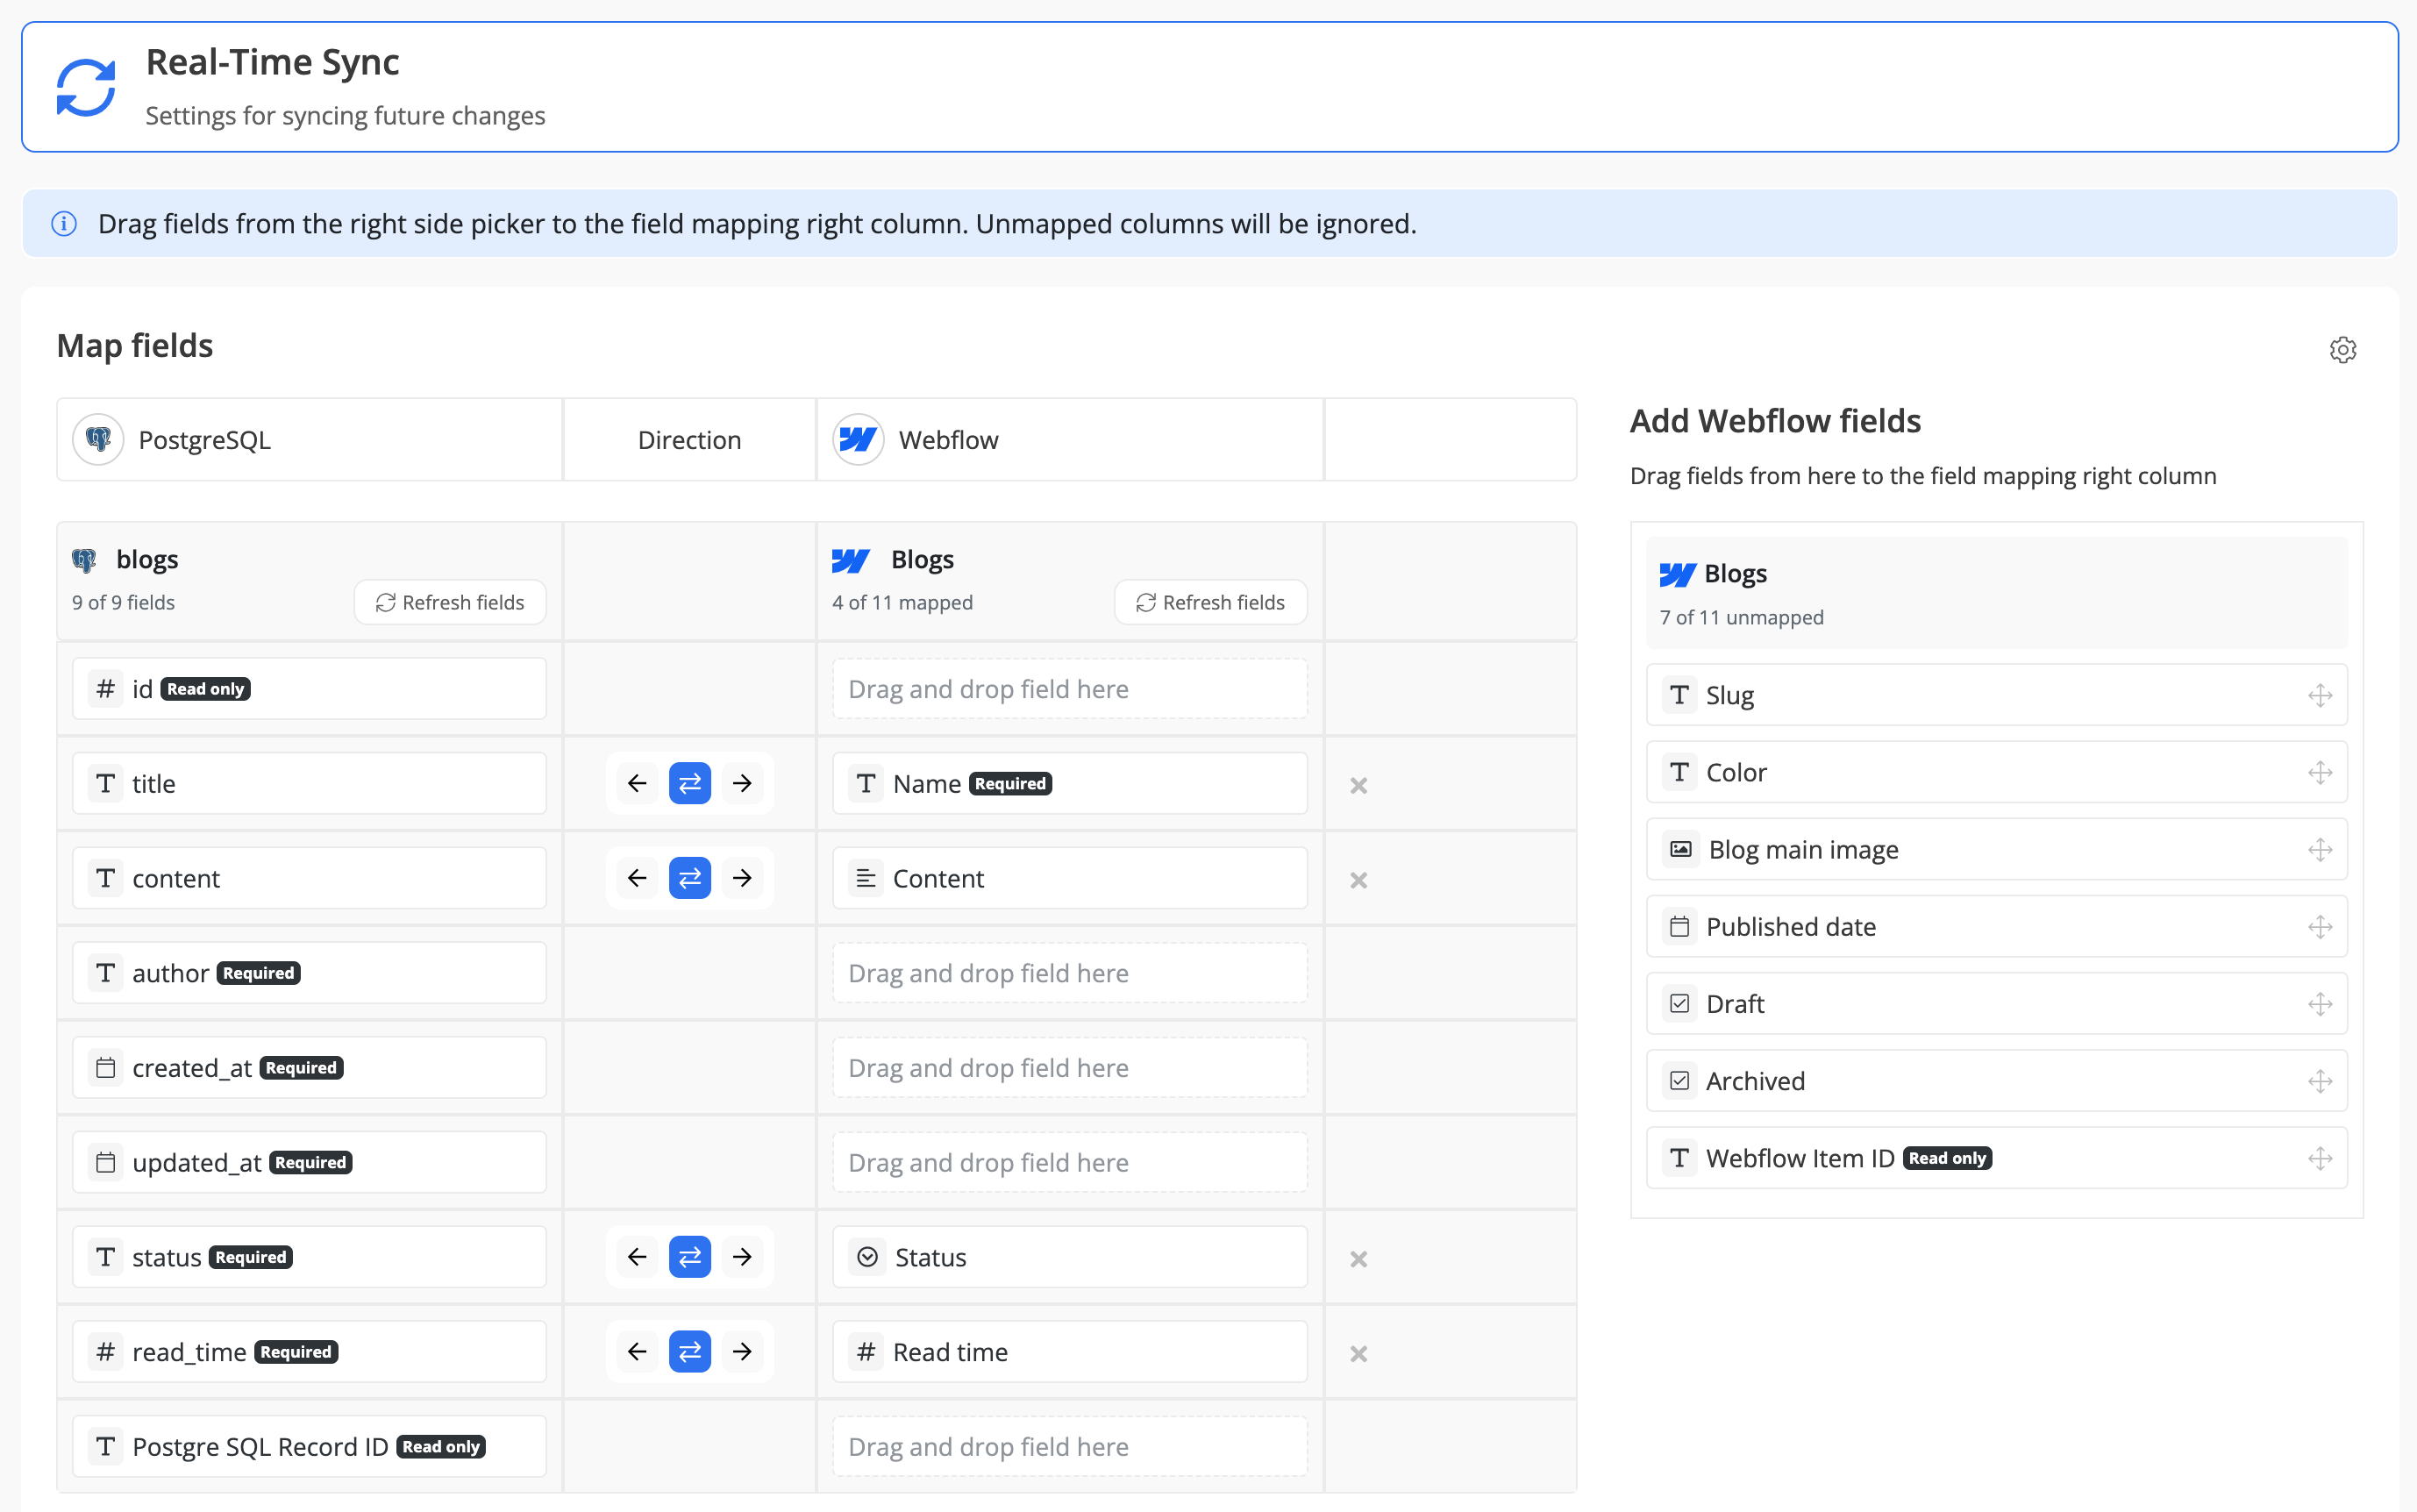
Select the sync direction for your existing data:
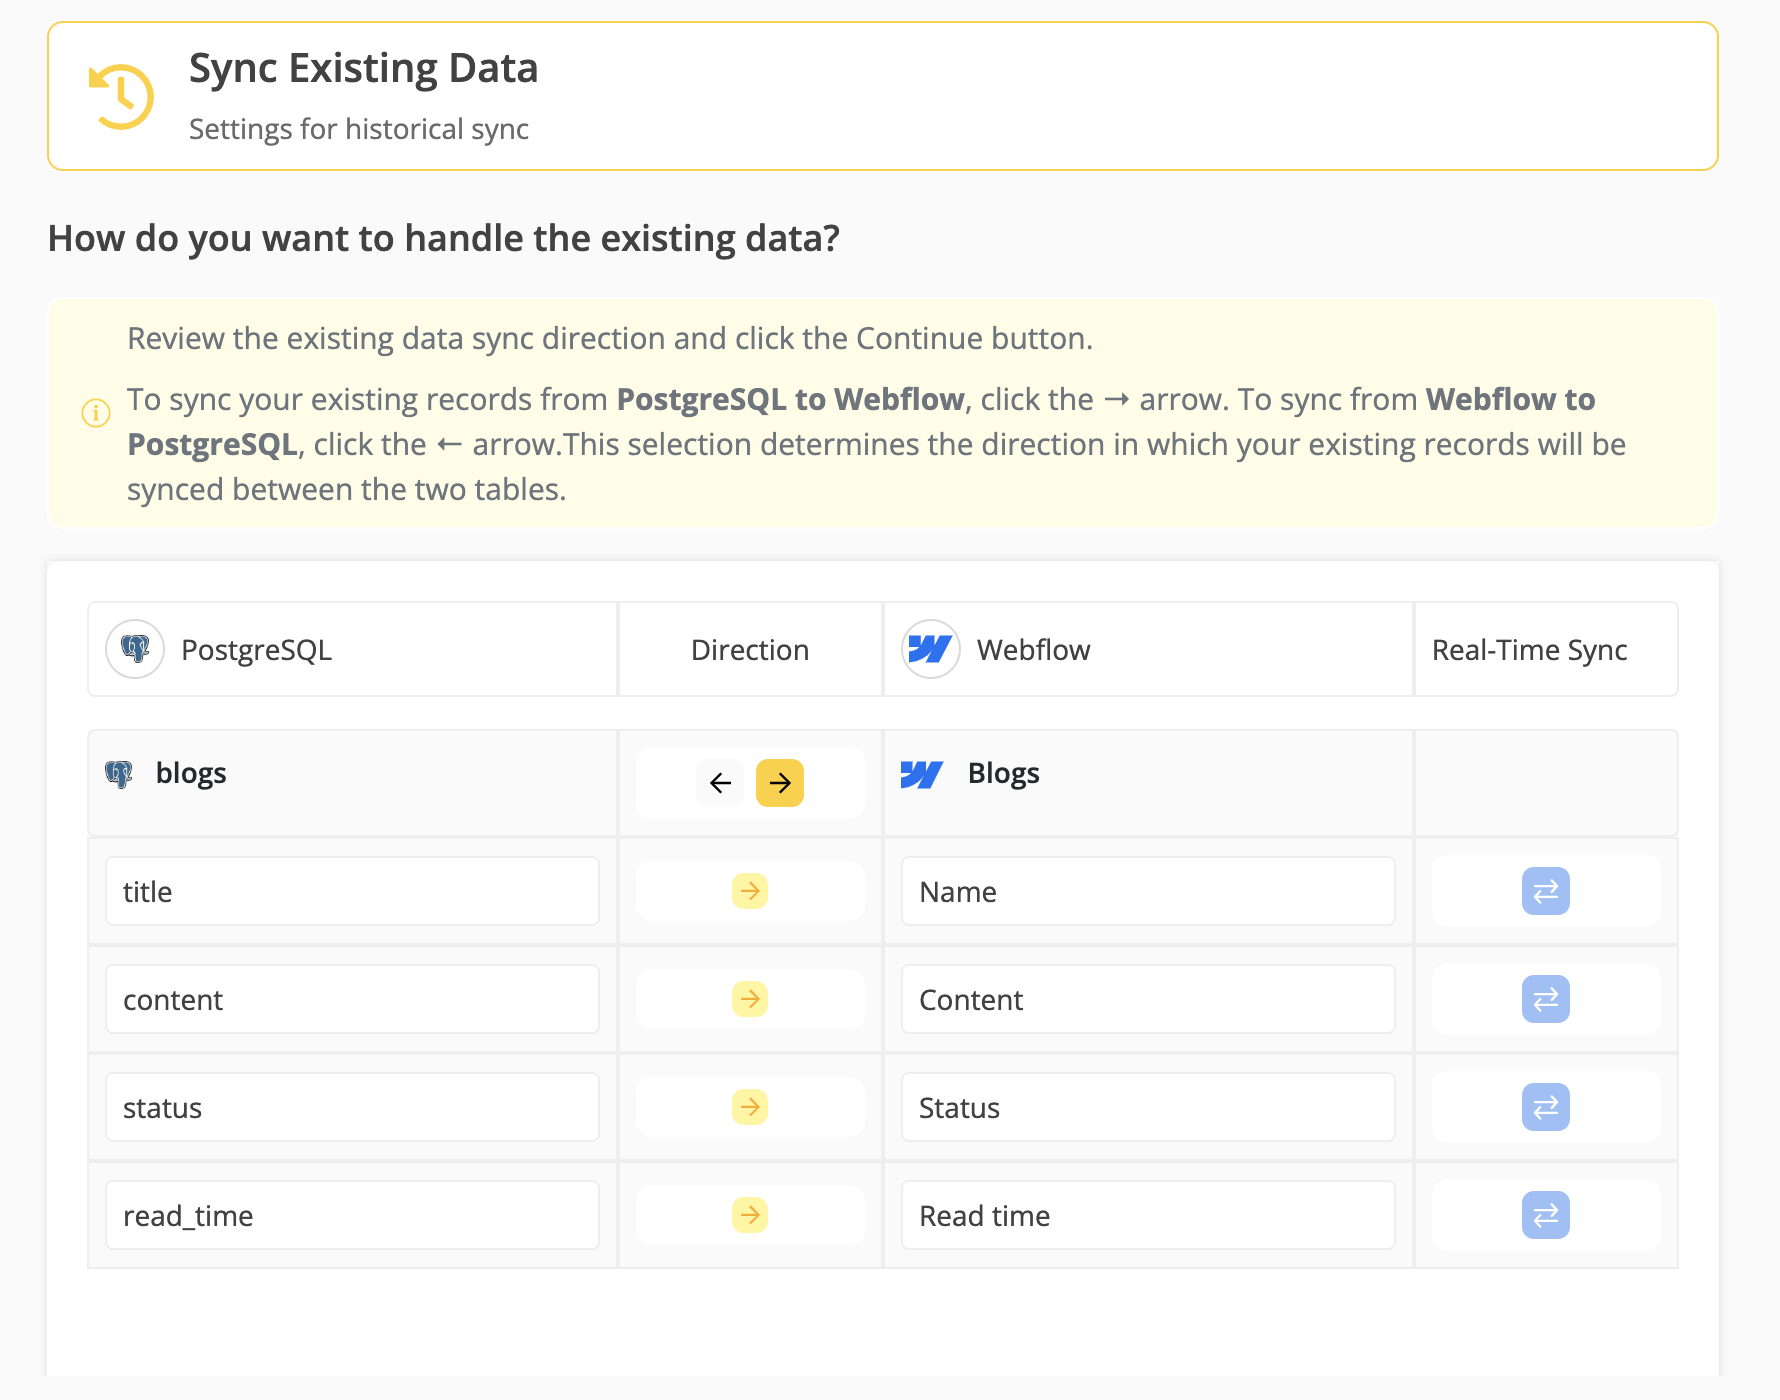
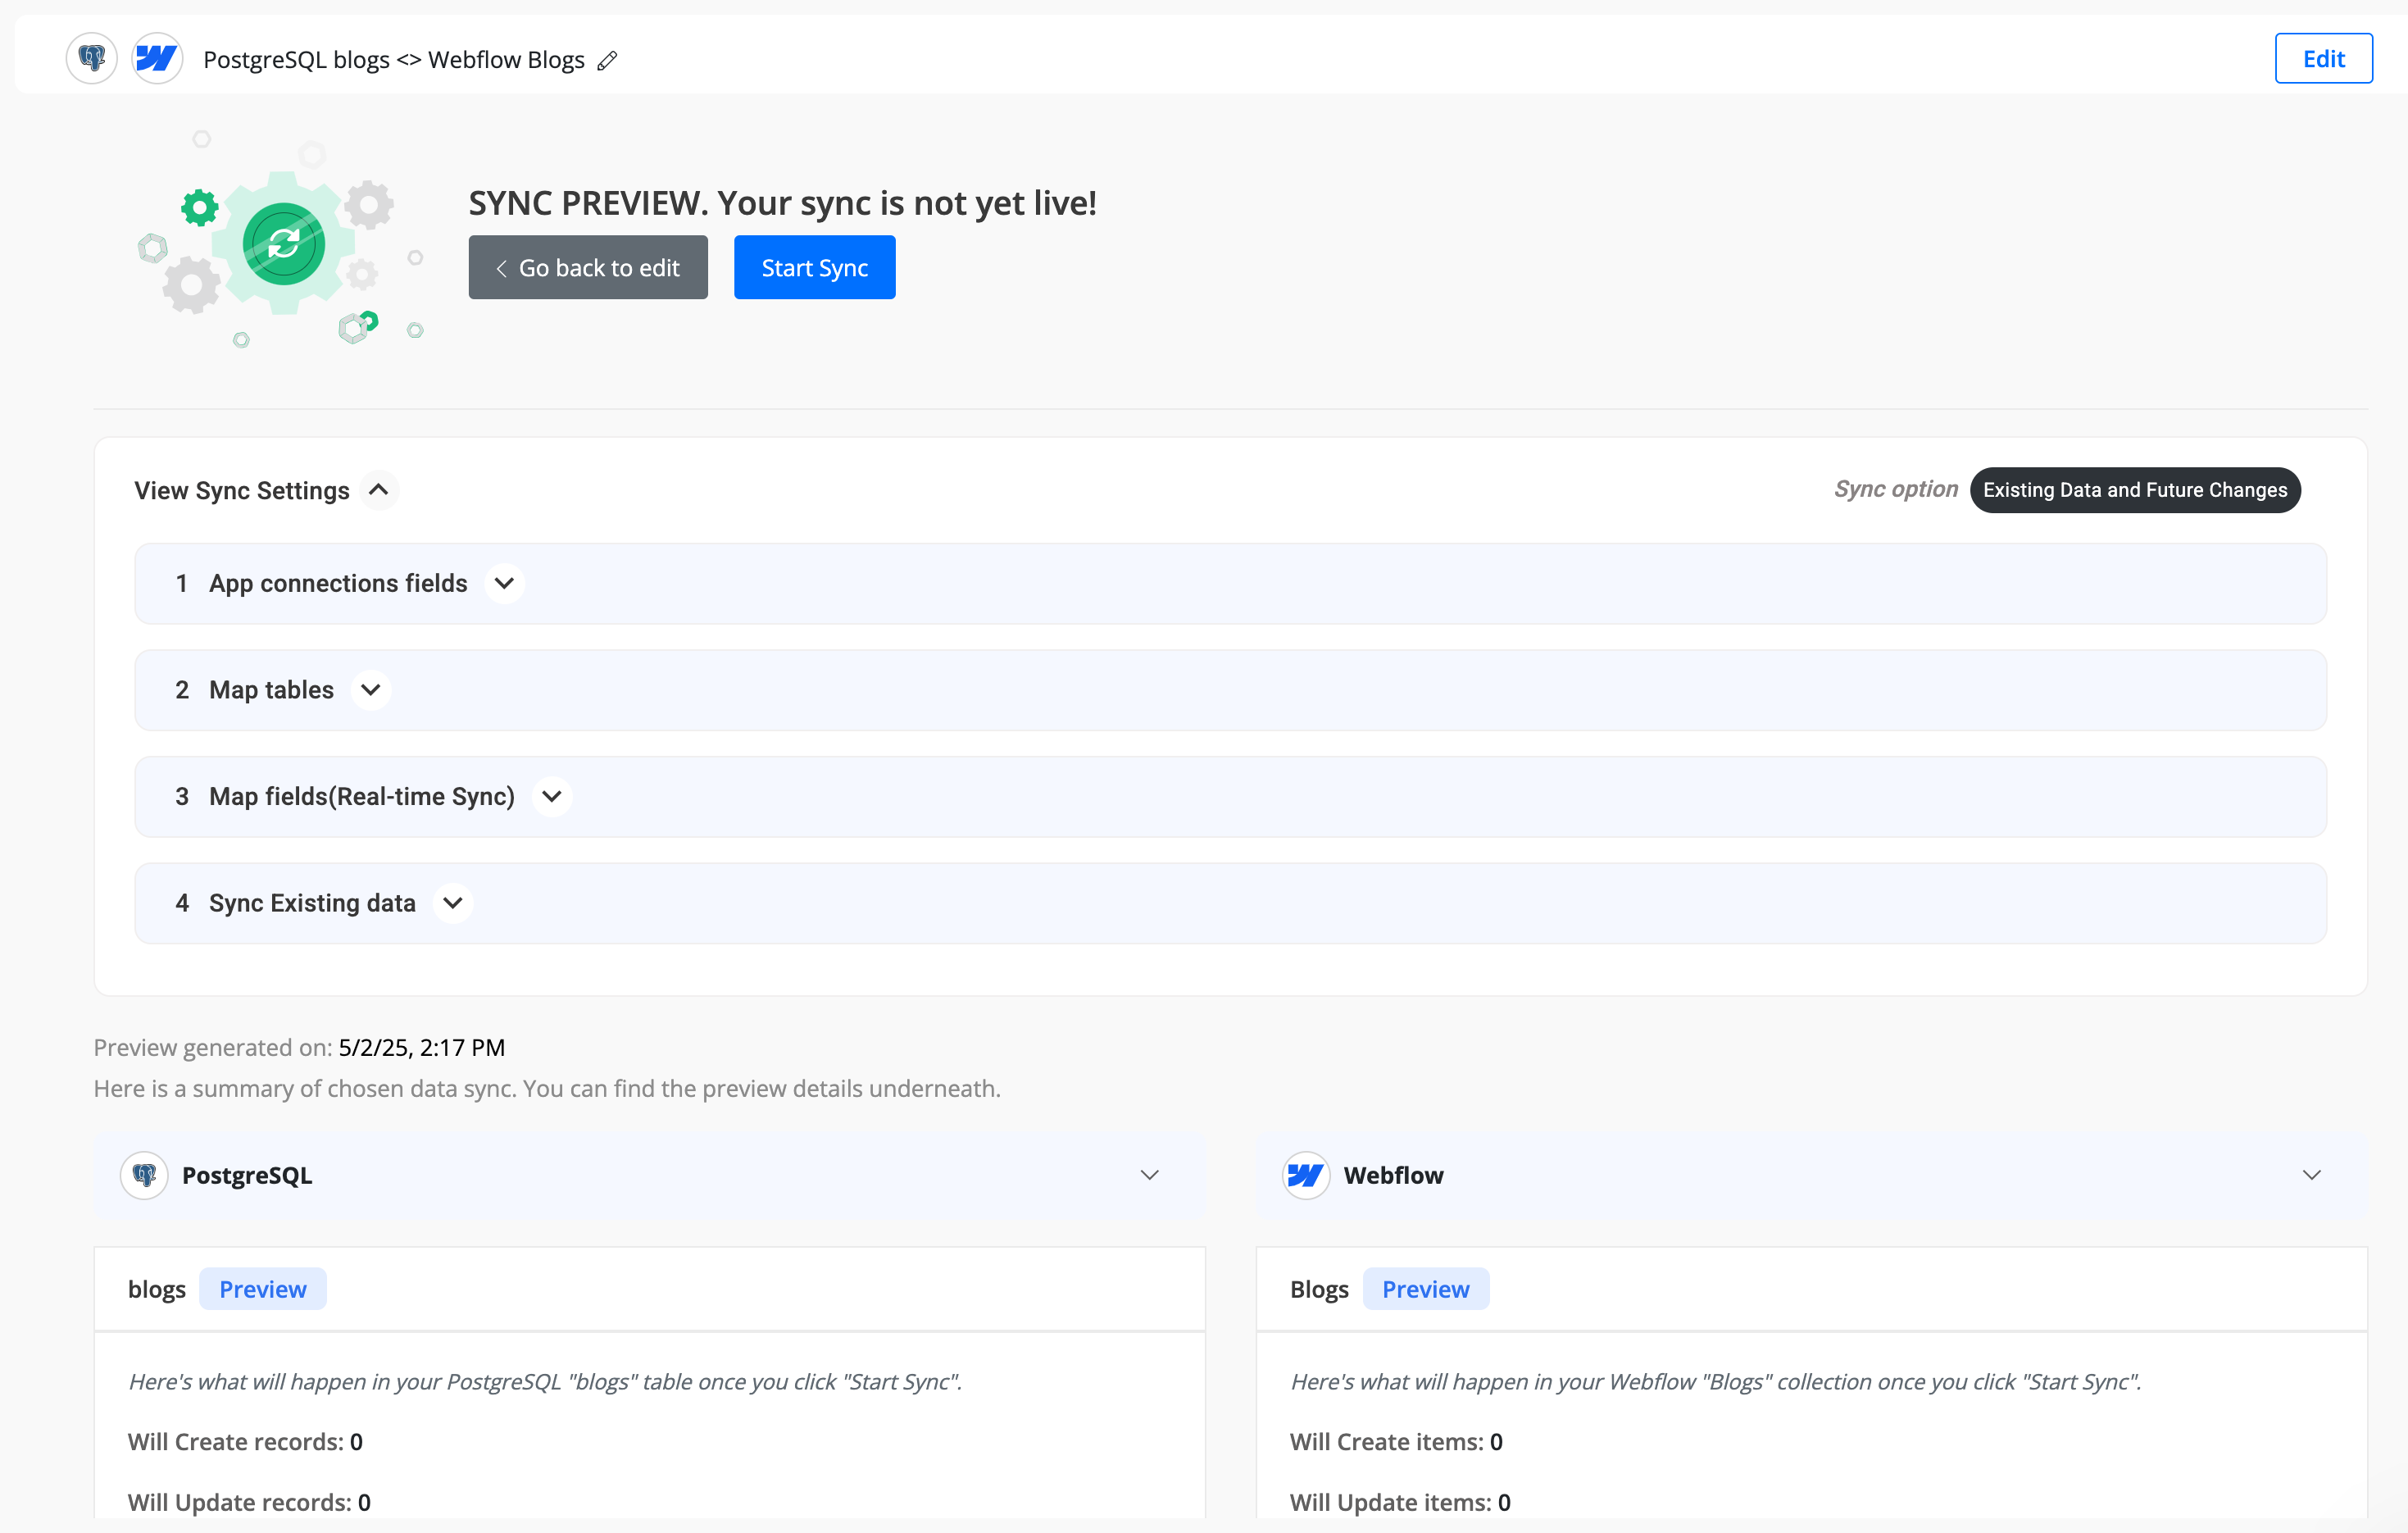
A primary key is required on a table for it to work with data sync. If your PostgreSQL table doesn’t already have a primary key, you can add one using either of the methods below.
Use this method when your table doesn’t already have a suitable column for a primary key. Note: You have to complete steps 1 & 2.
Step 1: Add an identity column
ALTER TABLE blogsADD COLUMN id INT GENERATED ALWAYS AS IDENTITY;Step 2: Add the primary key constraint
After ensuring that the ID column has been created and is unique:
ALTER TABLE blogs ADD PRIMARY KEY (id);Use this method if you already have a column (like title, email, or user_id) that contains unique values.
⚠️ Important: The column you select must have unique and non-null values.
ALTER TABLE blogs ADD PRIMARY KEY (title);To establish a secure and successful connection between your database and our data sync system, some hosting providers or firewall configurations may require you to whitelist our static IP address.
If your PostgreSQL database is hosted in a data center or cloud environment with IP restrictions, please ensure that the following IP address is allowed to connect:
➡️ IP to Whitelist: 3.21.72.72
Why is this needed?
Our data sync platform initiates the connection to your PostgreSQL database from the above IP. If your server blocks unknown IPs, whitelisting this address ensures that our sync operations can reach your database without interruption.
Ensure that the IP is whitelisted for port 5432 (the default PostgreSQL port), unless your database uses a different port.
⚠️ Note: If you are unsure how to whitelist an IP, please consult your database or hosting provider’s documentation or support team.
Once the IP is whitelisted, proceed with configuring the PostgreSQL connector in your data sync setup.
Usually, your database wouldn't be on the local machine. But if it is, and you want to sync data to or from it using Byteline, Ngrok can help expose your local database to the internet securely.
1. Install Ngrok
Download and install Ngrok from https://ngrok.com/download. Follow the installation instructions provided for your operating system.
2. Expose Your Local Database Using Ngrok
Ngrok can expose a TCP connection for your local database. Use the following command to expose your database:
ngrok tcp <port>
Replace <port> with the port your database is running on (e.g., 5432 ).
Example for a PostgreSQL database running on port 5432:
ngrok tcp 5432
Ngrok will generate a public TCP address (e.g., 0.tcp.ngrok.io:12345) that tunnels to your local database.
3. Update Database Configuration in Byteline
In the Byteline data sync configuration, use the Ngrok TCP address as the database host. For example:
Host: 0.tcp.ngrok.io
Port: 12345
Username: Your database username
Password: Your database password
Database Name: The name of your database
4. Test the Connection
Use the "Test Connection" feature in Byteline to ensure the platform can connect to your local database through the Ngrok TCP tunnel.
5. Run the Sync
After successfully testing the connection, initiate the data sync as you normally would. Byteline will access your local database through the Ngrok tunnel.
This comprehensive document will walk you through the step-by-step configuration process for MySQL data sync and address specific use cases tailored to MySQL .
Your MySQL tables must have a primary key column. If you don't have it, please refer to the section Configuring a Primary Key for Your MySQL Table for adding it.
Please refer to Data Sync - Getting Started for the standard data sync functionality. The getting started document covers the usage of data sync features valid for all integrations.
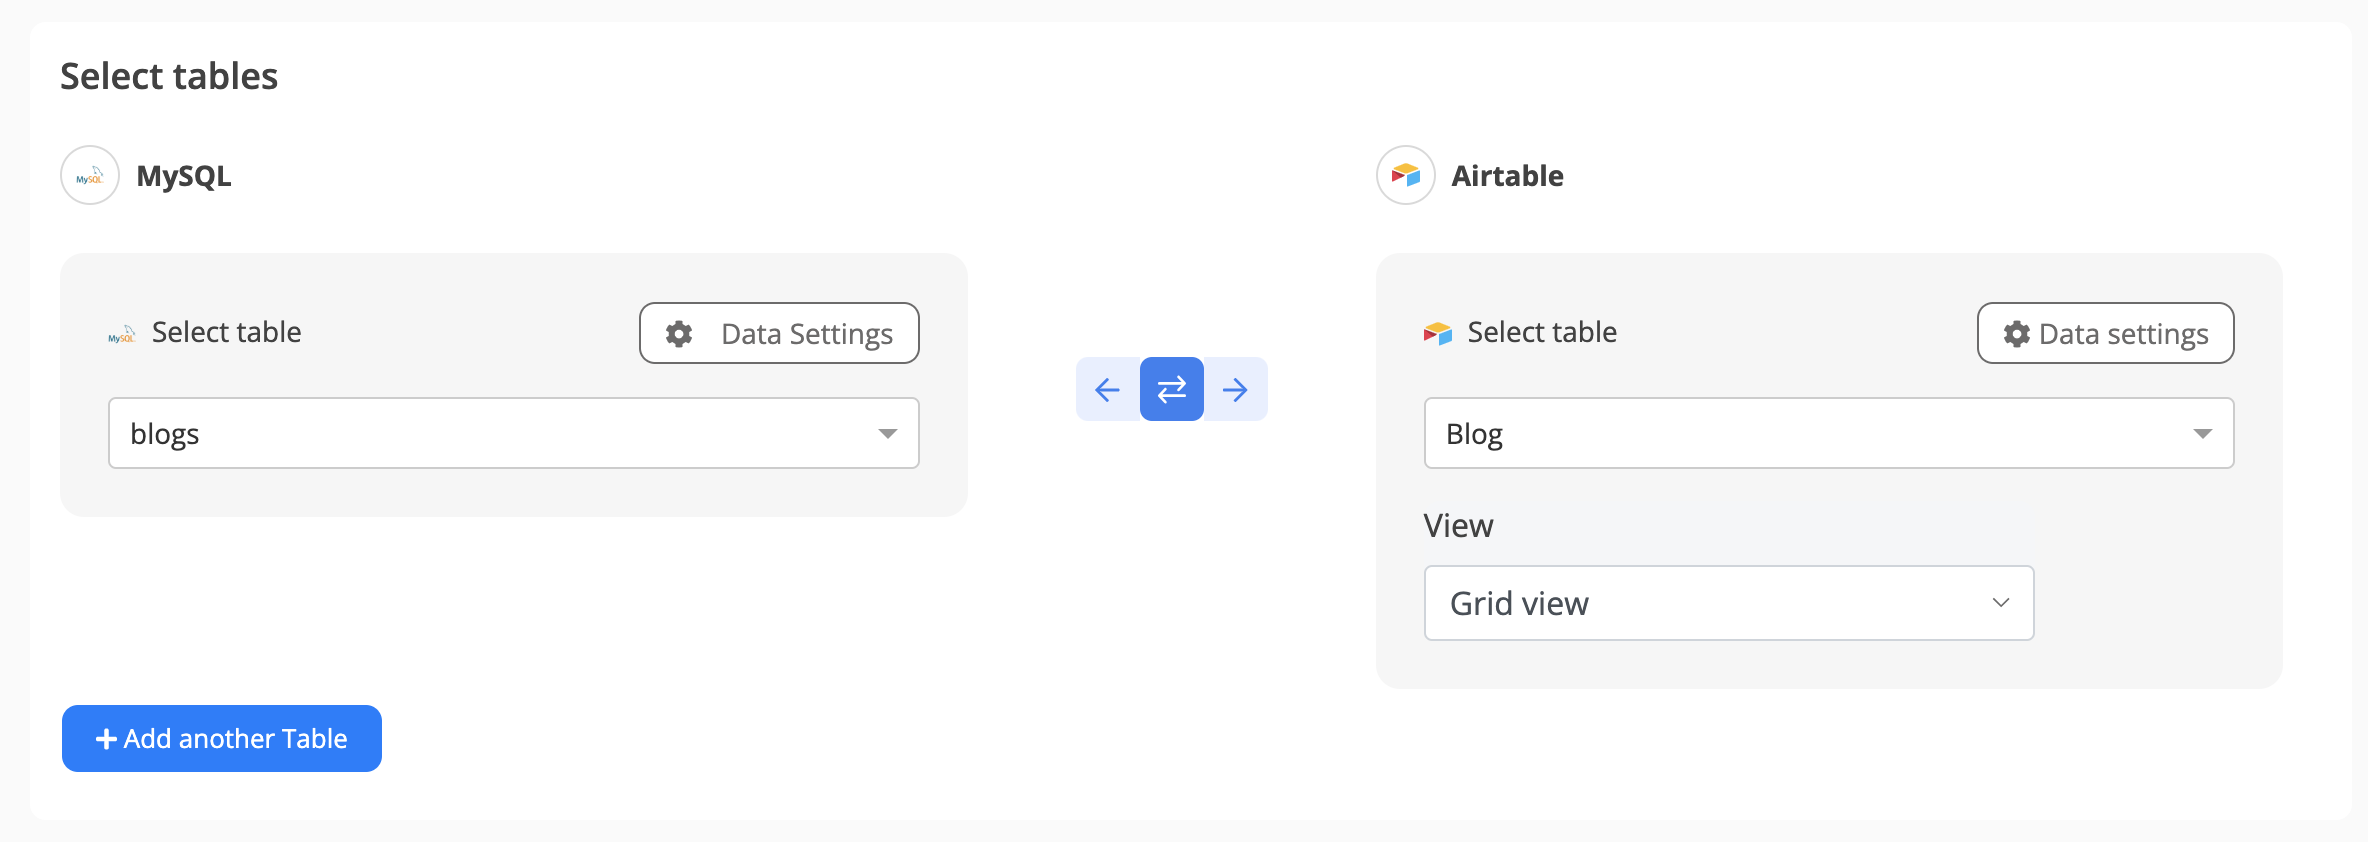
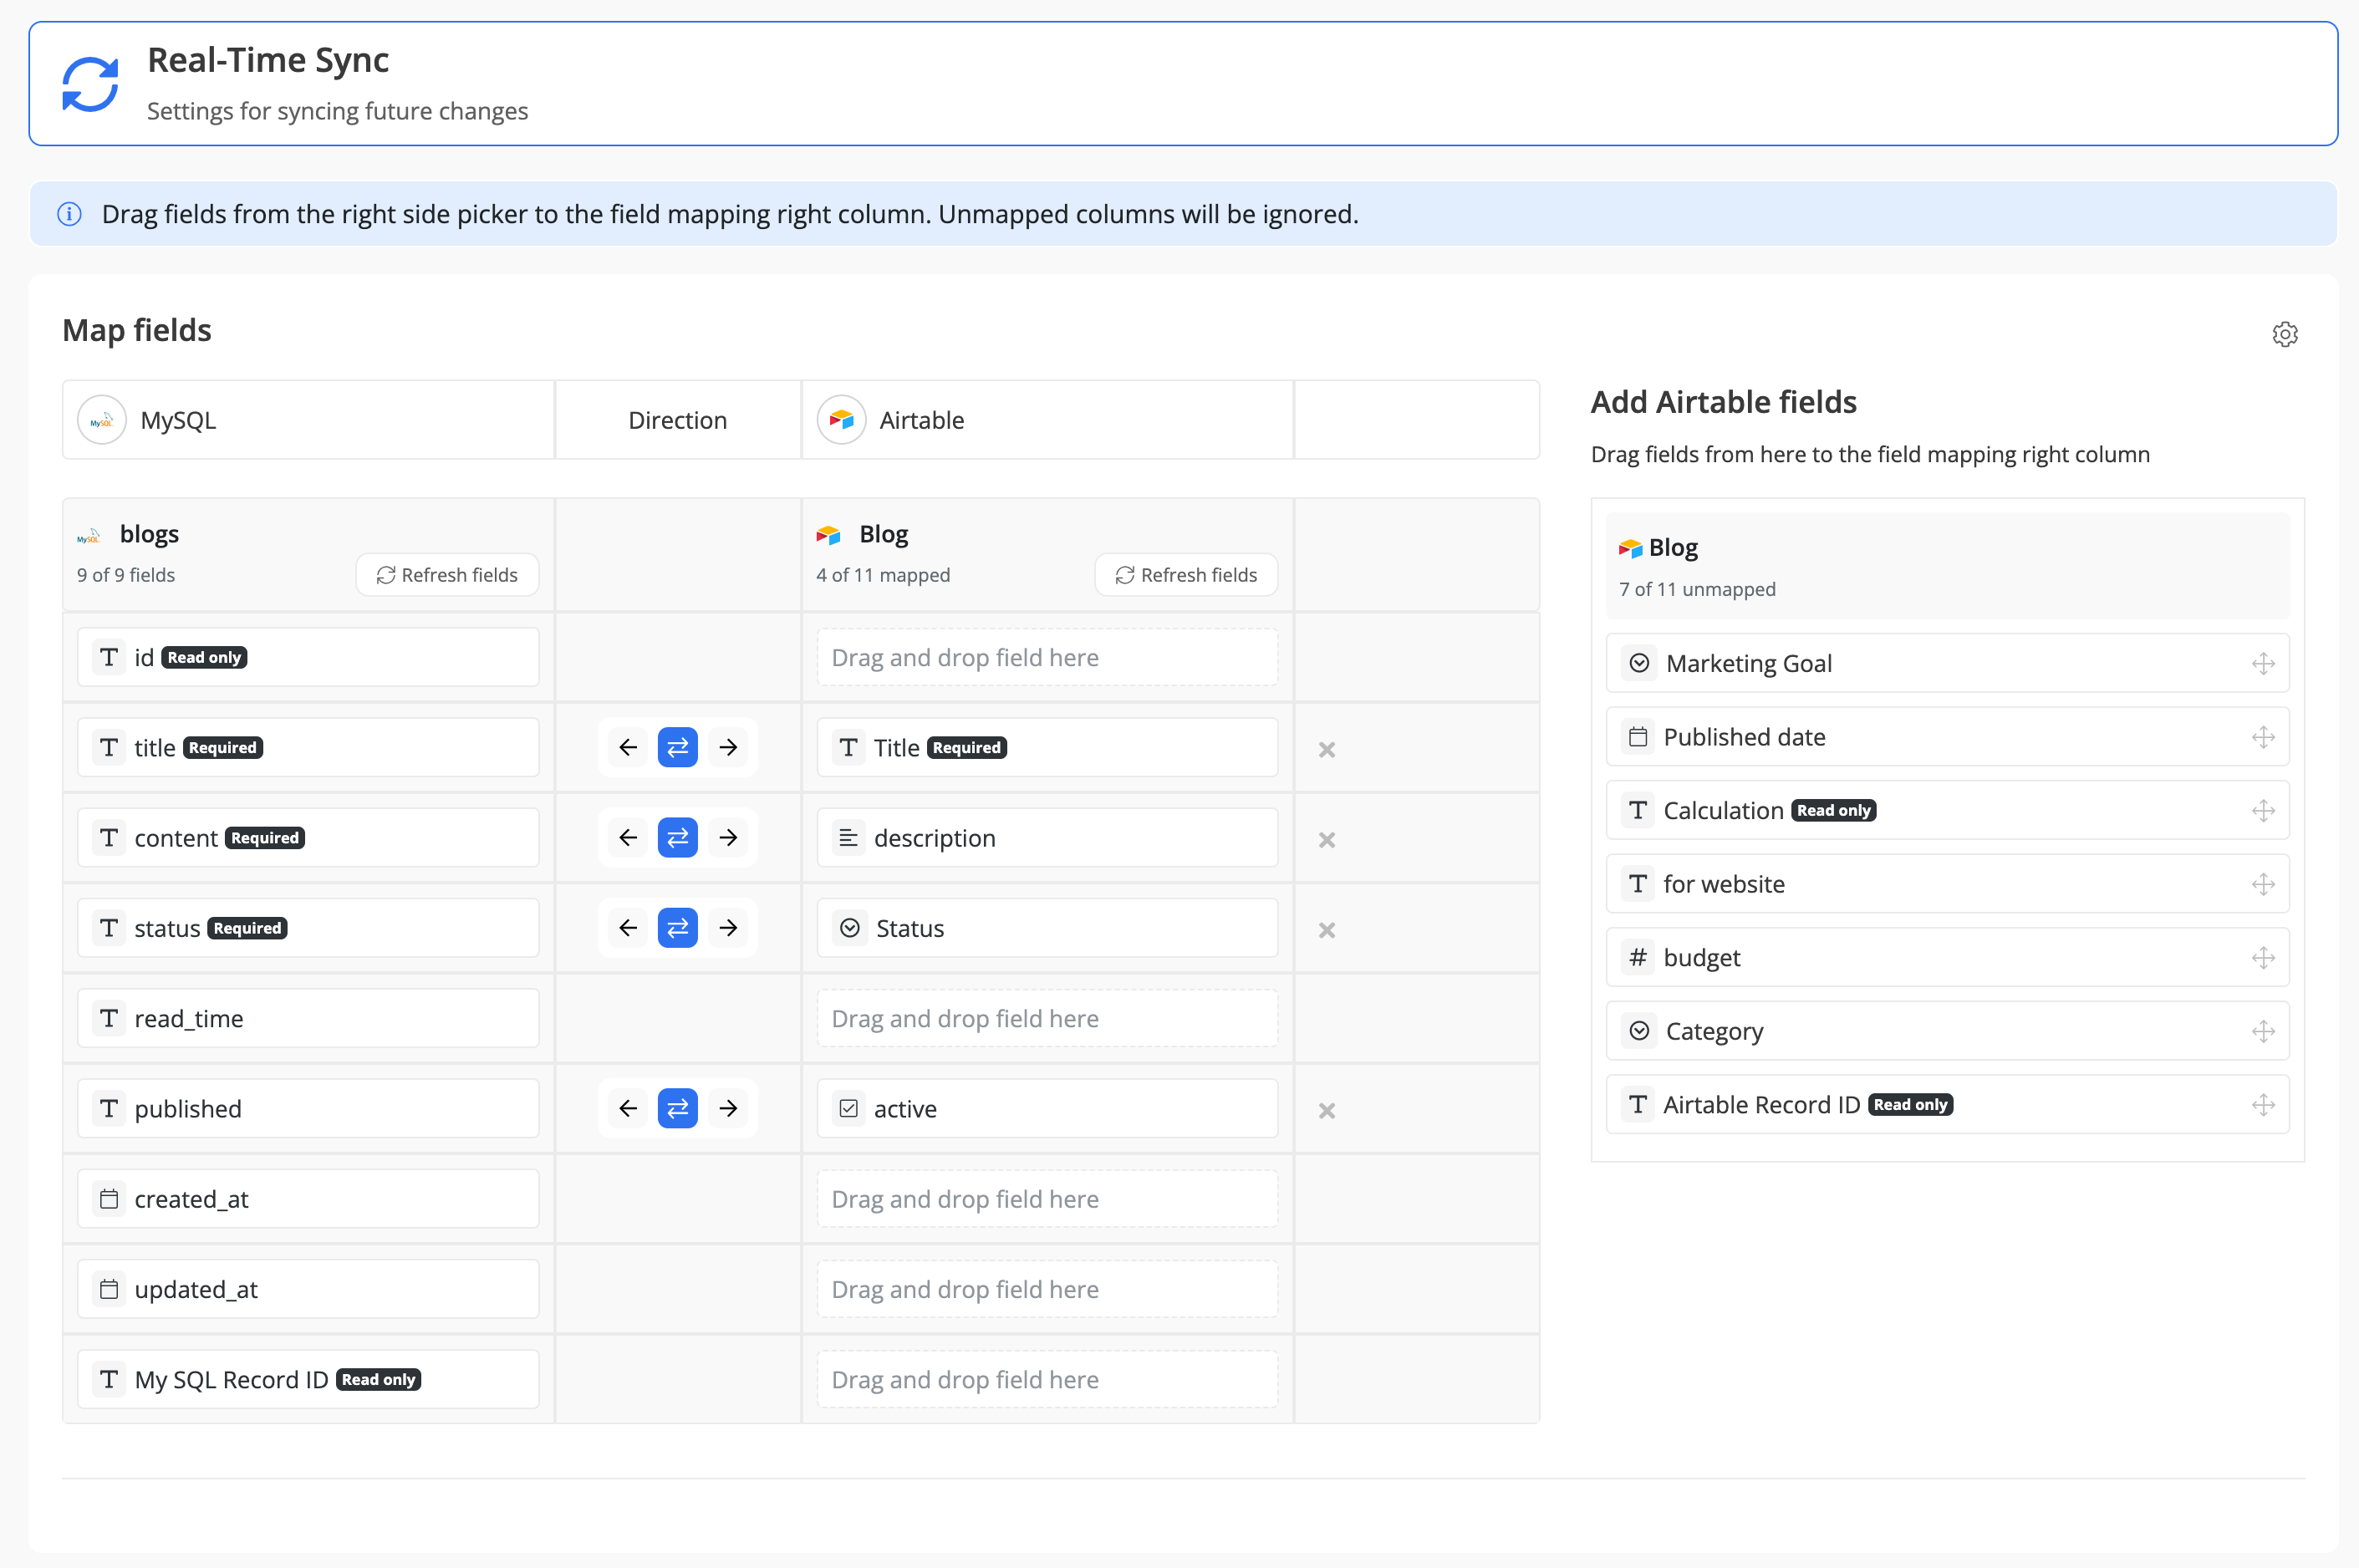
Select the sync direction for your existing data:
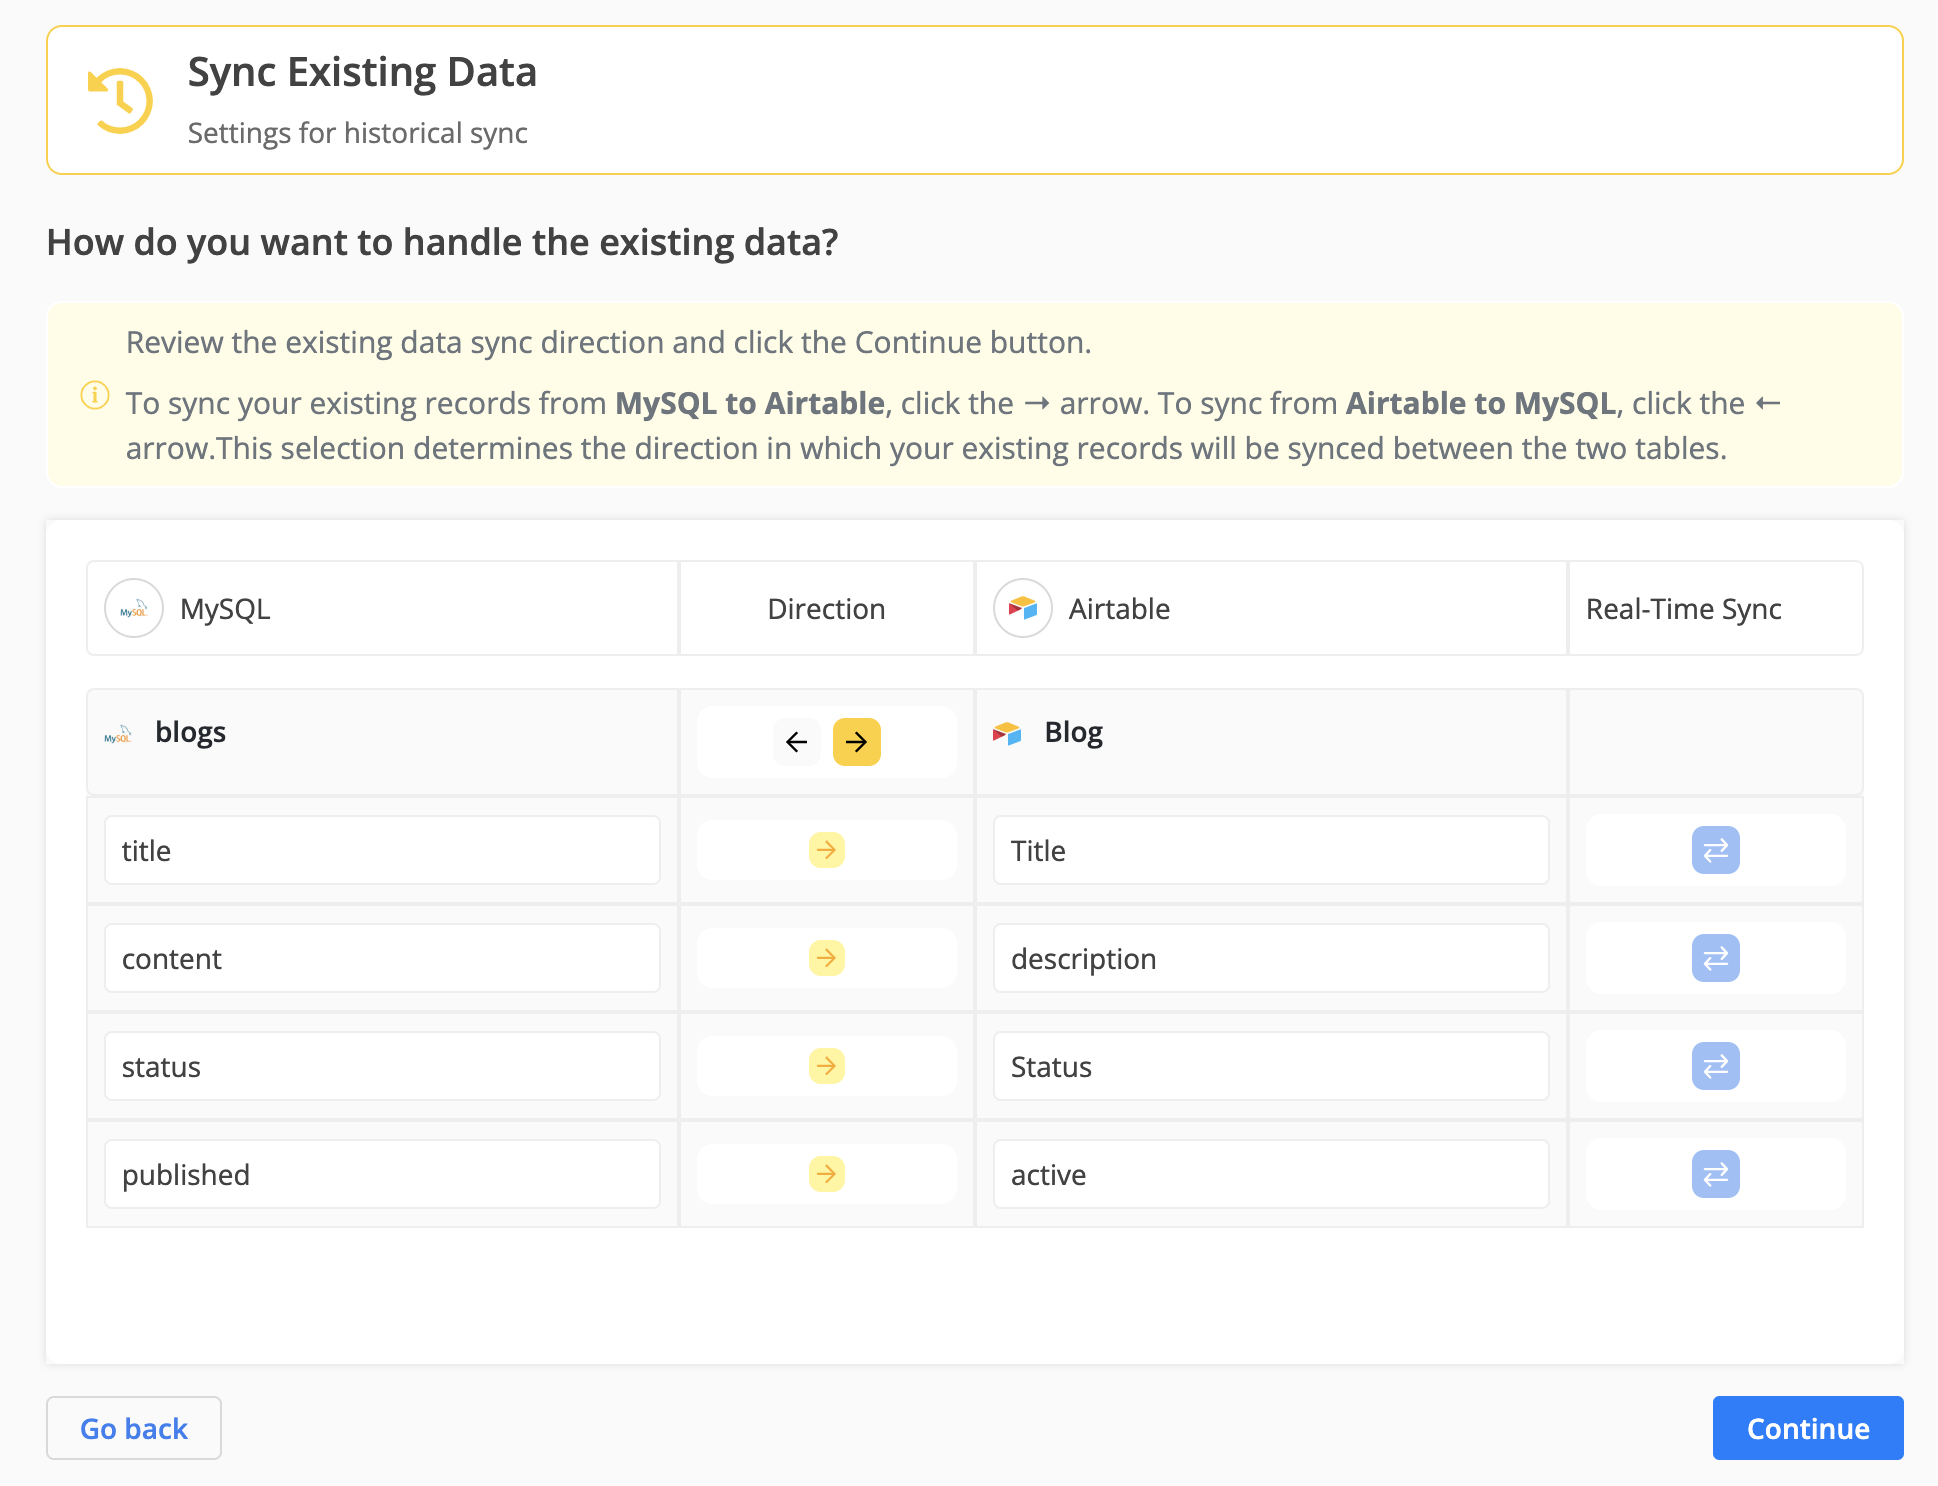
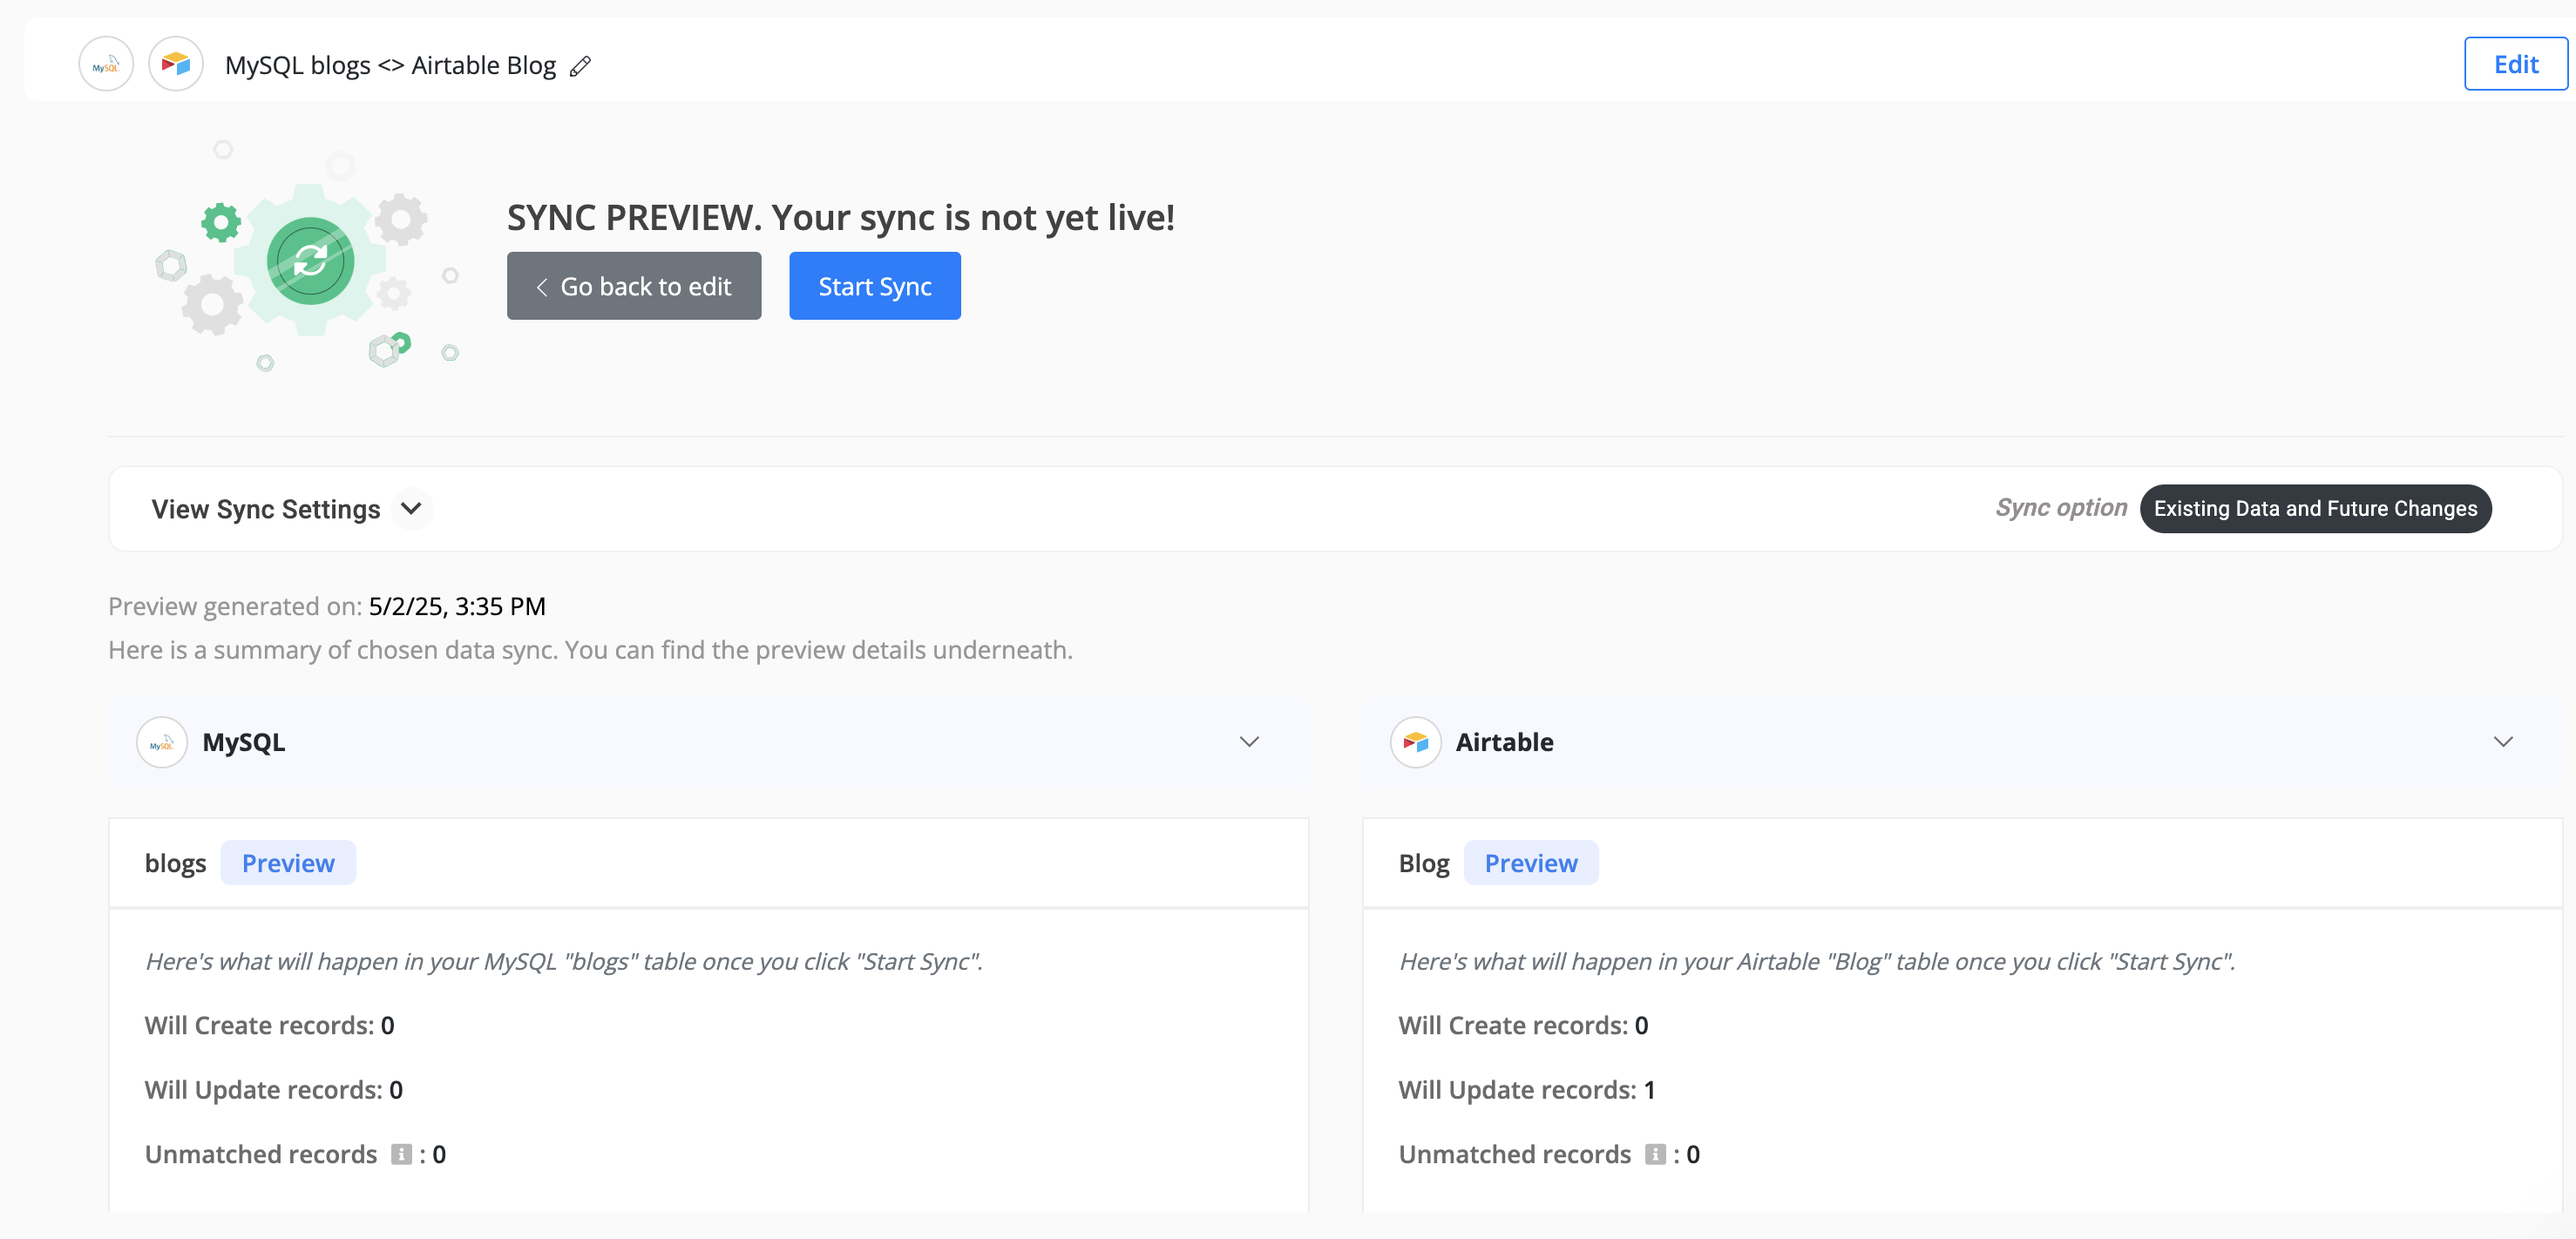
A primary key is required on a table for it to work with data sync. If your MySQL table doesn’t already have a primary key, you can add one using either of the methods below.
Use this method when your table doesn’t already have a suitable column for a primary key. This adds a new column that automatically generates unique IDs and sets it as the primary key.
ALTER TABLE blogs ADD COLUMN id INT AUTO_INCREMENT PRIMARY KEY;This adds a new id column that:
Use this method if you already have a column (like title, email, or user_id) that contains unique and non-null values.
⚠️ Important: The column you choose must not contain duplicate or NULL values.
ALTER TABLE blogs ADD PRIMARY KEY (title);To establish a secure and successful connection between your database and our data sync system, some hosting providers or firewall configurations may require you to whitelist our static IP address.
If your MySQL database is hosted in a data center or cloud environment with IP restrictions, please ensure that the following IP address is allowed to connect:
➡️ IP to Whitelist: 3.21.72.72
Why is this needed?
Our data sync platform initiates the connection to your MySQL database from the above IP. If your server blocks unknown IPs, whitelisting this address ensures that our sync operations can reach your database without interruption.
Ensure that the IP is whitelisted for port 3306 (the default MySQL port), unless your database uses a different port.
⚠️ Note: If you are unsure how to whitelist an IP, please consult your database or hosting provider’s documentation or support team.
Once the IP is whitelisted, proceed with configuring the MySQL connector in your data sync setup.
Usually, your database wouldn't be on the local machine. But if it is, and you want to sync data to or from it using Byteline, Ngrok can help expose your local database to the internet securely.
1. Install Ngrok
Download and install Ngrok from https://ngrok.com/download. Follow the installation instructions provided for your operating system.
2. Expose Your Local Database Using Ngrok
Ngrok can expose a TCP connection for your local database. Use the following command to expose your database:
ngrok tcp <port>
Replace <port> with the port your database is running on (e.g., 3306).
Example for a MySQL database running on port 3306:
ngrok tcp 3306
Ngrok will generate a public TCP address (e.g., 0.tcp.ngrok.io:12345) that tunnels to your local database.
3. Update Database Configuration in Byteline
In the Byteline data sync configuration, use the Ngrok TCP address as the database host. For example:
Host: 0.tcp.ngrok.io
Port: 12345
Username: Your database username
Password: Your database password
Database Name: The name of your database
4. Test the Connection
Use the "Test Connection" feature in Byteline to ensure the platform can connect to your local database through the Ngrok TCP tunnel.
5. Run the Sync
After successfully testing the connection, initiate the data sync as you normally would. Byteline will access your local database through the Ngrok tunnel.
This comprehensive document will walk you through the step-by-step configuration process for HubSpot data sync and address specific use cases tailored to HubSpot .
Please refer to Data Sync - Getting Started for the standard data sync functionality. The getting started document covers usages of data sync features valid for all integrations.

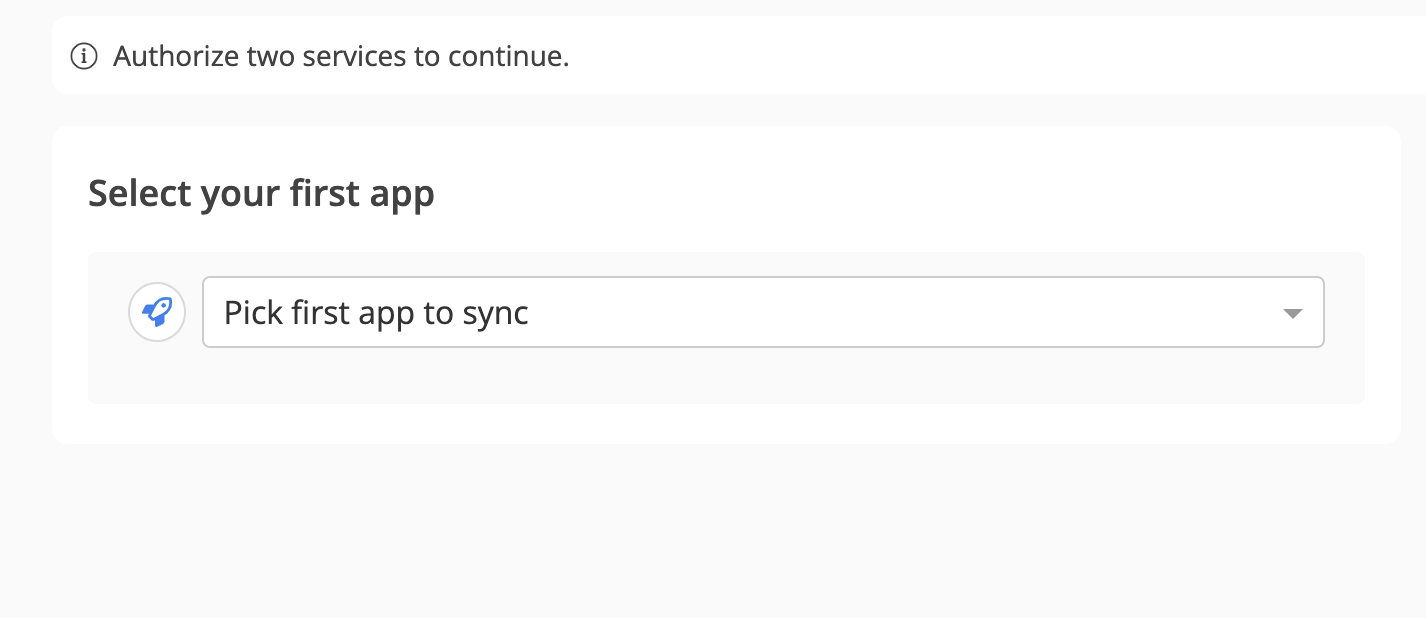


Once the sync is live, any changes made to records in either app will automatically sync to the other app in real time.
Byteline simplifies the process of syncing data between HubSpot and other apps, ensuring:
This comprehensive document will walk you through the step-by-step configuration process for Campaign Monitor data sync and address its specific use cases.
Byteline supports syncing the following data objects from QuickBooks:
Please refer to Data Sync - Getting Started for the standard data sync functionality. The getting started document covers the usage of data sync features valid for all integrations.
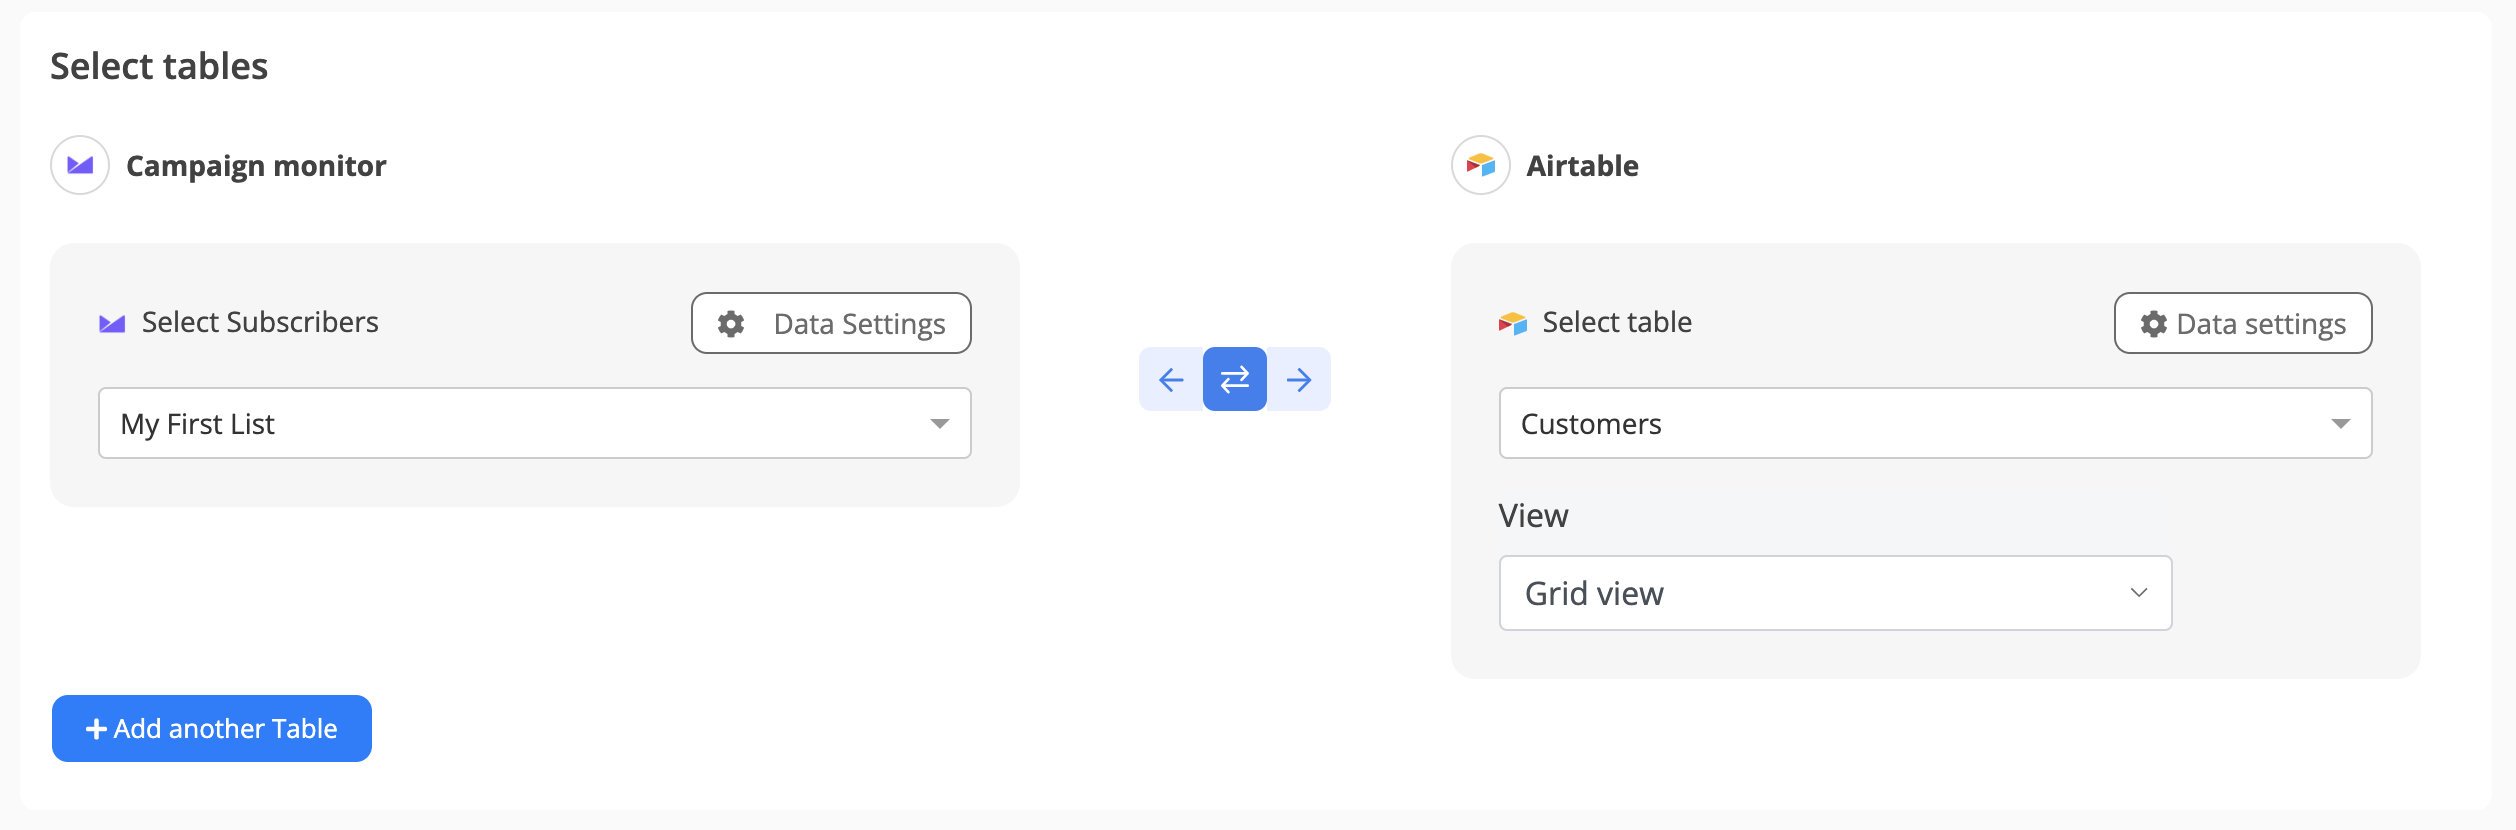
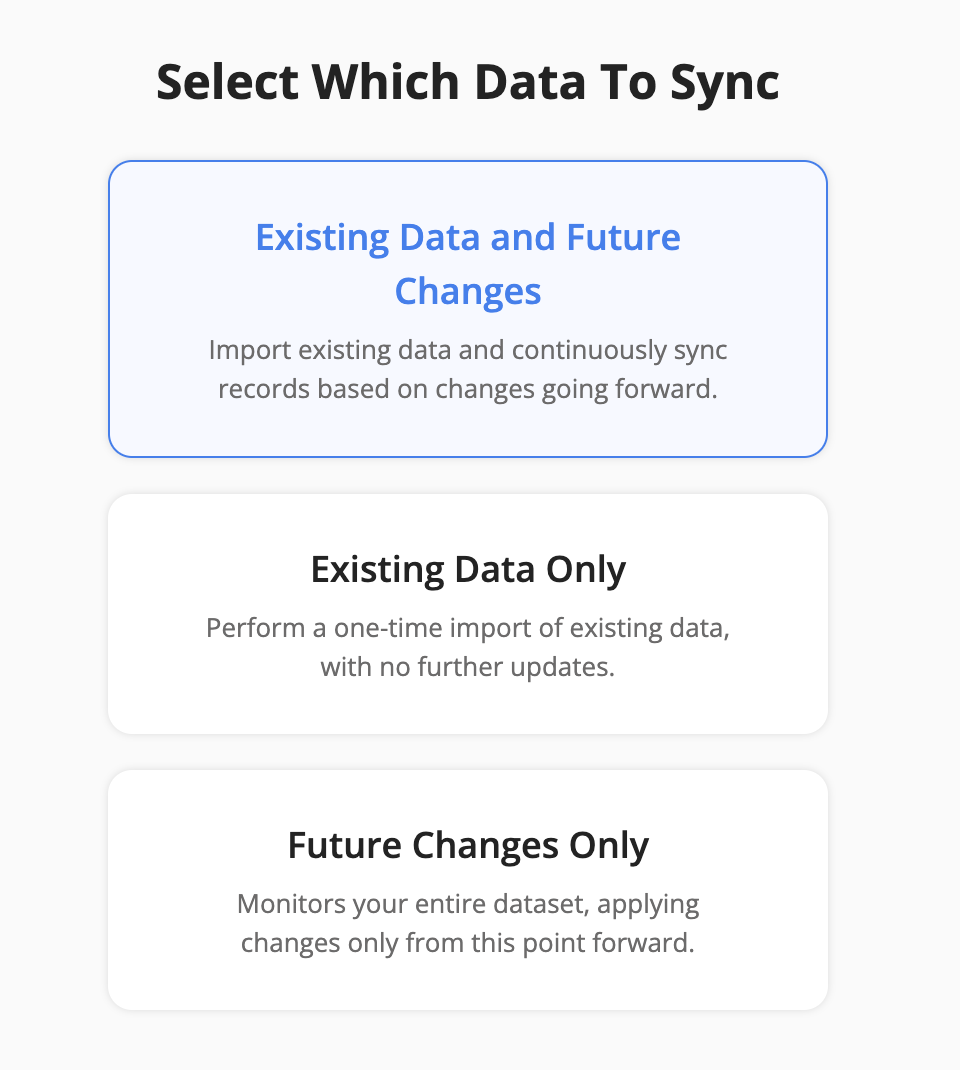
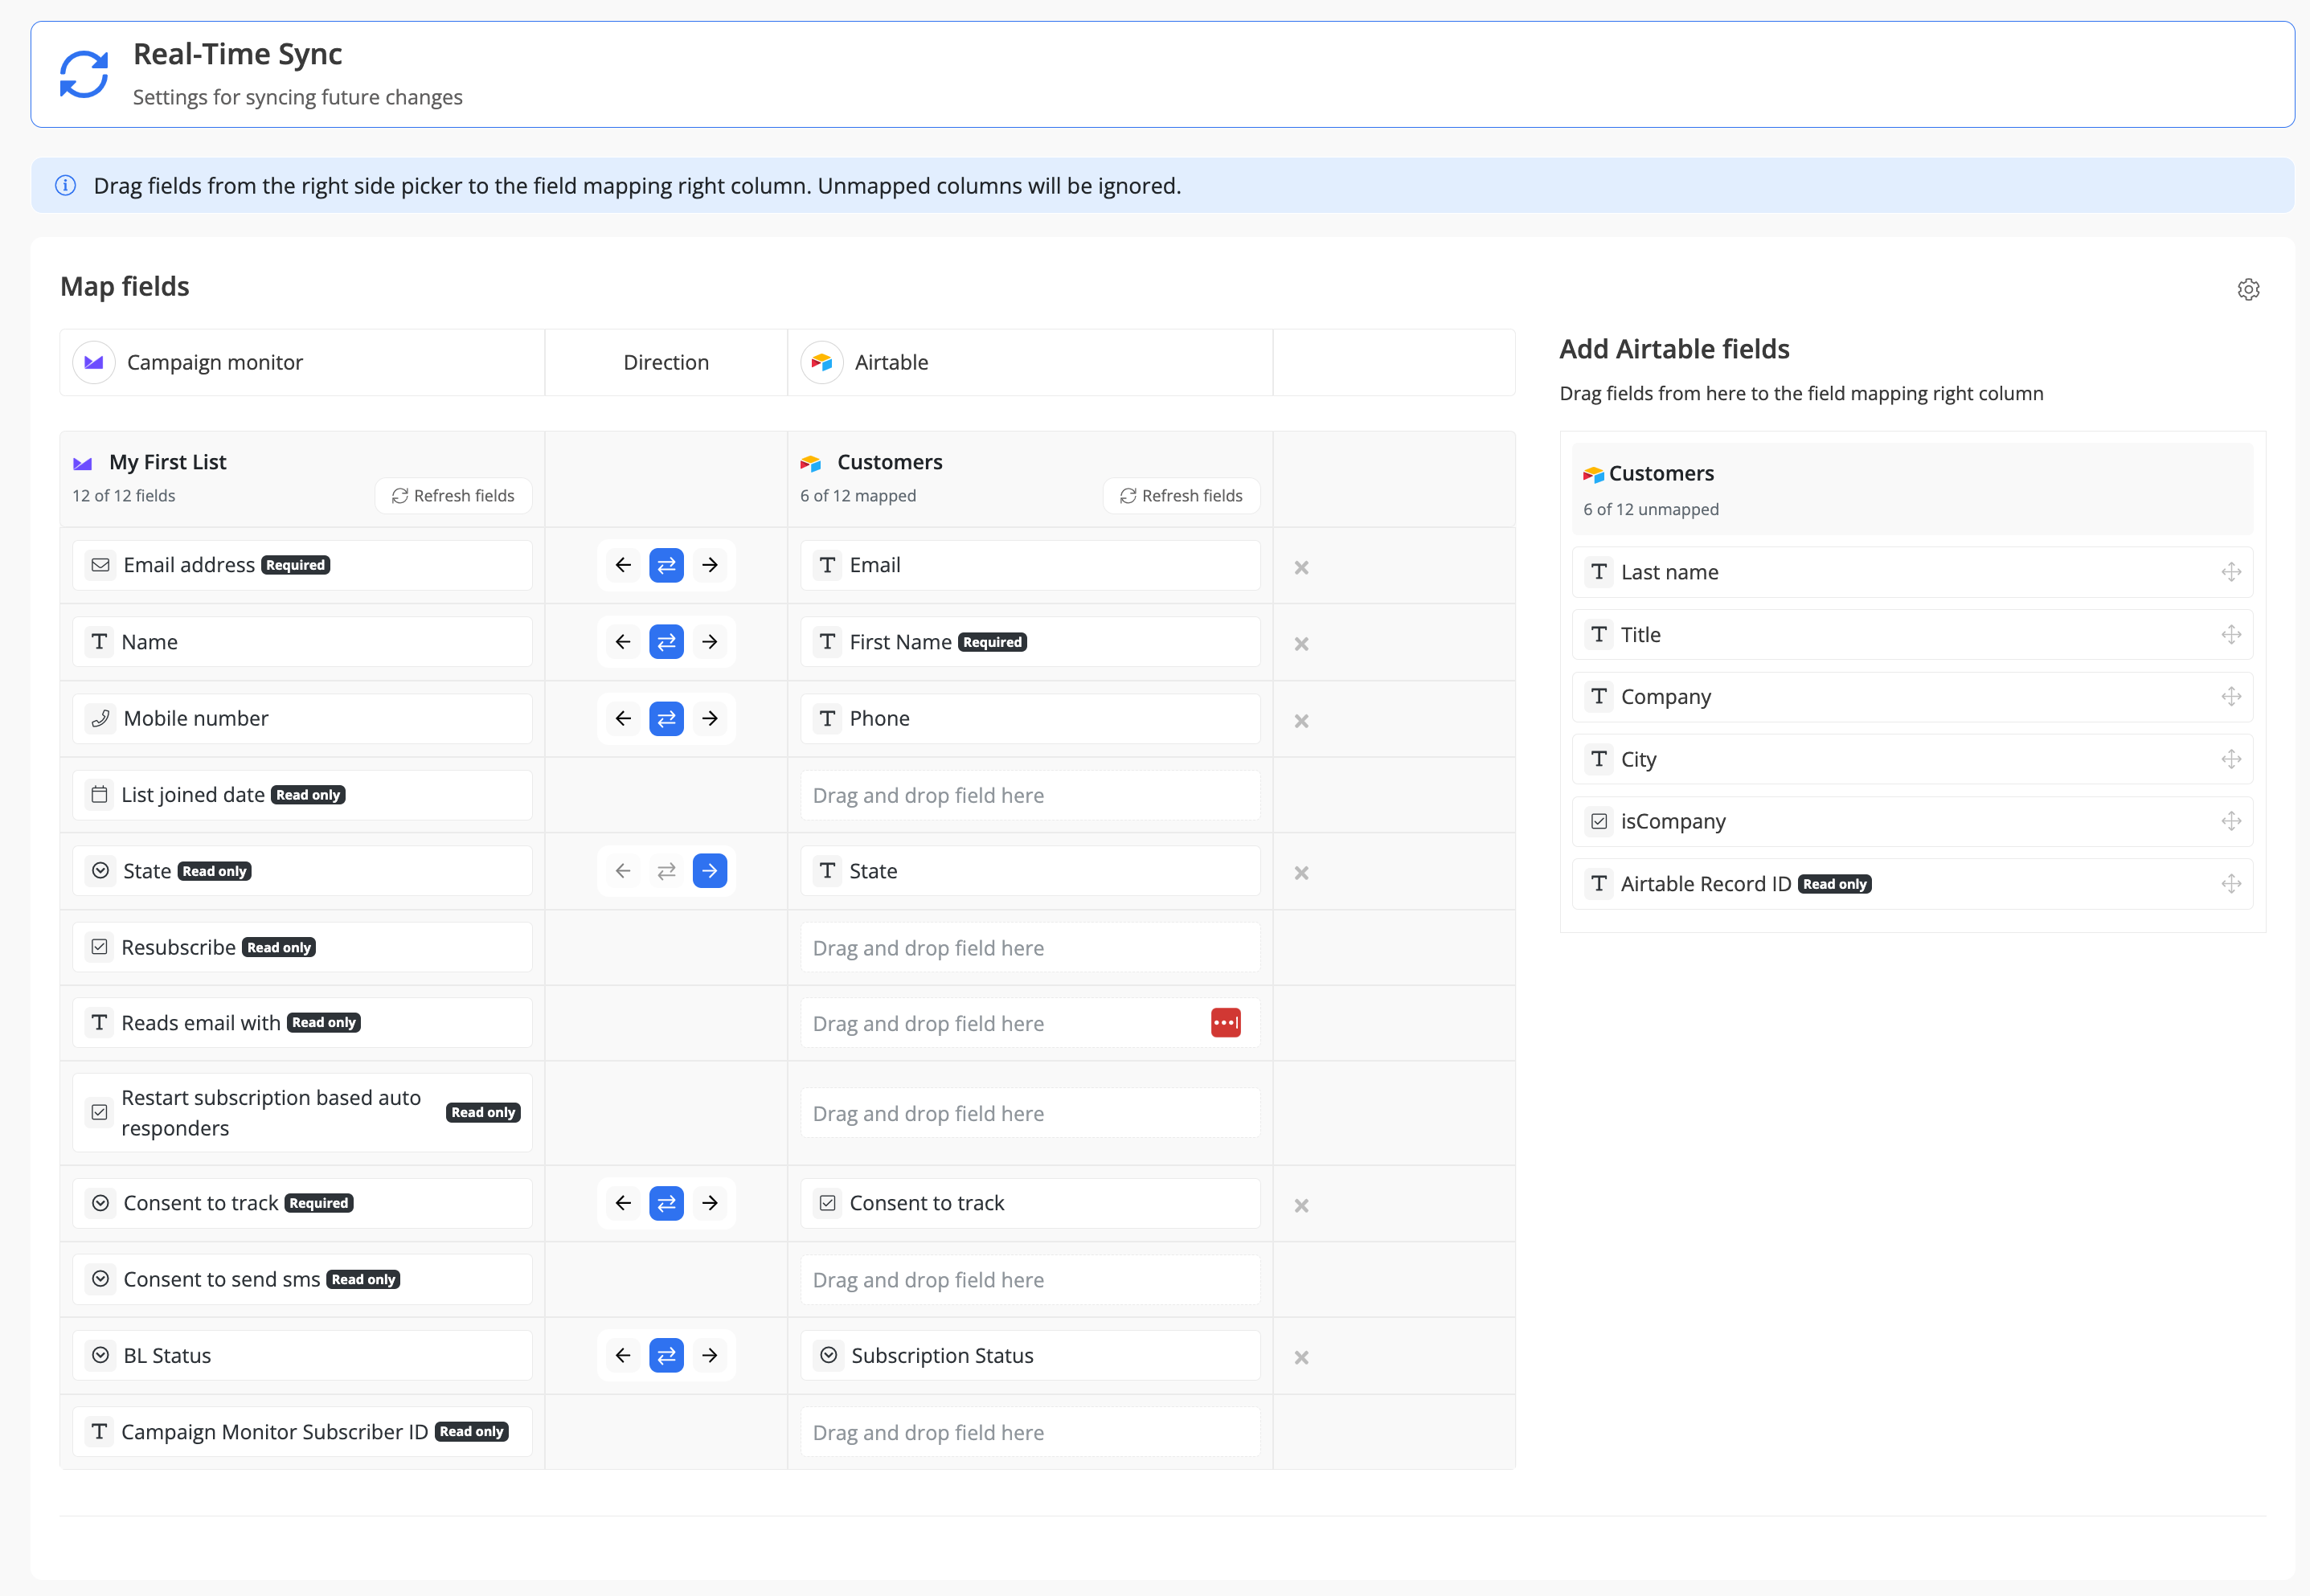
Select the sync direction for your existing data:
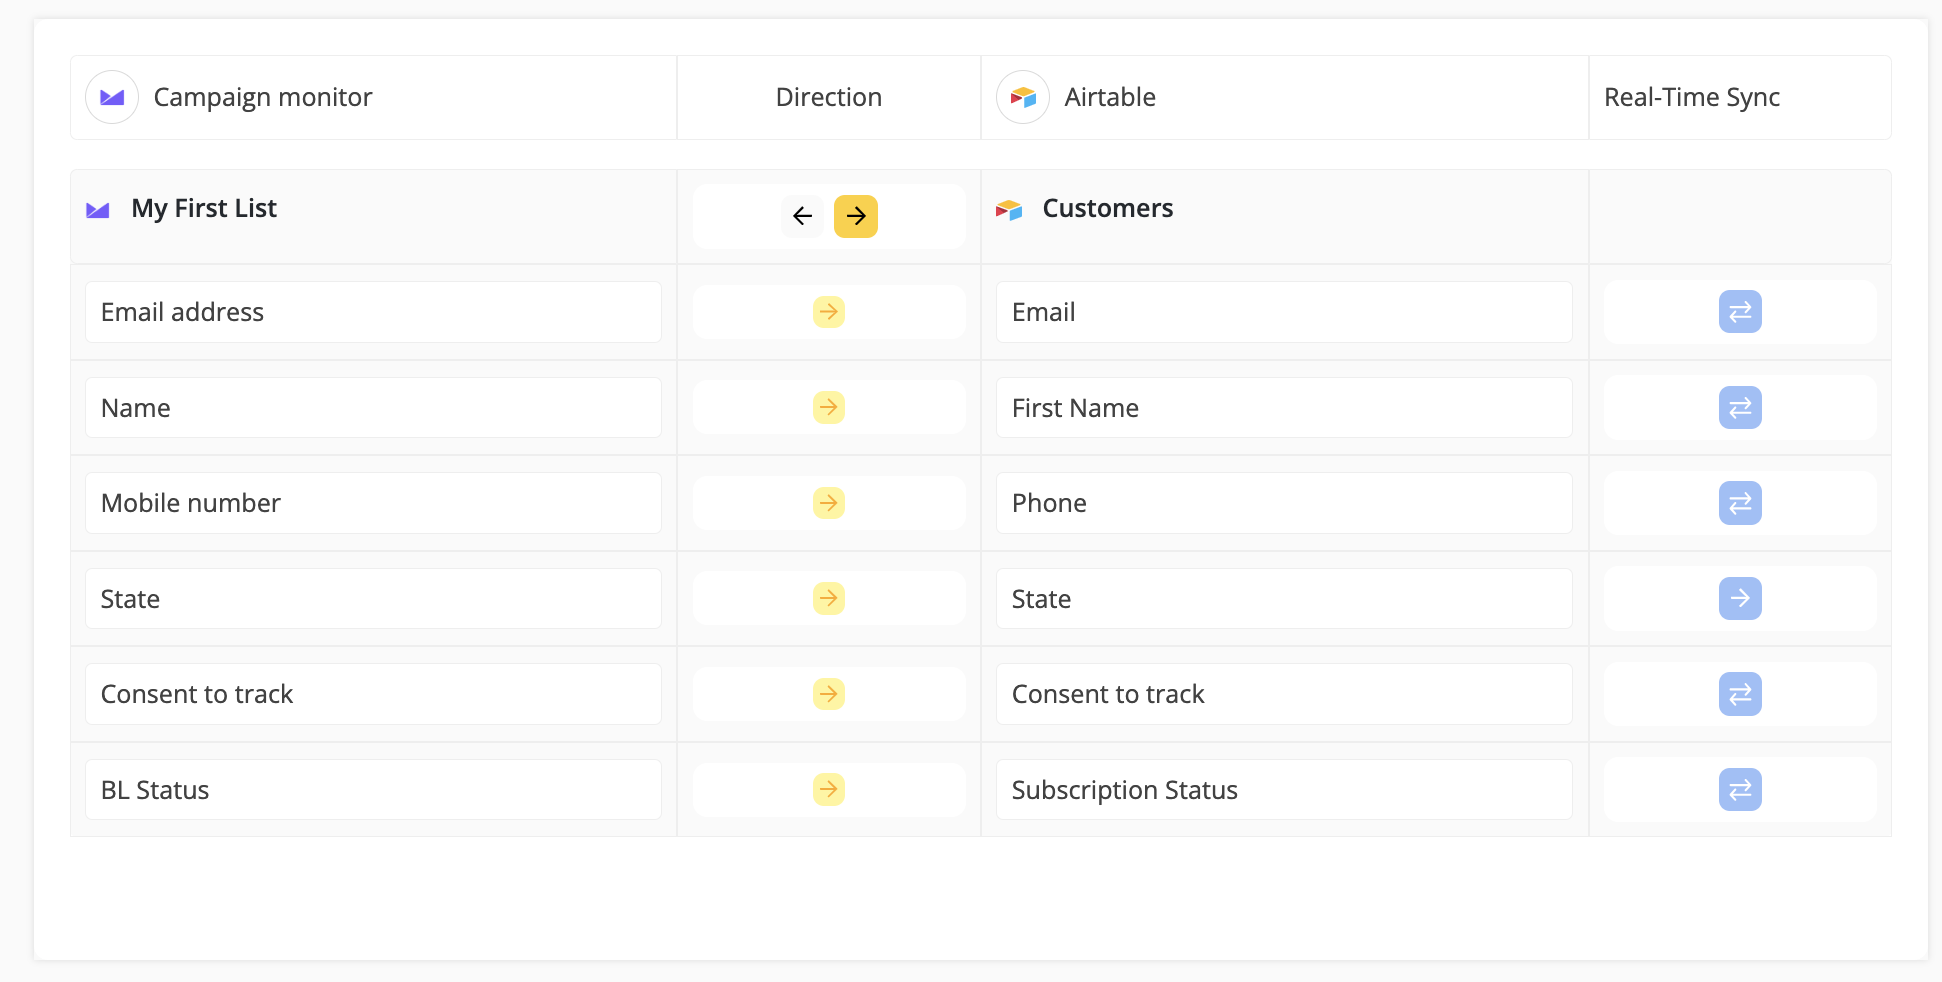
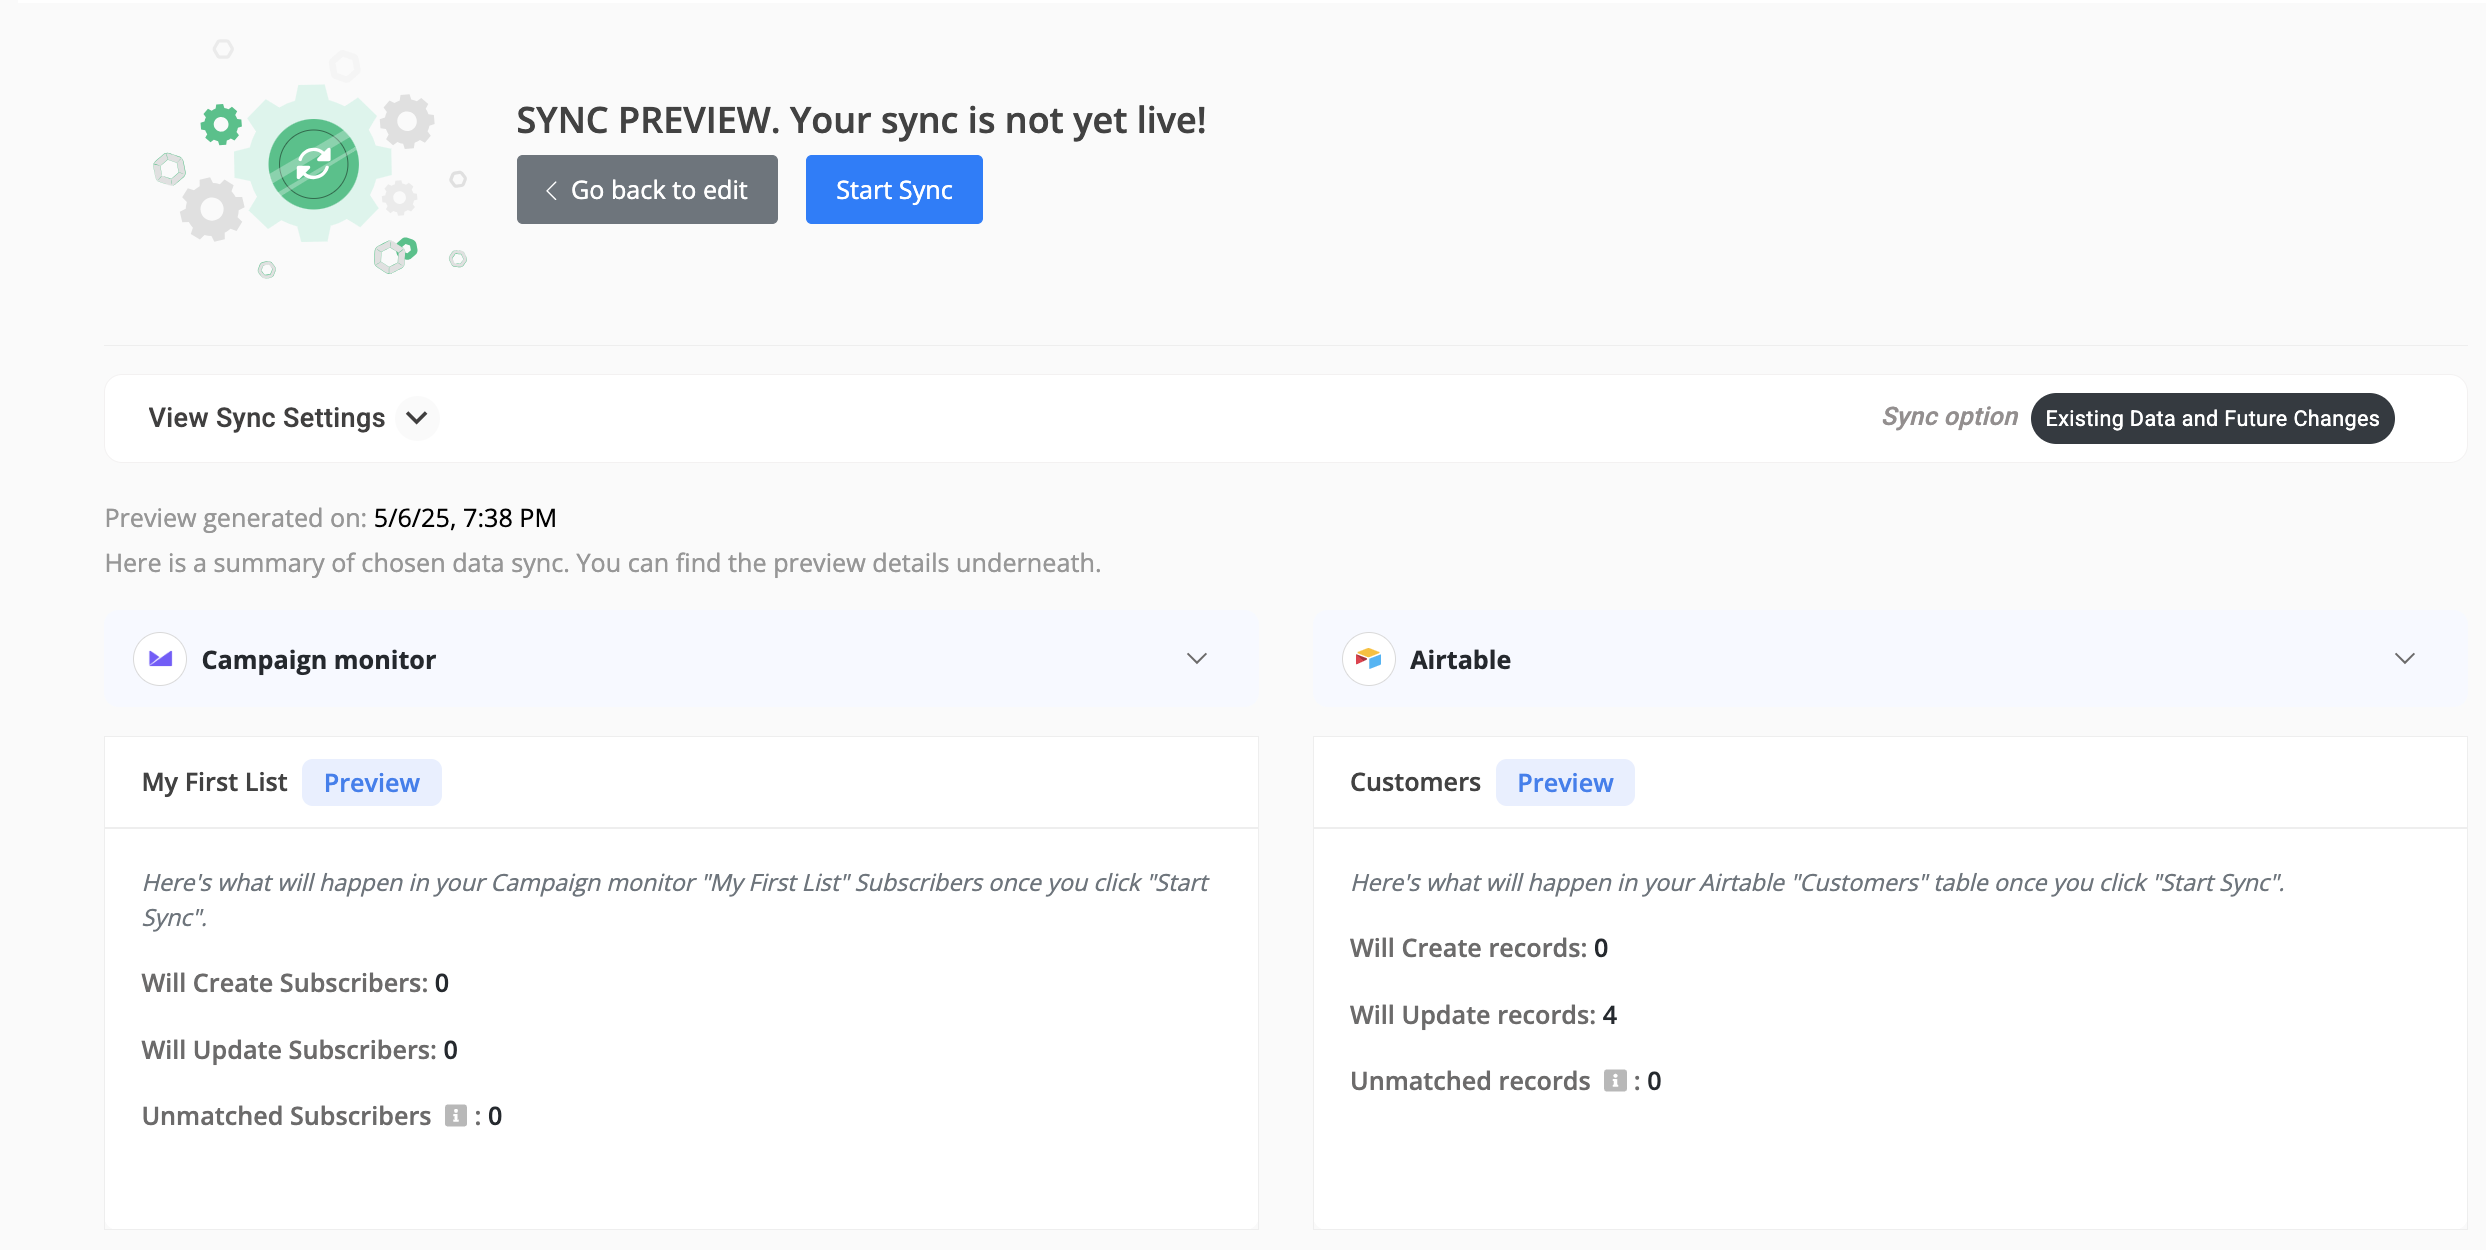
Sometimes you need to change the column field type in your app, e.g., Airtable. This action will cause the field types in your existing sync to differ from those in the app. Please follow the below steps to refresh the sync field types.

Your sync will now have up-to-date field types.
For Cloud-based applications like Notion, which rely on polling mechanisms for tracking data changes, there inevitably exists a lag between modifications within the app and their visibility to Byteline. This causes a time delay for a user to test our changes. So Byteline provides a way to force the "Refresh" for such apps.
To trigger this refresh, simply utilize the "Refresh" link conveniently located next to the table, as illustrated in the accompanying screenshot. Byteline promptly initiates a check for any recent changes, ensuring immediate synchronization.

This comprehensive document will walk you through the step-by-step configuration process for Fibery data sync and address specific use cases tailored to Fibery.
Please refer to Data Sync - Getting Started for the standard data sync functionality. The getting started document covers usages of data sync features valid for all integrations.

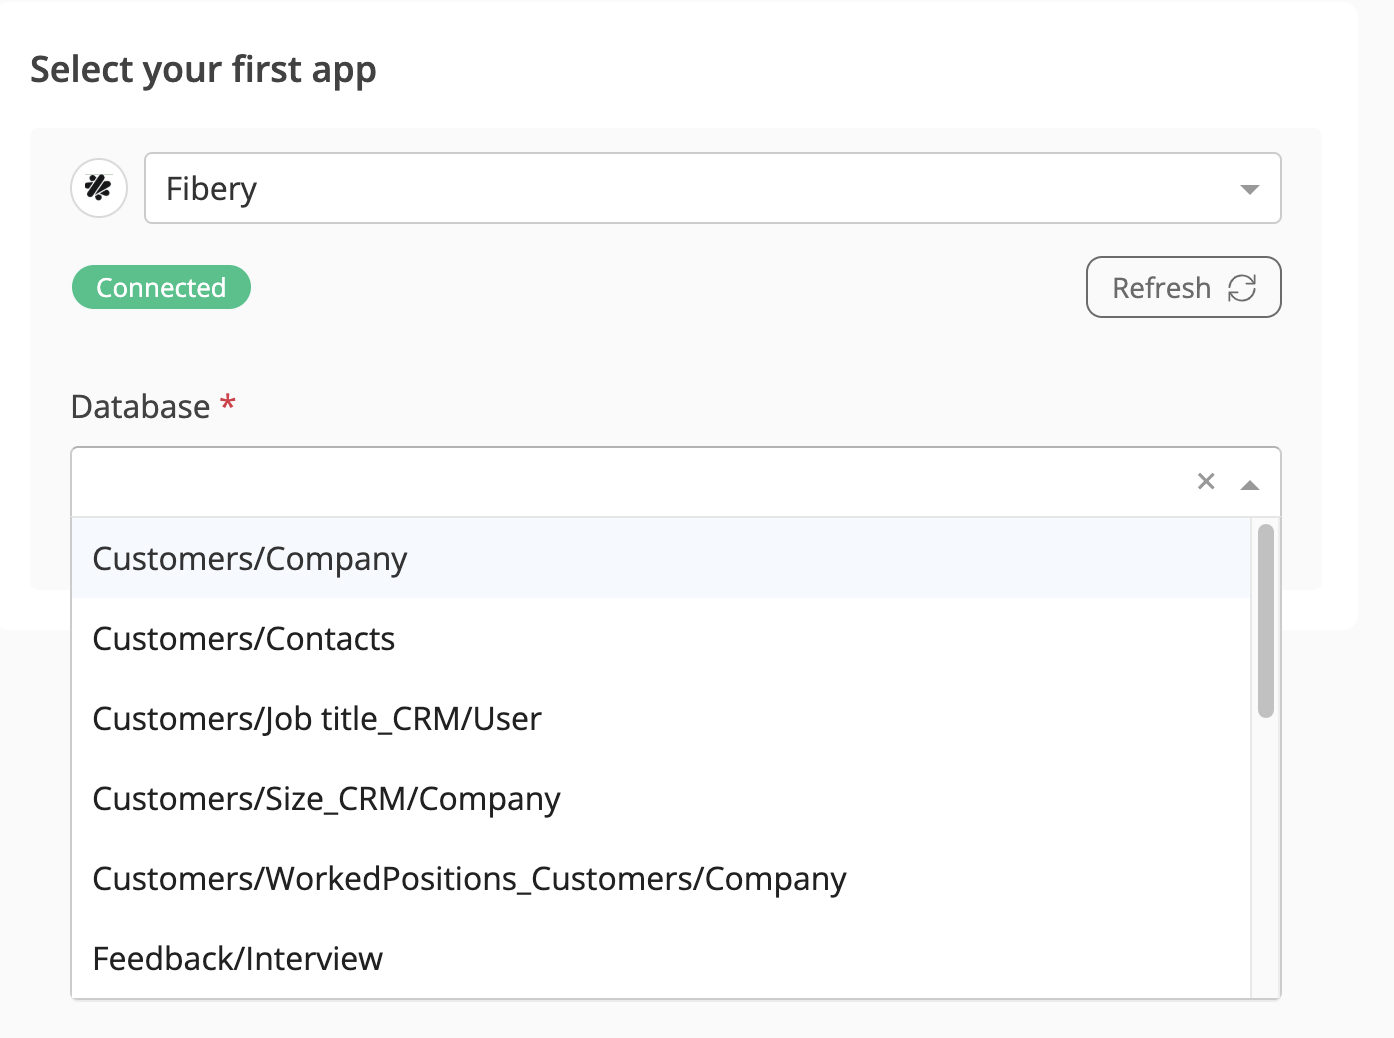
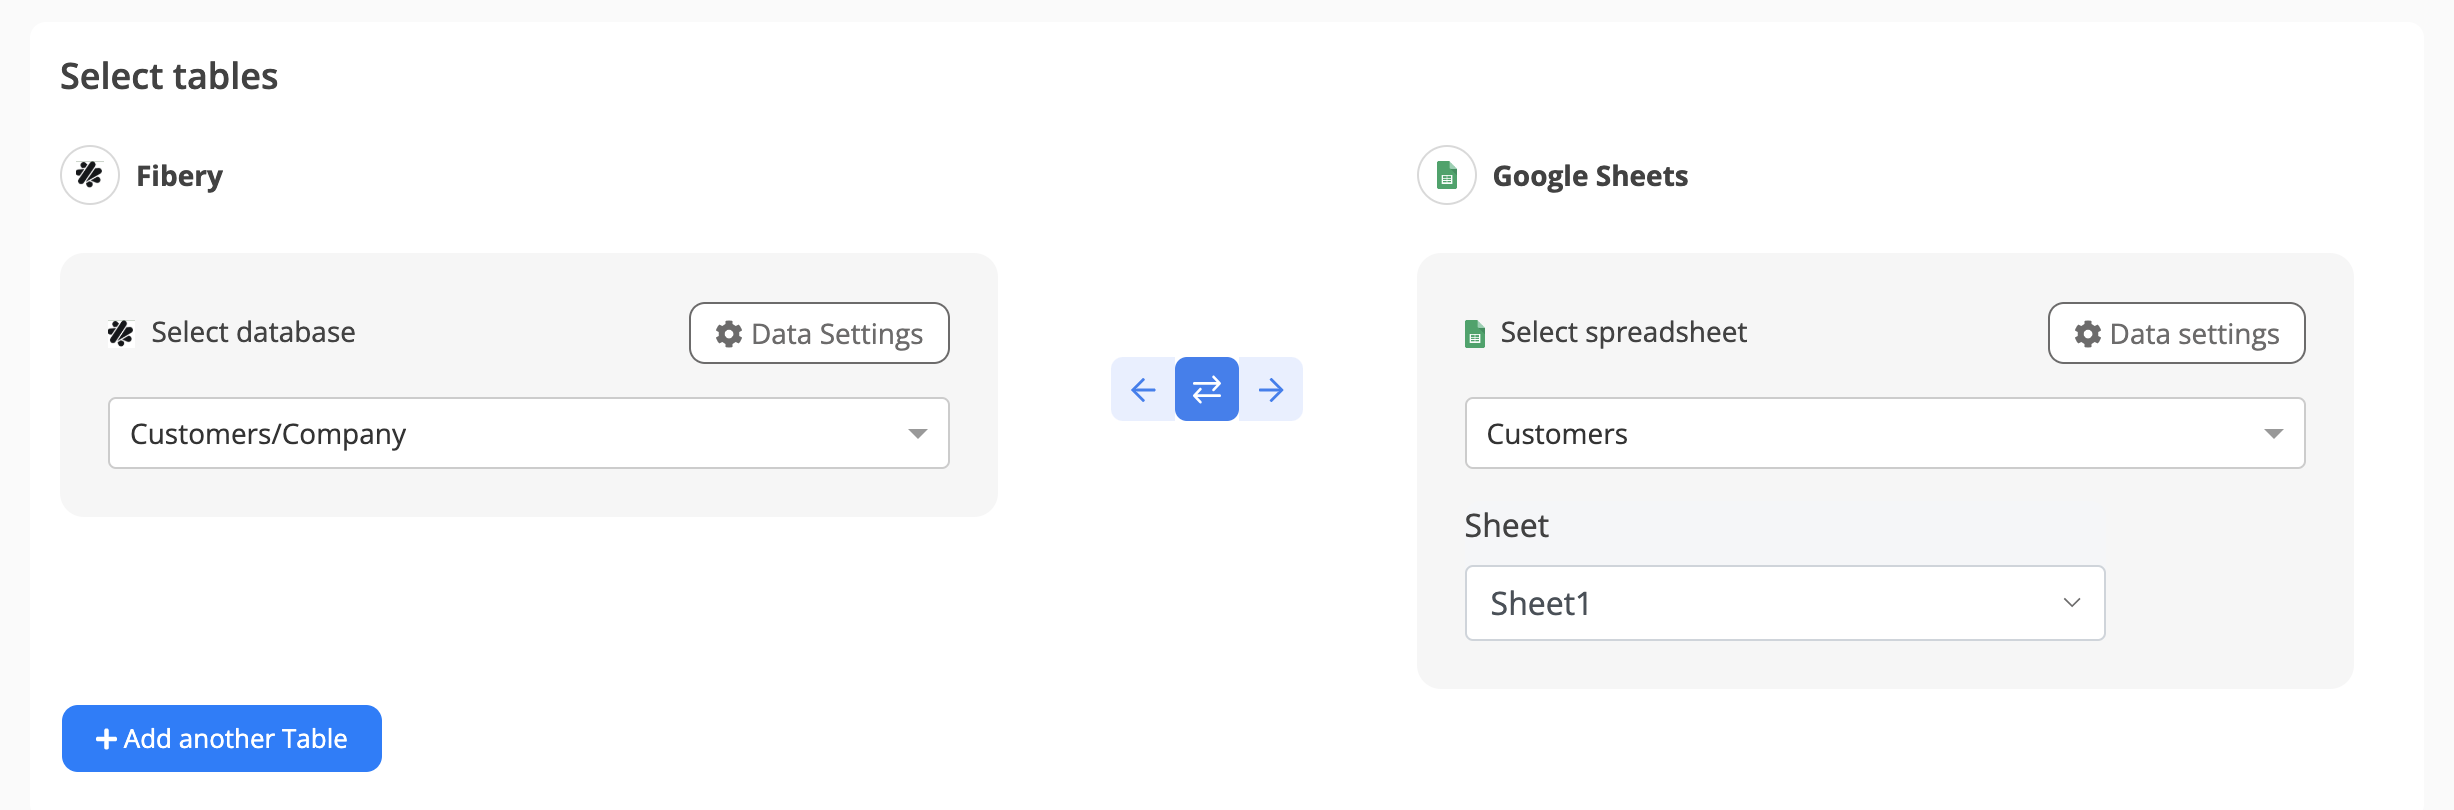
Once the sync is live, any changes made to records in either app will automatically sync to the other app in real time.