Foxy Data Sync

This comprehensive guide walks you through the step-by-step configuration process for syncing Foxy data using Byteline.
Supported Data Types
Byteline currently supports syncing the following Foxy data objects:
- Customers
- Transactions
Standard Data Sync functionality
Please refer to Data Sync - Getting Started for the standard data sync functionality. The Getting Started document covers the usage of data sync features that are valid for all integrations.
Setting up Foxy Data Sync with Byteline
Follow these steps to configure data sync for Foxy Transactions using Byteline. You can follow a similar process to sync other Foxy data types.
Step 1: Start the Sync Setup
- Log in to your Byteline account and navigate to the My Syncs page.
- Click on the "Create Sync" button to begin the configuration.
Step 2: Select Foxy as Your First App
- Choose Foxy as the first app to sync.
Alternatively, you can select another app first and then pick Foxy as the second app. - Click on the "Connect Foxy" button, if not already connected, under Foxy, to connect it to Byteline.
- Now select the Transaction for the data type to sync.
Step 3: Connect the Second App
- Select the second app for syncing and connect to authorize the connection.
- Once connected, click "Continue" to move to the table mapping screen.
Step 4: Map Tables Between Foxy Transaction and the Other App
Note: Foxy transactions is a read-only connector, meaning it can only act as the source in a sync.
- Select the tables you want to sync between the two apps.Foxy transactions include a Record Tracking Time Frame feature, which lets you define how long a transaction should be monitored. For example, if your transactions typically remain unchanged after 3 months, you can set the tracking time frame to 3 months.
Once the specified time has passed, the transaction is no longer managed or included in billing. Any updates made to the record after this period will be ignored by Byteline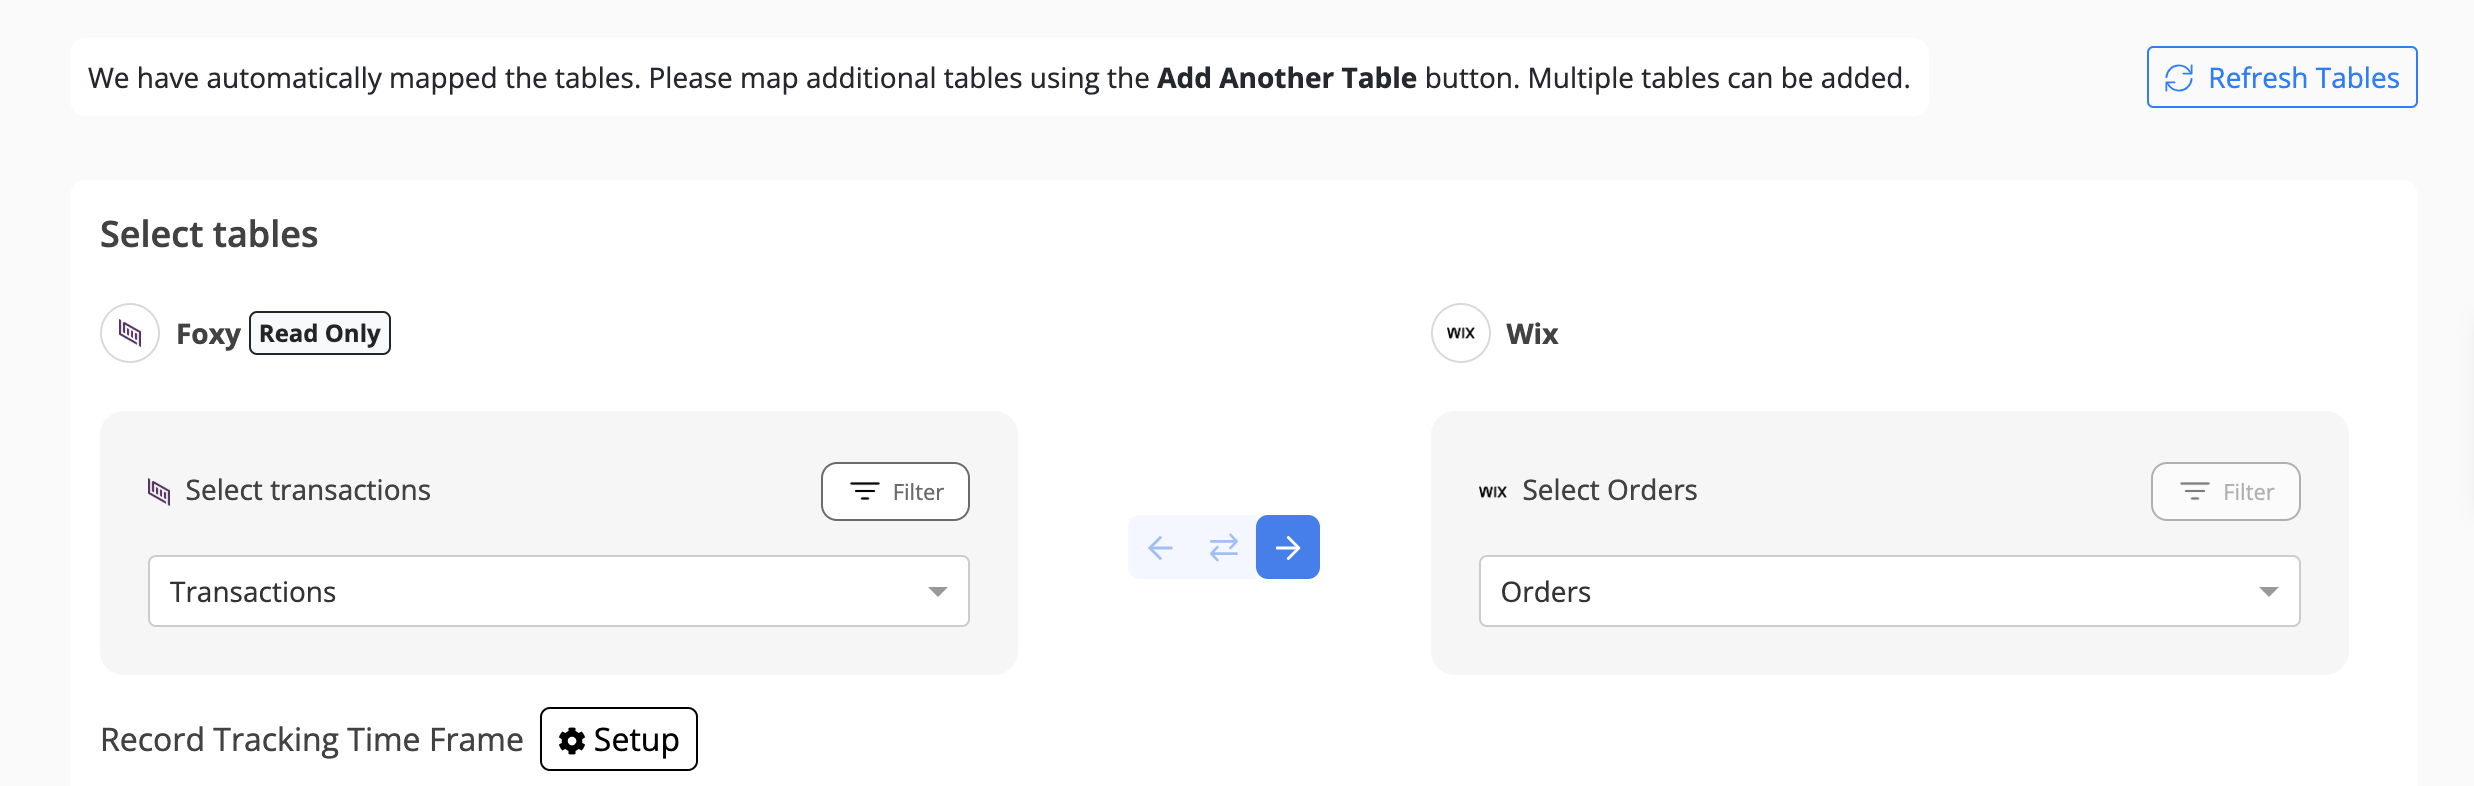
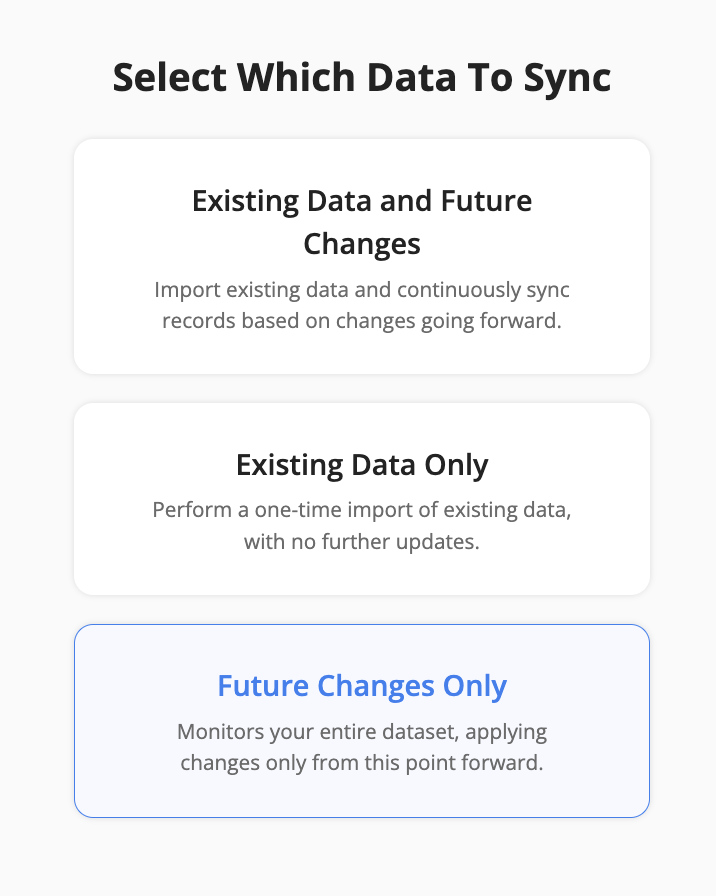
Step 5: Choose Which Data to Sync
For each sync, you'll need to select whether to sync existing records, future changes, or both. When syncing transactions, the most common choice is to sync future changes only.
Step 6: Configure Field Mapping
- On the Field Mapping screen, drag and drop fields from the right panel into the mapped fields column to create mappings.
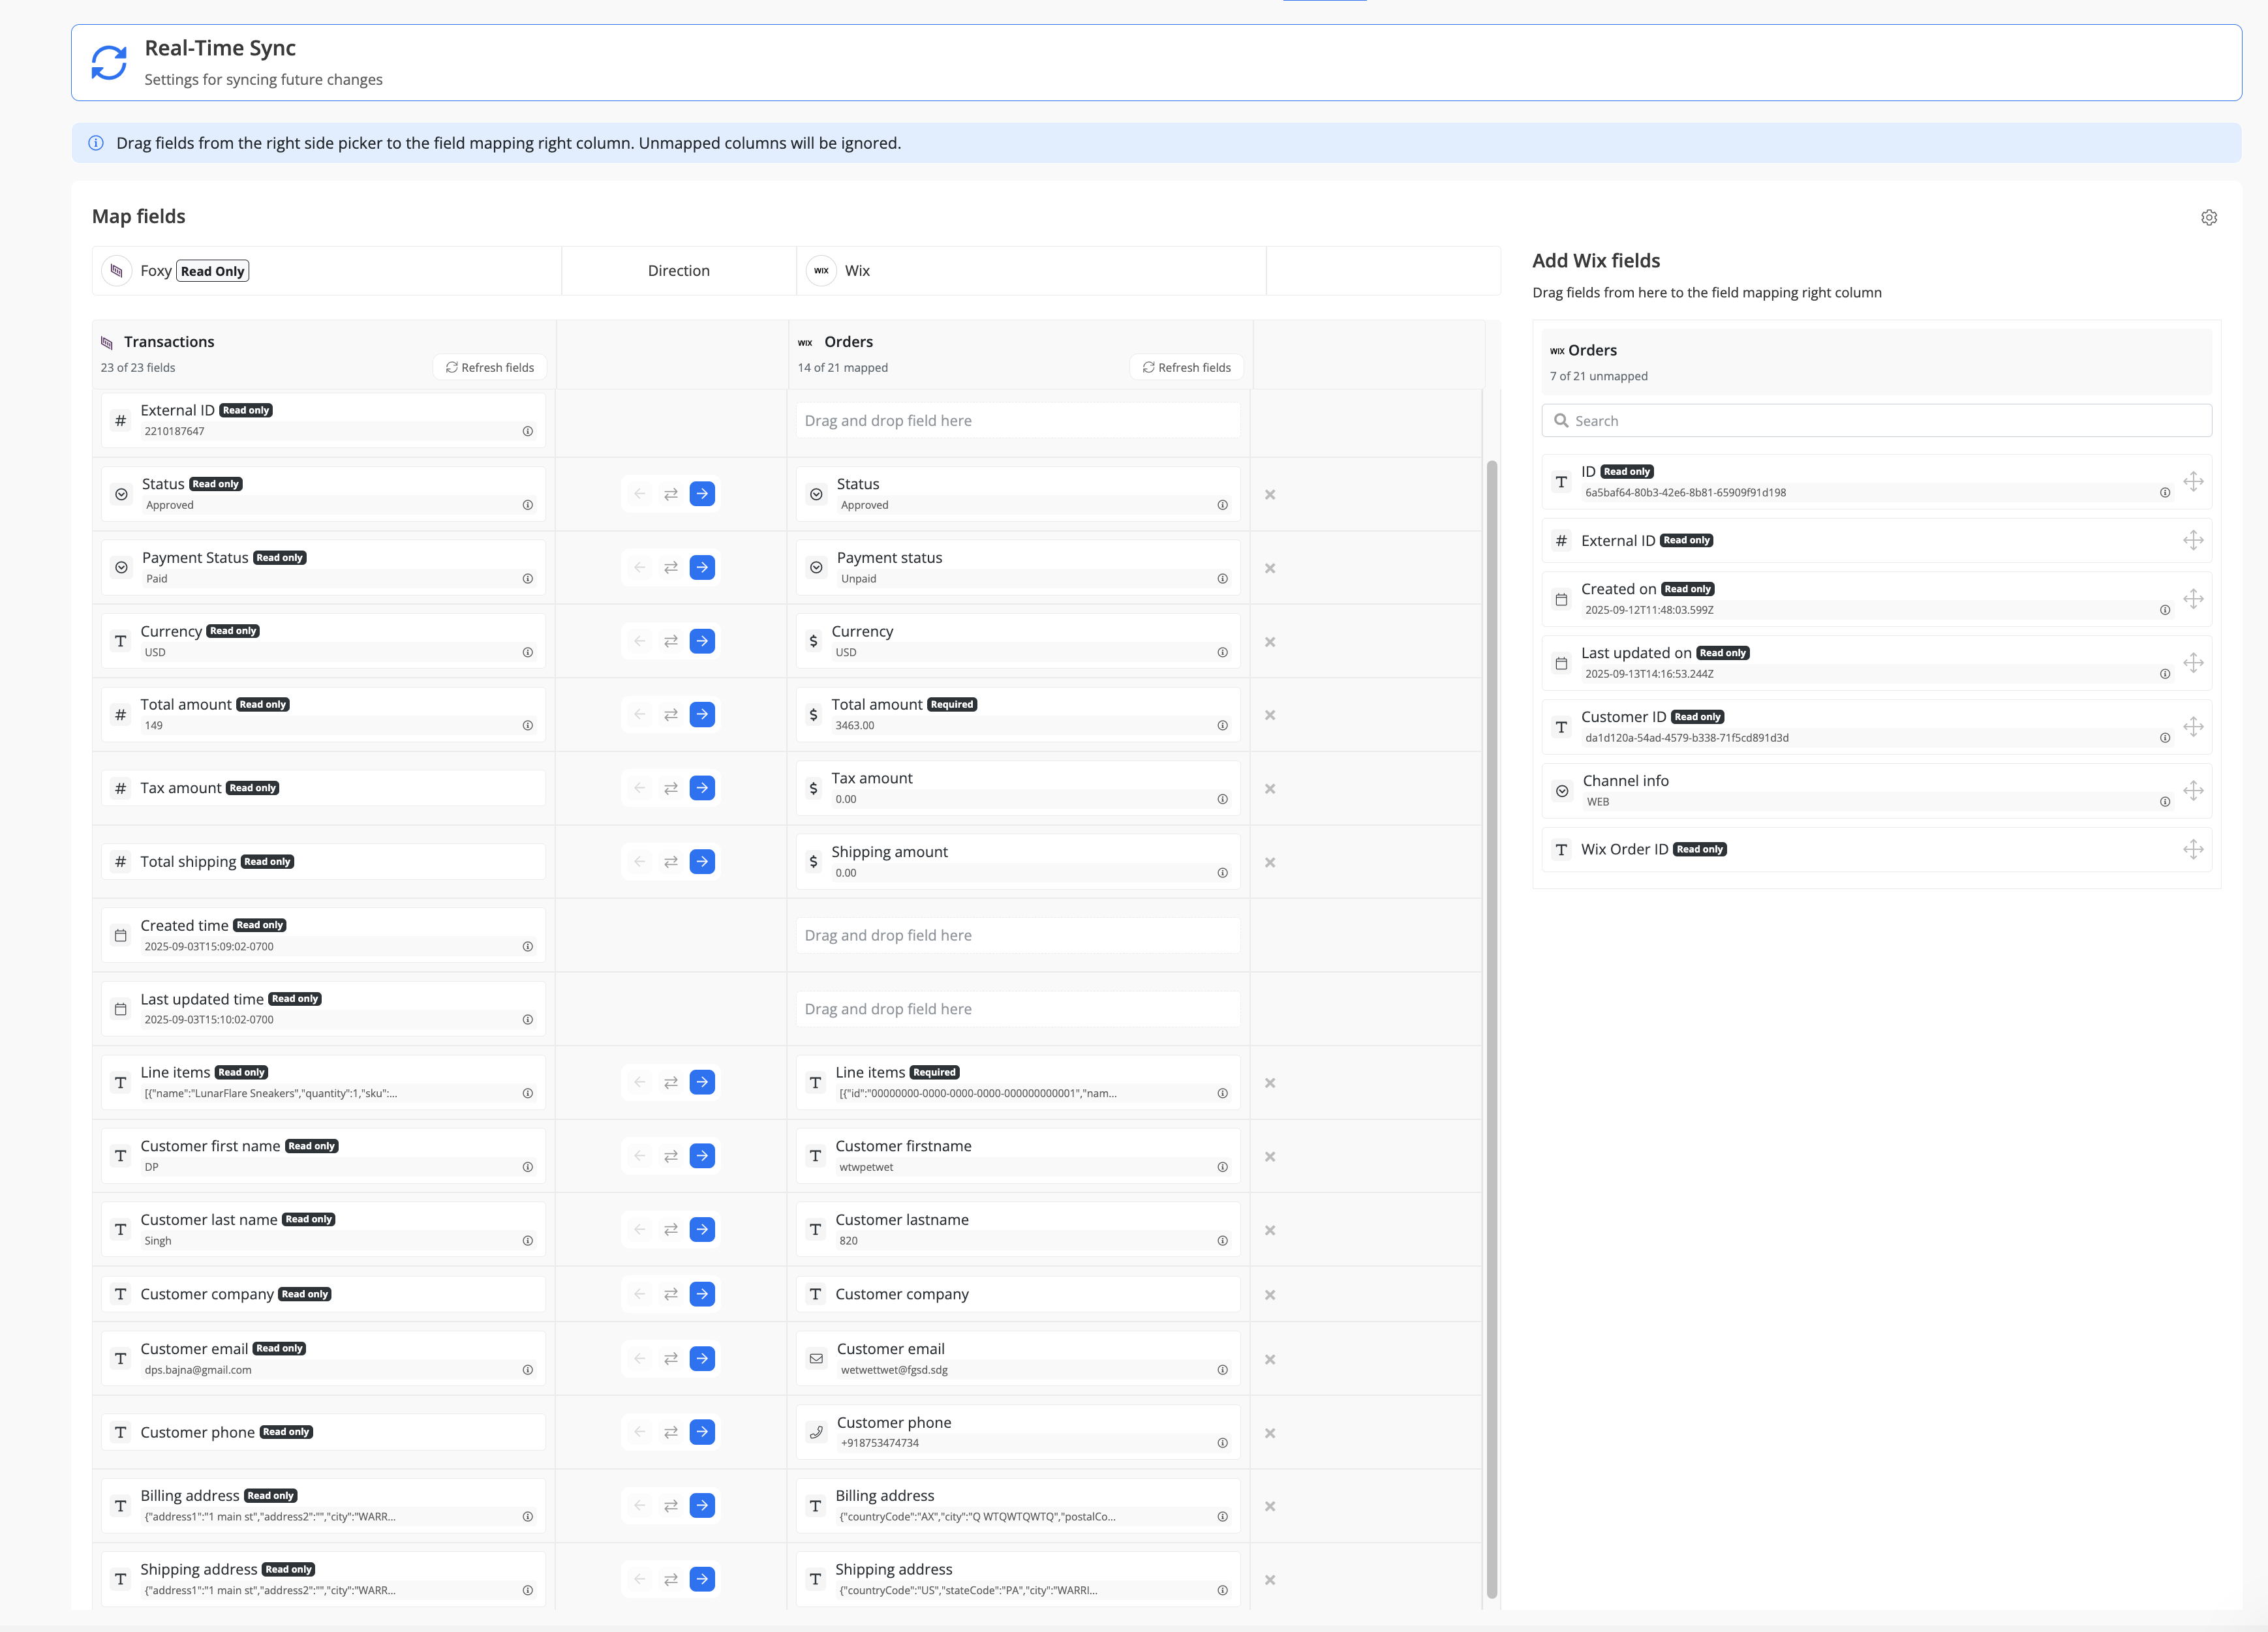
- To delete a mapping, click the X button next to the field.
- Select the sync direction at the field level using the arrow buttons.
One-Way Sync: Data flows from one app to the other.
Two-Way Sync: Data flows bidirectionally between both apps. - Once your mappings are finalized, click "Continue.
Step 7: Start the Sync
Click Start Sync at the bottom of the field mapping section to activate your sync. From this point on, any transaction processed in Foxy will automatically be sent to Wix orders (as shown in this guide’s example).
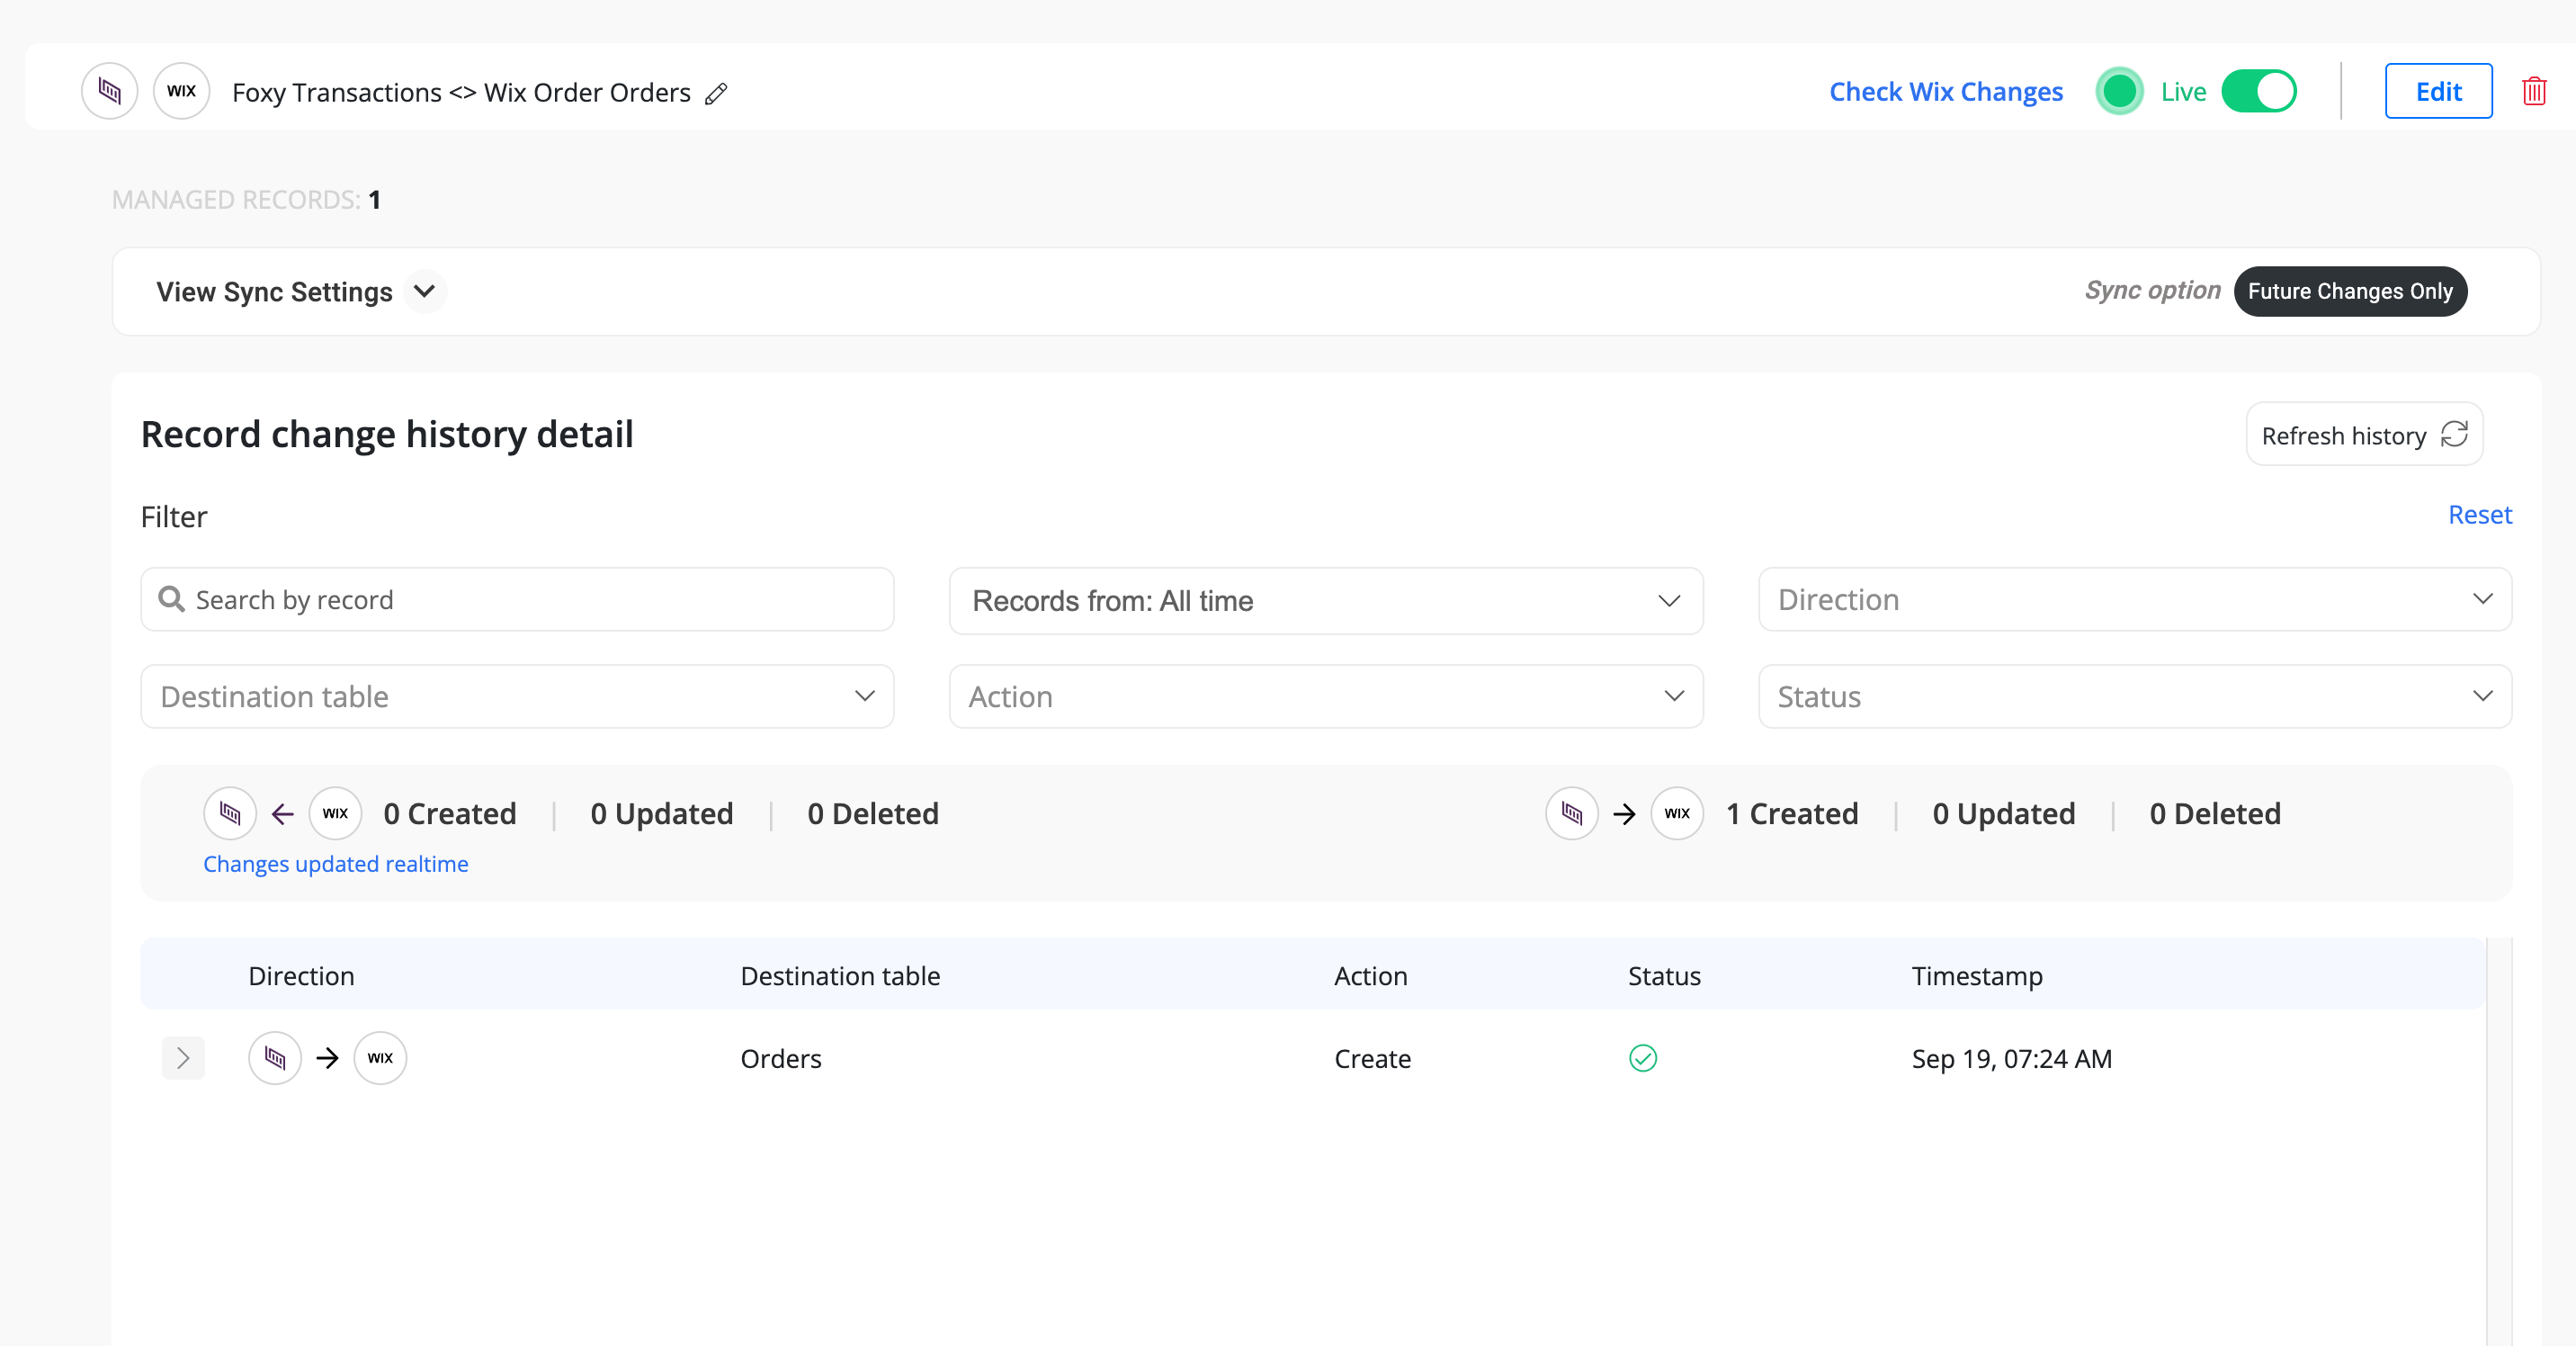
You can monitor sync progress, view logs, or make changes anytime from the Syncs page. If you need to pause or edit the sync, simply open it from your dashboard.
✅ That’s it! Your Foxy sync is now live.
Use Case: Inventory Sync with Wix
When you sync Foxy transactions with Wix orders, your Wix product catalog inventory is automatically updated. To enable this, the code field in Foxy transaction line items must be mapped to the SKU value. This setup is handled in your Foxy account. If you need help configuring it, please reach out to Foxy customer support.