Using Managed Scraper with Automation

Introduction
Use managed scraping with Byteline's workflow automation to unlock its full potential. You can easily tackle various use cases, such as exporting scraped data to an app such as Google Sheets, Airtable, Webflow, or any other Byteline integration.
Step-by-step guide
Here's a step-by-step guide to integrating your managed scraper with Byteline's automation:
- Navigate to your Byteline Managed Scraper dashboard.
- Select the desired scraper and click on the "Automation" button.

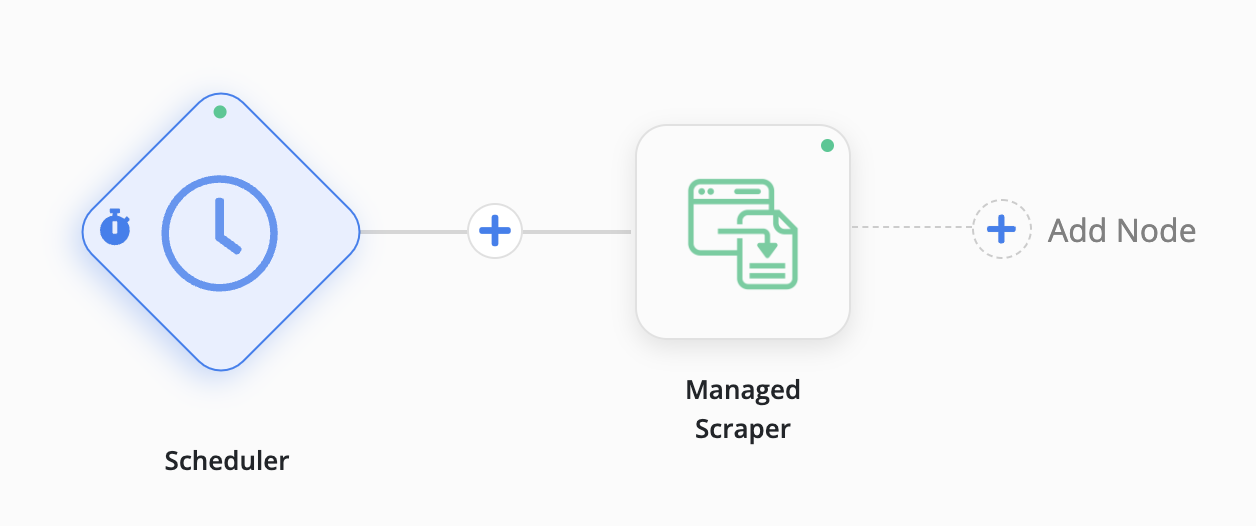
- This will create an automation flow, with the Scheduler as the trigger node and the Managed Scraper as the action node.
- Customize the scheduler settings to meet your specific requirements. Optionally, change the trigger node to start this flow on other criteria.
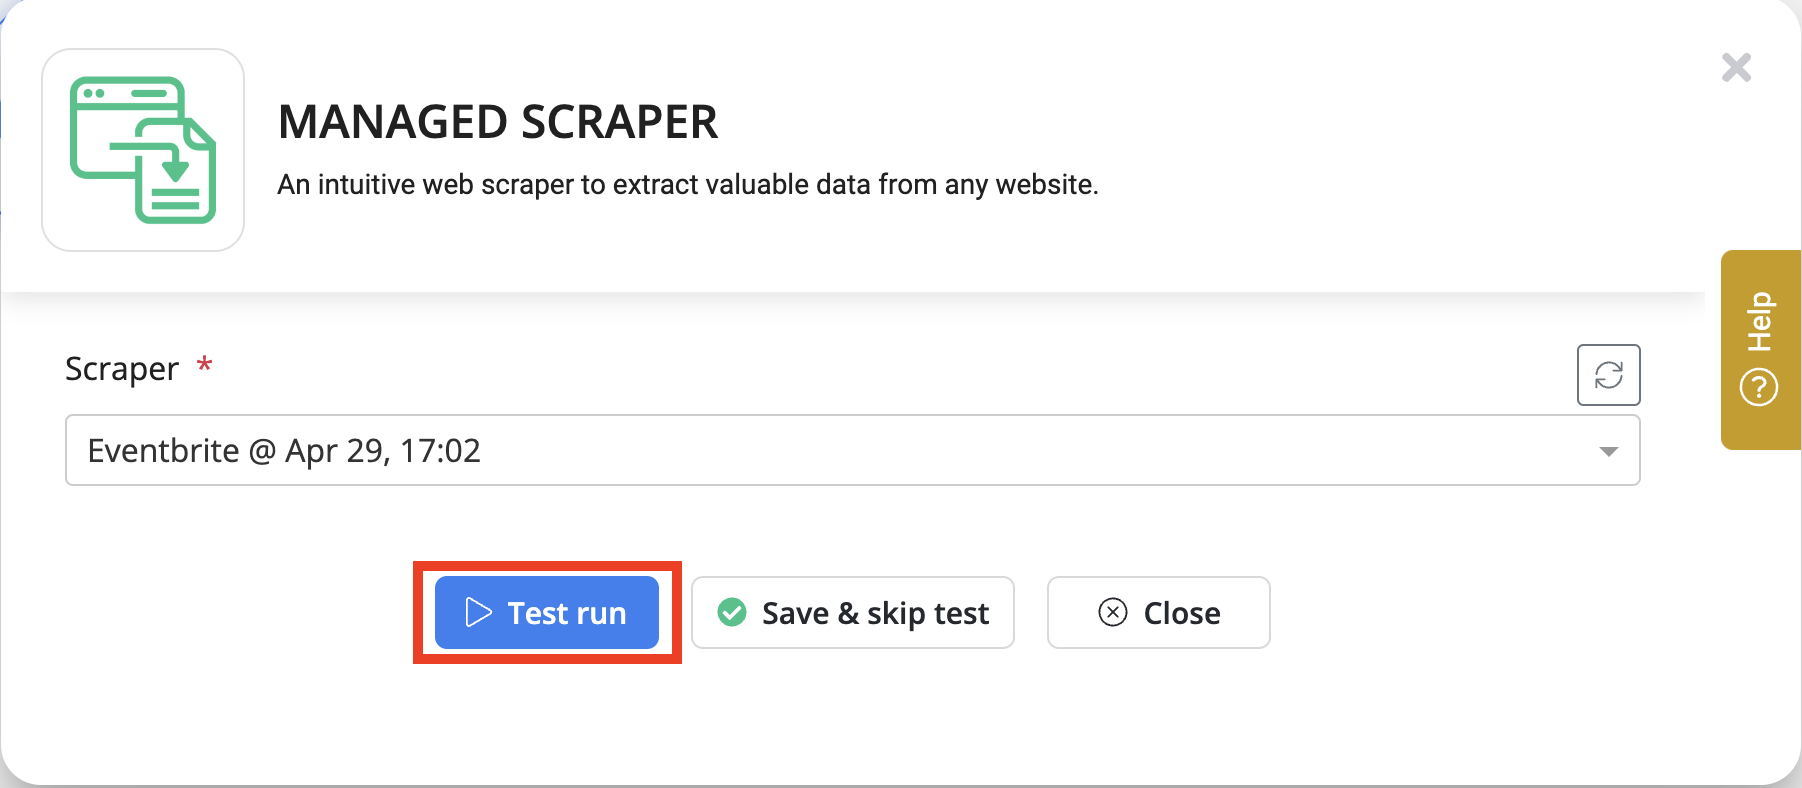
- Execute a test run by clicking the Managed Scraper node and selecting the "Test Run" button. This generates sample data for configuring subsequent action nodes.

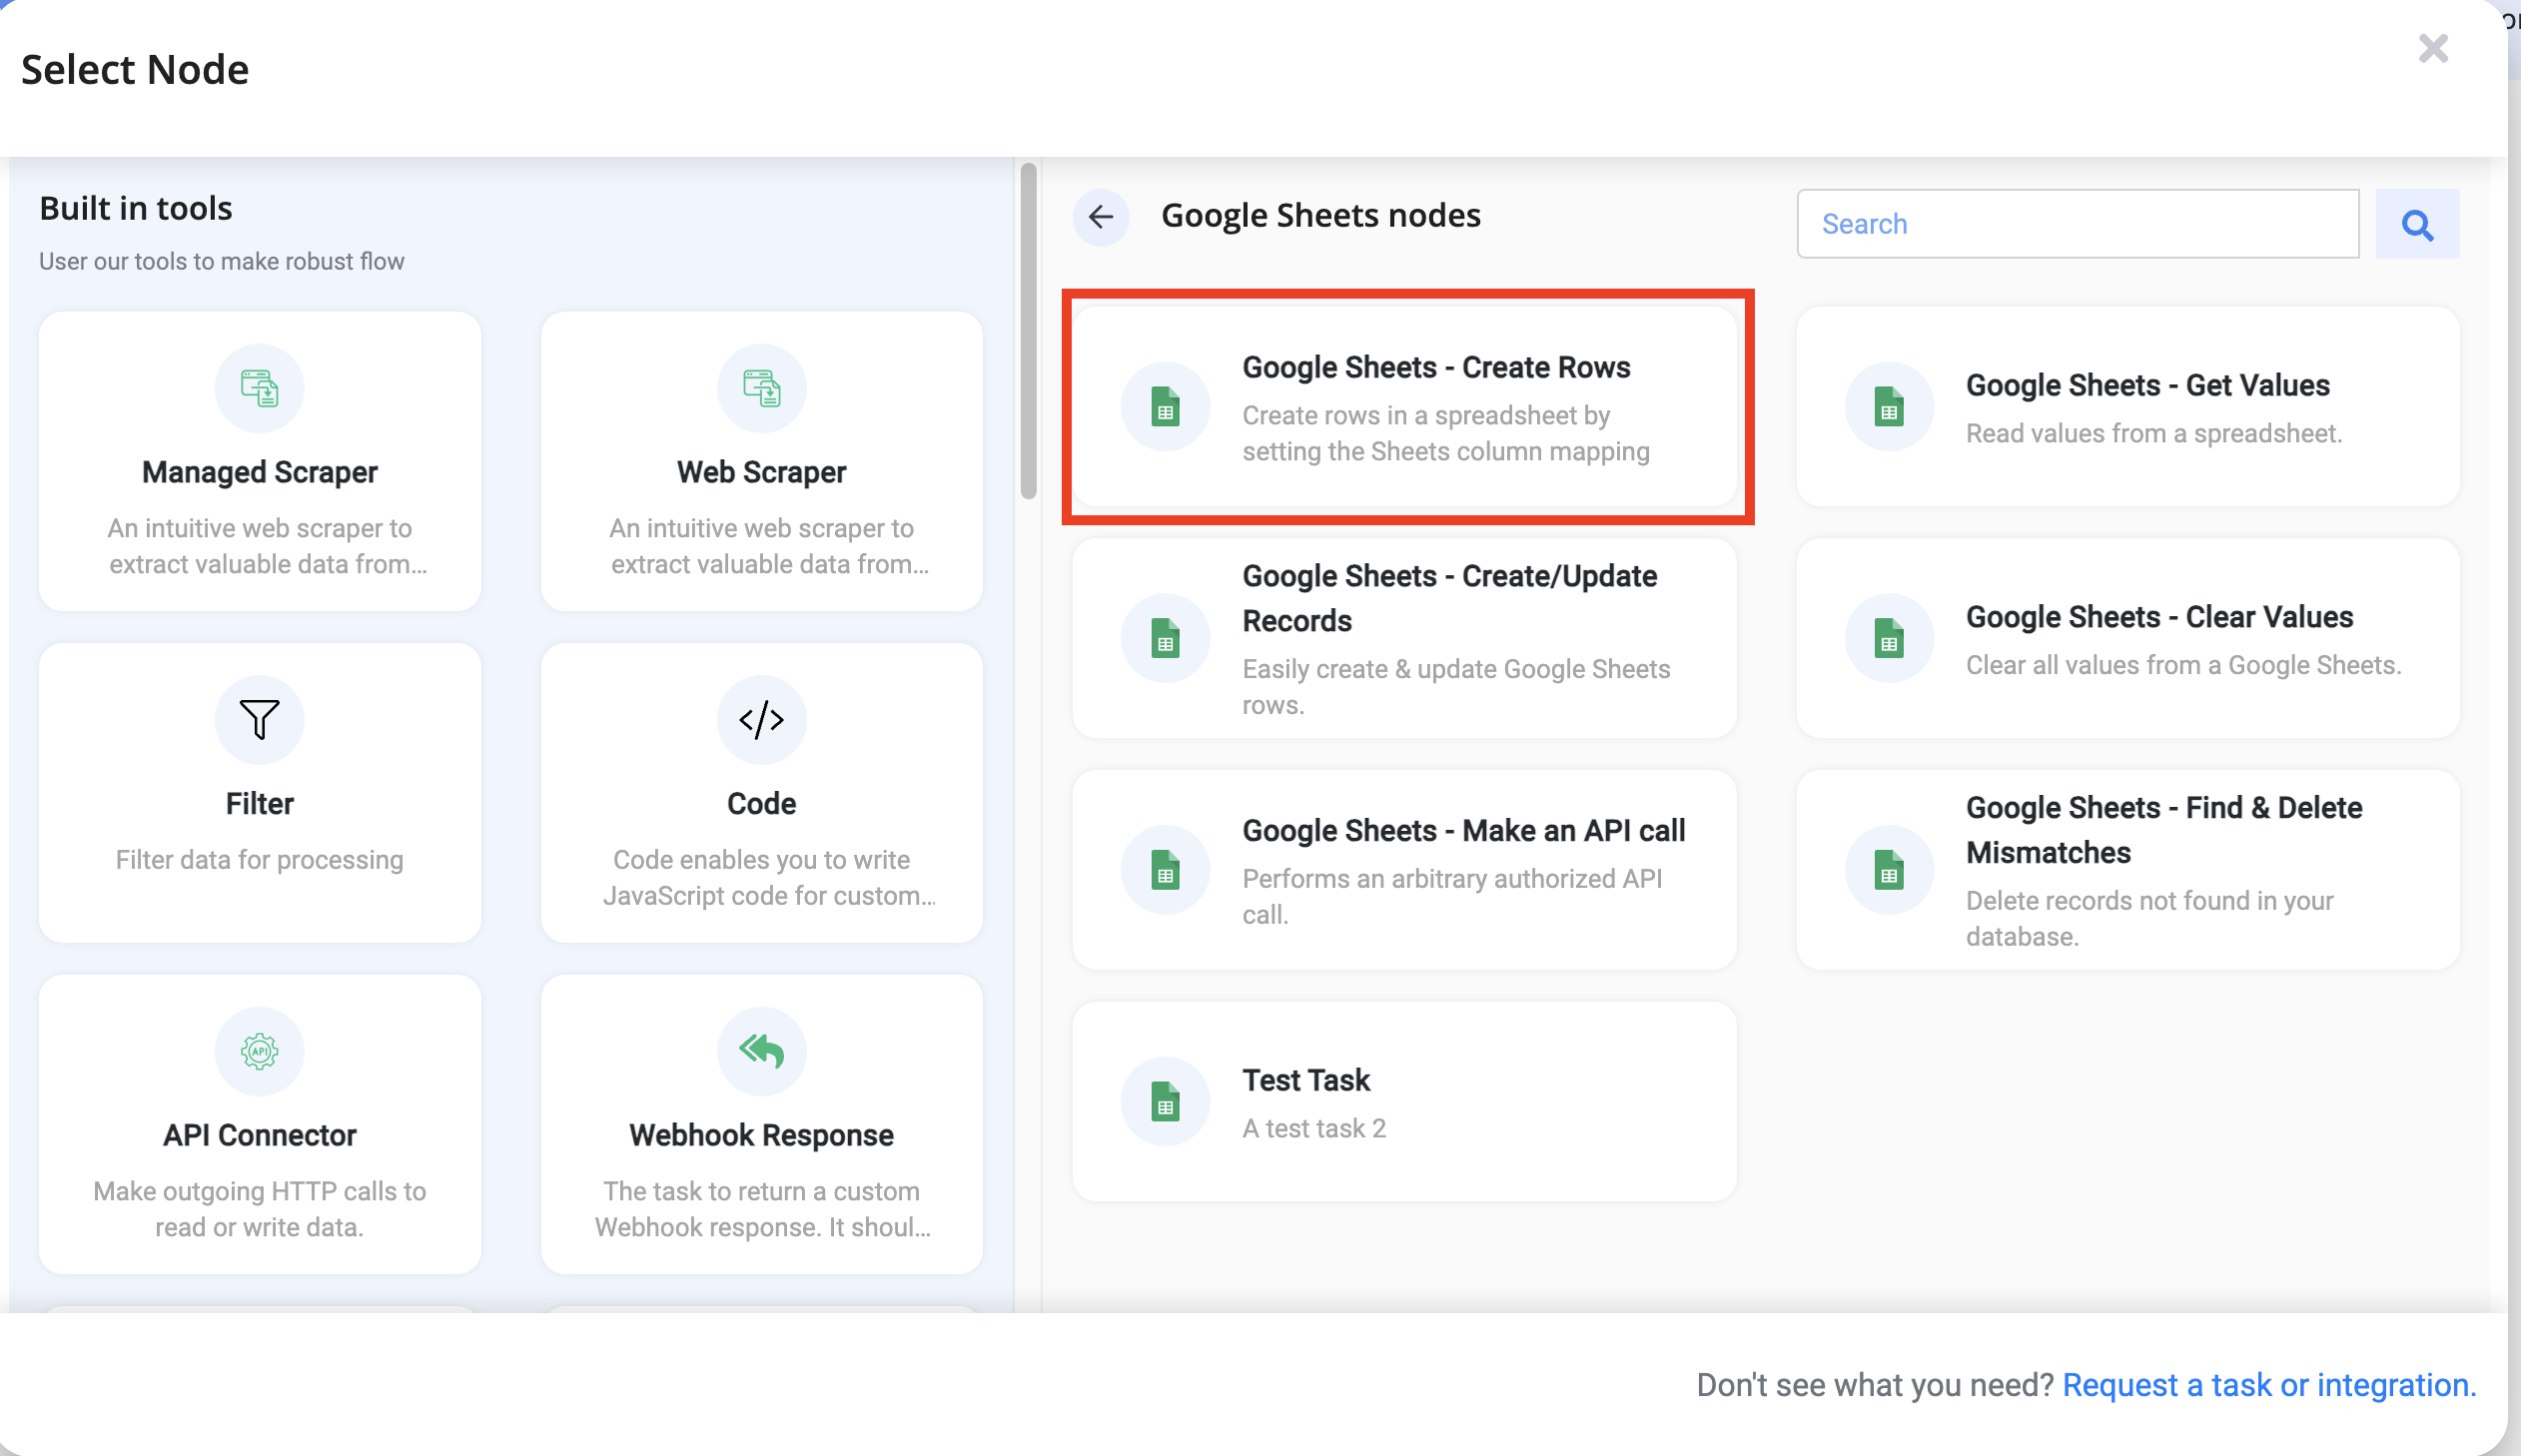
- For this documentation, we assume that you want to export the data to Google Sheets. Add a new node by clicking on "Add Node" and choosing "Google Sheets - Create Rows."
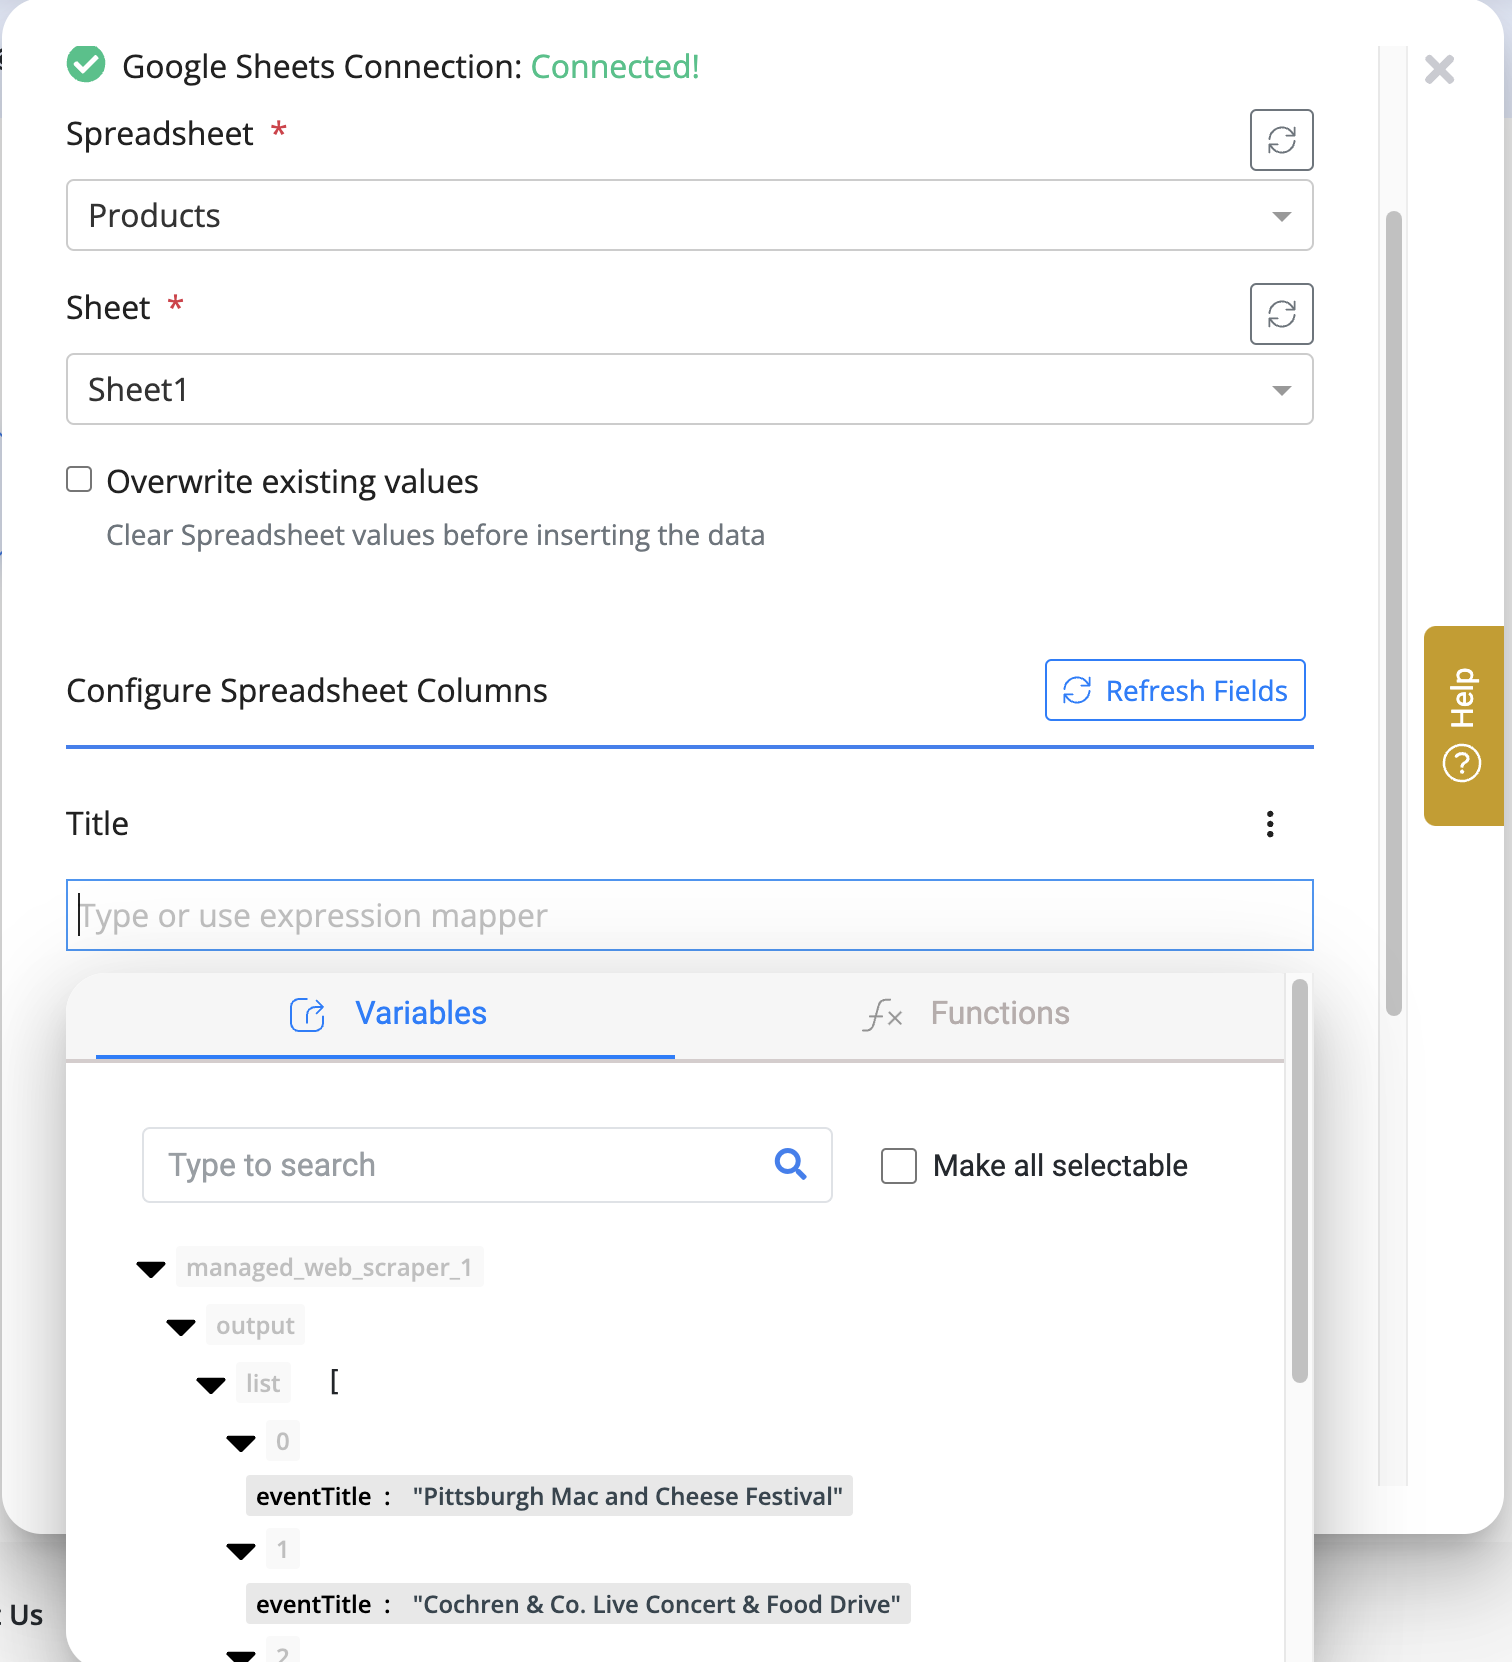
- Configure the newly added node by selecting the target spreadsheet and sheet.
- All available columns in the spreadsheet will be displayed. Map the corresponding values to each column.
- Now, perform a test run of this node to generate rows for the managed scraper test run data.
- If satisfied with the results, click the "Run Now" button to start this flow. It will first scrape all the data using your managed scraper, and then export it to your spreadsheet.
If you need any assistance or have any issues during the process, feel free to contact us via the chat widget located at the bottom-right corner of the Byteline console.