Use case
Relevant apps:
How to Sync Jobber to Google Sheets (No-Code, Auto-Updating)
Jobber is excellent for running a service business — scheduling, dispatching, invoicing, and client management. What it isn’t built for is flexible reporting. The moment you want to slice your job data your own way, share a live revenue tracker with a bookkeeper, feed a custom dashboard, or simply see everything in one familiar grid, you reach for Google Sheets.
The challenge is getting the data there — and keeping it current. Most people end up either exporting CSVs by hand every week or wiring up a chain of automation triggers that fire one event at a time and break the first time Jobber changes a field.
This guide shows you how to sync Jobber to Google Sheets the right way — automatically, with no code, starting from a prebuilt template that maps the fields for you. Existing jobs are backfilled, new and changed jobs flow through automatically, and you never touch a CSV again.
By the end, you’ll have a live Jobber → Google Sheets sync running in about 10 minutes.
Why sync Jobber to Google Sheets?
Jobber is the system of record for the work. Google Sheets is where the rest of the business wants to see it. That gap shows up fast:
- Reporting and analysis. You want revenue by job type, by month, by territory — pivot tables and formulas Jobber doesn’t give you natively.
- Sharing outside the team. Your bookkeeper, accountant, or franchise owner lives in Sheets and doesn’t need a Jobber seat.
- Feeding other tools. A Google Sheet is the universal connector — once your job data is there, it can flow into Looker Studio, a dashboard, or another system.
- A working backup. A live, always-current spreadsheet copy of every job — without the risk of someone deleting it in Jobber.
The catch: these only work if the spreadsheet stays current. A one-time export is stale by the next morning. That’s the problem a real sync solves.
The old way: CSV exports and automation triggers
Before we get to the setup, it’s worth being honest about the two common approaches — and why they wear thin.
Manual CSV export. Export from Jobber, open the file, paste into your Sheet, fix the columns that didn’t line up, repeat every week. It works exactly until you get busy, and then your “live” tracker is two weeks stale and nobody trusts it.
Automation tools (Zapier, Make, Pabbly). These fire on individual triggers — “when a new job is created, add a row.” That covers new jobs, but updates are harder, deletes are harder still, and historical jobs aren’t covered at all unless you build a separate import. You also hit Jobber’s data quirks fast: some fields aren’t exposed cleanly, so you end up building workarounds — calculating totals by hand in a formula step, or copying record IDs into a notes field just to reconstruct a link. Every quirk is another step you build and maintain, and you’re billed per task every time anything fires.
Both approaches treat “get Jobber data into Sheets” as a pile of little events to wire together. A sync treats it as one relationship you define once.
The better way: a prebuilt sync template
Byteline approaches this differently. Instead of building triggers, you pick a template that already knows what “Jobber jobs in a spreadsheet” should look like, point it at your Sheet, and turn it on. The field mapping is done for you, historical backfill and ongoing sync are part of the same setup, and billing is per synced record rather than per event.
When you choose Jobber and Google Sheets as your two apps, Byteline offers a set of ready-made templates so you don’t have to map anything from scratch:
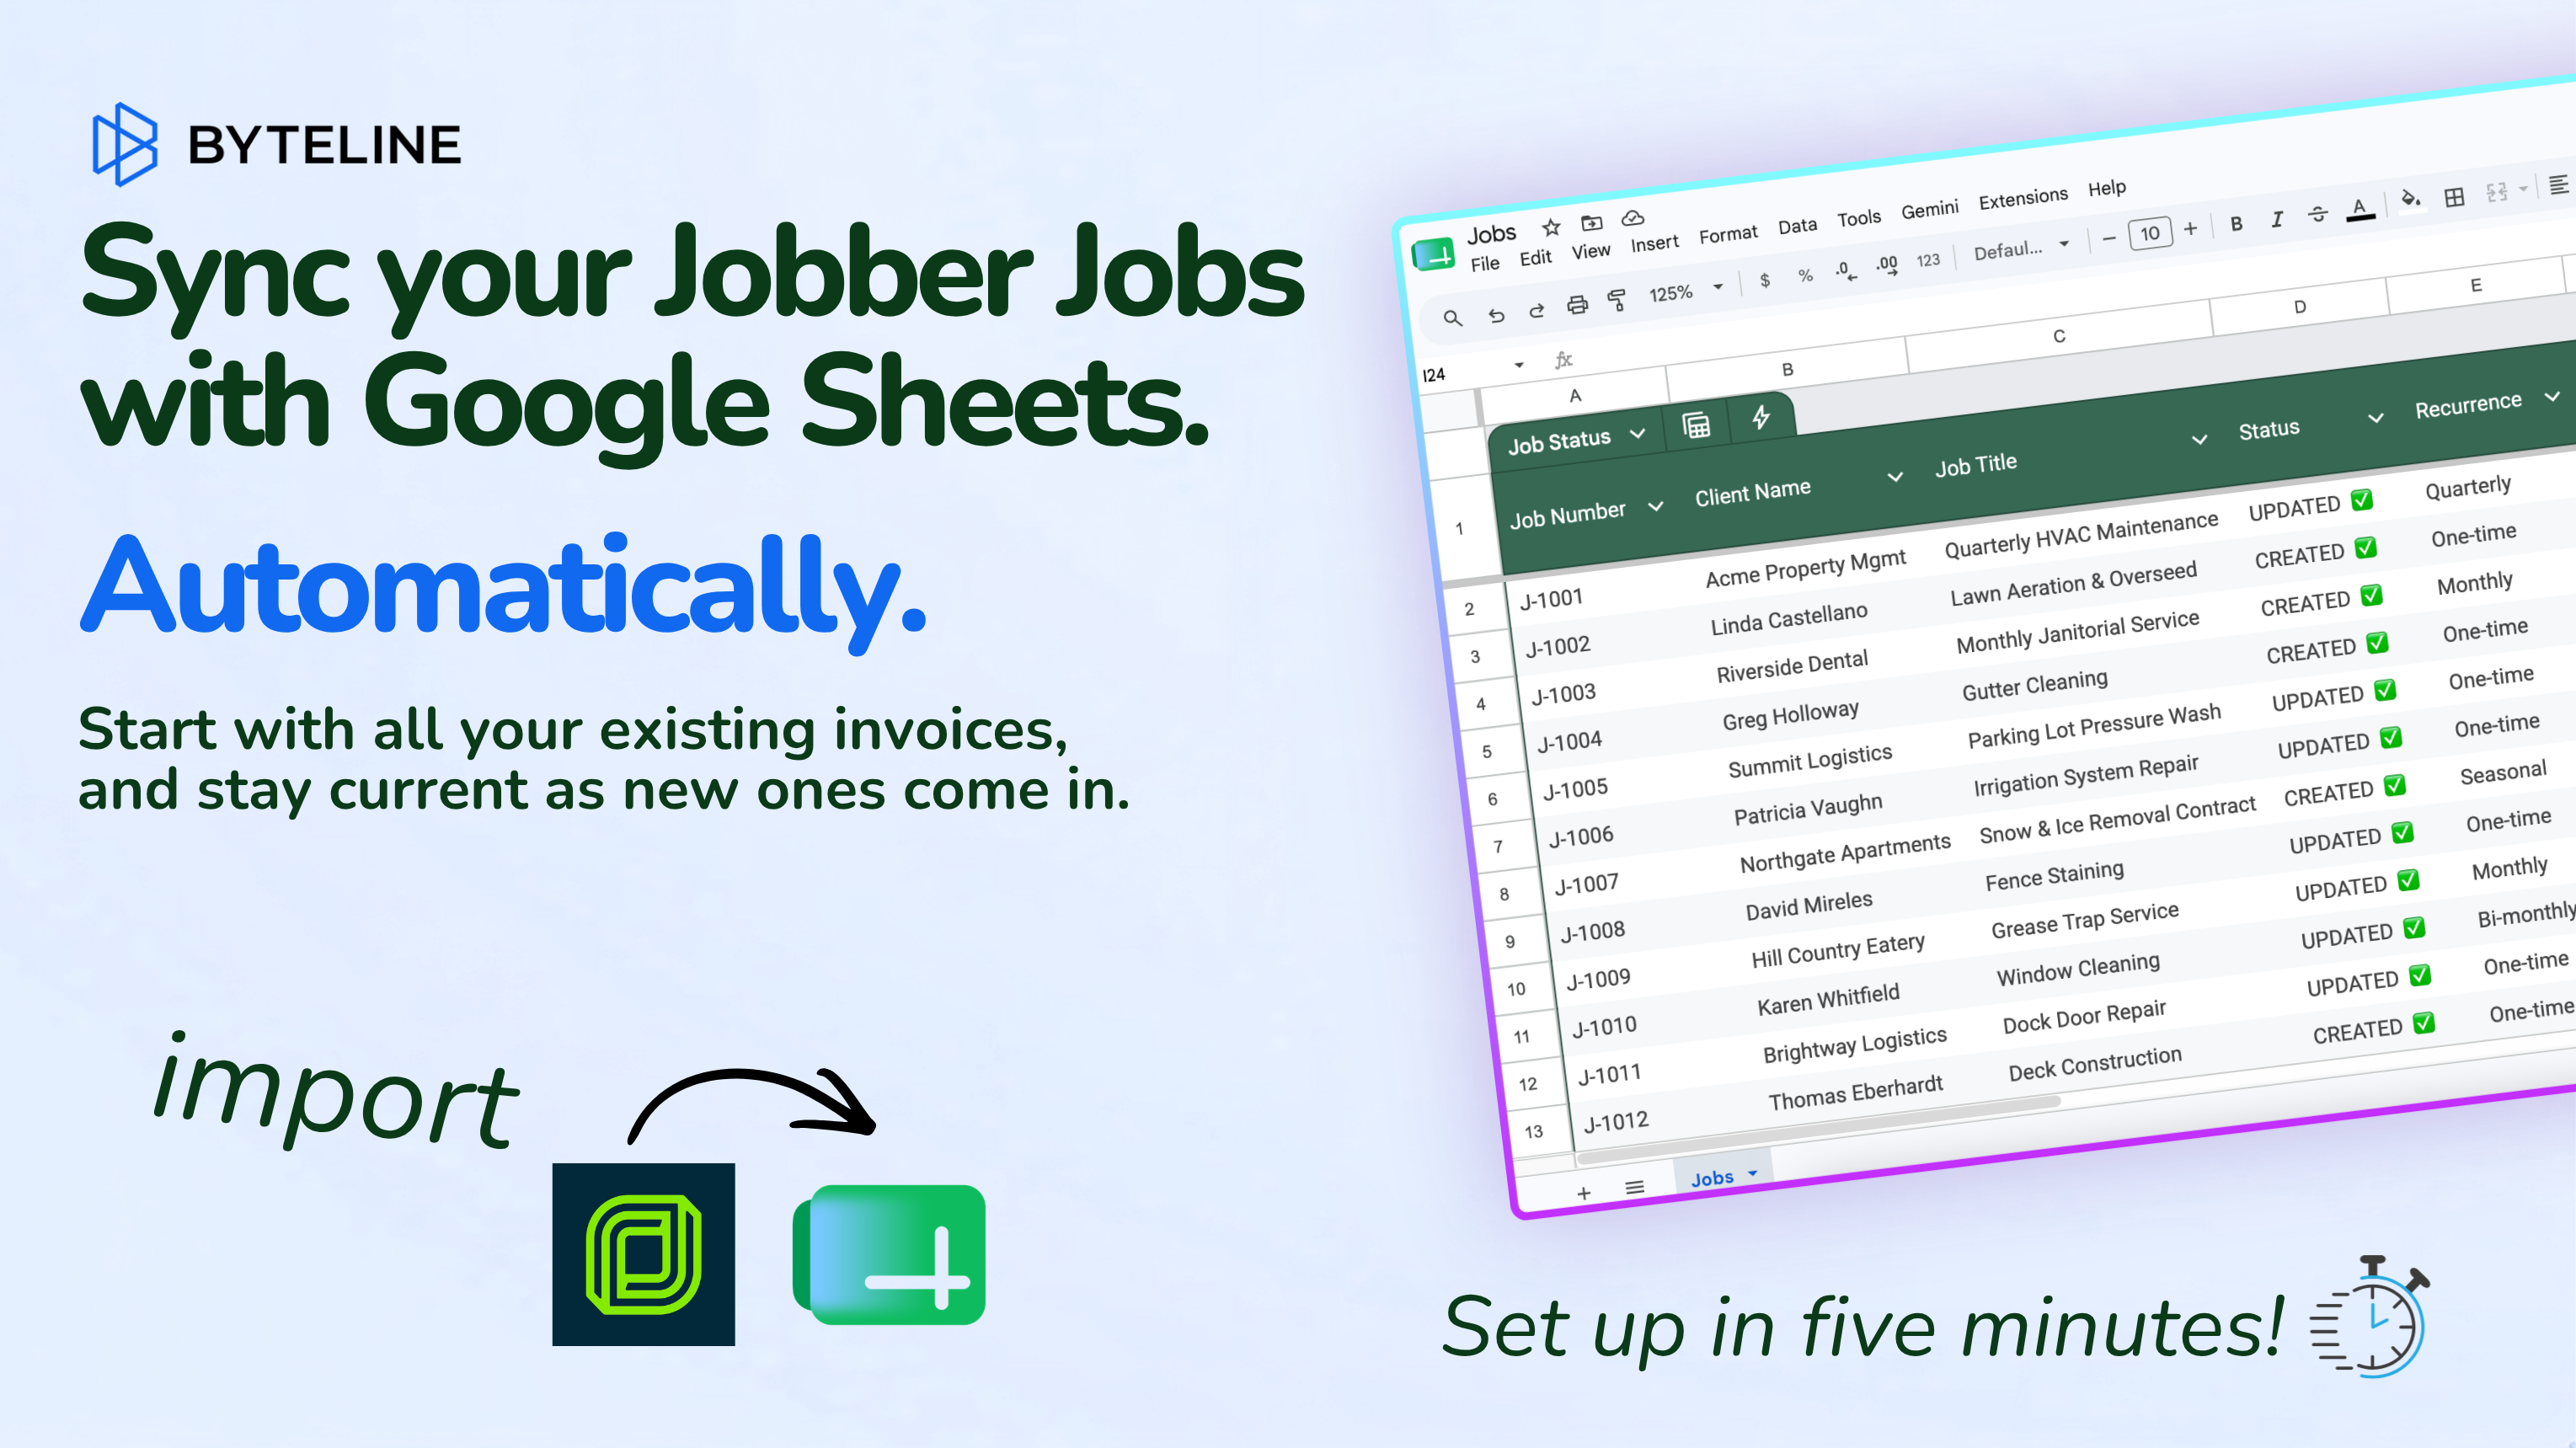
- Sync Jobber Jobs to Google Sheets (Open + Auto Sync). Pulls your existing open jobs into a Sheet and then keeps it updated automatically as new jobs are created or existing jobs change. This is the one most operators want — a live job board in spreadsheet form.
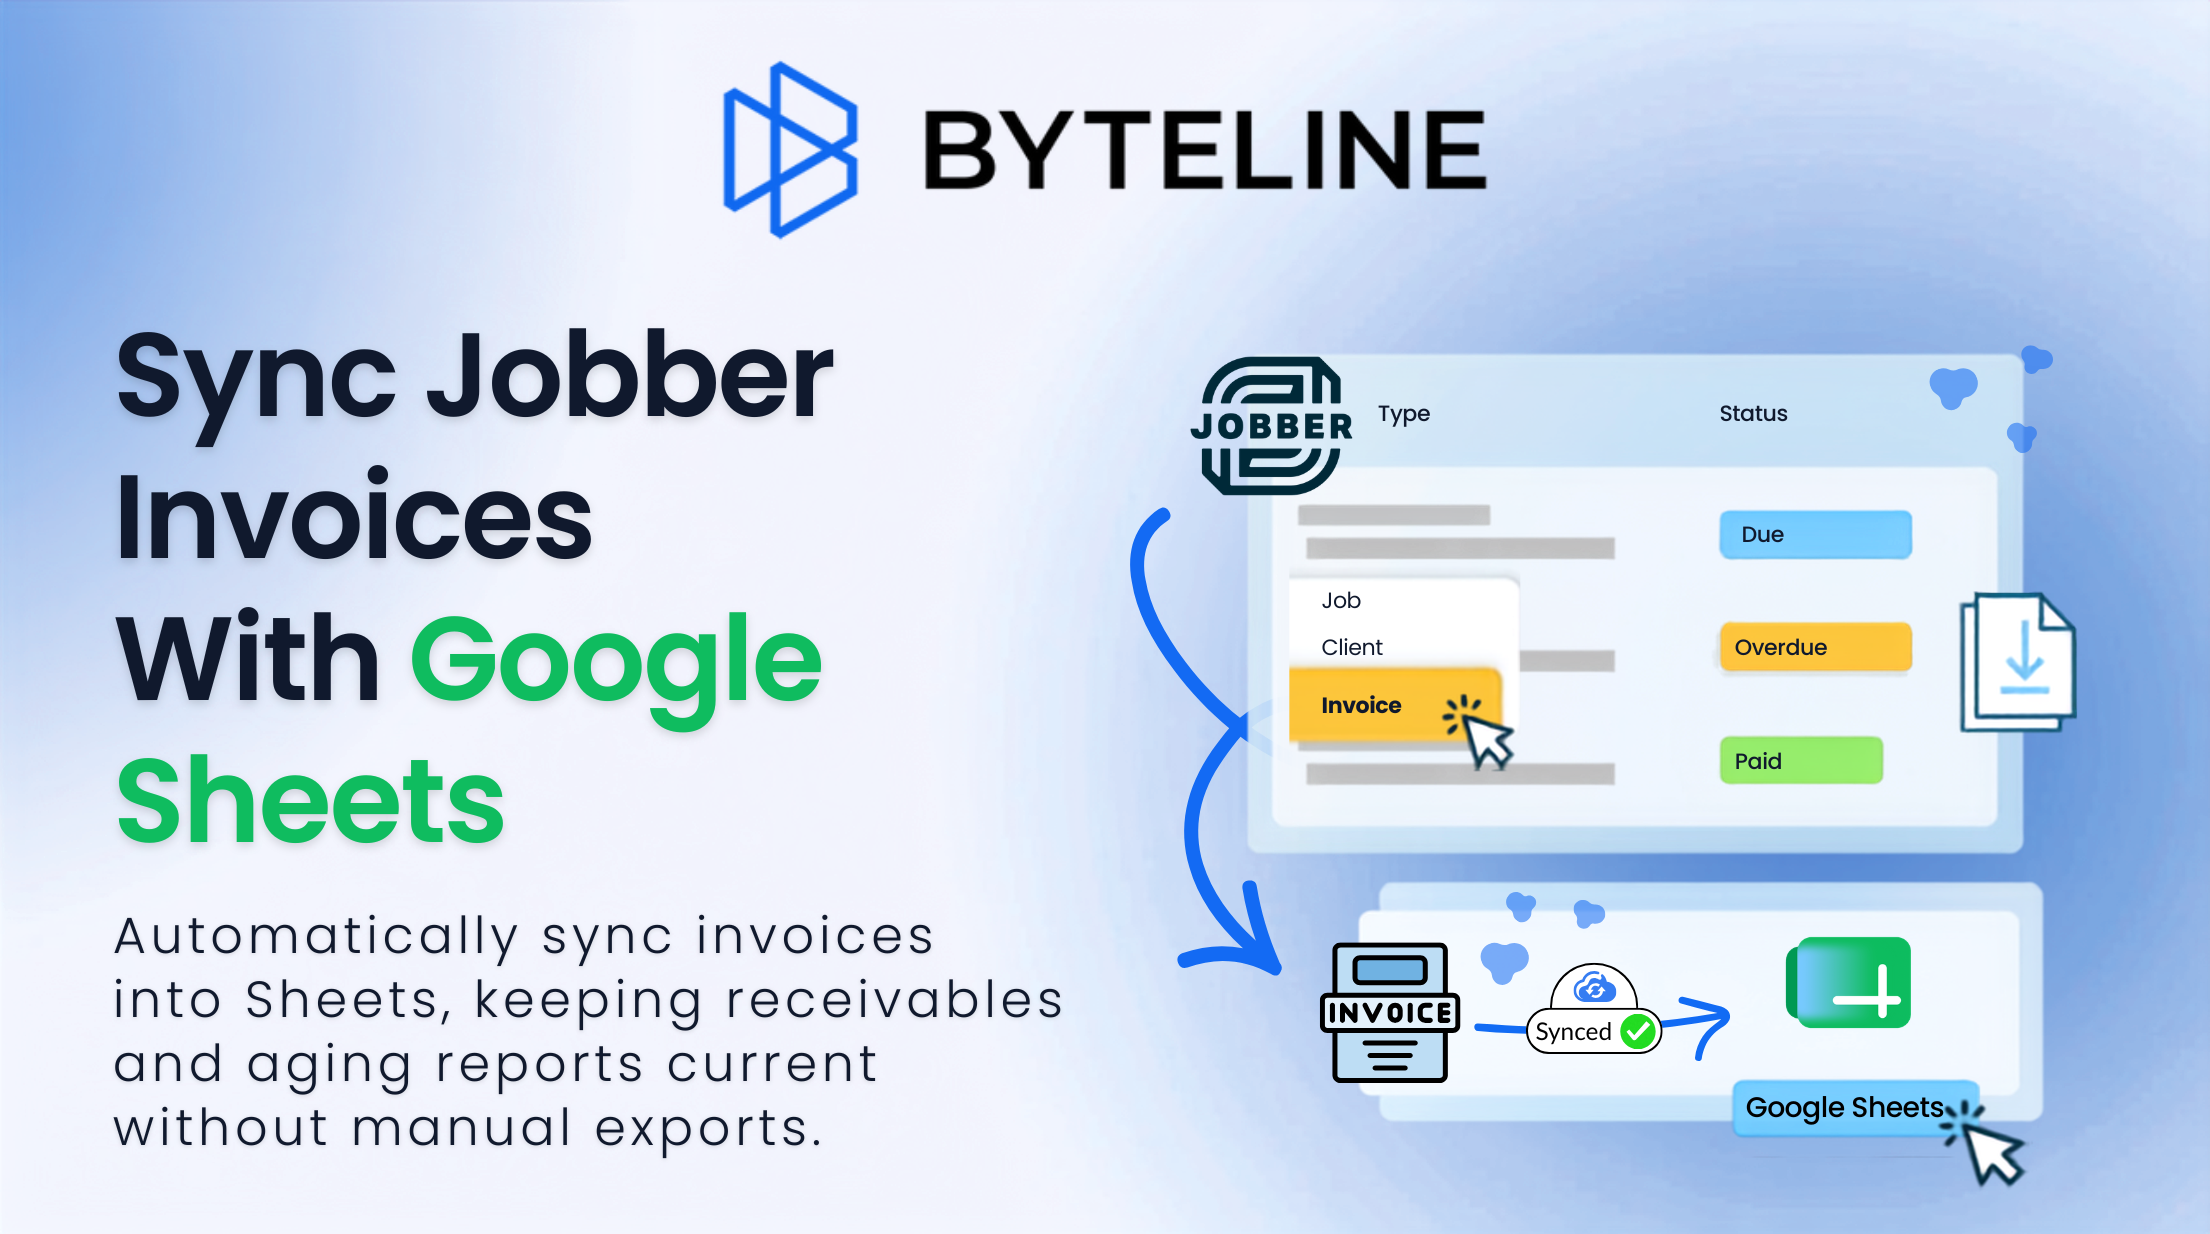
- Sync Jobber Invoices to Google Sheets Rows. Automatically syncs new and updated invoices as they’re created or modified in Jobber, and imports the last 90 days of invoices to get you started quickly. Built for businesses that want Sheets to always reflect the latest billing data.
- Sync Jobber Clients to Google Sheets Rows. Syncs new and updated clients automatically as they’re added or changed in Jobber. Built for businesses that manage customers in Jobber and want a current customer list in Sheets for reporting or outreach.
- Start from Scratch (custom sync). If none of the templates fit, you can build your own — pick the Jobber data type, choose the Sheet, and map the fields yourself.
This walkthrough follows the Jobs template, but the steps are identical for invoices, clients, or a custom build.
A real example: a service business reporting tracker
Here’s the workflow this is built around, kept generic on purpose because it applies across trades — HVAC, plumbing, electrical, landscaping, cleaning, pest control, and more.
The owner runs the business in Jobber. Every job has a status, a type, a scheduled window, a property address, a customer, a revenue figure, and an invoiced/uninvoiced amount. That’s the operational source of truth, and it stays in Jobber.
But the owner also wants a live spreadsheet — one tab, every job, always current — to build revenue reports, hand to a bookkeeper, and feed a simple dashboard. Rather than exporting weekly, they set up a one-way sync: Jobber is the source, Google Sheets is the always-current mirror. Nobody edits the Sheet back into Jobber; it’s a reporting surface, so the sync runs one direction only.
That one-directional choice matters, and it’s a setting you control — more on that below.
What the sync does, in plain English
The setup connects a Jobber data type (Jobs, Invoices, or Clients) to a specific tab in a Google Sheet and runs in historical + real-time mode. Byteline first backfills your existing records into the Sheet, then keeps the Sheet updated automatically as records change in Jobber.
For a jobs sync, the template maps the fields that matter for reporting — here’s the shape of it:
| Jobber (source) | Google Sheets (destination) |
|---|---|
| Job ID | Job ID |
| Job status | Job Status |
| Job number | Job Number |
| Job type | Job Type |
| Job web link | Jobber Web URI |
| Total revenue | Total Revenue |
| Uninvoiced total | Uninvoiced Total |
| Job start / end | Start Time / End Time |
| Created / completed | Start Date / End Date |
| Title | Job Title |
| Instructions | Job Description |
| Property street / city / state / ZIP | Street / City / State / Zip Code |
| Customer first / last name | First Name / Last Name |
| Phone | Phone |
A few things worth noticing:
- The sync is one-way (Jobber → Sheets). Because the Sheet is a reporting surface, every field flows from Jobber into the Sheet and the Jobber source fields are marked read-only. Nothing in the Sheet writes back to Jobber, so there’s no risk of a stray spreadsheet edit corrupting your operational data. If you wanted edits to flow both ways, you’d switch the direction — but for reporting, one-way is the safe default.
- Column names don’t have to match. Jobber’s Job start at maps cleanly to your Sheet’s Start Time. Byteline maps them explicitly, so your spreadsheet headers can read however you like.
- Historical and ongoing are one setup. The backfill (your existing jobs) and the live sync (everything going forward) are configured together and turned on at once.
Step-by-step: set up your Jobber–Google Sheets sync
Byteline walks you through the setup as a guided flow. The full walkthrough with screenshots is in the Byteline docs.
1. Choose your two apps. At console.byteline.io, create a free account and start a new sync. Search and select Jobber as the first app and Google Sheets as the second. (If an app you need isn’t listed, there’s a “Request Integration” option.)

Byteline new sync screen with Jobber selected as the first app and Google Sheets being chosen as the second app
2. Choose how to sync. Byteline shows the template picker — “Choose how to sync Jobber ↔︎ Google Sheets.” Pick a prebuilt template (Jobs, Invoices, or Clients) or choose Start from Scratch for a custom sync. For this example, choose Sync Jobber Jobs to Google Sheets (Open + Auto Sync).
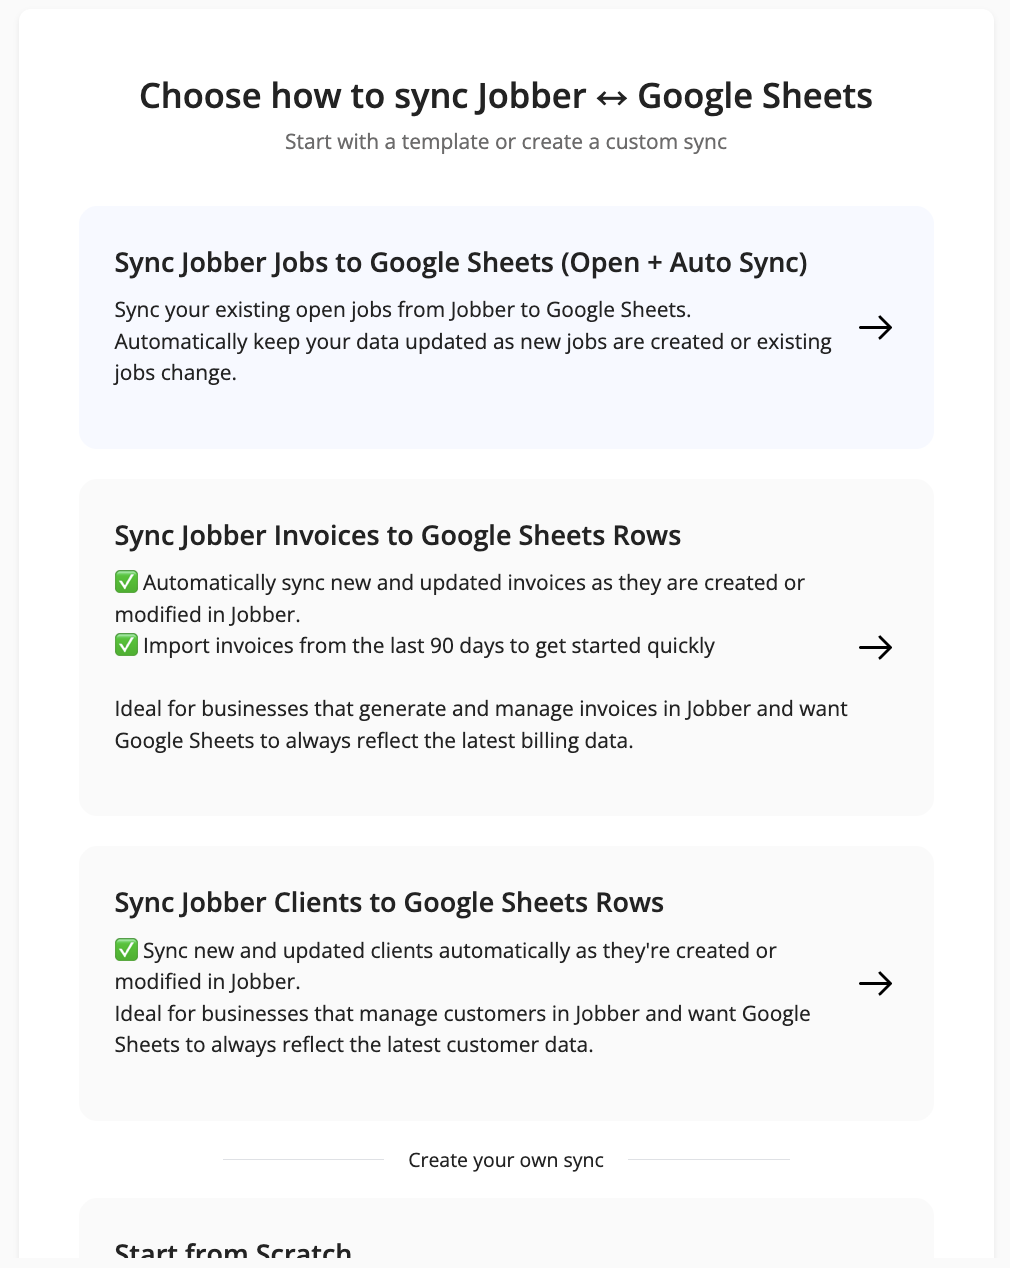
Byteline template picker showing prebuilt Jobber to Google Sheets templates for Jobs, Invoices, and Clients, plus a Start from Scratch option
3. Connect your apps. Authenticate Jobber (you’ll approve access to your Jobber account) and your Google account. This is a one-time authorization per app.
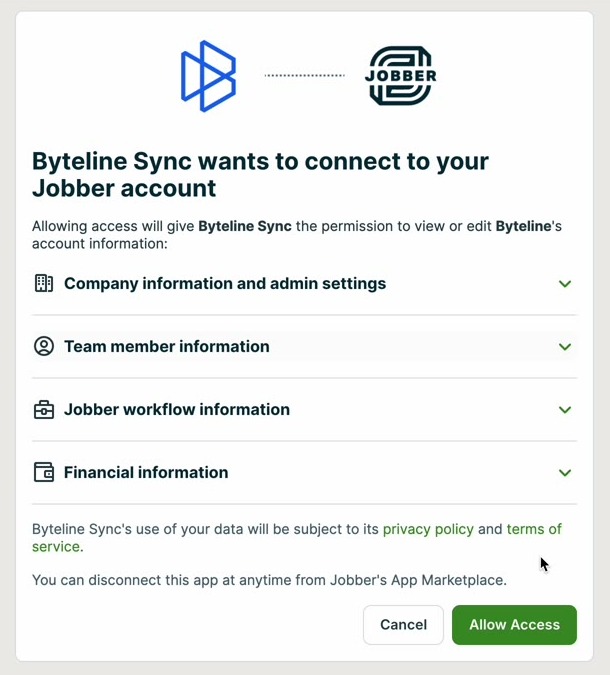
Jobber OAuth consent screen granting Byteline Sync access to the Jobber account
4. Select your spreadsheet and tab. Choose the destination Google Sheet and the specific sheet/tab the data should land in.
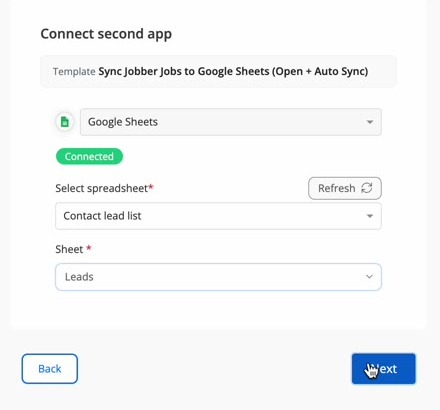
Byteline connect second app screen with Google Sheets connected, a spreadsheet selected, and the destination sheet tab chosen
5. Review the field mapping. Byteline analyzes both sides and auto-maps the fields for you — you’ll see a confirmation like “All required fields are mapped.” Each Jobber source field is marked read-only, with an arrow showing it flows into the matching Sheet column. Use Add mapping to include any extra fields, or Fix mappings if anything needs adjusting.

Byteline field mapping screen showing Jobber fields auto-mapped to Google Sheets columns, with each Jobber source field marked read-only
6. Review and confirm. The Sync Progress and Review screen summarizes everything — direction (Historical: Jobber → Google Sheets; Ongoing: Jobber → Google Sheets, labeled “Existing Data and Future Changes”), the connected apps, and the table and field mappings. Byteline generates a preview so you can see the result before going live.
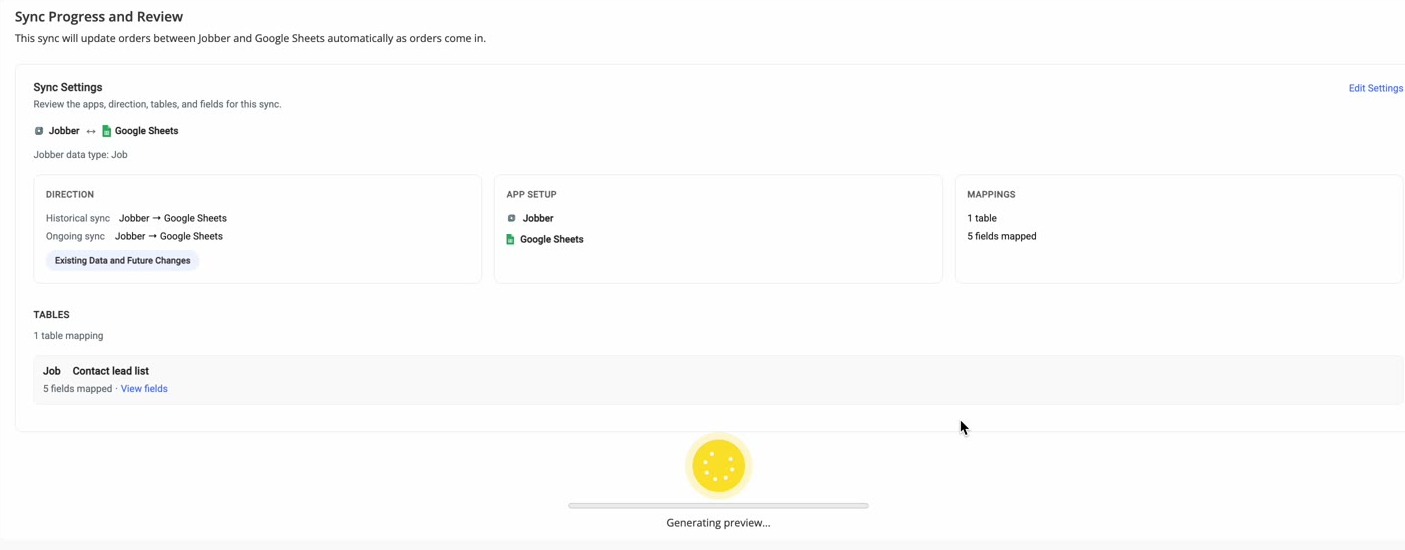
Byteline Sync Progress and Review screen summarizing direction, connected apps, and table and field mappings before going live
7. Go live. Turn the sync on. Byteline runs the historical backfill first, then keeps watching Jobber for changes. From the sync dashboard you can toggle it Live, trigger a manual check, and view a full record change history showing what was created, updated, or deleted on each side.

Byteline confirmation that the historical data sync completed successfully and the sync is now live and actively syncing changes
Why a sync template beats automation for this workflow
This is the part that compounds over time. Here’s the honest comparison.
The field mapping is done for you
With an automation tool, you start from a blank trigger and map every field by hand — and you discover Jobber’s data quirks one frustrating field at a time. With a template, the mapping for a jobs sync (or invoices, or clients) is already built. You point it at your Sheet and go.
Historical backfill is included
The “import your existing jobs” part — the thing automation tools make you build as a separate one-time job, or skip entirely — is part of the same setup. One configuration handles both your existing records and everything going forward.
Updates and deletes are handled, not just new rows
Trigger-based automations are good at “new job → new row.” They struggle with “job changed → update the right row” and “job removed → reflect that.” A sync tracks the record, so updates land on the same row and the Sheet stays a true mirror, not an append-only log that drifts out of date.
Billing matches the work
Automation tools bill per task — every created or updated record is a billed event. A busy month with lots of job updates is a bigger bill. Byteline bills per synced record: a job that changes 30 times this month counts as one synced record. Your cost tracks the size of your business, not how active a given month was.
One relationship, not a pile of Zaps
To cover jobs, invoices, and clients with an automation tool, you build and maintain separate flows for each — times the number of events you care about. With Byteline, each is a template you turn on. The mental model is “Jobber data, mirrored in Sheets,” not “a dozen triggers I hope are all still working.”
Who this setup is for
This workflow fits any service business running on Jobber that needs its data somewhere more flexible for reporting or sharing:
- HVAC, plumbing, and electrical contractors building revenue and job-completion reports
- Landscaping and lawn care businesses tracking jobs by crew, route, or season
- Cleaning and janitorial services sharing schedules and billing with clients or franchisees
- Pest control and home services feeding job data into dashboards or accounting
- Bookkeepers and accountants who need a live, current view of a client’s Jobber data without a Jobber login
- Multi-location or franchise operators consolidating job and revenue data across sites in one Sheet
If Jobber runs your operations and Google Sheets is where you report, this is the bridge.
Frequently asked questions
Can I sync Jobber to Google Sheets without code?
Yes. Byteline handles it visually — pick a template, connect both accounts, confirm the mapping, and turn it on. No scripts, no Apps Script, no API code.
Does it sync existing jobs or only new ones?
Both. With historical + real-time sync, Byteline backfills your existing records and then keeps the Sheet updated as records change. The invoices template, for example, imports the last 90 days to start.
Can I sync invoices and clients too, not just jobs?
Yes. Byteline offers separate templates for Jobber Jobs, Invoices, and Clients, plus a custom “Start from Scratch” option if you need a different data type or mapping.
Will the sync overwrite my Jobber data?
No. The jobs reporting setup is one-way — Jobber → Sheets. Jobber fields are read-only on the sync, so nothing in the Sheet writes back. If you want two-way sync, you can change the direction during setup.
Will it create duplicate rows?
No. Byteline matches records by a unique key, so an updated job updates its existing row rather than adding a new one.
How fast do changes show up?
Near real time. Most changes appear in the Sheet within seconds to a few minutes. You can also trigger a manual check from the sync dashboard.
How is this priced compared to Zapier or Pabbly?
Byteline bills per synced record, not per task. A job that changes 30 times in a month counts as one synced record. Trigger-based tools bill per event, so the same activity would be 30 billed tasks.
What if the template doesn’t match my fields exactly?
You can adjust. After the auto-mapping step, use “Add mapping” to include extra fields or “Fix mappings” to change any pairing — or start from scratch and map everything yourself.
Running a service business is hard enough without becoming a part-time data clerk. Exporting CSVs and babysitting automation triggers is exactly the kind of work that should be invisible. Pick a template, point it at your Sheet, turn it on — and let your reporting take care of itself.
👉 Try Byteline for free and get your Jobber sync running today.

.png)
.png)